Showing posts with label cream cheese. Show all posts

Thursday, 2 October 2025

Cream Cheese Icing (Breakfast Bible)

I've made a few different cream cheese icings before. But, since I've been working through The Breakfast Bible, I figured I'd try out their cream cheese icing recipe. I mean, I'm still somewhat dubious about any dish with icing that claims to be breakfast. But it was tasty nontheless. Especially on the cinnamon bus (also from The Breakfast Bible) that I made to put it on.


Cream Cheese Icing

Slightly adapted from The Breakfast Bible by Kate McMillan

Ingredients

  • 180g icing (powdered/confectioners') sugar
  • 60g cream cheese, room temperature
  • 2 Tbsp. butter, softened
  • 1/2 tsp. vanilla extract
  • grated zest of 1 orange
  • ~1/4 c. whole milk

Directions

  1. Sift the icing sugar into a bowl.
  2. Add the cream cheese, butter, vanilla, and orange zest.
  3. Beat until crumbly.
  4. Continue beating and gradually add milk until a thick, but pourable icing forms.

Tuesday, 29 July 2025

Apple Strata

I'm used to stratas being savoury dishes. Layers of bread, maybe some sausage and/or veggies, probably cheese, and then eggs or custard to bind it all together. Baked up into a tasty breakfast dish.

This one is a bit different. It's a sweet strata! Basically a layered bread pudding. Full of apples, raisins, spices, and a lightly sweetened custard. And served with maple syrup. Rather than cheddar or mozzarella (as I might normally expect for a strata), it uses cream cheese.

I think, on the whole, I prefer my savoury stratas. But this was definitely a nice way to mix things up a bit. And the Kidlet loved it!


Apple Strata

Slightly adapted from The Big Book of Breakfast by Maryana Vollstedt

Ingredients

  • 6 slices stale bread, cubed and divided
  • 125g cream cheese, cubed
  • 2 apples, peeled and diced
  • 1/2 c. raisins
  • 6 large eggs
  • 1 1/4 c. milk
  • 1 Tbsp. brown sugar
  • 1 tsp. ground cinnamon
  • 1/4 tsp. ground nutmeg
  • 1/8 tsp. ground cloves

Directions

  1. Grease a 23x23cm (9x9") square pan.
  2. Place half of the bread cubes in an even layer in the bottom of the pan.
  3. Scatter the cream cheese on top.
  4. Layer the apples on top of this and sprinkle with the raisins.
  5. Beat the eggs with the milk and mix in the sugar, cinnamon, nutmeg, and cloves.
  6. Pour the custard over the strata.
  7. Cover and set aside to allow the bread to soak up the custard for at least an hour and as long as overnight. (Store in the fridge if there will be more than 2 hours between assembly and baking.)
  8. Preheat oven to 180°C (350°F)1.
  9. Bake strata at 180°C (350°F) until custard is just set (60-75 minutes).
  10. Serve topped with icing sugar and/or maple syrup.


1 The original recipe says to bake your strata at 190°C (375°F) for 55 minutes. Mine was very dark on top after only 45, but still raw in the centre. I ended up covering it with foil and baking it for another 10 minutes and then reducing the temperature to 180°C (350°F) and baking it 10 more minutes. So, I think next time I'd just start it out at 180°C (350°F) and bake it for a bit longer to make sure that everything gets cooked through without burning. Back

Thursday, 12 June 2025

Green Apple and Lime Slice

RM put me onto this recipe a while ago. I had hoped to make it with some fresh limes from Reiver's tree while I was in NZ, but I never quite got to it. Luckily we had a bunch of limes in the freezer here though and Granny Smith apples are easy to come by, so I decided to give it a try after I got home instead.

I cut back the sugar significantly in the cake. And I was tempted to skip the icing altogether. But TF was keen on having a bit of frosting, so I did end up using it in the end.

The icing was good. Although I was definitely glad to have cut back the sugar in the cake once the frosting was added. That said, I think that next time I'd be inclined to swap out the American buttercream for a cream cheese icing. I think the cream cheese tang would complement the other flavours nicely. And cream cheese icings tend to need proportionally less sugar and butter to begin with. So, while still not a health food by any stretch, it would still make for a marginally less sweet and calorific topping.


Green Apple and Lime Slice

Adapted from Twisted Citrus

Ingredients

Cake

  • 2 Granny Smith apples, grated
  • 2 limes, zested and juiced
  • 125g butter
  • 3 Tbsp. golden syrup
  • 240g soft (plain/standard/cake) flour
  • 1 Tbsp. baking powder
  • 1 tsp. coarse sea salt, ground
  • 2 tsp. ground cinnamon
  • 1/2 c. brown sugar
  • 125g unsweetened applesauce
  • 2 c. dessicated coconut
  • 1 c. sultanas
  • 1 c. dried currants
  • 2 large eggs

Icing

  • 100g butter, softened
  • 240g cream cheese, softened
  • 1 lime, zested and juiced
  • 1 tsp. vanilla extract
  • 250-300g icing (powdered/confectioners') sugar

Directions

  1. Preheat oven to 180°C (350°F) and grease and flour a 23x33cm (9x13") baking dish.
  2. Mix the lime zest and 2 Tbsp. of the juice with the grated apples.
  3. Combine the butter and golden syrup in a small pot and melt over low heat.
  4. Sift the flour and baking powder into the bowl with the apples and mix in the salt, cinnamon, sugar, applesauce, coconut, sultanas, and currants.
  5. Pour the butter mixture into the bowl and stir to combine.
  6. Add the eggs and mix well.
  7. Scoop the batter into the prepared pan and smooth into an even layer.
  8. Bake at 180&det;C (350°F) until done (~30 minutes).
  9. Remove from oven and allow to cool in pan.
  10. Meanwhile, make the icing byt beating the butter with the cream cheese until light and fluffy (2-3 minutes).
  11. Beat in the lime juice, lime zest, and vanilla.
  12. Sift in icing sugar until desired consistency is reached.
  13. Once cake has cooled completely, spread the icing on top.
  14. Cut into squares and serve.

Saturday, 8 March 2025

Milo Cheesecake

It was my birthday yesterday. (I guess, technically, it's kind of still my birthday; it's still the 8th back in Ontario.)

Anyway, it was a pretty low-key birthday overall. Both because I didn't really want to do anything big for it and because the Kidlet had caught a cold and was feeling a bit under the weather. I did want to at least make a cake to mark the occasion though. And, after perusing the various recipes in my collection, I decided to hit up this one from my collection of recipes from the Something Awful CAKE thread.

It's a pretty simple, no-bake cheesecake recipe. Nothing too fancy. Just make the crust, beat together all the ingredients for the filling, pour it over, and chill until set. No fancy techniques or decorations. No icing. No layers. But that was honestly exactly the type of thing I wanted for the day. And, if I was going to do a cheesecake, how could I resist the Milo one? It was the perfect recipe to try out while I was here in New Zealand.

Not only is it a straight-forward, chilled cheesecake full of Milo. The crust is basically just a batch of chocolate crackles mushed into the bottom of a springform pan!

I mean, it's not quite exactly the recipe from Edmonds, but only because the author has you use real milk chocolate rather than getting you to make ersatz chocolate by combining shortening, icing sugar, and cocoa powder the way the Edmonds recipe does. Same idea though.

And, given that this recipe specifically calls for 250g of "good quality milk chocolate", Reiver pointed out that the author almost certainly had Whittaker's in mind. Since it's one of the only brands that still comes in 250g blocks. So, between that, and the Milo, and the inclusion of thickened cream, this does, indeed, feel like a very NZ recipe.

It is also, as it turns out, delicious! I liked this one a lot. It's easy to make, not too sweet, and nicely flavoured. The chocolate crackle crust comes out pretty firm, so it can be a bit challenging to get your fork through it, but it tastes lovely and adds an interesting texture to the base. Also, the fact that the crust is so sturdy makes it relatively easy to lift off the pan in one piece. I mean, it was a little tricky to get any implements under it initially. But once we managed to wedge the edge of a spoon under there, we were pretty much able to lever the whole thing up and slide it over onto a plate without any worries about the structural integrity. So that was handy!

I don't think this is my favourite cheesecake that I've ever made, but it is certainly a good one! I liked it a lot, I'm glad I tried it, and I would definitely make it again.


ETA: Now that I've clicked through to the link provided in the original post, I see that this was presented as an Australian recipe, not a NZ one. Oh well... I still think it was very approparite to NZ, so no complaints here.

Milo Cheesecake

From Raspberri Cupcakes via the Something Awful forums

Ingredients

Crust

  • 250g milk chocolate (preferably Whittaker's)
  • 1/3 c. dessicated coconut
  • 2 c. Rice Krispies

Filling

  • 300mL thickened cream or heavy (35%) cream
  • 340g cream cheese, softened
  • 75g sugar
  • 4 tsp. unflavoured gelatine
  • 3 Tbsp. cold water
  • 200mL milk
  • 1 1/2 c. Milo (plus extra to decorate)

Directions

  1. Lightly oil a 20cm (8") springform pan.1
  2. Melt the chocolate over low heat.
  3. Mix in the coconut, then stir in the Rice Krispies.
  4. Once everything is well-mixed, press the chocolate mixture into the bottom of the springform pan in an even layer.
  5. Chill for at least 30 minutes.
  6. Meanwhile, whip the cream until soft peaks form. Set aside.
  7. In a clean bowl, beat the cream cheese until light and fluffy.
  8. Beat in the sugar until well-combined.
  9. In a small bowl, combine the gelatine with the water and set aside.
  10. Heat the milk over medium heat until just boiling.
  11. Remove milk from heat and mix in the Milo.
  12. Add the softened gelatine to the Milo mixture and stir until smooth and well-mixed.
  13. Add the Milo mixture to the cream cheese mixture and beat until evenly mixed.
  14. Fold in the whipped cream.
  15. Pour the filling over the crust.
  16. Chill for at least 3 hours.
  17. Run a hot knife around the edge of the pan and pop off the sides.
  18. Carefully lift the cake off the base and transfer to a serving platter.
  19. Sprinkle with additional Milo and serve.


1 I ended up using a 24cm (~9") springform pan for my rendition of this cake. Obviously this resulted in a wider, but shorter cake, but it was fine. The crust was still thick enough and everything seemed to work out fine. That said, if you'd like a taller cake, the smaller pan is definitely the way to go. Back

Monday, 9 September 2024

Scrambled Eggs with Dill, Cream Cheese, and Croutons

This was an interesting combo. It essentially incorporates the toast as a topping for the eggs rather than a substrate. It works pretty well. Although I think I preferred the kielbasa and arugula scrambled eggs overall. Still, it was a fun experiment.


Scrambled Eggs with Dill, Cream Cheese, and Croutons

Slightly adapted from The Breakfast Bible by Kate McMillan

Ingredients

  • 2 Tbsp. butter or bacon grease, divided
  • 3/4 c. cubed stale bread
  • 8 large eggs
  • 2 Tbsp. milk
  • 1/4 tsp. coarse sea salt, ground
  • 1/8 tsp. black peppercorns, ground
  • 125g cream cheese
  • 2 Tbsp. chopped fresh dill

Directions

  1. Melt 1 Tbsp. of the fat over medium heat.
  2. Add the bread and cook, stirring every minute or two, until nicely crisp. Transfer to plate and set aside.
  3. Beat eggs with milk, salt, and pepper.
  4. Add remaining 1 Tbsp. of fat to pan and reduce heat to medium-low.
  5. Pour in eggs and cook until bottom beings to set (~3 minutes).
  6. Add cream cheese and dill and stir it in.
  7. Continue cooking until eggs are fully set.
  8. Top with croutons and serve.

Friday, 2 August 2024

Stuffed French Toast

The Kidlet loves French toast. (And strawberry jam, for that matter.) So I figured the idea of French toast stuffed with cream cheese and strawberry jam would be a big hit. And it was!

I think the concept for this recipe is sound. I just question their instructions.
As written, the recipe recommends using one loaf of challah and cutting it into six 6-cm thick slices. Now, first of all, even considering that you'll be suffing the slices, that is insanely thick. And, secondly, how big are their loaves of challah that you can get six 6-cm slices out of one loaf? That would mean that the whole loaf would have to be a little over 36cm long! (A little over, because you need to trim the heels off.) I consider a "standard" loaf pan to be between 20 and 23cm long. So, that is one monster loaf of bread they have there.

I asked TF to cut our loaf into four 5-cm thick slices. And even those were (in my opinion) still much too thick. I'd definitely go for five 4-cm slices next time. And TF thinks that those might be too thick even still. She suggested that 3-cm slices might be more appropriate. And, honestly, I think she might be right. That said, I'd want to try it with 4-cm slices first and see how that works out before moving down to even thinner slabs of bread.

Given that we ended up with only four slices for our rendition of this recipe today, I reduced the amount of custard and filling somewhat. However, since I'm writing up the recipe for a larger number of thinner slices, I've scaled the filling and custard amounts back up. Hopefully these amounts should be about right, but feel free to play around with the proportions a bit.


French Toast Stuffed with Cream Cheese and Strawberry Jam

Slightly adapted from The Breakfast Bible by Kate McMillan

Ingredients

  • 1 loaf of bread1
  • 170g cream cheese, softened
  • 1/3 c. strawberry jam
  • 5 large eggs
  • 1 1/4 c. milk
  • 1 tsp. vanilla extract
  • 1 Tbsp. butter, divided
  • maple syrup, to serve

Directions

  1. Trim off the heels and cut the bread into five or six very thick slices (3-4cm each).
  2. Cut a slit into the top of each slice of bread to form a pocket that extends through the centre of the slice to within ~2cm of each of the other three sides.
  3. Combine the jam and cream cheese and mix well.
  4. Carefully spoon some of the cream cheese mixture into each bread pocket, doing your best to divide it evenly.
  5. Beat the eggs with the milk and vanilla.
  6. Melt ~1/2 a tsp. of butter over medium-low heat.
  7. Dip one stuffed bread slice into the custard to thoroughly coat the outside.
  8. Place it in the pan and cook until underside is golden brown. Flip and cook until other side is similarly golden.
  9. Repeat cooking process with remaining slices.
  10. Serve topped with maple syrup.


Variants

French Toast Stuffed with Mascarpone and Apricot Jam

Ingredients

  • 1 loaf of bread
  • 170g mascarpone
  • 1/3 c. apricot jam
  • 5 large eggs
  • 1 1/4 c. milk
  • 1 tsp. vanilla extract
  • 1 Tbsp. butter, divided
  • maple syrup, to serve

French Toast Stuffed with Banana and Nutella

Ingredients

  • 1 loaf of bread
  • 1 banana, mashed
  • 1/3 c. Nutella
  • 5 large eggs
  • 1 1/4 c. milk
  • 1 tsp. vanilla extract
  • 1 Tbsp. butter, divided
  • maple syrup, to serve


1 A relatively close-grained bread will be best for this. Something with a fairly light, but fine crumb so that the filling won't leak out. Challah, brioche, and pain de mie are all good choices. I used a loaf of Sister Virginia's bread based on a 19th century Shaker recipe. It is a fairly basic white bread very slightly enriched with a bit of milk, sugar, and lard. But anything that's not too heavy, too open, or too savoury would work well here. Back

Monday, 15 July 2024

Creamy Mushroom Sauce

We had a big crêpe buffet for brunch this morning. I had lots of different fillings available, but I felt like some sort of savoury sauce was in order. I was also thinking that some sautéed mushrooms would be good. So I went looking for recipes for mushroom sauce and found this one. It's a great sauce! Everyone loved it.

Creamy Mushroom Sauce

Slightly adapted from Havoc in the Kitchen

Ingredients

  • 5g dried porcini mushrooms
  • 1 c. hot water
  • 450g cremini mushrooms, sliced
  • 1 Tbsp. unsalted butter
  • 1 Tbsp. olive oil
  • 1 onion, halved and sliced
  • 2-4 cloves garlic, minced
  • 1/2 tsp. coarse sea salt
  • 1/2 Tbsp. smoked paprika
  • 1/8 tsp. ground Kashmiri chilies
  • 1 Tbsp. Italian seasoning1
  • 1/2 c. cream cheese

Directions

  1. Pour the hot water over the dried mushrooms and set aside to soak for 15-30 minutes.
  2. Rinse the cremini mushrooms well, trim, and slice.
  3. Add the sliced mushrooms and a splash of the porcini soaking water to a large pan and cook, covered, over medium heat until mushrooms release their juices.
  4. Uncover and continue cooking until most of the water has evaporated.
  5. Add the butter, oil, onion, and garlic and cook for another 5-8 minutes.
  6. Meanwhile, drain the porcinis and reserve the liquid.
  7. Chop the porcinis and add them to the pan along with the salt, smoked paprika, Kashmiri chilies, and herbs.
  8. Cook for another 2-3 minutes, then add the porcini soaking water (strained to remove any grit if necessary) along with the cream cheese.
  9. Cook, stirring, until cheese has melted and sauce thickens slightly.


1 I used up all of my Italian seasoning a few months ago and I don't use it often enough to really justify keeping it on hand these days, so I just threw in a mix of herbs to approximate it.

Thursday, 4 July 2024

Cucumber Toasts with Radishes

I made these ages ago. Way back in April, I think. They went over super well and everyone loved them. But things were pretty hectic and I never did get around to doing the write-up for it. So, finally, here it is!


Cucumber Toasts with Radishes

Slightly adapted from The Breakfast Bible by Kate McMillan

Ingredients

  • 125g cream cheese, softened
  • 60g feta cheese, crumbled
  • 1 green onion, thinly sliced
  • 1 clove garlic, minced
  • salt and pepper, to taste
  • 4 slices bread (preferably whole wheat), toasted
  • 1/2 English cucumber, thinly sliced
  • 2 radishes, thinly sliced
  • 1/4 c. broccoli sprouts1

Directions

  1. Combine cream cheese, feta cheese, green onion, and garlic and mix well.
  2. Season to taste with salt and pepper.
  3. Spread the cheese mixture over the toast.
  4. Top with cucumber, radishes, and sprouts.
  5. Season to taste with salt and pepper and serve.


1 The recipe calls for alfalfa "or other" sprouts. And I had some lovely fresh broccoli sprouts from Noki Farms, so I opted to use those. I think the slight spiciness of the sprouts complemented the radishes nicely! Back

Friday, 29 March 2024

Smoked Salmon Toasts with Capers and Red Onion

I've been meaning to make these breakfast toasts for a couple weeks now, but my breakfast plans keep getting off track. I finally managed to get all the bits organized though and was up early enough to put this together this morning.

I do feel like the proportions could use a little adjusting. The recipe is meant to be for four slices of toast, but we had a lot of cheese left over, even though I felt like I was pretty generous with it. I think we probably could have gotten away with about half as much cheese. Everything else seemed about right though. That said, I certainly wouldn't've said no to a bit more salmon...

To make life easier, I've adjusted the recipe to use one whole brick of cream cheese (250g).


Smoked Salmon Toasts with Capers and Red Onion

Slightly adapted from The Breakfast Bible by Kate McMillan

Ingredients

  • 250g cream cheese, softened
  • 3 Tbsp. chopped fresh dill or 1 1/2 Tbsp. dried dill
  • 1/2 Tbsp. lemon juice
  • salt and pepper, to taste
  • 8 slices of bread, toasted
  • 300g thinly sliced cold-smoked salmon
  • 1/2 red onion, thinly sliced
  • 1/4 c. capers
  • 2 Tbsp. chopped fresh chives

Directions

  1. Mix the dill and lemon juice into the cream cheese and season to taste with salt and pepper.
  2. Spreak the cream cheese on the toast and top with salmon, onion, capers, and chives.

Friday, 16 February 2024

Strawberry Cream Cheese Tart

This recipe didn't look like it should work. You beat a whole lot of cream into cream cheese -- not whipped cream even, just runny cream -- and then pour it into a pie shell and expect it to set up. It doesn't contain any gelatin or eggs or anything else that seems like it would cause it to set. You're relying entirely on the fact that cream cheese firms up a bit when chilled. (And, I guess, the tiny amount of icing sugar.) Neither of these seemed like they would be enough to cause the filling to set. I was dubious. But I've been surprised by recipes before! There are lots that seem like they shouldn't work, but then somehow do. So, I followed the recipe and gave it a go. It did not set. At all. The flavour is nice, but it has zero structural integrity. Oh well... Now I know.

I haven't bothered including the original recipe below as I don't think it actually works as written. Instead this is a rough idea of what I'd like to try next time in the hopes of getting something that actually holds together.

I've increased the cream cheese slightly and specified a small amount of gelatin. Hopefully that'll be enough to get it to hold together. I've also bumped up the quantity of strawberries. Not for any structural reason, just because I though it'd be nice with more fruit.

All the usual caveats here: this is an untested variation, use at your own risk, etc., etc.


Strawberry Cream Cheese Tart

Adapted from Dessert of the Day by Kim Laidlaw

Ingredients

  • enough pastry for a 9" pie crust1
  • 3/4 c. heavy (35%) cream, divided
  • 1/2 Tbsp. unflavoured gelatin powder
  • 225g cream cheese, softened
  • 1 tsp. vanilla extract
  • 50g icing sugar
  • 400g strawberries, hulled and halved

Directions

  1. Roll out the pastry and line a 9" (23cm) pie plate or tart tin.
  2. Crimp and trim the edges, cover with plastic wrap, and chill for 20-30 minutes.
  3. Preheat oven to 190°C (375°F).
  4. Remove the plastic wrap from the crust and prick bottom a few times with a fork.
  5. Line with parchment/baking paper and fill with pie weights.
  6. Bake at 190°C (375°F) for 20-25 minutes.
  7. Remove paper and pie weights and bake for another 5-10 minutes until well-browned and cooked through.
  8. Transfer to wire rack to cool.
  9. Meanwhile, sprinkle the gelatin into 1/4 c. of the cream and set aside for 5-10 minutes.
  10. Scald the remaining cream, heating it to just shy of a boil.
  11. Add the gelatin mixture to the hot cream and whisk thoroughly to combine.
  12. Beat the cream cheese until lightened.
  13. Pour in the cream mixture and beat until smooth.
  14. Mix in the vanilla.
  15. Sift in the icing sugar and mix well.
  16. Once the pie shell is completely cool, pour in the cheese mixture.
  17. Add the strawberries on top.
  18. Cover and chill for at least 2 hours to allow filling to set.
  19. Cut into wedges and serve.


1 I was making this to try to use up some leftover pastry from a previous recipe. Feel free to use whatever sort of pastry you prefer. Shortcrust, sweet shortcrust, sourdough shortcrust, or flaky are all good options. Back

Tuesday, 6 February 2024

Maple Cream Cheese

This recipe comes from a waffle cookbook and is suggested as a good topping for peanut butter or pumpkin waffles. I also think it would go great on bagels or with carrot or pumpkin muffins.

Maple Cream Cheese

From Waffles: Sweet, Savory, Simple by Dawn Yanagihara

Ingredients

  • 225g cream cheese, softened
  • 2 Tbsp. unsalted butter, softened
  • 2 Tbsp. icing (powdered/confectioners') sugar
  • 1/4 tsp. vanilla extract
  • 1/3 c. maple syrup

Directions

  1. Beat the cream cheese with the butter.
  2. Beat in the icing sugar, vanilla, and maple syrup.
  3. Cover and chill until ready to use.


Variations

Maple Cream Cheese with Smoked Paprika

Ingredients

  • 225g cream cheese, softened
  • 2 Tbsp. unsalted butter, softened
  • 2 Tbsp. icing (powdered/confectioners') sugar
  • 1/2 tsp. smoked sweet paprika
  • 1/4 tsp. vanilla extract
  • 1/3 c. maple syrup

Tuesday, 21 February 2023

Brownie Batter Dip

I've had this recipe sitting in my bookmarks for ages. It really appealed to me when I first saw it, but we didn't have all the ingredients (and also, it's pretty unhealthy, so I couldn't really justify going out and getting the bits for it). So, it sat there in my bookmarks, mostly ignored and forgotten.

I wasn't even planning on making it today. I was going to do a completely different unhealthy, cheese-based recipe. But, sadly, my goat cheese had gone off, so I had to punt on my original plans. But this still left me with half a package of cream cheese to use up. Perfect for making half a batch of brownie batter dip! And, since it's only a half batch, I feel less bad about its nutritional status.

(The recipe below reflects the original quantities since I figure I'm more likely to have a whole brick of cream cheese on hand than a half package, but feel free to scale it up or down as needed.)

Brownie Batter Dip

Slightly adapted from Taste of Home

Ingredients

  • 250g cream cheese, softened
  • 1/4 c. unsalted butter, softened
  • 2 c. icing (powdered/confectioners') sugar
  • 6 Tbsp. cocoa powder
  • 1/4 c. milk
  • 1 tsp. vanilla extract
  • 2 Tbsp. brown sugar

Directions

  1. Beat cream cheese with butter until combined.
  2. Sift in icing sugar and cocoa powder.
  3. Add milk, vanilla, and brown sugar and beat until smooth.
  4. Serve with fruit or graham crackers to dip.

Saturday, 18 February 2023

Goat Cheese Cake with Wine-Poached Cranberries and Candied Pistachios

I still kind of can't believe that I found a recipe that fit my ingredients so well. I had cream cheese, fresh goat cheese, and mascarpone to use up. This cake uses all three. And it calls for cranberries and pistachios, both of which I had in the freezer. And the cranberries have been going begging for months now, so I was thrilled to finally have a use for them. (I kept contemplating trying to make cranberry curd to use as either a cake or pie filling, but never quite getting around to it.)

And the cake was delicious. Not, I think, my favourite cheesecake, but it was still really good.

The cake itself is very simple. Just cheese, eggs, and a bit of sugar and vanilla. No crust either! The topping is a little more complicated since you have to poach the cranberries and then strain them and use the poaching liquid to make a gelée. Plus there's making the candied pistachios. But none of those tasks are particularly onerous. I think the worst part of making this cake was all the waiting! Everything needs to be cooled and cilled to set up properly, so it takes forever to be ready to eat. (I actually got impatient and cut mine before the topping had completely set. It was still tasty, just a bit messy.)


Goat Cheese Cake with Wine-Poached Cranberries and Candied Pistachios

Slightly adapted from Food & Wine

Ingredients

Cake

  • 375g cream cheese, softened
  • 225g fresh goat cheese
  • 1/2 c. sugar
  • 1/2 tsp. coarse sea salt, ground
  • 1 vanilla bean
  • 340g mascarpone
  • 4 large eggs, at room temperature

Topping

  • 1 c. port1
  • 3/4 c. sugar
  • 2-3 strips of lemon peel (~2cm x 5cm each)
  • 225g fresh or frozen cranberries
  • 1 Tbsp. cold water
  • 1 1/4 tsp. unflavoured gelatin
  • 1/2 c. candied pistachios

Directions

Cake

  1. Preheat oven to 160°C (325°F) and wrap a 23cm (9") springform pan in tin foil.
  2. Combine the cream cheese, goat cheese, sugar, and salt.
  3. Split open the vanilla bean, scrape out the seeds, and add them to the bowl with the cheeses and sugar. (Put the vanilla pod in your sugar bowl or save it for another use.)
  4. Beat the cheese mixture for 2-3 minutes.
  5. Add the mascarpone and beat it in.
  6. Beat in the eggs, one at a time.
  7. Pour the cake mixture into the prepared springform and place it in a roasting pan or other large vessel. Pour hot water into the roasting pan until it comes ~2/3 of the way up the side of the foil-wrapped springform.
  8. Carefully transfer the cake in its bain marie to the oven and bake at 160°C (325°F) for ~60 minutes2.
  9. Transfer springform pan to wire rack to cool.
  10. After 1-2 hours, transfer cake to fridge and chill for at least an hour or two before proceeding. (Overnight would be better, but I'm not that patient!)

Topping

  1. Combine wine, sugar, and lemon peel and bring to a boil over medium heat.
  2. Cook, stirring occasionally, for ~3 minutes.
  3. Add cranberries and cook until they begin to pop (~3 minutes).
  4. Remove from heat and allow to cool (~1 hour).
  5. Pour mixture through a fine mesh strainer, reserving both the cranberries and the poaching liquid. (Discard the lemon peel.)
  6. Place cold water in a small bowl and sprinkle with gelain. Set aside for 5 minutes.
  7. Meanwhile, return poaching liquid to pot and bring to a boil over medium heat.
  8. Cook, stirring occasionally, for ~5 minutes.
  9. Remove from heat, add softened gelatin, and stir until dissolved (~1 minute).
  10. Pour mixture through a fine mish strainer into a bowl and let cool to room temperature. Skim off any foam or bubbles.
  11. Pour gelatin mixture over the chilled cheesecake, tilting to completely coat the top of the cake.
  12. Chill, uncovered, until gelatin has set (~1 hour).
  13. Meanwhile, make the candied pistachios as directed.
  14. Once gelée has set, decorate the cake with the poached cranberries and candied pistachios.
  15. Run a hot knife or offset spatula around the edge of the springform pan, then remove the sides.


1 I didn't have any port and I didn't want to go out and get a bottle just for this, so I mixed ~1 tsp. of brown sugar into a cup of dry red wine and called it a day. Back
2 I checked my cake after 60 minutes and it still seemed really, really jiggly, so I gave it another 10. Then I was worried that it still wasn't done, so I turned off the oven, but put it back in the warm oven for another 10 minutes. I think that last 10 minutes in the warm oven may have been a bit too much though, because my cake came out kind of crumbly. Next time I should probably cook it a little less. Oh well... Back

Monday, 6 February 2023

Rosemary-Cream Cheese Sourdough

I don't usually make white bread, but this recipe looked too good to pass up. And I am pretty pleased with how it came out. Judging by TF's response to it, she is very pleased with how it came out. I'll definitely have to make more rosemary bread in the future!

When it comes to breads, I find that I'm generally able to get very good results from 100% whole wheat doughs that use commercial yeast, but I still sometimes struggle to get a really nice internal structure with the 100% whole wheat sourdoughs. Although, after this experience, I've realized that that may be, in part, down to my shaping technique rather than anything to do with the dough itself. More experimentation required...


Rosemary-Cream Cheese Sourdough

Slightly adapted from The Fresh Loaf

Ingredients

  • 470g hard (strong/high grade/bread) white flour
  • 80g hard (strong/high grade/bread) whole wheat flour
  • 410mL water
  • 100g ripe/fed sourdough starter (100% hydration)
  • 40g pâte fermentée
  • 40g cream cheese, softened
  • 12g coarse sea salt
  • 6g honey
  • 2 Tbsp. minced fresh rosemary
  • 1/4 tsp. black peppercorns, ground

Directions

  1. Feed your starter so that it's nice and active by the time you're ready to mix your dough.
  2. Combine the flours and pour in the water. Mix well, cover, and let rest at room temperature for anywhere from 1-12 hours.1
  3. Mix all the remaining ingredients into the dough. I like to do them one at a time, but mix them however you'd prefer.
  4. Cover and let rest at room temperature for ~2 hours, stretching and folding every 30 minutes.
  5. Cover and ferment in fridge for up to 24 hours.
  6. Divide the dough into two equal portions and round each one. Cover and let rest at room temperature for 10-20 minutes.
  7. Shape your loaves2 and place in covered bannetons to rise.
  8. Proof at room temperature for 1-2 hours.
  9. Preheat oven to 250°C (475°F) and dust a baking sheet with cornmeal. (I like to use a little butter on the baking sheet to help the cornmeal "stick".)
  10. Turn the loaves out onto the prepared baking sheet and slash as desired.
  11. Pour some boiling water into a pan and place it on the bottom rack of the oven.
  12. Bake the loaves on the middle rack over the pan of boiling water for 15 minutes.
  13. After 15 minutes, remove the water pan and reduce oven temperature to 200°C (400°F) and bake for another 15-20 minutes.
  14. Turn off oven and let loaves rest in warm oven for 10 minutes.
  15. Remove from oven and transfer to wire rack to cool.


1 I like to feed my starter and mix the flour and water the night before. That way the flour can be autolysing while the starter is building toward its peak. Back
2 I normally shape my sourdough loaves the same way I'd shape a pan loaf: letter fold, then roll up jelly roll style. I did that for one of these loaves. But for the other one, I tried a book fold. It was that second one that produced the better shape and gave me a nicer oven spring. So... maybe try book folds for sourdoughs going into bannetons to proof and save the jelly-roll-ing for pan loaves? Back

Saturday, 4 February 2023

Cream Cheese Spread

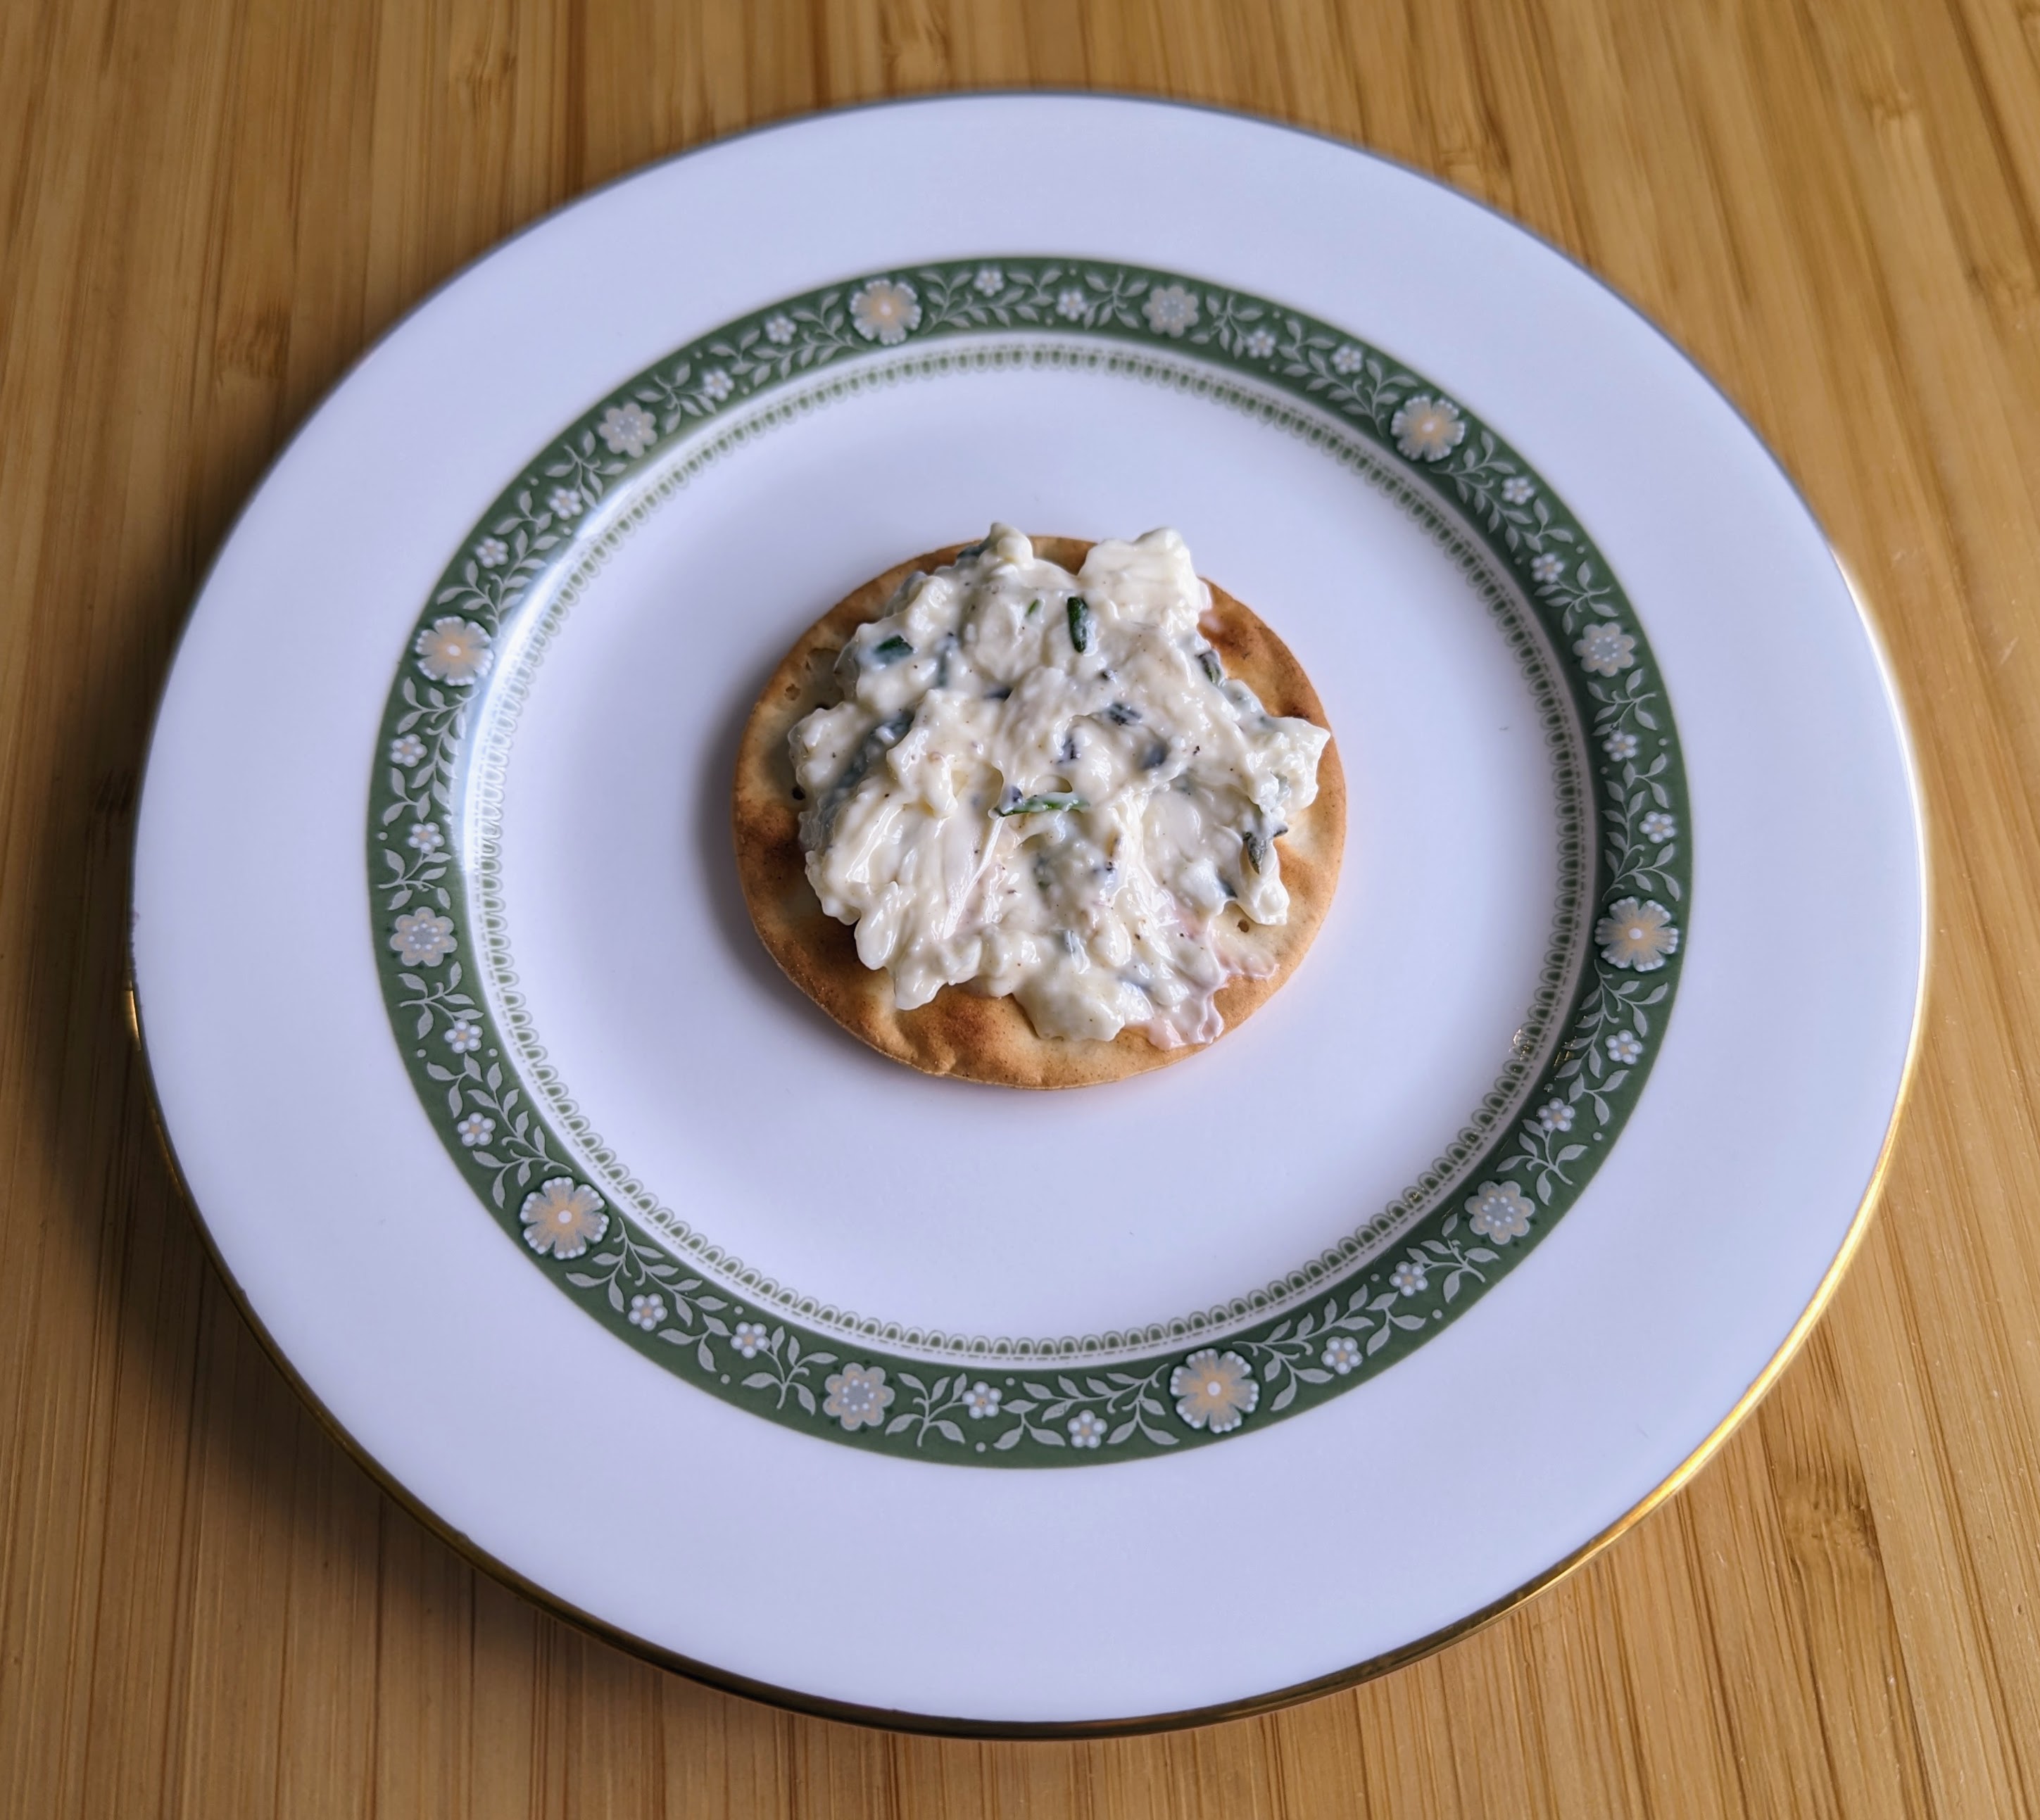
I grabbed some rosemary in the last produce basket we got. I keep running into recipes that call for fresh rosemary and I either have to substitute dried or punt on them because they really seem to hinge on the fresh rosemary. This wasn't one of the recipes I'd had in mind when I got the rosemary, but it looked tasty and I had a lot of cream cheese to use up, so I figured I'd give it a go.

I'm really pleased with the result. And TF and the Kidlet both seem to like it as well. I'd love to try to other flavours sometime as well. The olive and scallion really sings to me and I think the Kidlet would be very enthusiastic about the cinnamon and brown sugar version. And, of course, I think everyone would like the smoked salmon and chive one!


Honey and Rosemary Cream Cheese Spread

Slightly adapted from Cook's Country April/May 2019

Ingredients

  • 250g cream cheese, softened
  • 1/8 tsp. coarse sea salt, ground
  • 1/4 tsp. black peppercorns, ground
  • 2 Tbsp. honey
  • 1 Tbsp. minced fresh rosemary

Directions

  1. Combine everything and mix well.1
  2. Store in an airtight container in the fridge until ready to use.


Variations

Herb and Garlic Cream Cheese Spread

Ingredients

  • 250g cream cheese, softened
  • 1/8 tsp. coarse sea salt, ground
  • 1/4 tsp. black peppercorns, ground
  • 1/2 c. fresh flat-leaf parsley2
  • 1/4 c. fresh basil
  • 1 tsp. lemon juice
  • 1 clove garlic

Cinnamon and Brown Sugar Cream Cheese Spread

Ingredients

  • 250g cream cheese, softened
  • 2 Tbsp. brown sugar
  • 1 tsp. ground cinnamon

Smoked Salmon and Chive Cream Cheese Spread

Ingredients

  • 250g cream cheese, softened
  • 1/4 tsp. black peppercorns, ground
  • 60g sliced cold-smoked salmon3
  • 1/4 c. chopped fresh chives
  • 1 tsp. lemon juice

Olive and Scallion Cream Cheese Spread

Ingredients

  • 180g cream cheese, softened
  • 1 tsp. black peppercorns, ground
  • 1/2 c. pitted kalamata olives, patted dry
  • 2 tsp. olive brine
  • 4 scallions, minced


1 Cook's Country says to use a food processor, but I managed just fine with a spoon. Just make sure your cream cheese is good and soft so you can mix it easily. Back
2 If you're using a food processor, you can just put the leaves into it whole. If you're mixing by hand, you'll need to mince them very fine first. Back
3 For use in a food processor, just tear it into chunks (4-5cm is fine). If mixing by hand, mince as finely as possible before adding it to the cream cheese. Back

Friday, 2 December 2022

Pumpkin Pie Cupcakes

So, this is one of several slightly insane recipes that I originally saw on the Something Awful cake thread. I originally assumed that "pumpkin pie cupcakes" meant "pumpkin pie-flavoured" and was expecting pumpkin cupcakes with pumpkin pie spices in the batter. Or maybe even just the pumpkin pie spices without the pumpkin itself. That's not the way this recipe rolls though! They start out by having you make a bunch of tiny pumpkin pies. (I guess maybe that makes them pumpkin tarts? I'm not sure.) And then you make your cupcakes, carefully nestling a mini pie in the centre of each one. And top it all off with a cinnamon cream cheese frosting.

Like I said: insane. And fairly time-consuming and labour-intensive if you're making everything from scratch.
Tasty though.

The original recipe actually called for using store-bought pastry and canned pumpkin pie filling. But that's not the way I roll, so I started with a pie pumpkin and went from there. That said, if you'd like to save a little time, feel free to shave off a few steps with ready-made alternatives!


Pumpkin Pie Cupcakes

Slightly adapted from Bake It in a Cake via the Something Awful forums

Ingredients

Pumpkin Pies

  • 250g flour
  • 95g unsalted butter
  • 75-90mL cold water
  • 1 recipe pie filling from pumpkin pie

Cupcakes

  • 3/4 c. unsalted butter, softened
  • 250g cream cheese, softened
  • 1 c. sugar1
  • 3 large eggs
  • 2 tsp. vanilla extract
  • 2 1/2 c. all-purpose flour, divided
  • 2 tsp. baking powder
  • 1/2 tsp. baking soda
  • 1/4 tsp. coarse sea salt, ground
  • 1 1/3 c. milk2, divided

Decoration

Directions

Pumpkin Pies

  1. If you're starting with a whole pumpkin, scoop the seeds and get it roasting first.
  2. Cut the butter into the flour.
  3. Mix the water in with a fork, adding 1 Tbsp. at a time.
  4. Shape the pastry into a ball or disc, cover (or wrap in plastic wrap), and chill for at least an hour.
  5. While the pastry is chilling, make your pumpkin pie filling: combine pumpkin, egg, egg yolks, sugar, coconut milk, and spices. Use an immersion blender to purée if using home-cooked/roasted pumpkin.
  6. Preheat oven to 190°C (375°F).
  7. Divide the pastry into two roughly equal portions.
  8. Working with one portion at a time, roll out fairly thin (maybe 2-3mm) and cut out 7.5cm (3") circles. Repeat with second portion of pastry. Then roll out scraps and continue until all pastry has been used (or nearly so).
  9. Use the pastry circles to line the wells of a mini muffin pan (3-4cm diameter wells).
  10. Place mini cupcake liners/papers inside each tart shell and place a few pie weights/beans inside each liner.
  11. Bake at 190°C (375°F) for ~5 minutes.
  12. Remove liners and pie weights and fill each tart shell with pumpkin pie filling.
  13. Return to oven and bake for another 6-7 minutes.
  14. Let pies cool in tin for 5-10 minutes, then use a spatula to carefully remove each one from the tin.4

Cupcakes

  1. Preheat oven to 180°C (350°F) and grease the wells of a muffin tin (5cm/2" diameter wells). Alternatively, you may line the wells with cupcake liners.
  2. Cream butter and cream cheese with the sugar until light and fluffy.
  3. Beat in eggs one at a time.
  4. Beat in the vanilla.
  5. Add 1 c. of flour, but don't mix it in yet!
  6. Sift the baking powder and baking soda in on top of the flour.
  7. Add the salt on top of the flour as well.
  8. Now mix in the flour.
  9. Add about half of the milk and mix it in.
  10. Add another c. of flour and mix it in.
  11. Mix in the remaining milk.
  12. Add the last 1/2 c. of flour and mix it in.
  13. Mix for an additional 30 seconds.
  14. Add a generous Tbsp. of batter to each well in the muffin tin.
  15. Place a mini pie into each well and press it down a bit so that the batter comes up the sides.
  16. Place another Tbsp. or so of batter on top of each pie and spread it out to completely encase the pie.
  17. Bake at 180°C (350°F) for 25 minutes.
  18. Let cool in pan for ~5 minutes, then turn out onto wire rack to finish cooling.

Decoration

  1. Make icing as directed: beat butter and cream cheese together, beat in icing sugar, cinnamon, and vanilla.
  2. Chill icing until ready to use.
  3. Once cupcakes are completely cooled, decorate with icing as desired.
  4. If desired garnish with cinnamon-sugar roasted pumpkin seeds. (I'm kicking myself for not thinking of this until after I took the photo. The seeds were right there!)


1 The original recipe called for 1 1/2 c. of sugar, but that seemed like a lot, so I scaled it back a bit. I think the final cupcakes taste plenty sweet enough with only 1 c. of sugar. Especially since they end up getting iced as well. Back
2 Whoops! Just realized that the recipe says 1 1/3 c. milk, not 1 1/2. Oh well, it still seemed to turn out fine with 1 1/2 c. Back
3 The original recipe came with its own icing recipe but, as far as I can tell, it was pretty similar. The base was the same combination of cream cheese, butter, and icing sugar. The main difference seems to be that it also called for melting "cinnamon chips" and mixing them into the icing. I have never heard of cinnamon chips before. I assume they're some sort of cinnamon-flavoured white chocolate baking chip? Anyway, I had some icing left over from making the cayenne-pumpkin cupcakes the previous week, so I just used it here and was quite happy with the results. I figured it's still a cinnamon-y, cream cheese-y icing, so it amounts to just about the same thing. Back 4 Full disclosure, I don't have a mini muffin pan, but I do have a Babycakes Cupcake Maker so I just used that to make my pies. This worked alright, but the crusts did end up a bit underbaked since you can't really blind bake them that way and the filling cooked faster than the pastry. I've written out the instructions to do them in the oven here both because I don't expect everyone to have a cupcake maker and because I think that blind baking the crusts will likely provide better results. (And I have used the pie weights inside a cupcake liner approach for making tart shells before. It works quite well. Although I usually use liners one size smaller than the wells on the muffin tin, so I'm not sure how that works when you're already using a mini muffin tin. If you can find "extra mini" liners, that would be idea. Otherwise I think slightly crumpling the liners so that they're a little more flexible and willing to conform to the smaller shape would probably work reasonably well. It may take some experimentation, but I'm sure it can be done! Back

Saturday, 26 November 2022

Cayenne-Pumpkin Cupcakes with Cream Cheese Icing

I love pie pumpkins. They're just so cute and bright and they always feel special because they're so seasonal. You can get butternut squash all year round, but pie pumpkins are only available for a fairly narrow window in the fall.

The fact that they'll only be around for a limited time makes me really want to make the most of pumpkin season and get a bunch and cook lots of delicious pumpkin things. But I haven't been very good at it the last couple of years. And the only thing worse than missing your chance to get a pie pumpkin during pumpkin season is getting one and letting it go to waste because you couldn't get your act together enough to do anything with it.

I was reluctantly intending to abstain for getting any pumpkins this year because I didn't trust myself to use them up before they went bad. I've been having a lot of trouble staying on top of food and meal planning this year. But then I dropped the ball on one of the produce baskets and we ended up with a pie pumpkin anyway. I've spent the last few weeks alternately forgetting it existed and trying to figure out what to do with it. Pie is, of course, always an option, but I kind of wanted to try something different. And, after flipping through a few different recipes, I settled on this cayenne-pumpkin cupcake recipe.

I wasn't sure what the Kidlet would think of the cayenne in these cupcakes, so I dialed it way back. Having tasted the cupcakes, TF thinks I probably should've put the full amount in after all. With 1/2 tsp. of cayenne, I find it makes a gentle but noticeable impression. TF and the Kidlet both say they can barely taste it. I've called for 3/4 tsp. of cayenne in the recipe below, but feel free to use a bit more or a bit less according to your tastes. (The original recipe called for 1 1/4 tsp.)


Cayenne-Pumpkin Cupcakes with Cream Cheese Icing

Slightly adapted from C&C Cakery

Ingredients

Cupcakes

  • 2 c. all-purpose flour
  • 2 tsp. baking powder
  • 1 tsp. baking soda
  • 1/2 tsp. coarse sea salt, ground
  • 1 tsp. ground cinnamon
  • 1 tsp. ground ginger
  • 3/4 tsp. ground cayenne
  • 1/2 tsp. ground nutmeg
  • 1/8 tsp. allspice berries, ground
  • 1/8 tsp. black peppercorns, ground
  • 1/2 c. unsalted butter, softened
  • 1 c. brown sugar
  • 2 large eggs
  • 1/3 c. yogurt
  • 1 tsp. vanilla extract
  • 1 1/3 c. mashed roasted pumpkin

Icing

  • 250g cream cheese, softened
  • 1/4 c. unsalted butter, softened
  • 1 tsp. vanilla extract
  • 2 1/2 c. icing (powdered/confectioners') sugar
  • 1/2 Tbsp. ground cinnamon

Directions

Cupcakes

  1. Preheat oven to 180°C (350°F) and grease and flour a muffin tin (or line with papers).
  2. Sift baking powder and baking soda into flour.
  3. Add salt, cinnamon, ginger, cayenne, nutmeg, allspice, and pepper and stir to combine.
  4. In a separate bowl, cream butter with the sugar and mix until light and fluffy.
  5. Beat in eggs, one at a time.
  6. Add half the flour mixture and stir until mostly combined.
  7. Stir in the yogurt and the vanilla.
  8. Add the remaining flour mixture and stir until almost combined.
  9. Add the pumpkin and mix until just combined.
  10. Spoon into prepared muffin wells. (I had more batter than would comfortably fit into twelve 5-cm wells.)
  11. Bake at 180°C (350°F) until toothpic/skewer poked into centre comes out clean (~20 minutes or a bit more if you overfilled your pans like me).
  12. Let cool in pan for 5 minutes then turn out onto wire rack to finish cooling.

Icing

  1. Beat cream cheese with butter until mixed well.
  2. Beat in the vanilla.
  3. Mix the cinnamon with 1/2 c. of the flour and add it to the cream cheese mixture.
  4. Continue adding icing sugar to the cream cheese mixture, half a cup at a time until it's all been incorporated.
  5. Once the cupcakes are completely cool, spoon a big dollop of frosting on top of each one.

Wednesday, 16 November 2022

Scottish Smoked Salmon and Cucumber Cream Cheese Tart

I picked up some smoked salmon on sale a little while back, tossed it in the freezer, and kind of forgot about it. I recently remembered it existed and figured I'd give this salmon tart a go. I was dubious about using cucumbers in a cooked pie, but it actually worked really well! I love the cream cheese in the custard.


Scottish Smoked Salmon and Cucumber Cream Cheese Tart

Slightly adapted from the Book of Old Tarts by Elizabeth Hoder

Ingredients

  • 175g shortcrust pastry
  • 1 English cucumber, peeled and chopped
  • 3/4 tsp. coarse sea salt
  • 250g smoked salmon, broken into large pieces
  • 250g cream cheese, softened
  • 2 large eggs
  • 1 large egg yolk
  • 150mL heavy (35%) cream
  • 2 Tbsp. chopped fresh chives
  • 2 Tbsp. chopped fresh dill1
  • zest and juice of 1 lemon
  • 1/4 tsp. peppercorns, ground

Directions

  1. Line a shallow 25cm (10") tart tin2 with the pastry and blind bake it3.
  2. Toss cucumber with salt, place in colander, and place a plate and a heavy object on top. Set aside to drain for 30 minutes.
  3. Pat cucumber dry and toss with salmon.
  4. Preheat oven to 200°C (400°F).
  5. Blend cream cheese, eggs, egg yolk, cream, chives, dill, lemon zest, lemon juice, and pepper.
  6. Place cucumber-salmon mixture in pie crust.
  7. Pour the cheese mixutre over the filling.
  8. Bake at 200°C (400°F) for 30 minutes.
  9. Serve warm or cold with vegetable side of your choice.


1 I didn't have any fresh dill, so I ended up using an extra 2 Tbsp. of chives + 1/2 tsp. of ground dill seeds. Back
2 The original recipe called for a 9" tart tin, but I've had issues with having too much filling for pies in this book before, so I decided to go up one tin size. Back
3 Line with parchment paper and fill with pie beans and bake at 400°F for 15 minutes, then remove paper and beans, prick with a fork, and brush with egg white, then return to oven and bake for another 5 minutes. Back

Thursday, 23 June 2022

New York Cheesecake

My mom makes fabulous cheesecakes and, over the years, has shared several of her recipes with me. Surprisingly, this is not one of those recipes. I was tempted, but the lure ATK's promise of a "foolproof" cheesecake was too strong. (Plus, there's something very satisfying about getting to check off another recipe in one of my cookbooks.)

I did make a couple very minor changes to the recipe -- mostly to avoid having leftover ingredients -- but I tried to follow the instructions very closely. I don't have much experience with cheesecakes, so I was out of my comfort zone here. It seems to have turned out well though, despite my worries about it being underbaked, overbrowned, or not sweet enough.

I might be tempted to try turning the oven up very slightly next time, but I'm undecided. It did seem cooked in the end, so maybe it's best not to mess with it. I have similar thoughts about the browning step at the end. I felt that even just four minutes at 500°F made it quite dark and wondered if 475°F might not be a more suitable temperature. I may experiment with that next time. I'll see.

Sorry, I forgot to snap any photos and it's all gone now. Another thing to try to remember for next time!

New York Cheesecake

Slightly adapted from The Perfect Cake by America's Test Kitchen

Ingredients

Crust

  • 3/4 c. graham cracker crumbs (or 6 whole graham crackers, crushed)
  • 1/3 c. brown sugar
  • 1/2 c. all-purpose flour
  • 6 Tbsp. unsalted butter, melted

Filling

  • 1kg (2.2 lbs) cream cheese, softened
  • 135g mascarpone (or more cream cheese)
  • 1 1/2 c. sugar, divided
  • 1/3 c. sour cream
  • 2 tsp. lemon juice
  • 2 tsp. vanilla extract
  • 7 large eggs1

Directions

Crust

  1. Place one over rack in the upper middle position and one at the lower middle height.
  2. Preheat oven to 160°C (325°F) and brush the bottom of a 23cm (9") springform pan with melted butter.
  3. If you're starting with whole graham crackers and have a food processor, this whole procedure can be done with short pulses in the food processor. If you're starting with whole graham crackers and don't have a food processor then a molcajete or a Ziploc back and a rolling pin are probably your best bet for arriving at the crumb stage.
  4. Combine the graham cracker crumbs and sugar, mixing well.
  5. Add the flour and mix until evenly combined.
  6. Pour in the butter and mix with a fork until all the crumbs look moistened.
  7. Dump the crumb mixture into the greased pan and press it down firmly to form an even layer.
  8. Use the bottom of a measuring cup to tamp it down and smooth it out a bit more.
  9. Bake at 160°C (325°F) on the lower middle rack for 12-13 minutes.
  10. Set aside to cool while the filling is prepared.

Filling

  1. Reduce oven temperature to 95°C (200°F) and carefully grease the sides of the springform pan with a bit of melted butter.
  2. Beat the softened cream cheese and mascarpone (if using) with 3/4 c. of the sugar for ~1 minute.
  3. Add the remaining 3/4 c. sugar and beat for another minute.
  4. Scrape down the bowl and add the sour cream, lemon juice, and vanilla and beat for 1 more minute.
  5. Beat in the eggs one or two at a time.
  6. If desired, strain the filling through a fine mesh strainer.2
  7. Pour the filling into the prepared springform pan and set aside for 10 minutes to allow air bubbles to rise to the surface.
  8. Gently draw the tines of a fork across the surface to pop the air bubbles.3
  9. Bake the cheesecake on the lower middle rack at 95°C (200°F) for 3-3.5 hours4. If you don't mind poking a thermometer into the top of the cake -- which seems criminal if you went to the effort of straining the filling and popping all the bubbles on the surface -- then you can test for doneness with an instant-read thermometer. Look for an internal temperature of 74°C (165°F).
  10. Remove the cake from the oven and preheat the oven to 260°C (500°F).
  11. Once the oven is preheated, place the cake on the upper middle rack and bake for another few minutes5 until the top is well-browned. Watch it carefully!
  12. Remove the cake from the oven and let it cool for 5 minutes.
  13. Run a thin knife around the edge of the pan, then continue cooling, in pan on wire rack, for 2-3 hours.
  14. Cover with plastic wrap and chill for 6-24 hours6 before serving.
  15. Serve as-is or with a fruit compote of your choice.


1 The original recipe calls for six eggs + 2 yolks. This would definitely make the cake richer, but I didn't want to have to deal with figuring out what to do with two leftover egg whites, so I just put in an extra whole egg in place of the two yolks. This doesn't seem to have hurt the cake any. Back
2 I skipped this step. Back
3 I did do this step, but it didn't seem to work very well. A lot of the air bubbles seemed very reluctant to pop. I'm sure it's beneficial if you want the smoothest possible top, but I'd be inclined not to bother next time. It's fiddly and the bubbles don't bother me enough for it to be worthwhile. Back
4 Mine needed every minute of the full 3.5 hours. To the point where I was worried that it was still a bit underdone at the end of baking. I think it was fine in the end, but it made me a bit nervous. Back
5 ATK suggests 4-12 minutes, which is a pretty wide range. Mine was already quite dark after 4 minutes. As noted above, I think I would be tempted to try browning it at 250°C (475°F) next time, just to see how it goes. Back
6 Mine definitely didn't get a full six hours in the fridge before cutting, but it seemed none the worse for wear for it. Back

Saturday, 29 January 2022

Cheesy Breadsticks (Sourdough)

I have not been having good bread days lately. I just haven't had the spoons to do it properly. I thought I'd get a good batch made this weekend, but I was very tired this morning and forgot to zero the scale which resulted in some very stiff dough. I tried to amend it a bit, but I was worried about overshooting and didn't add enough water. So my bread is not shaping up great so far. I'll bake it off tomorrow morning, but I don't have high hopes for this one. Maybe I can take another crack at it next weekend.

In the meantime, I decided to use some of the excess starter to make breadsticks. These also could've used a little more care and attention, but they still came out pretty good.

Cheesy Breadsticks

Slightly adapted from Sourdough Companion

Ingredients

  • 340g soft flour1
  • 9g coarse sea salt
  • 25g unsalted butter
  • 125g cream cheese
  • 200g ripe/active starter (100%) hydration
  • 180mL water
  • extra cheese, cubed (optional)

Directions

  1. Mix flour and salt.
  2. Cut in butter and cream cheese.
  3. Mix in starter and water to form a soft dough.
  4. Knead for a minute or two, then cover and leave to rest for about an hour.
  5. Stretch and fold, flip over, cover, and rest for another hour.
  6. Give it one or two more stretches at one-hour intervals (depending on how lively the dough seems). If desired, work in some extra cheese on the last stretch.
  7. Shape dough into a ball and leave to rest for 20-30 minutes.
  8. Press flat and cut into thirds.
  9. Cut each third into long, skinny rectangles.
  10. Stretch each rectangle to desired length and place on a greased baking sheet.
  11. Bake at 180°C (350°F) for 30 minutes. (You may need more or less time depending on the thickness of your breadsticks.)


1 I used a mix of white and whole wheat. Back