Showing posts with label raisins. Show all posts

Friday, 1 May 2026

Sauerbraten (German Sweet and Sour Beef)

When I was in NZ last year, I found an excellent deal on beef brisket and came home with a nice piece. It went in the freezer to be cooked later... But then I never quite got to it before I left. So it was still waiting for me in the freezer when I returned this year.

Another time I might've tried to smoke and/or barbecue it. But we're kind of out of grilling season in this hemisphere now and, after a year in the freezer, it was a bit freezer-burnt, so I decided to go for a slow cooker option instead.

After giving it a bit of thought and tossing around a few different ideas, I settled on taking a crack at turning it into sauerbraten. I have fond memories of the sauerbraten that my dad made. And, while I don't have his recipe, I figured I could at least ask the internet and try to come up with something similar. And it seemed like the ideal thing to do with a big chunk of slightly freezer-burnt beef.

The recipe that I used recommends using a bottom round or rump roast for this, but I figured the brisket would also work quite well. And it did! I really enjoyed how it came out. That said, I'm sure it would be good with other cuts too.


Sauerbraten

Slightly adapted from Daring Gourmet

Ingredients

  • 2 onions, chopped
  • 2-3 carrots, cut into large chunks
  • 1 leek, white parts only, thoroughly rinsed and chopped
  • 3-4 cloves garlic, minced
  • 1 tsp. dried thyme
  • 1 tsp. dried rosemary
  • 2 bay leaves
  • 8 juniper berries
  • 6 whole cloves
  • 10-12 black peppercorns
  • 2 1/2 tsp. coarse sea salt
  • 1 tsp. sugar
  • 2 1/2 c. red wine
  • 1 c. red wine vinegar1
  • 1 1/2 c. water
  • 1.5-2kg beef roast (brisket, bottom round, rump, etc.)
  • 1-2 Tbsp. oil or lard
  • 4 slices bacon, chopped (optional)
  • 1/4 c. flour
  • 1/4 c. raisins
  • 75-85g gingersnaps/gingernuts (6-7 gingernuts), crushed
  • 1 Tbsp. honey

Directions

  1. Combine the onion, carrot, leek, garlic, thyme, rosemary, bay leaves, juniper berries, cloves, peppercorns, salt, sugar, wine, vinegar, and water and bring to a boil.
  2. Reduce heat and simmer for 10 minutes.
  3. Remove from heat and allow to cool completely.
  4. Nestle the roast into the marinade, cover, and refrigerate for 4-7 days, turning each day if the marinade does not completely cover the meat.
  5. When ready to cook, remove the meat from the marinade and set aside.
  6. Strain the marinade and reserve both the solids and the liquids.
  7. Heat the oil over medium-high heat.
  8. Add the beef and sear on all sides. Set aside.
  9. Add the bacon (if using) to the now-empty pot and cook.
  10. Add the vegetables and sauté for ~5 minutes.
  11. Add the flour and cook until no longer raw (3-4 minutes).
  12. Pour in the reserved marinade, raisins, gingersnaps/gingernuts, and honey and bring to a boil.
  13. Add beef, cover, reduce heat to low, and simmer for 2-4 hours if cooking on the stovetop. Otherwise, transfer everything to a slow cooker and cook on "high" for ~6 hours. (Or use an InstantPot-style multi-cooker to do the whole thing in place.)
  14. Once beef is cooked through and tender, remove from the pot and set aside.
  15. If desired, remove the bay leaves, juniper berries, and cloves from the liquid and purée the veggies into it to make a thick gravy. Otherwise, adjust consistency by mixing in a cornstarch or flour slurry and boiling until gravy thickens to desired consistency.
  16. Adjust seasoning to taste.
  17. Slice beef and serve with the gravy (and veggies if you chose not to purée them).
  18. Serve with a starch (potatoes, bread, etc.) and rotkohl (sweet-and-sour red cabbage) or another vegetable dish of your choice.


1 I couldn't find any red wine vinegar, so I just used white wine vinegar. Either is fine. I think that cider vinegar would also be good in a pinch. Back

Wednesday, 10 September 2025

Banana Bread Cottage Cheese Bowl

I was going to make a banana-ginger oatmeal for breakfast this morning. But then it turned out that we were all out of crystalized ginger. So that was a bust. And most of the other things I'd been looking at either required ingredients or time that I didn't have. And it was already late to be having breakfast. So, in the end, I just asked TF to put together this simple cottage cheese bowl for me. It was actually pretty good! I was going for a banana bread sort of vibe.

I tried it with a full tablespoon of maple syrup this time. But I think next time I might try it with a little less maple syrup, but add a few raisins in instead.

Banana Bread Cottage Cheese Bowl

Ingredients

  • 1/2 c. cottage cheese
  • 1 banana, sliced
  • 1 Tbsp. ground flax seed
  • 1 Tbsp. chopped walnuts
  • 1 Tbsp. raisins (optional)
  • 1-2 tsp. maple syrup
  • 1/8 tsp. vanilla extract
  • 1/8 tsp. ground cinnamon
  • pinch of ground nutmeg

Directions

  1. Place all ingredients in a bowl.
  2. Mix and serve.

Saturday, 23 August 2025

Spinach with Feta and Pine Nuts

I made this back in April, while I was in New Zealand, but never quite got around to writing it up. I remember it being pretty good. If I recall correctly, I think I made it with a slightly soft, low-sodium feta that Reiver turned out to actually like (despite not normally being a fan of the stuff).

Photo goes here.

Spinach with Feta and Pine Nuts

Slightly adapted from Vegetable of the Day by Kate McMillan

Ingredients

  • 2 Tbsp. olive oil
  • 2-3 cloves garlic, minced
  • 1/8 tsp. red pepper flakes
  • 1kg fresh spinach, tough stems removed
  • 1/2 tsp. coarse sea salt
  • 2 Tbsp. golden raisins, soaked and drained
  • 1/4 c. pine nuts, toasted
  • 1/2 c. crumbled feta
  • 1 lemon wedge

Directions

  1. Heat oil over medium heat.
  2. Add the garlic and pepper flakes and cook for a minute or so.
  3. Add the spinach a handful or two at a time and cook until wilted.
  4. If the pan gets too dry, add a splash of water.
  5. Add the salt and raisins.
  6. Transfer to a platter and sprinkle with pine nuts and feta.
  7. Squeeze the lemon juice over the spinach and serve immediately.

Wednesday, 20 August 2025

Lee's Rich Loaf

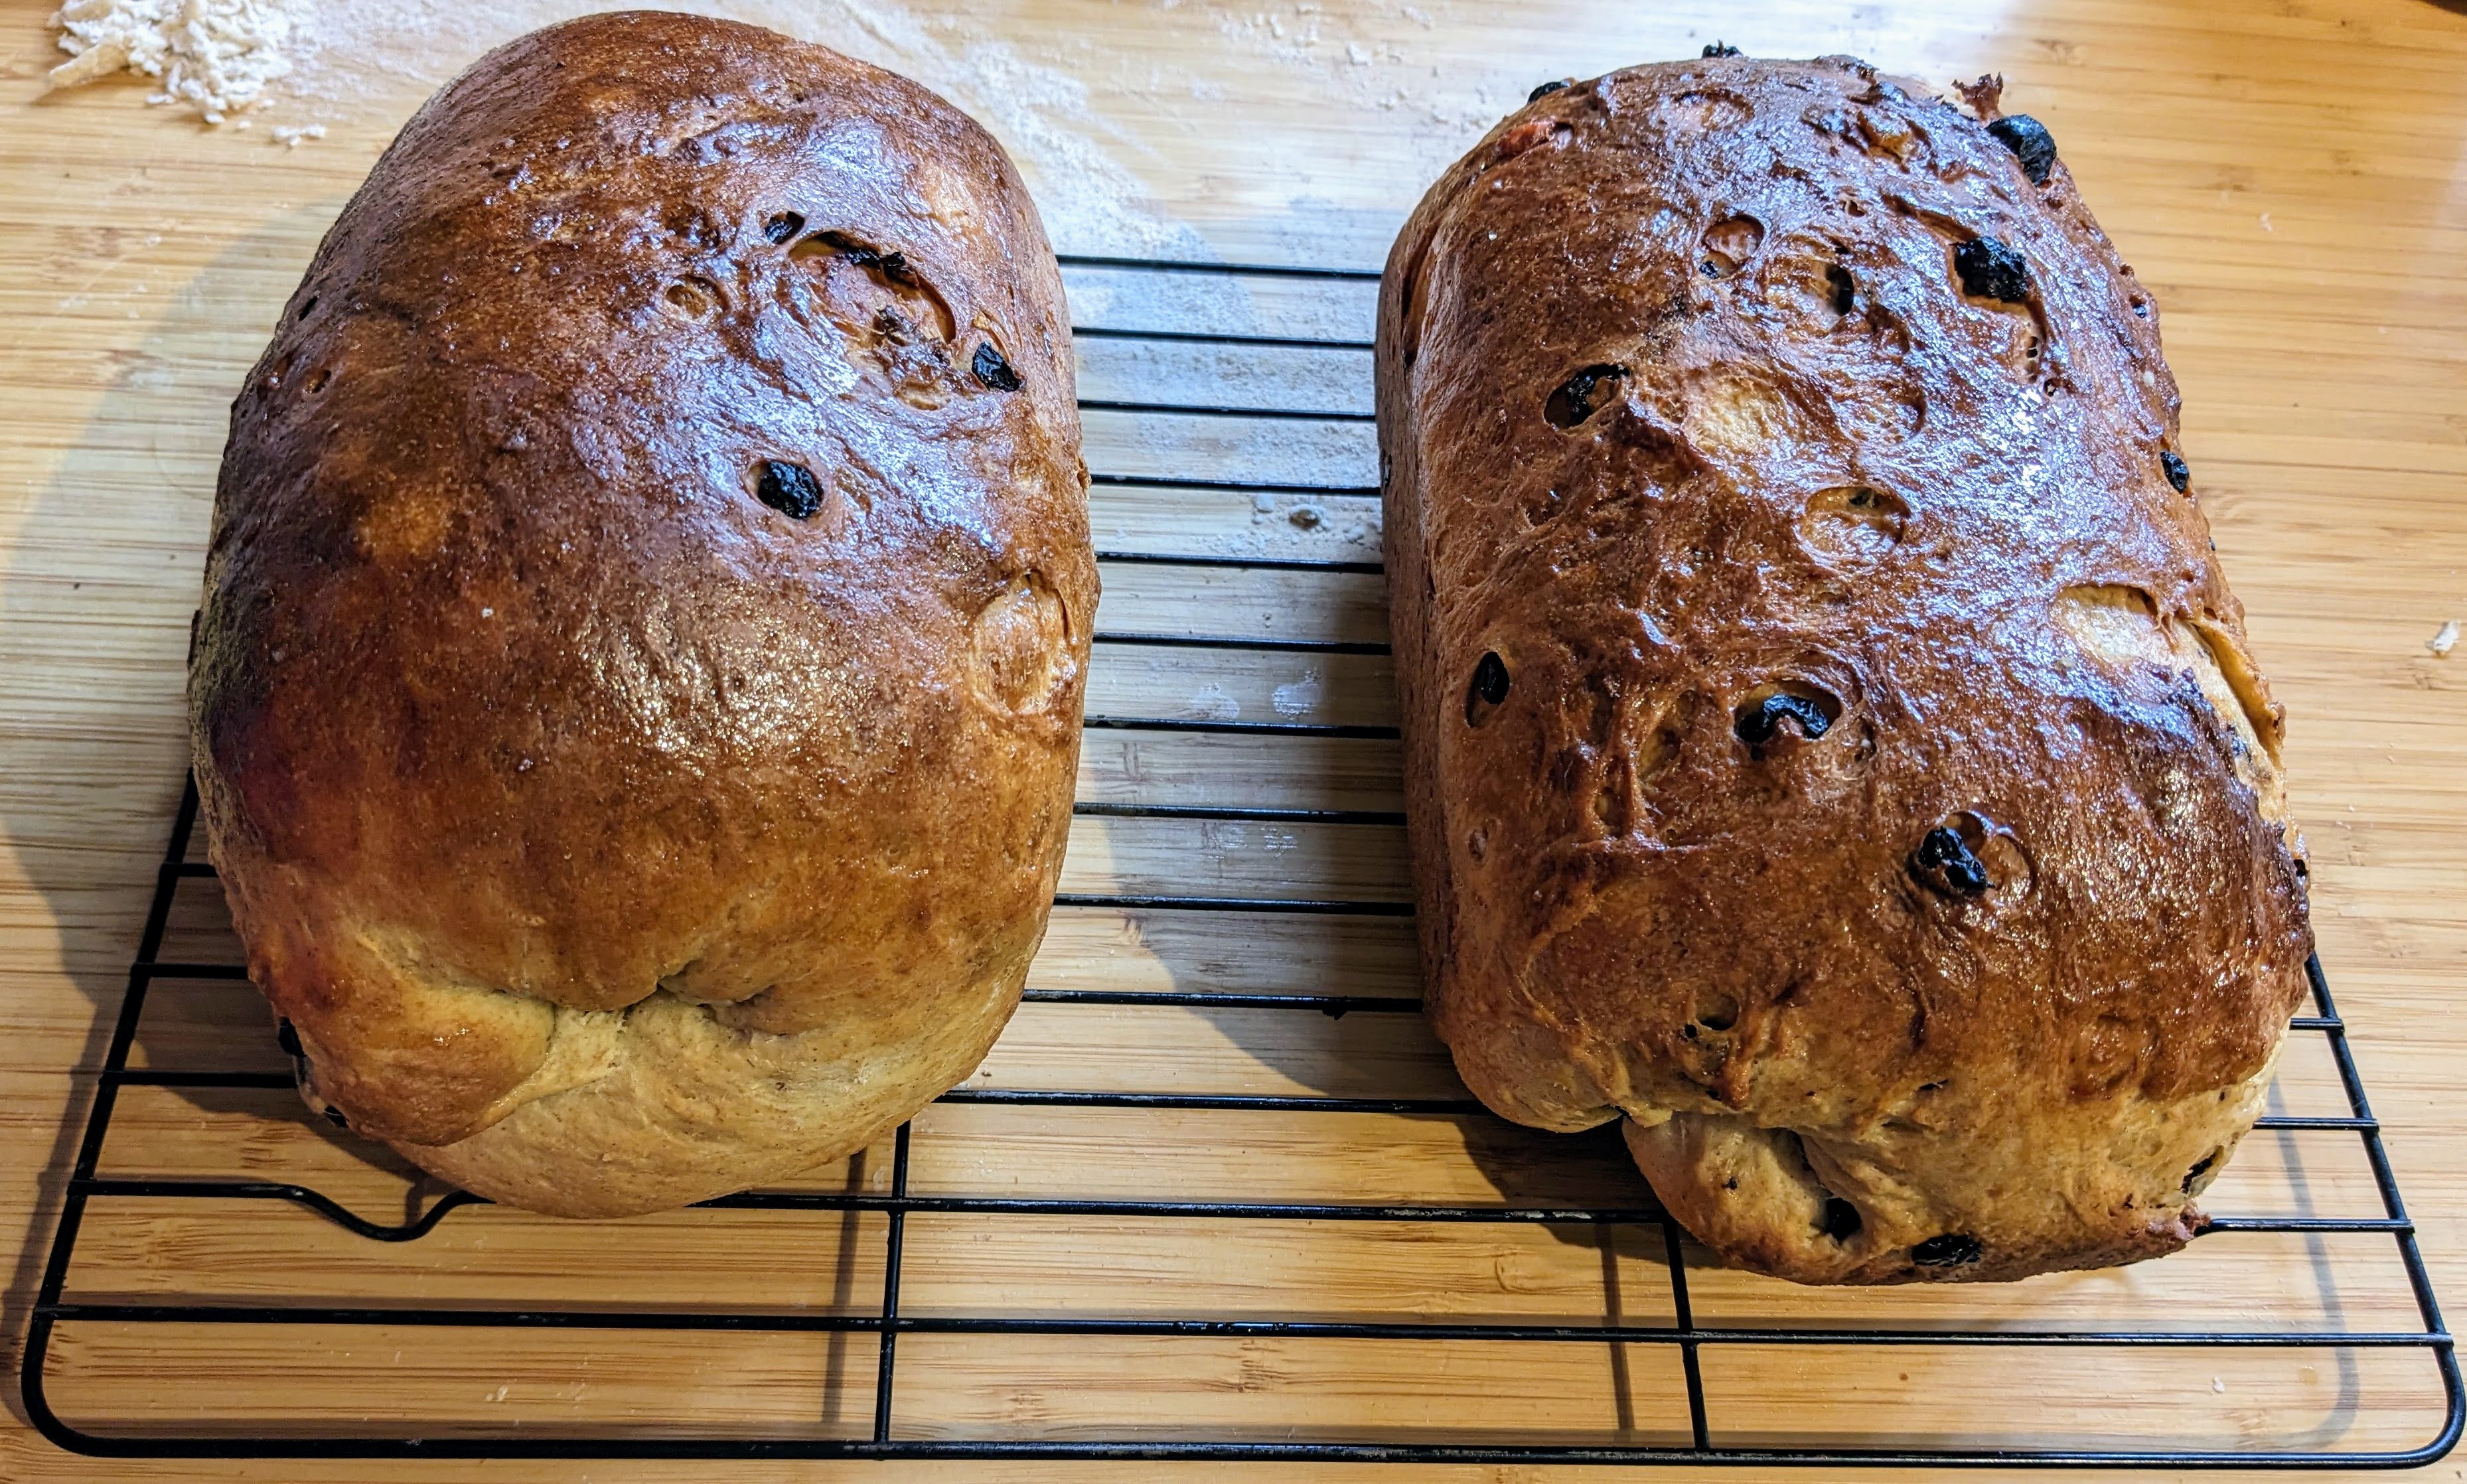
This is yet another recipe from my time in New Zealand. (Not that I got the recipe in NZ, but I made it for the first time while I was over there and then never got around to writing it up.) This is a nice, enriched white bread. The recipe makes enough dough for two loaves. Meanwhile, there is enough filling for one. So, in a single batch, you get a plain white sandwich bread as well as a lovely dessert loaf, replete with nuts and cinnamon!

Photo goes here.

Lee's Rich Loaf

Slightly adapted from Bernard Clayton's New Complete Book of Breads

Ingredients

Dough

  • 1 tsp. coarse sea salt
  • 1/4 c. sugar
  • 1/4 c. butter
  • 1 1/4 c. water
  • 1/3 c. dry milk powder
  • ~700g hard (strong/high grade/bread) flour
  • 2 1/4 tsp. active dry yeast
  • 2 large eggs

Filling

  • 1/4 c. chopped walnuts or pecans
  • 1/4 c. raisins, soaked and drained
  • 1 tsp. ground cinnamon
  • 2 Tbsp. brown sugar
  • 2 tsp. grated orange zest
  • 1 Tbsp. butter, melted

Directions

  1. Combine salt, sugar, butter, water, and milk powder over low heat and cook until butter is melted and water is very warm, but do not allow to boil.
  2. Place ~250g of the flour into a bowl, pour in the warm liquid, and mix well.
  3. Double check the temperature to make sure it's not too hot. Batter should be no more than 50°C.
  4. Add the yeast and mix well.
  5. Stir in the eggs, then beat for 2-3 minutes.
  6. Add the most of the remaining flour a little bit at a time until a rough, shaggy dough forms.
  7. Turn out onto a lightly floured work surface and knead, using any remaining flour to dust as necessary to keep it form being excessively sticky. Be very careful not to add too much flour! The dough should remain soft and pliable.
  8. Continue kneading for 10-20 minutes.
  9. Round the dough and place it in a covered bowl to rise for ~1 hour at room temperature.
  10. Once the dough is well-risen, knock it back and knead a few strokes.
  11. Divide into two equal portions and round each one.
  12. Cover and rest for ~10 minutes.
  13. Meanwhile, combine the nuts, raisins, cinnamon, sugar and orange zest in a bowl and mix well.
  14. Grease two 20x10cm (8x4") loaf pans.
  15. Take one of the dough balls and press/roll it into a flat rectangle ~35cm (14") long and ~1cm (1/2") thick.
  16. Brush the melted butter onto the dough, leaving a 1-2cm margin where the seam will be.
  17. Sprinkle the filling mixture over the butter.
  18. Carefully roll the dough into a log and pinch to seal.
  19. Place the loaf, seam-side-down, into one of the prepared loaf pans.
  20. Shape the other dough ball into a loaf by your preferred shaping method and place it in the remaining empty loaf pan.
  21. Cover and set aside to rise for ~45 minutes.
  22. Preheat oven to 200°C (400°F).
  23. Bake at 200°C (400°F) for 15 minutes.
  24. Reduce temperature to 180°C (350°F) and keep baking for an additional 10-20 minutes.
  25. Turn out onto baking rack to cool.

Tuesday, 29 July 2025

Apple Strata

I'm used to stratas being savoury dishes. Layers of bread, maybe some sausage and/or veggies, probably cheese, and then eggs or custard to bind it all together. Baked up into a tasty breakfast dish.

This one is a bit different. It's a sweet strata! Basically a layered bread pudding. Full of apples, raisins, spices, and a lightly sweetened custard. And served with maple syrup. Rather than cheddar or mozzarella (as I might normally expect for a strata), it uses cream cheese.

I think, on the whole, I prefer my savoury stratas. But this was definitely a nice way to mix things up a bit. And the Kidlet loved it!


Apple Strata

Slightly adapted from The Big Book of Breakfast by Maryana Vollstedt

Ingredients

  • 6 slices stale bread, cubed and divided
  • 125g cream cheese, cubed
  • 2 apples, peeled and diced
  • 1/2 c. raisins
  • 6 large eggs
  • 1 1/4 c. milk
  • 1 Tbsp. brown sugar
  • 1 tsp. ground cinnamon
  • 1/4 tsp. ground nutmeg
  • 1/8 tsp. ground cloves

Directions

  1. Grease a 23x23cm (9x9") square pan.
  2. Place half of the bread cubes in an even layer in the bottom of the pan.
  3. Scatter the cream cheese on top.
  4. Layer the apples on top of this and sprinkle with the raisins.
  5. Beat the eggs with the milk and mix in the sugar, cinnamon, nutmeg, and cloves.
  6. Pour the custard over the strata.
  7. Cover and set aside to allow the bread to soak up the custard for at least an hour and as long as overnight. (Store in the fridge if there will be more than 2 hours between assembly and baking.)
  8. Preheat oven to 180°C (350°F)1.
  9. Bake strata at 180°C (350°F) until custard is just set (60-75 minutes).
  10. Serve topped with icing sugar and/or maple syrup.


1 The original recipe says to bake your strata at 190°C (375°F) for 55 minutes. Mine was very dark on top after only 45, but still raw in the centre. I ended up covering it with foil and baking it for another 10 minutes and then reducing the temperature to 180°C (350°F) and baking it 10 more minutes. So, I think next time I'd just start it out at 180°C (350°F) and bake it for a bit longer to make sure that everything gets cooked through without burning. Back

Monday, 7 July 2025

Kishmish Waale Chane ki Dal

I really liked this curry! The tomatoes, lightly caramelized onions, and sweet raisins (along with all the spices, of course) make for a delightful combination! Definitely a keeper.


Kishmis Waale Chane ki Dal

Slightly adapted from 660 Curries by Raghavan Iyer

Ingredients

  • 1 c. yellow split peas (chana dal)
  • 4-5 c. water1, divided
  • 1/2 tsp. ground turmeric
  • 3 Tbsp. ghee, divided
  • 1 onion, halved and sliced
  • 1/2 c. golden raisins
  • 3 bay leaves
  • 1/2 Tbsp. cumin seeds2
  • 1/2 tsp. black cumin seeds
  • 2 Tbsp. ginger paste
  • 2 Tbsp. garlic paste
  • 1 small (~400mL) can diced tomatoes
  • 4-6 fresh green Thai, serrano, or finger chilies, chopped
  • 1 tsp. coarse sea salt
  • 1/2 tsp. Punjabi garam masala
  • 1/4 c. chopped fresh cilantro

Directions

  1. Thoroughly rinse and drain the peas.
  2. Add 3 c. of the water, bring to a boil, and skim off any foam that forms on the surface.
  3. Stir in the turmeric, reduce heat, and simmer, uncovered, until almost tender (25-30 minutes).
  4. Add the remaining 1-2 c. of water and continue to simmer until peas are tender and just starting to break down (~15 minutes longer).
  5. Meanwhile, melt 2 Tbsp. of the ghee over medium heat.
  6. Add the onion, raisins, and bay leaves and cook until onion is browned and the raisins are plump (~10 minutes). Transfer to plate and set aside.
  7. Add the remaining 1 Tbsp. ghee to the now-empty pan.
  8. Add the cumin and black cumin and sizzle for 10-20 seconds.
  9. Add the ginger paste and the garlic paste and cook until colour darkens (2-4 minutes).
  10. Add the tomatoes, chilies, salt, and masala and stir to combine.
  11. Simmer until heated thorugh and peas are ready.
  12. Stir tomato mixture into peas and cook until flavours blend (~5 minutes).
  13. Stir in onion-raisin mixture and cilantro and serve.


1 The original recipe calls for six cups of water! Three for the initial cooking of the peas, then two that get added later, and one for the sauce. I thought this sounded like way too much, so I omitted the water in the sauce. The finished consistency was still a bit thinner than I would have ideally liked though. I think I would consider scaling the water back even further next time. Back
2 The original recipe calls for one teaspoon each of regular cumin and black cumin. Neither TF nor I are huge fans of black cumin though, so I usually scale it back a bit and replace it with extra regular cumin instead. Back

Thursday, 12 June 2025

Green Apple and Lime Slice

RM put me onto this recipe a while ago. I had hoped to make it with some fresh limes from Reiver's tree while I was in NZ, but I never quite got to it. Luckily we had a bunch of limes in the freezer here though and Granny Smith apples are easy to come by, so I decided to give it a try after I got home instead.

I cut back the sugar significantly in the cake. And I was tempted to skip the icing altogether. But TF was keen on having a bit of frosting, so I did end up using it in the end.

The icing was good. Although I was definitely glad to have cut back the sugar in the cake once the frosting was added. That said, I think that next time I'd be inclined to swap out the American buttercream for a cream cheese icing. I think the cream cheese tang would complement the other flavours nicely. And cream cheese icings tend to need proportionally less sugar and butter to begin with. So, while still not a health food by any stretch, it would still make for a marginally less sweet and calorific topping.


Green Apple and Lime Slice

Adapted from Twisted Citrus

Ingredients

Cake

  • 2 Granny Smith apples, grated
  • 2 limes, zested and juiced
  • 125g butter
  • 3 Tbsp. golden syrup
  • 240g soft (plain/standard/cake) flour
  • 1 Tbsp. baking powder
  • 1 tsp. coarse sea salt, ground
  • 2 tsp. ground cinnamon
  • 1/2 c. brown sugar
  • 125g unsweetened applesauce
  • 2 c. dessicated coconut
  • 1 c. sultanas
  • 1 c. dried currants
  • 2 large eggs

Icing

  • 100g butter, softened
  • 240g cream cheese, softened
  • 1 lime, zested and juiced
  • 1 tsp. vanilla extract
  • 250-300g icing (powdered/confectioners') sugar

Directions

  1. Preheat oven to 180°C (350°F) and grease and flour a 23x33cm (9x13") baking dish.
  2. Mix the lime zest and 2 Tbsp. of the juice with the grated apples.
  3. Combine the butter and golden syrup in a small pot and melt over low heat.
  4. Sift the flour and baking powder into the bowl with the apples and mix in the salt, cinnamon, sugar, applesauce, coconut, sultanas, and currants.
  5. Pour the butter mixture into the bowl and stir to combine.
  6. Add the eggs and mix well.
  7. Scoop the batter into the prepared pan and smooth into an even layer.
  8. Bake at 180&det;C (350°F) until done (~30 minutes).
  9. Remove from oven and allow to cool in pan.
  10. Meanwhile, make the icing byt beating the butter with the cream cheese until light and fluffy (2-3 minutes).
  11. Beat in the lime juice, lime zest, and vanilla.
  12. Sift in icing sugar until desired consistency is reached.
  13. Once cake has cooled completely, spread the icing on top.
  14. Cut into squares and serve.

Thursday, 1 May 2025

Kishmish Waale Murghi (Raisin Chicken)

Whole chickens were on sale at the grocery store again a couple of weeks ago. I was somewhat reluctant to get any since I was worried that I wouldn't have time to break them down before I left. But, after discussing it with Reiver, I decided to go for it anyway. I got the chickens broken down the next day and then ended up using one of them in this curry a few days later.

I ended up going with this recipe, specifically, both because it wasn't on the blog yet and because it let me incorporate some veggies into the meal without having to make an extra dish. The original recipe calls for making this with chunks of chicken breast, but I think it also works quite well with bone-in chicken pieces.

Photo goes here.

Kishmish Waale Murghi

Slightly adapted from 660 Curries by Raghavan Iyer

Ingredients

  • 2 Tbsp. oil
  • 1 onion, chopped
  • 1/2 c. golden raisins
  • 1/2 c. slivered almonds
  • 1kg skinless boneless chicken breasts, cut into 2cm pieces
  • 1 Tbsp. Punjabi garam masala
  • 1 tsp. coarse sea salt
  • 1/2 tsp. ground cayenne or Kashmiri chilies
  • 1/2 tsp. ground turmeric
  • 250g chopped frozen spinach
  • 1/2 c. water

Directions

  1. Heat oil over medium heat.
  2. Add the onion, raisins, and almonds and cook until the onions soften and nuts brown (15-20 minutes).
  3. Add the chicken and cook until it sears (~10 minutes).
  4. Add the garam masala, salt, ground chilies, and turmeric and cook for a minute or so.
  5. Add the spinach and water, bring to a boil, reduce heat to medium-low, cover, and cook, stirring occasionally, until chicken is cooked through (~10 minutes).
  6. Serve with rice and/or your favourite flatbread.

Saturday, 19 April 2025

Feijoa Walnut Cake

More feijoas! I only have a week left, so I'm going to have to kick it into high gear if I want to get through the rest of them before I go!

This cake was delicious! Rich and moist with just a hint of spice. I loved it.

Photo goes here.

Feijoa Walnut Cake

Slightly adapted from NZ Woman's Weekly

Ingredients

  • 1 large egg
  • 100g butter, melted
  • 100g sugar1
  • 300g feijoa pulp, chopped
  • 1 c. (~120g) chopped walnuts
  • 1 c. dried cranberries, sultanas, and/or raisins
  • 120g soft (plain/standard/cake) flour
  • 2 tsp. mixed spice2
  • 2 tsp. baking soda

Directions

  1. Preheat oven to 180°C (350°F) and grease and flour a 20cm (8") springform pan3.
  2. Beat the egg with the butter.
  3. Add the sugar, feijoa, walnuts, and dried fruit and mix well.
  4. Sift in the flour, mixed spice, and baking soda and stir to combine.
  5. Pour the batter into the prepared pan and bake at 180°C (350°F) for ~45 minutes.
  6. Serve warm or at room temperature.


1 The original recipe called for 3/4 c. caster sugar. I opted to use 100g (~1/2 c.) of granulated sugar. I was perfectly happy with the results from doing it this way. I found the cake was sweet enough to taste like a special treat without being cloying. That said, with the raisins/cranberries in, I think you could probably take it as low as 75g if you wanted to. I'd also be tempted to try it with brown sugar next time. Just to see how it compares. That said, I don't think either of these modifications are necessary, they'd just be interesting experiemnts to try. Back
2 Reiver didn't have any mixed spice ready to hand, but did have a surplus of pumpkin pie spice, so I just used that. While the two mixes are not the same they are very similar, so I usually find that I can get away with substituting one for the other in most cases. Back
3 I didn't have a 20cm springform pan available, so I just used a 23cm (9") one instead. It will bake a little faster in the larger diameter pan, but works fine otherwise. Back

Wednesday, 2 April 2025

Feijoa Chutney

I've been continuing to try to work my way through the ridiculous quantity of feijoas that we've suddenly come into. So far I've made two apple-feijoa crumbles, a batch of chocolate-feijoa friands, and a feijoa custard tart. I have a bunch of other feijao recipes queued up as well. But, for today, I decided to give this chutney a try.

It was certainly... interesting.

Recipe as written called for a truly terrifying amount of both vinegar and sugar. I tried it with half the amount of vinegar and no sugar at first. But it tasted a little flat, so I decided to add some of the sugar called for in the recipe and adjust from there.

I actually started with only 1/3 the quantity of sugar called for. I felt like that was being quite conservative. But, having tasted it, I think it probably could have done with even less. I'd probably cut the sugar back to just 50g (1/6 the amount called for in the original recipe) next time.

I also added a few more seasonings after tasting it several times. I think the seasonings helped. A lot. But, I have to admit, this is still not an amazing recipe. It's fine. It's not bad. It's just not great either. All-in-all, I think I'd rather do other things with my feijoas.

Update: I have since found another, very similar, feijoa chutney recipe. Similar enough that I strongly suspect it to be the basis of this recipe. (I suspect the RNZ version to be the newer variation because the author notes that she has tweaked and adjusted it to her tastes over the years and also because the cookbook that I found the other recipe in appears to be an older, hand-typed affair.)

The two recipes call for most of the same ingredients in roughly the same proportions. The main differences appear to be that the cookbook version calls for twice as many onions as the RNZ one and 1/3 again as much sugar (although, I only ended up using ~1/6 the amount of sugar called for in the RNZ version to begin with)! It also quadruples the cayenne, adds ground cloves as an additional seasoning, and calls for 48x the salt! And while I did feel that the RNZ version was somewhat lacking in savouriness (hence my doubling of the salt plus the addition of several salty umami-boosters), I'm not sure I'd go so far as to increase the salt nearly 50-fold. That seems somewhat excessive.

Anyway, I don't intend on actually making the cookbook version of this chutney. I found the RNZ one disappointing enough. And I don't feel that extra sugar, onion, salt, and spices are going to magically make it better. I'll save my ingredients and do something else with my remaining feijoas. That said, I did think it was interesting and wanted to make note of the similar (possibly source) recipe.

Feijoa Chutney

Adapted from RNZ

Ingredients

  • 1kg feijoa pulp
  • 500g onions
  • 300g dates
  • 200g raisins
  • 400-500mL malt vinegar1
  • 1/4 c. tomato paste
  • 50g brown sugar
  • 1 Tbsp. curry powder
  • 1 Tbsp. ground ginger
  • 1 Tbsp. garlic paste
  • 2 tsp. Maggi liquid seasoning
  • 1 tsp. dark soy sauce
  • 1/2 tsp. coarse sea salt
  • 1/2 tsp. ground cayenne

Directions

  1. Purée the feijoas with the onions, dates, raisins, and vinegar (or blitz in a food processor).
  2. Stir in the tomato paste, sugar, curry powder, ginger, garlic, Maggi seasoning, soy sauce, salt, and cayenne and bring to a boil over medium heat.
  3. Reduce heat to low and continue to simmer, stirring often, until mixutre is heated through and desired conistency is achieved.
  4. Adjust seasoning to taste.


1 The original recipe called for a whopping 1L of vinegar. I cut this back to 500mL in my rendition. That said, I think it probably could have stood to have been cut back even further. I might try it with just 400mL next time. This would make the vinegar a little less overpowering and hopefully make the chutney a little thicker as well. Back

Tuesday, 18 March 2025

Clootie Dumpling

This worked out really well!

I'd never made a boiled pudding before. Or baked with suet. Lard, yes, but not suet. I'd used suet in cooking and making things like mincemeat. But I don't think I'd ever done a classic suet pudding before. So this was a bit of an experiment, but also a lot of fun.

I made this as a gluten-free, dairy-free clootie dumpling. I just used a commercial gluten-free flour mix and some rice-based GF breadcrumbs and then swapped in some oat milk for the cow's milk. The flour I used did have some vegetable gums added to try to compensate for the lack of gluten, but my dumpling was still somewhat lacking in structural integrity. I might try adding an extra egg next time, just to help bind it a little more. It was still delicious either way, it just didn't stay intact.


Clootie Dumpling

From BBC Good Food

Ingredients

  • 175g fresh white breadcrumbs
  • 175g self-raising flour, plus extra for dusting
  • 175g beef suet, grated/shredded
  • 100g dark soft brown sugar
  • ½ tsp salt
  • 1 tsp mixed spice or pumpkin pie spice
  • 2 tsp ground cinnamon
  • 1 tsp ground ginger
  • 1 tsp baking soda
  • 100g currants
  • 175g sultanas
  • 2 tbsp black treacle or golden syrup
  • 150mL milk
  • 1 large egg

Directions

  1. Boil a pudding cloth for 15-20 minutes, then wring it out and dust it liberally with flour.
  2. Tip the breadcrumbs, flour, suet, sugar, salt, baking soda, spices, and dried fruit into a large bowl and stir to mix.
  3. Whisk the treacle or syrup into the milk and egg using a fork until well blended.
  4. Stir the mixture into the dry ingredients with a fork or butter knife to make a soft dough.
  5. Use the floured pudding cloth to line a large bowl and then press the dough into it to make a large, round ball.
  6. Dust the top of the pudding with more flour and then bring the edges of the cloth up around the top of the pudding and tie it off, leaving enough room for some expansion.
  7. Fill a large pot with water, place an upturned plate in it, and bring to a simmer.
  8. Place your cloth-wrapped pudding into the simmering water, cover, and cook for 3 hours.
  9. Preheat oven to 180°C (350°F).
  10. Tip the pudding into a colander to drain, then carefully peel off the cloth.
  11. Place the pudding on an ovenproof dish or baking sheet and bake for 15 minutes to dry it off and produce the classic skin.
  12. Serve sliced with custard, cream, or ice cream—and a dram of whisky if you like.


Variations

Gluten-Free, Dairy-Free Version

Ingredients

  • 175g gluten-free breadcrumbs1
  • 175g gluten-free flour, plus extra for dusting
  • 175g beef suet, grated/shredded
  • 100g dark soft brown sugar
  • 2 tsp. baking powder
  • 1 tsp baking soda
  • 3/4 tsp. salt
  • 1 tsp mixed spice or pumpkin pie spice
  • 2 tsp ground cinnamon
  • 1 tsp ground ginger
  • 100g currants
  • 175g sultanas
  • 2 tbsp black treacle or golden syrup
  • 150mL oat milk (or non-dairy milk of your choice)
  • 1-2 large eggs


1 As noted above, I used some dry, rice-based breadcumbs for my version in order to keep my dumpling gluten-free. This seemed to work fine. That said, I think I'd probably aim to get a loaf of GF bread next time and make my own fresh breadcrumbs. Back

Tuesday, 11 February 2025

Oatmeal-Raisin Cookies

I'm taking a te reo Maaori course! It's awesome. I mean, I am hopelessly out of my depth, but I'm also learning a lot about Maaori culture and worldview, which is very exciting!

Anyway, the instructor suggested that folks might want to bring some biscuits or something to have during the break (since it's a 3-hour evening class). Since I had the oven on for polenta anyway, I decided to whip up a quick batch of oatmeal-raisin cookies to take and share with the class.

I used a slightly modified version of the recipe from Dessert of the Day for these. The only real change I made was to reduce the sugar. One-and-a-half cups sounded like way too much to me! In the end, I decided to put in the full cup of brown sugar, but omit the half cup of granulated sugar that the recipe called for. And, honestly, I probably could've cut the brown sugar back slightly as well. I mean, they were prefectly tasty this way, but I definitely wouldn't've wanted them any sweeter and I think they still would've been just fine with a little less sugar. So, follow your heart on this one. I'd say anything in the 3/4 c. to 1 c. range is probably good.

I also omitted the salt since I was using salted butter rather than the unsalted that the recipe called for. Obviously that's something that you can adjust as you see fit depending on your personal preference and the ingredients you have to hand. It's not super critical either way.


Oatmeal-Raisin Cookies

Slightly adapted from Dessert of the Day by Kim Laidlaw

Ingredients

  • 1/2 c. butter
  • 1 c. brown sugar
  • 2 large eggs
  • 2 tsp. vanilla extract
  • 180g flour
  • 1 Tbsp. ground cinnamon
  • 1/4 tsp. coarse sea salt, ground (optional)
  • 1 tsp. baking powder
  • 1 1/2 c. rolled oats
  • 1 1/2 c. raisins

Directions

  1. Preheat oven to 180°C (350°F) and line a baking sheet with a silicone mat or parchment paper.
  2. Beat the butter with the sugar until light and fluffy (3-4 minutes).
  3. Beat in the eggs, one at a time.
  4. Mix in the vanilla.
  5. Sift in the flour, cinnamon, salt (if using), and baking powder and stir to combine.
  6. Mix in the oats, followed by the raisins.
  7. Spoon onto the prepared baking sheet. (Should make ~2 dozen cookies.)
  8. Bake at 180°C (350°F) until set, but still soft (12-15 minutes).
  9. Allow to cool on baking sheet for 5 minutes, then transfer to wire rack to finish cooling.

Tuesday, 17 December 2024

Honey-Lemon Carrot Salad

This is a nice vegetable side. It's fast, easy, and surprisingly tasty. I quite liked it!


Honey-Lemon Carrot Salad

Slightly adapted from Vegetable of the Day by Kate McMillan

Ingredients

  • 1/2 Tbsp. honey
  • 2 Tbsp. white wine or sherry vinegar
  • 1 Tbsp. lemon juice
  • 1 1/2 Tbsp. olive oil
  • 1/4 tsp. coarse sea salt, ground
  • 500g carrots, grated
  • 1/3 c. sultanas or golden raisins
  • 1/4 c. sliced almonds1
  • 1 Tbps. chopped flat-leaf parsley

Directions

  1. Combine the honey, vinegar, and lemon juice and mix well.
  2. Whisk in the olive oil and salt.
  3. Add the carrots, sultanas, almonds, and parsley and toss to combine.


1 I was all out of sliced almonds, so I used sliced hazelnuts for my salad instead. Back

Friday, 15 November 2024

Sourdough Kugelhopf

Kugelhopf is a yeasted cake full of dried fruit. It's traditionally baked in a special toroidal pan, similar to a Bundt pan, but narrower and deeper. I don't have a kugelhopf pan, so I just used a Bundt pan instead.


Sourdough Kugelhopf

Slightly adapted from King Arthur Flour

Ingredients

  • 1/2 c. dried cherries
  • 1/2 c. raisins
  • 1 c. rum1
  • 1 Tbsp. orange blossom water
  • 500g hard (strong/high grade/bread) flour
  • 2 tsp. coarse sea salt
  • 200g ripe (fed) sourdough starter
  • 130g milk
  • 4 large eggs
  • 1/4 c. sugar
  • 13 Tbsp. unsalted butter, softened
  • 1-2 dozen whole almonds
  • icing sugar, to garnish

Directions

  1. Combine cherries, raisins, and rum and let stand overnight.
  2. Drain fruit and mix in orange blossom water. (Discard rum or set aside for another use.)
  3. Combine flour and salt and mix well.
  4. In a separate bowl, combine starter, milk, eggs, and sugar and mix well.
  5. Gradually mix wet ingredients into dry and knead with dough hook for a minute or two.
  6. Cover and rest for 10 minutes.
  7. Knead with dough hook for another 3-5 minutes.
  8. Work in butter, 1 Tbsp. at a time, over the course of another 5 minutes or so.
  9. Work in fruit and knead until evenly mixed and elastic.
  10. Round dough and place in a covered bowl to rise for 2-4 hours, stretching and folding every 30-60 minutes.
  11. Knock back the dough, round, cover, and rest for 20-30 minutes.
  12. Grease a 10-12 cup kugelhopf or Bundt pan.
  13. Place an almond in each "peak" in the bottom of the pan.
  14. Round the dough again and make a hole through the centre.
  15. Place the dough in the prepared pan, cover, and set aside to rise for another 3-6 hours (or overnight in the fridge).
  16. Once ready to bake, preheat oven to 200°C (400°F).
  17. Bake at 200°C (400°F) for 25 minutes.
  18. Reduce heat to 190°C (375°F) and bake for another 15 minutes.
  19. Turn out onto wire rack to cool.
  20. Dust with icing sugar and serve.


1 The original recipe calls for kirsch, but I didn't have any (and TF and I don't like it anyway), so I used some spiced rum instead. Back

Tuesday, 29 October 2024

Walnut and Raisin Oatmeal Sourdough

I've been continuing to try out sourdough recipes from the King Arthur Flour website. This one is full of inclusions and spices. And, between the starter and the oatmeal, doesn't actually contain all that much fresh flour. Which made it a bit difficult to work with initially. The dough seemed very loose and wet and had very little gluten development. I actually ended up adding ~50g of extra flour, just to try to adjust the consistency to something slightly more workable. After it had sat overnight in the cold room though, it had tightened up quite a bit and I found myself wishing that I hadn't added the extra flour after all. So, I guess next time I'll trust the recipe and go with the original amounts.


Walnut and Raisin Oatmeal Sourdough

Slightly adapted from King Arthur Flour

Ingredients

  • 120g ripe (fed) sourdough starter @ 100% hydration
  • 250g cooked steel-cut oats1, cooled
  • 30g honey
  • 30g water
  • 30g unsalted butter
  • 1 tsp. allspice berries, ground
  • 1/4 tsp. ground nutmeg
  • 1 Tbsp. orange zest
  • 220g hard (strong/high grade/bread) whole wheat flour2
  • 1/8 tsp. instant yeast (optional)
  • 1 tsp. coarse sea salt
  • 65g walnuts, toasted and chopped
  • 90g raisins

Directions

  1. Make sure your starter is well-fed and active.
  2. Combine starter, oatmeal, honey, water, butter, allspice, nutmeg, and orange zest and mix well. (Make sure the oatmeal isn't too hot or it will kill the yeast/starter.)
  3. Add the flour and yeast and mix very well.
  4. Cover and let stand at room temperature for 30-60 minutes.
  5. Work in the salt and let stand for another hour or two.
  6. Do a bowl fold and then let rest for another hour or so. Repeat until dough feels light and well-risen.
  7. Work in the walnuts and raisins.
  8. At this point, dough can be covered and stored in the fridge overnight or allowed to rest for one more hour before shaping.
  9. Shape into a loaf and place in a banneton or prepared loaf pan. (If desired, dust the banneton/pan with some finely chopped steel-cut oats first to give the loaf a nice coating.)
  10. Cover and allow to rise at room temperature for 2-3 hours.
  11. If desired, loaf may be proofed in the fridge overnight.
  12. Preheat oven to 230°C (450°F) and boil some water.
  13. Bake bread at 230°C (450°F) over a pan of boiling water for 15 minutes.
  14. Remove water pan and reduce heat to 190°C (375°F) and bake for another 20 minutes or so.
  15. Turn off oven and let loaf stand in hot oven for 10 minutes.
  16. Transfer to wire rack to cool.


1 Oats should be cooked with a ratio of 1:4.1 oats to water by mass. I started with 100g of oats and 410g of water and cooked until the oats were somewhat tender with a decent tooth/chew to them and the oatmeal was reasonably thick. I then weighed out 250g of the cooked oatmeal and reserved the rest for another use. Back
2 The original recipe calls for 220g of all-purpose flour. I ended up using 120g of whole wheat flour and 160g of all-purpose flour. I think next time I'd try using entirely whole wheat flour, but sticking to the originally recommended quantity. Back

Tuesday, 21 November 2023

Blood Orange and Lemon Curd Parfaits

Continuing my way through the parfait recipes in the Breakfast Bible, I decided to give this citrusy one a try. It's ideally meant to be made with pistachios and goji berries, both of which I usually have on hand. But I'd forgotten that I'd used up the last of my goji berries a while ago and hadn't bothered restocking immediately since I don't tend to use them very often. Whoops! Fortunately the recipe also suggested golden raisins as an acceptable alternative. And those I did have!

I really enjoyed this combination. The colours were pretty and the flavours were excellent. That said, I think it also would have been fine with regular oranges. Not quite as visually striking, maybe, but I think the flavours still would have worked out quite well. And I actually really liked the sweetness of the raisins in it. The do think the goji berries would have been a nice complement to the lemon, but they also tend to be a bit less sweet than raisins in my experience, so choose your fruit according to your tastes.

I found pistachios a somewhat surprising combination here. It was good, don't get me wrong! Just unexpected. I really enjoyed the pistachios in it, but I think it would be interesting to experiemnt with different nuts too. Toasted almonds were my first idea, but I think cashews could also be quite nice. Maybe something to consider for next time...


Blood Orange and Lemon Curd Parfaits

Slightly adapted from The Breakfast Bible by Kate McMillan

Ingredients

  • 1 c. lemon curd, divided
  • 4 blood oranges, peeled and sectioned1, divided
  • 1/4 c. dried goji berries or golden raisins, divided
  • 3 c. plain Greek yogurt, divided
  • 1/4 c. chopped pistachios2, divided

Directions

  1. Put 2 Tbsp. of lemon curd in the bottom of each jar.
  2. Top each with the sections from 1/2 an orange.
  3. Add 1/2 Tbsp. of raisins or goji berries to each one.
  4. Then add 6 Tbsp. of yogurt to each jar.
  5. Repeat layers. (This should use up the remainder of the lemon curd, oranges, raisins/goji berries, and yogurt.)
  6. Top each parfait with 1 Tbsp. of pistachios and serve.


1 The original recipe called for "peeled and sliced", but I felt like cutting out the membrane entirely would make them easier to eat, so I opted for sectioning rather than slicing. Back
2 If you have the time and patience for it, I think toasting the pistachios before chopping would make the final result even tastier. That said, I still found it very good with untoasted pistachios, so go with whatever works for you. Back

Monday, 13 November 2023

Barm Brack

Apparently "barm brack" is Irish for "yeast bread". It's a rich, fruity bread full of butter, eggs, sugar, raisins, and candied fruit. It reminds me a bit of hot cross buns in loaf form.

I had a bit of trouble judging when these were done. I'm usually pretty good with that sort of thing, but I think the quantity of inclusions threw me off a bit. It was still tasty, the crust was just a bit thicker than it should've been because I didn't realize that I'd pulled it out of the oven too soon until after it had already cooled significantly. Other than that though, this recipe worked out very well. (And the Kidlet absolutely loved it!)


Barm Brack

Slightly adapted from Bernard Clayton's New Complete Book of Breads

Ingredients

  • 500g hard (strong/high grade/bread) or all-purpose flour
  • 1/2 c. sugar
  • 2 tsp. coarse sea salt
  • 1 tsp. lemon zest
  • 1 Tbsp. instant yeast
  • 1/2 c. unsalted butter
  • 3/4 c. water
  • 1/2 c. milk
  • 2 large eggs
  • 1 1/2 c. golden raisins
  • 1/2 c. mixed peel or mixed candied fruit
  • 1 tsp. sugar dissolved in 1 Tbsp. water

Directions

  1. Combine 180g flour with sugar, salt, lemon zest, and yeast.
  2. Combine butter, water, and milk and heat to ~50°C (~120°F).
  3. Add the hot butter mixture to the flour mixture and beat with a wooden spoon or the flat beater of a stand mixer for ~2 minutes.
  4. Add the eggs and another 100g of flour and beat for another 2 minutes.
  5. If using a stand mixer, switch to the dough hook at this point and continue adding flour ~1/4 c. (~30g) at a time until dough comes together into a shaggy mass.
  6. Turn out onto counter and knead by hand for 10-15 minutes (or continue working with dough hook in stand mixer for 2-4 minutes).
  7. Add a little more flour or water as needed during kneading in order to get a nice, smooth, relatively soft dough.
  8. Round the dough and place in a covered bowl to rise for 45-60 minutes.
  9. Knock back and turn out onto a lightly floured surface.
  10. Work in the raisins and the candied fruit.
  11. Divide dough into two equal portions and round each one.
  12. Cover and rest for 5-10 minutes.
  13. Meanwhile, grease two loaf 20x10cm (8x4") loaf pans.
  14. Flatten each round, letter fold, roll up, and place each loaf seam-side-down in one of the prepared loaf pans.
  15. Cover and allow to rise for another 45-60 minutes.
  16. Preheat oven to 190°C (375°F).
  17. Bake at 190°C (375°F) for ~40 minutes.
  18. Remove loaves from pans and return to oven without the pans for 10 minutes.
  19. Brush loaves with sugar glaze and return to oven for another 2 minutes.
  20. Turn oven off and allow loaves to sit in hot oven for another 5-10 minutes.
  21. Transfer to wire rack to cool.

Saturday, 11 November 2023

Buttermilk Coleslaw with Carrots and Raisins

I was going to make the Carolina red slaw recipe from Cook's Country to go with our pulled pork. However, it turns out that the slaw recipes for that issue were only actually part of the digital edition and are no longer available unless you're a paid subscriber. Bummer.

I thought about looking for "red slaw" recipes elsewhere. There are definitely lots online. But, given how many cookbooks we have (and how much of a completionist I am), I figured that maybe it made more sense to seek out a coleslaw recipe in one of the many cookbooks we own instead.

A quick search of Dish of the Day turned up this buttermilk slaw recipe. I didn't have the red cabbage for it, but I did still have a truly terrifying amount of green cabbage, so I decided to just make it with all green cabbage. Not as pretty, for sure, but it was still nice. Although I think we ended up going a bit heavy on the pepper and light on the salt. I've corrected that in the recipe below.


Buttermilk Coleslaw with Carrots and Raisins

Slightly adapted from Dish of the Day by Kate McMillan

Ingredients

  • 1/2 c. golden raisins
  • 3/4 c. mayonnaise
  • 1/2 c. buttermilk1
  • 1/4 c. sour cream2
  • ~1/2 c. chopped fresh parsley
  • ~1/4 c. chopped fresh chives
  • 1/2 tsp. coarse sea salt, ground
  • 1/4 tsp. white peppercorns, ground
  • 2 carrots, peeled and grated
  • 2-3 shallots, halved and sliced
  • 3 Tbsp. cider vinegar
  • ~1kg cabbage, thinly sliced (preferably a mix of red and green)

Directions

  1. Soak the raisins in warm water for 20-30 minutes, then drain.
  2. Combine the mayo, buttermilk, sour cream, parsley, chives, salt, and pepper and mix well.
  3. In a separate bowl, combine the carrots, shallots and vinegar, mix well, and set aside.
  4. In a large bowl, combine the cabbage and raisins.
  5. Add the dressing and carrot mixture and mix very well.
  6. Garnish with additional parsley and chives and serve.


1 I was all out of buttermilk, but I remembered that I had some buttermilk powder in the pantry, so I just used 2 Tbsp. of that + 1/2 c. of water for the buttermilk component of my dressing. Back
2 This dressing would absolutely be best made with full fat sour cream. I chose to swap in fat-free Greek yogurt for my dressing both to reduce the calorie count and to avoid having to go out to the shops for any more ingredients. Back

Tuesday, 24 October 2023

Pumpkin-Apple Brown Betty

I got a long pie pumpkin in my produce basket a few weeks ago. I'd never seen or heard of such a thing before! They're apparently a heritage variety that gets harvested while still green and then gradually turns orange afterward.

I didn't have any specific plans for it. I just really wanted to try one. So it's been sitting on the kitchen table for the last few weeks waiting for me to come up with a good use for it. I found a bunch of tempting-looking pumpkin recipes and debated between which one(s) to try. Eventually I settled on this pumpkin and apple brown betty. It looked easy and tasty and I liked that it was specifically writeen to use a fresh pumpkin (rather than canned pumpkin purée).

I really like how this recipe came out (and so did TF and the Kidlet). And I actually think making it with a long pie pumpkin worked out better than if I'd used one of the "standard" round pie pumpkins (sugar pie, autumn gold, etc.). Rather than cutting the top of a round pumpkin and hollowing it out, I was able to just cut the long pumpkin in half. The long, relatively shallow boat formed by the scooped out half pumpkin fit much better in the baking dish than a round pumpking would have. And this meant that I was able to cover the dish with its normal lid rather than having to use foil. My pumpkin also cooked in about half the time the recipe recommended for baking. I assume that this was down to the shape of the pumpkin and having more surface area for heat exchange. And, of course, this still left the other half of the pumpkin available for another use. So, pretty great all 'round1!


Pumpkin-Apple Brown Betty

Slightly adapted from Food Network

Ingredients

  • 1 pie pumpkin (or 1/2 a long pie pumpkin)
  • 3 Tbsp. unsalted butter, divided
  • 1 1/2 c. cubed bread2
  • 2 apples (preferably Gala), peeled and cubed
  • 1/4 c. brown sugar
  • 1/4 c. raisins (preferably golden)
  • 1 Tbsp. rum
  • 1/2 tsp. vanilla extract
  • 1/4 tsp. mixed spice
  • 1/4 c. maple syrup, to serve (optional)
  • 1/2 c. or more cream (runny or whipped) or ice cream, to serve (optional)
  • 1/4 c. pumpkin granola, to serve (optional)

Directions

  1. Preheat oven to 190°C (375°F).
  2. If using a round pie pumpkin: Cut the top off and scoop out the guts.
    If using a long pumpkin: Cut in half and scoop out the guts.
  3. Melt 2 Tbsp. of the butter over medium heat.
  4. Add the bread and cook, stirring occasionally, until browned (4-5 minutes). Transfer to a bowl and set aside.
  5. Add the remaining 1 Tbsp. of butter to the now empty pan.
  6. Add the apples, brown sugar, and raisins and cook for 3-4 minutes.
  7. Add the rum, vanilla, and mixed spice.
  8. Return the bread to the pan and stir to combine. Set aside.
  9. Place the pumpkin (or 1 pumpkin half) in a baking dish.
  10. Fill the cavity with the bread mixture.
  11. If using a round pumpkin, place the pumpkin "lid" back on top.
  12. Pour boiling water into the baking dish around the pumpkin to a depth of ~2cm.
  13. Cover loosely with foil (or the lid of the baking dish, if appropriate).
  14. Bake at 190°C (375°F) for 1-2 hours. (Closer to 1 hour for a long pumpkin, 2 for a round one.)
  15. Once pumpkin flesh is very tender, remove the foil and pumpkin lid (if present).
  16. Return pumpkin to oven and bake until filling looks nicely browned (5-10 minutes).
  17. When serving, scrape the pumpkin flesh from the skin and mix it with the filling.
  18. Drizzle with maple syrup, granola, and/or (whipped) cream. Alternatively top with a small scoop of vanilla ice cream (and optional granola, if desired).


1 Or oblong, as it were. ;P Back
2 The original recipe only called for 1 c. of bread. One slice of bread wasn't quite enough and two slices was too much. But I like bread, so I just decided to put it all in. I was happy with how the proportions came out with that amount of bread, so I think I'll just keep doing it that way in the future. Back

Friday, 22 September 2023

Kashmiri Shaami Kebab (Raisin-Stuffed Lamb Patties)

I picked up a pound of ground lamb on sale a few weeks back and it's been sitting in the freezer waiting for me to come up with something to do with it. This saucy stuffed lamb patty curry sounded delicious and was actually much easier to put together than I'd feared. A few of the patties came open during cooking, but most of them held their shape well and kept the filling neatly encased.


Kashmiri Shaami Kebab

Slightly adapted from 660 Curries by Raghavan Iyer

Ingredients

Patties

  • 1/2 c. yellow split peas (chana dal)
  • 3 c. water
  • 1/2 tsp. ground turmeric
  • 1/2 c. golden raisins
  • 1/4 c. chopped fresh cilantro
  • 2-3 fresh green Thai, serrano, or finger chilies
  • 450g ground lamb
  • 1 tsp. coarse sea salt
  • 1 tsp. Kashmiri garam masala
  • 1 Tbsp. oil

Sauce

  • 2 Tbsp. mustard oil
  • 4-5 cloves garlic, chopped
  • 1/2 c. golden raisins
  • 400mL diced tomatoes1
  • 1 tsp. fennel seeds, ground
  • 1 tsp. ground ginger
  • 1 tsp. ground Kashmiri chilies
  • 1 tsp. coarse sea salt

Directions

Patties

  1. Rinse the peas very well, then add the water and bring to a boil, uncovered, over medium-high heat.
  2. Skim off and discard any foam, then stir in the turmeric and reduce the heat to medium-low.
  3. Simmer, covered, stirring occasionally, until tender (~30 minutes).
  4. Reserve 1 c. of cooking water from the peas.
  5. Drain the peas and transfer them to a food processor2 and pulse to mince.
  6. Transfer the peas to a bowl and add the raisins, cilantro, and chilies to the food processor (or blender) and pulse to mince.3
  7. Transfer the raisin mixture to a separate bowl.
  8. Add the ground lamb to the bowl with the peas and mix in the salt and garam masala.
  9. Take ~2 Tbsp. of the meat mixture and shape it into a flat disc. Place ~1 tsp. of the raisin mixture in the centre of the disc and fold it up over the filling to completely encase it. Shape into a ball and then flatten slightly into a small patty.
  10. Repeat the above process with the remaining meat and filling.
  11. heat the oil over medium heat.
  12. Add a few of the patties and cook for ~5 minutes, flip, and cook for 5 minutes on the other side.
  13. Transfer to a plate and repeat with remaining patties.

Sauce

  1. Heat the oil over medium heat.
  2. Add the garlic and raisins and stir-fry until the garlic browns a little and the raisins swell (2-4 minutes).
  3. Add the tomato, fennel, ginger, chilies, and salt and cook, uncovered, stirring occasionally for ~5 minutes.
  4. Pour in the reserved cooking water from the split peas and bring to a boil.
  5. Cook, uncovered, stirring occasionally until the sauce thickens (~5 minutes).
  6. Transfer to a blender and purée.
  7. Serve the lamb topped with sauce over a substrate of your choice.


1 The original recipe called for 1 large tomato. Even a very large tomato is probably going to produce significantly less than 400mL once it's cored and chopped, but I liked the idea of going a bit heavy on the tomatoes and having some extra sauce so I just used the whole tin. Back
2 I don't have a food processor, so I just used the "food chop" setting on my blender. The peas were soft enought that they ended up more puréed than minced, but it still seemed to work out fine. Back
3 I saved a bit of extra cooking water from the peas and added this as well since the blender was struggling to chop the ingredients without it. Back