Showing posts with label alcohol. Show all posts

Sunday, 28 June 2026

Slow Cooker Bolognese

It's been a bit over a month since I made this, so I'm hoping that I can remember all the changes I made. The base recipe was fine, but the flavour was a bit flat, so I did end up tweaking it a bit just to punch things up a notch.

Slow Cooker Bolognese

Adapted from Pioneer Woman

Ingredients

  • 1 Tbsp. olive oil
  • 2 stalks celery, chopped
  • 1-2 carrots, grated
  • 1-2 onions, chopped
  • salt and pepper, to taste
  • 3-4 cloves garlic, minced
  • 1/4 c. tomato paste
  • 1/2 c. red wine
  • 1kg lean ground beef
  • 1 1/2 c. whole milk
  • 1 large (800mL) can crushed tomatoes
  • 1/2 Tbsp. dried oregano
  • 1/2 Tbsp. dried basil
  • 1 tsp. dried thyme
  • 1/4 tsp. red pepper flakes
  • 1 Parmesan rind (optional)
  • 2 Tbsp. brown sugar
  • 1 tsp. dark soy
  • 2 tsp. light soy
  • 1 tsp. Worcestershire sauce
  • 2 tsp. balsamic vinegar

Directions

  1. Heat olive oil over medium heat.
  2. Add celery, carrots, and onions and season to taste with salt and pepper. Cook until softened (~10 minutes).
  3. Add the garlic and tomato paste and cook until fragrant (3-4 minutes).
  4. Add the red wine and cook until mostly evaporated.1
  5. Meanwhile, in a separate pan, cook the ground beef and season with salt and pepper.
  6. Stir the milk into the beef and cook until mostly absorbed.
  7. Add the beef to the slow cooker along with the tomatoes, oregano, basil, thyme, pepper flakes, and parmesan rind (if using).
  8. Cover and cook on low for 6-12 hours.
  9. Taste and add sugar, soy sauces, Worcestershire sauce, and vinegar if needed.

1 If you have an InstantPot, then these steps can be done on the sauté setting. Otherwise, transfer veggie mixture to slow cooker once this step is complete. Back

Friday, 1 May 2026

Sauerbraten (German Sweet and Sour Beef)

When I was in NZ last year, I found an excellent deal on beef brisket and came home with a nice piece. It went in the freezer to be cooked later... But then I never quite got to it before I left. So it was still waiting for me in the freezer when I returned this year.

Another time I might've tried to smoke and/or barbecue it. But we're kind of out of grilling season in this hemisphere now and, after a year in the freezer, it was a bit freezer-burnt, so I decided to go for a slow cooker option instead.

After giving it a bit of thought and tossing around a few different ideas, I settled on taking a crack at turning it into sauerbraten. I have fond memories of the sauerbraten that my dad made. And, while I don't have his recipe, I figured I could at least ask the internet and try to come up with something similar. And it seemed like the ideal thing to do with a big chunk of slightly freezer-burnt beef.

The recipe that I used recommends using a bottom round or rump roast for this, but I figured the brisket would also work quite well. And it did! I really enjoyed how it came out. That said, I'm sure it would be good with other cuts too.


Sauerbraten

Slightly adapted from Daring Gourmet

Ingredients

  • 2 onions, chopped
  • 2-3 carrots, cut into large chunks
  • 1 leek, white parts only, thoroughly rinsed and chopped
  • 3-4 cloves garlic, minced
  • 1 tsp. dried thyme
  • 1 tsp. dried rosemary
  • 2 bay leaves
  • 8 juniper berries
  • 6 whole cloves
  • 10-12 black peppercorns
  • 2 1/2 tsp. coarse sea salt
  • 1 tsp. sugar
  • 2 1/2 c. red wine
  • 1 c. red wine vinegar1
  • 1 1/2 c. water
  • 1.5-2kg beef roast (brisket, bottom round, rump, etc.)
  • 1-2 Tbsp. oil or lard
  • 4 slices bacon, chopped (optional)
  • 1/4 c. flour
  • 1/4 c. raisins
  • 75-85g gingersnaps/gingernuts (6-7 gingernuts), crushed
  • 1 Tbsp. honey

Directions

  1. Combine the onion, carrot, leek, garlic, thyme, rosemary, bay leaves, juniper berries, cloves, peppercorns, salt, sugar, wine, vinegar, and water and bring to a boil.
  2. Reduce heat and simmer for 10 minutes.
  3. Remove from heat and allow to cool completely.
  4. Nestle the roast into the marinade, cover, and refrigerate for 4-7 days, turning each day if the marinade does not completely cover the meat.
  5. When ready to cook, remove the meat from the marinade and set aside.
  6. Strain the marinade and reserve both the solids and the liquids.
  7. Heat the oil over medium-high heat.
  8. Add the beef and sear on all sides. Set aside.
  9. Add the bacon (if using) to the now-empty pot and cook.
  10. Add the vegetables and sauté for ~5 minutes.
  11. Add the flour and cook until no longer raw (3-4 minutes).
  12. Pour in the reserved marinade, raisins, gingersnaps/gingernuts, and honey and bring to a boil.
  13. Add beef, cover, reduce heat to low, and simmer for 2-4 hours if cooking on the stovetop. Otherwise, transfer everything to a slow cooker and cook on "high" for ~6 hours. (Or use an InstantPot-style multi-cooker to do the whole thing in place.)
  14. Once beef is cooked through and tender, remove from the pot and set aside.
  15. If desired, remove the bay leaves, juniper berries, and cloves from the liquid and purée the veggies into it to make a thick gravy. Otherwise, adjust consistency by mixing in a cornstarch or flour slurry and boiling until gravy thickens to desired consistency.
  16. Adjust seasoning to taste.
  17. Slice beef and serve with the gravy (and veggies if you chose not to purée them).
  18. Serve with a starch (potatoes, bread, etc.) and rotkohl (sweet-and-sour red cabbage) or another vegetable dish of your choice.


1 I couldn't find any red wine vinegar, so I just used white wine vinegar. Either is fine. I think that cider vinegar would also be good in a pinch. Back

Thursday, 6 November 2025

Elegant Scrambled Eggs

Unfortunately the avocado that I got for this wasn't quite ripe yet, so I had to make it without that particular ingredient. It was still tasty though! A bit more involved than most scrambled eggs, but good if you have the ingredients on hand and want something particularly hearty for breakfast.

Photo goes here.

Elegant Scrambled Eggs

Slightly adapted from The Big Book of Breakfast by Maryana Vollstedt

Ingredients

  • 4 tsp. butter, divided
  • 100-150g mushrooms, sliced
  • 1 shallot, chopped
  • 1 c. chopped cooked chicken breast
  • 1 avocado, diced
  • 1 tsp. lemon juice or red wine vinegar
  • 8 large eggs
  • 1/2 c. milk
  • 1 Tbsp. dry white wine
  • 1/4 tsp. coarse sea salt, ground
  • 1/8 tsp. black peppercorns, ground
  • chives and/or roasted red pepper, to serve
  • sour cream, to serve (optional)

Directions

  1. Melt 1 Tbsp. of butter over medium heat.
  2. Add the mushrooms and shallot and cook until softened (5-10 minutes).
  3. Add the chicken, avocado, and lemon juice/vinegar, remove from skillet, and set aside.
  4. Beat the eggs with the milk, wine, salt, and pepper.
  5. Melt the remaining 1 tsp. of butter over medium-low heat.
  6. Pour the eggs into the pan and cook for a couple of minutes.
  7. Add the chicken-mushroom mixture and continue to cook, stirring occasionally, until eggs reach desired doneness.
  8. Serve garnished with red pepper and/or chives and a dollop of sour cream.

Friday, 3 October 2025

Maple Pumpkin Soup

This soup is a bit different than my usual approach to pumpkin soup. Quite often my soups will involve generous quantities of curry powder and coconut milk and quite often a bit of tomato as well. This one leans into maple syrup with a little bit of cayenne as the main seasoning. (Although I used Kashmiri chilies in my rendition of it.) I think I still prefer my usual curried version overall, but this was an interesting twist on the pumpkin soup theme. Especially with the sour cream and seasoned pumpkin seeds.


Maple Pumpkin Soup

Slightly adapted from Vegetable of the Day by Kate McMillan

Ingredients

  • 1/2 tsp. sugar
  • 1/2 tsp. sweet paprika1
  • 1/2 tsp. ground cayenne (or Kashmiri chilies), divided
  • 1/4 tsp. coarse sea salt, ground
  • 2 1/2 Tbsp. butter, divided
  • 7 Tbsp. maple syrup, divided
  • 1 tsp. water
  • 1/2 c. pumpkin seeds, toasted
  • 1 onion, finely chopped
  • 2-3 ribs celery, finely chopped
  • 2-4 cloves garlic, minced
  • 1/2 c. white wine
  • 4-5 c. chicken or vegetable stock
  • 1250g pumpkin purée2
  • 1/2 tsp. coarse sea salt
  • 1/4 tsp. black peppercorns, ground
  • 1 c. sour cream

Directions

  1. Combine the sugar, paprika, 1/4 tsp. of the cayenne, and ground sea salt and set aside.
  2. Combine 1/2 Tbsp. of the butter, 1 Tbsp. of the maple syrup, and the water and bring to a boil over medium heat.
  3. Add the pumpkin seeds and cook until liquid has evaporated and seeds are well-coated.
  4. Transfer to bowl with the paprika mixture and toss to coat.
  5. Spread out on a sheet of parchment paper to cool.
  6. Melt the remaining 2 Tbsp. of butter over medium heat.
  7. Add the onion and celery and cook until softened (~10 minutes).
  8. Add the garlic and cook for another minute or so.
  9. Add the wine, increase heat to medium-high, and cook until reduced by half.
  10. Add the stock and the pumpkin, reduce heat to medium-low, and simmer for ~10 minutes.
  11. If soup is chunkier than you'd like, use an immersion blender to smooth it out.
  12. Stir in the remaining 6 Tbsp. of maple syrup, sea salt, remaining 1/4 tsp. of cayenne, and pepper and simmer for an additional 10 minutes.
  13. Taste and adjust seasonings as desired.
  14. Serve topped with a dollop of sour cream and a sprinkle of the seasoned pumpkin seeds.


1 I just used plain sweet paprika this time, but I think that smoked sweet paprika would actually be really nice in this. Back
2 I used a mix of fresh and canned pumpkin for this. One 796mL can + 1 pie pumpkin yieled about the right amount. I cut the pumpkin in half, scooped out the seeds, rubbed it with a little olive oil, and baked it at 180°C (350°F) for 50 minutes, then scooped the flesh out of the skin. Back

Monday, 8 September 2025

Clambake

Lobster tails went on sale last week. $5 each! So, of course, I picked up a few. Then it was just a matter of figuring out what to do with them. I was already leaning toward making this clambake. And then I ended up with an accidental surplus of potatoes and corn. And I already had some extra fennel left over that needed to be used up. So this recipe was pretty much perfect to use up those ingredients.

To do it properly, I really should've gotten live mussels and clams and some jumbo shrimp to throw in the pot. But I was trying to do this as a relatively affordable meal, so instead of getting live shellfish, I got some frozen, pre-cooked, in-shell clams, plus a bag of frozen mixed seafood that included squid, mussel meat, and a few teeny, tiny shrimp. Obviously, this wasn't as nice as doing it properly, but it was still very good. Especially the lobster!


Clambake

Slightly adapted from Dish of the Day by Kate McMillan

Ingredients

  • 2 Tbsp. butter
  • 1 onion, chopped
  • 1 small bulb fennel, chopped and fronds reserved
  • 3-4 cloves garlic, minced
  • 2-3 sprigs fresh thyme (or 1/2 tsp. dried thyme)
  • 1/2 tsp. Old Bay (optional)
  • 1/8 tsp. black peppercorns, ground
  • 1 1/2 c. white wine
  • 3 c. chicken stock
  • 450g small potatoes, quartered
  • 450g kielbasa, sliced
  • 1-2 lobsters (or 4 small lobster tails)
  • 2 ears of corn, husked and quartered
  • 24 mussels, scrubbed and de-bearded
  • 24 clams, scrubbed
  • 12 large shrimp (preferably in-shell)
  • lemon wedges (optional)

Directions

  1. Melt the butter over medium heat.
  2. Add the onion, fennel, and garlic and cook until softened (5-8 minutes).
  3. Add the thyme, Old Bay (if using), and pepper and cook for another minute or two.
  4. Add the wine and cook until reduced by half.
  5. Add the chicken stock.
  6. Add the potatoes, then layer the kielbasa on top.
  7. Place the lobsters/lobster tails on top of everything, cover, and cook for 10 minutes.
  8. Add the corn, mussels, clams, and shrimp.
  9. Cover and cook for another 10-15 minutes.
  10. Scoop out the solids and place in a serving dish.
  11. Taste the broth and adjust seasonings as desired.
  12. Pour broth into the serving dish with everything else.
  13. Garnish with fennel fronds and serve with lemon wedges.

Friday, 22 August 2025

Chocolate Soufflé

This can be made as either one large soufflé or several small ones. I opted for the small ones today. Mostly because they don't take nearly as long to bake.

I really liked this soufflés. They were deeply chocolate-y and very light (as you would expect). I will say that I found them ever so slightly on the sweet side. I think I'd be tempted to either reduce the sugar or use unsweetened chocolate next time. I've written them up to use a bit less sugar than originally called for, but feel free to use unsweetened chocolate either instead or as well.


Chocolate Soufflé(s)

Slightly adapted from Dessert of the Day by Kim Laidlaw

Ingredients

  • 6 large eggs, separated
  • 1/2 tsp. cream of tartar
  • 1/8 tsp. coarse sea salt, ground
  • 1/2 c. sugar, divided1
  • 1 tsp. vanilla extract or 1 Tbsp. Cointreau
  • 250g dark chocolate, melted
  • whipped cream, to serve

Directions

  1. Preheat oven to 200°C (400°F) for several small soufflés or 190°C (375°F) for one large one.
  2. Grease your soufflé dish or ramekins and dust with sugar.
  3. Combine the egg whites with the cream of tartar and salt and beat until soft peaks form.
  4. Gradually beat in 1/4 c. of the sugar. Set aside.
  5. Beat the egg yolks until pale.
  6. Add the remaining 1/4 c. of sugar and beat vigorously until very pale and thick and mixture makes "ribbons" when beater is lifted out.
  7. Beat in the vanilla or Cointreau.
  8. Fold in the melted chocolate.
  9. Add ~1/3 of the meringue and stir to combine and loosen the mixture.
  10. Add the remaining meringue and gently fold it into the mixture until no longer streaky.
  11. Spoon the mixture into the prepared baking dish(es).
  12. Run a finger around the top edge to make a small "moat".
  13. Bake at 200°C (400°F) for 10-12 minutes for small soufflés or 190°C (375°F) for ~30 minutes for a large soufflé. Soufflé should be well-risen and slightly crisp on the outside, but still very soft and slightly wobbly in the middle.
  14. Cut a circle of the "crust" off the top and spoon a generous portion of whipped cream over it.
  15. Serve immediately!


1 The original recipe called for 3/4 c. of sugar total: 1/4 c. in the meringue and 1/2 c. in the base. I found this a bit too sweet for my tastes, so I've scaled back the sugar somewhat here. You could also try swapping out the dark chocolate for unsweetened, either instead of or as well as reducing the sugar. Try it and see which you like better! Back

Thursday, 24 April 2025

Feijoamisu

NZ Woman's Weekly calls this a "boozy feijoa and gingernut pudding". But that's a terrible name for it. It's long, unweildy, and -- despite giving you half the ingreient list in the title -- tells you very little about what the dessert is actually like. But, having made it now, it's basically a tiramisu. But with feijoas instead of custard/saboyon, gingernuts instead of ladyfingers, and sherry or feijoa brandy instead of coffee.

Okay, yes, that is a lot of subsitutions and the final result doesn't taste anything like a traditional tiramisu. But the technique, form, and texture is very tiramisu like, even if the flavour profile is very different. So I stand by this being a "feijoamisu".

Photo goes here.

Feijoamisu

Slightly adapted from NZ Woman's Weekly

Ingredients

  • 250mL heavy (35%) cream
  • 1 Tbsp. brown sugar
  • 1 tsp. vanilla extract
  • 200g mascarpone cheese
  • 500g feijoa pulp, mashed
  • 1 packet Gingernuts
  • 1/4 c. sherry or feijoa brandy
  • 10-20g dark chocolate, grated

Directions

  1. Whip the cream with the sugar and the vanilla.
  2. Stir the mascarpone and feijoa pulp.
  3. One at a time, dip the Gingernuts in the sherry, spread each with a generous quantity of the cream mixture, and place it in a 23x13cm loaf tin to make two parallel rows of cookies and feijoa cream.
  4. Once all the Gingernuts have been used, scoop the rest of the cream mixture into the pan to cover up the biscuits.
  5. Cover and chill for at least an hour.
  6. Uncover, dust with grated chocolate, and serve.

Thursday, 10 April 2025

Smoked Trout Chowder

We had some lovely home-smoked trout left over from Reiver's birthday and he suggested that it might go well in a soup.

I've made fish chowder plenty of times before, but never with smoked fish. So I went looking for something that was tailored to smoked fish specifically. I found this one on the Food & Wine website. I will admit that I tweaked it slightly, but only slightly. I omitted the water called for. Used a regular commercial chicken broth (rather than low-sodium), but then omitted the salt. Halved the thyme. And, after tasting it at the end of cooking, decided to add in some corn and grated carrot as it seemed like it needed some more veg to balance it out and I usually put those in my chowders anyway.

Photo goes here.

Smoked Trout Chowder

Slightly adapted from Food & Wine

Ingredients

  • 1-2 Tbsp. butter
  • 2 ribs celery, chopped
  • 3-6 green onions, greens and whites kept separate and chopped
  • 2-3 cloves garlic, minced
  • 450g potatoes, cut into 1cm dice
  • 1/4 c. dry white wine
  • 4 c. chicken stock
  • 1/2 tsp. dried thyme
  • 1 bay leaf
  • 1/2 tsp. black peppercorns, ground
  • 1 c. frozen corn kernels
  • 1-2 carrots, peeled and grated
  • 1 c. half-and-half (10% MF)
  • 2 fillets smoked trout, skin removed and flesh flaked

Directions

  1. Melt the butter over medium-low heat.
  2. Add the celery, white parts of the green onions, and garlic and cook until softened (5-10 minutes).
  3. Add the potatoes, wine, chicken stock, thyme, bay leaf, and pepper.
  4. Increase heat to medium-high, bring to a boil, then reduce to medium and cook until potatoes are just tender (~15 minutes).
  5. Stir in the corn and carrots.
  6. Reduce heat to medium-low and stir in the cream.
  7. Cook for a few minutes, then stir in the trout.
  8. Serve with crusty bread.

Friday, 4 April 2025

Pullum Parthicum (Parthian Chicken)

I quite enjoy a bit of historical cooking. Cooking in the Archives has been a lot of fun (even if I don't always agree with their interpretations). And I've quite liked some of the recipes from Shakespeare's Kitchen and Townsends as well.

Reiver was actually the one who originally put me onto Townsends. And now he's shared a few more of his favourite cooking channels. One of which is Max Miller's Tasting History. I'm not necessarily a huge fan of the videos I've watched on his channel, but Reiver has his cookbook and had pointed out that we had all the bits for this chicken recipe. And, unlike some of his other recipes, he actually seems to have a reasonable source for this one and hasn't been overly... "creative" in his interpretation of it.

This was quite a surprising recipe. It honestly didn't really grab me at first. It looked unusual, but not that exciting. But, I have to say, this turned out very nice in the end! I don't think it was quite a favourite for me, but it was nice.

I never would have thought of combining red wine and fish sauce, but the combination works surprisingly well! And the caraway, black pepper, celery, and asafetida is a somewhat bewildering -- but not unpleasant -- way to complete the flavours.

I think I might put somewhat less wine next time. I do feel like using a full cup was a bit heavy-handed and possibly excessive for a recipe that calls for "seasoning" with wine. But otherwise, I really can't complain or suggest any changes or alterations. This was actually quite lovely!

We served our Parthian chicken over a bit of saffron rice with a slice of buttered rye bread and some silverbeet gratin on the side. This turns out to have been an excellent (and fairly thematically appropriate) combination. Would definitely recommend!

Parthian Chicken: Open the chicken and quarter. Pound pepper, lovage, a little caraway, moisten with garum, season with wine. Arrange the chicken in an earthen dish and put the seasoning on top. Dissolve silpuium in warm water, and put it with the chicken and cook. Sprinkle with pepper and serve.
-- Apicus, De re coquinaria


Pullum Parthicum

Slightly adapted from Tasting History by Max Miller

Ingredients

  • 1 whole chicken (~1.5kg)1
  • 3 Tbsp. fish sauce
  • 2 Tbsp. fresh lovage or 1/4 c. celery leaves2
  • 1/2 Tbsp. black peppercorns, ground
  • 1/2 Tbsp. caraway seeds, ground
  • 1/2-3/4 c. dry red wine
  • 3/4 tsp. ground asafetida
  • 1/4 c. warm water

Directions

  1. Preheat oven to 230°C (450°F).
  2. Quarter the chicken and place the pieces, skin-side-up, in a baking dish.
  3. Combine the fish sauce, lovage (or celery), pepper, and caraway and mix well.
  4. Stir in the wine.
  5. Pour this mixture over the chicken. Try to distribute the spices as evenly as possible and press them into the chicken skin a little.
  6. Stir the asafetia into the water and pour it over the chicken as well.
  7. Roast at 230°C (450°F) until chicken is cooked through and meat registers ~74°C/165°F (~45 minutes).
  8. Remove from oven and allow to rest for 10-15 minutes.
  9. Serve drizzled with the sauce and extra black pepper.


1 Honestly, any skin-on, bone-in chicken pieces should work reasonably well for this. I actually ended up using a bunch of thighs for my rendition. Back
2 I used both the leaves and the ribs of the celery for my rendition and liked that quite a lot. I only used one rib this time around, but Reiver and I agreed that a bit more would have been even better. Personally, I would recommend 1/4 c. of leaves + 2 ribs of celery if going that route. Back

Saturday, 22 February 2025

Citrus-Braised Lamb Shanks

This was meant to be done with lamb shanks, but I found some bone-in "lamb pieces" and shoulder chops on sale, so I opted to use those instead. The shanks would have been lovely (and probably resulted in everyone getting a bit more meat), but these were tasty too. And a lot cheaper!


Citrus-Braised Lamb Shanks

From Dish of the Day by Kate McMillan (p. 123)

Ingredients

  • 2 Tbsp olive oil
  • 4 lamb shanks, about 1 lb (450 g) each
  • 2 tsp. coarse sea salt
  • 1 tsp. black peppercorns, ground
  • 1 carrot, finely chopped
  • 1 yellow onion, finely chopped
  • 2 celery ribs, finely chopped
  • 3 small sprigs fresh thyme
  • 1 bay leaf
  • 3-4 cloves garlic, minced
  • 2 Tbsp tomato paste
  • 2 c. dry white wine
  • 1 c. chicken broth
  • Grated zest and juice of 1 lemon
  • Grated zest and juice of 1 lime
  • Grated zest and juice of 1 orange

Directions

  1. Heat 1 Tbsp of the oil over medium-high heat (preferably in a Dutch oven).
  2. Season the shanks with salt and pepper.
  3. Working in batches, sear the shanks, turning as needed, until browned on all sides, 6–8 minutes. Set aside.
  4. Preheat the oven to 120°C (250°F).
  5. Add the remaining 1 Tbsp oil to the pot and place over medium-low heat.
  6. Add the carrot, onion, and celery and sauté until softened (~5 minutes).
  7. Add the thyme, bay leaf, garlic, and tomato paste and cook for 1 minute.
  8. Add the wine, broth, and lemon and lime zests and juices.
  9. Return the shanks to the pot and bring the liquid to a gentle simmer.
  10. Cover and cook in the oven, turning the shanks every hour, until the meat is completely tender (2-3 hours).
  11. Transfer the shanks to a platter and keep warm in the oven.
  12. Pour the juices from the pot into a large, heatproof measuring pitcher and let stand for 1 minute. The fat will rise to the top. Use a bulb baster to transfer the juices underneath the fat to a small saucepan.
  13. Simmer to reduce slightly. Stir in the orange zest and juice.
  14. Drizzle the reduced juices over the lamb shanks and serve.

Monday, 10 February 2025

Barley Risotto with Chicken and Mushrooms

Mushrooms are on sale again, we had half a rotisserie chicken in the fridge, and there was silverbeet (Swiss chard) ready to harvest in the garden, so this recipe was a natural choice for dinner. Sadly, it didn't work out quite right. For whatever reason, the barley refused to cook. I gave it an extra half an hour of simmering and it was still somewhat al dente and more soupy than creamy. It was delicious anyway, but I was somewhat disappointed with the delays and final appearance, even if the flavour was still excellent.


Barley Risotto with Chicken and Mushrooms

Slightly adapted from Dish of the Day by Kate McMillan

Ingredients

  • 6 c. chicken stock
  • 1 Tbsp. olive oil
  • 1 onion, chopped
  • 2 cloves garlic, minced
  • 200g mushrooms, sliced
  • freshly ground pepper, to taste
  • 1/2 c. dry white wine
  • 1 c. pearl barley
  • 150g Swiss chard (silverbeet), chopped
  • 350g cooked chicken, shredded
  • 1/2 c. grated Parmesan

Directions

  1. Bring the stock to a boil, cover, and set aside.
  2. Heat oil over medium heat.
  3. Add onion and garlic and cook until softened (~5 minutes).
  4. Add mushrooms, cover, and cook until they have released their liquid.
  5. Season to taste with pepper, add the wine, and cook for another minute or two.
  6. Add the barley and 5 c. of the stock and bring to a boil.
  7. Reduce heat to medium-low and simmer, stirring occasionally, until most of the liquid has been absorbed.
  8. Add 1/4 c. of the remaining stock and cook, stirring often, until it has been absorbed.
  9. Repeat process with remaining stock.
  10. Add the chard along with the last portion of stock.
  11. Stir in the chicken and Parmesan and cook until heated through (3-5 minutes).
  12. Serve topped with additional Parmesan.

Friday, 22 November 2024

Pears Poached in Red Wine

We had pears poached in white wine last week. And from there I moved onto poached plums, which were meant to get a red wine bath. (Although my poaching liquid was a bit of a franken-mix of red and white, but... close enough!) Well, after that, I still had a bunch of poaching liquid left over. And I hated to throw it out. So I picked out another wine-poached fruit recipe.

Honestly, I'd been hoping to do poached apricots next. They required a very similar poaching liquid, but with the addition of a small amount of rosewater. My intent had been to do the apricots and then, with the leftover liquid from that make these poached pears. But I couldn't find any fresh apricots (or nectarines) at the grocery store. So I skipped over that recipe for now and moved straight to the red wine pears.

As written, the recipe called for four Bosc pears poached in sweetened, spiced red wine. It used 3/4 c. of sugar to 750mL of wine + some cloves, cinnamon, and lemon zest. Since I already had a light syrup of a mix of red and white wine, cloves, cinnamon, lemon zest, star anise, peppercorns, vanilla, and ginger; I just reused it completely unaltered. And, since my pears were quite small, I tossed a few extras in. I managed to fit seven small pears into the pot with the poaching liquid.

Once I started boiling the syrup down, I gave it a taste and decided that it was slightly undersweetened for my liking. (I'm really not sure what the overall sugar-to-wine ratio was at this point. Since I'd already amended and reused it so many times.) So I stirred in 1 Tbsp. of extra sugar and let it continue cooking down. I feel like this produced a nice final result as a sauce to drizzle over the pears. That said, this is something that will be largely down to your personal taste (and the wine you use1).


Pears Poached in Red Wine

Slightly adapted from Dessert of the Day by Kim Laidlaw

Ingredients

  • 4-8 Bosc2 pears
  • 750mL fruity red wine
  • 3/4 c. sugar
  • 1 strip of lemon zest (~5cm long and 2.5cm wide)
  • 1 cinnamon stick (~7cm long)
  • 2 whole cloves
  • 2 Tbsp. unsalted butter

Directions

  1. Peel the pears, leaving the stem on.
  2. Using a small spoon or melon baller and starting from the blossom end, remove the cores. (Leaving the stem end in tact.)
  3. Trim a thin slice off the bottom of each pear so it will stand upright.
  4. Combine the wine, sugar, lemon zest, cinnamon stick, and cloves in a small pot and bring to a boil.
  5. Add the pears. If there is not enough liquid to cover them, add water until it does.
  6. Reduce heat to medium-low and simmer until pears are tender (20-30 minutes).
  7. Transfer pears to dish.
  8. Increase heat to medium and boil syrup down until it is somewhat thick and volume is reduced to ~3/4 c.
  9. Remove from heat and stir in butter.
  10. Drizzle sauce over pears and serve.


1 This recipe (and the one for the poached plums that I did before this) calls for a "fruity red wine" and suggests a Merlot or a Zinfandel as good options. I wasn't about to go out and get a whole new bottle of wine just for this, so I used whatever I had on hand already. And I have no idea whether it was a "fruity" wine or not. (Although hopefully all the rounds of fruit poaching in it did serve to lend it some fruitiness.) I think it was relatively dry, but I have no idea whether that has any bearing on its fruitiness or not. I am not a wine person. Back
2 The recipe specifically calls for Bosc pears, so that's what I used. That said, I do think it would be interesting to try it with other varieties. I ended up using Bartlett pears for the white wine version and I quite liked those. Don't get me wrong, the Bosc were nice. I'd just be interested to see how Bartlett or Anjou pears turned out when given this treatment. Back

Saturday, 16 November 2024

Poached Plums with Vanilla Mascarpone

Keeping the poached fruit train rolling! And this plum recipe was next up. TF and I didn't enjoy this one quite as much as the pears or the quince, but it was still good. And I'm enjoying getting to try all of these different poached fruit desserts.

This one calls for one bottle (750mL) of red wine that has been seasoned with cloves, star anise, and ginger and sweetened with 1 c. of sugar. But, since I was still using leftover syrup from the previous poached fruit recipes, I just chose to add the relevant spices and 1 c. of red wine to the syrup I already had.

For the actual recipe below, I've written it up as given in the book. But I'll try to briefly run through what I actually did here. Just so that I have a record of it.
  • Made a syrup of 2 c. water, 2 1/2 c. sugar, vanilla, and lemon zest; poached qince in it
  • To the residual syrup, added 1 1/2 c. white wine, peppercorns, cinnamon, star anise; poached more quince in it
  • To that residual syrup, added 1/2 c. white wine and fresh ginger; poached pears in it
  • Finally, to the resulting syrup, added 1 c. red wine, cloves, and additional star anise; poached plums in it


Poached Plums with Vanilla Mascarpone

Slightly adapted from Dessert of the Day by Kim Laidlaw

Ingredients

  • 750mL fruity red wine
  • 17 Tbsp. sugar, divided
  • 2-3 slices fresh ginger
  • 3 whole cloves
  • 3 whole star anise
  • 2 (7cm long) cinnamon sticks
  • 900g red or black plums, peeled and quartered
  • 1 c. mascarpone
  • 1 tsp. vanilla extract

Directions

  1. Combine the wine, 1 c. of the sugar, ginger, cloves, star anise, and cinnamon sticks and bring to a boil.
  2. Add plums, reduce heat slightly, and simmer until softened (8-10 minutes).
  3. Meanwhile, combine the mascarpone, vanilla, and remaining 1 Tbsp. sugar.
  4. Use a slotted spoon to transfer plums to bowls.
  5. Serve topped with mascarpone.

Friday, 8 November 2024

Poached Quince with Mascarpone, Caramel, and Gingersnaps

These were absolutely delicious! TF and I both had seconds. I really loved the combination of flavours and textures. (Even if I did undercook my caramel slightly.) This is definitely my new favourite thing to do with quince!

I did cheat slightly on the syrup for these quince. Recipe as written, it's meant to be made with an entire (750mL) bottle of Riesling, 1 c. of sugar, and a few spices. But I still had a bunch of syrup left over from making the quince poached in vanilla syrup the day before, so I just added the spices and a bit of white wine to that and called it a day. This does mean that my final syrup was a bit different than the recipe called for though:
  • The original recipe called for a 1:3 ratio of sugar to liquid (by volume); my starting syrup was 1.25:1 sugar to water (which I then diluted with wine to bring it closer to 1:1.5)
  • The original recipe used Riesling as the liquid; mine had a mix of water and white wine
  • The original contained star anise, cinnamon, and black peppercorns; mine had those, but also the residual vanilla and lemon zest from the previous recipe

I was quite happy with the overall result. And I was pleased that I was able to reuse the vanilla syrup from the first recipe. The catch is that this does make it somewhat difficult to write up accurately.

I've written up the recipe below based on how I'd do this next time if I didn't have the pre-existing vanilla syrup to build on. I haven't had a chance to test it yet, but I think it would give good results.


Poached Quince with Mascarpone, Caramel, and Gingersnaps

Slightly adapted from Dessert of the Day by Kate McMillan

Ingredients

Quince

  • 750mL Riesling
  • 1 c. sugar
  • 2 (7cm) cinnamon sticks
  • 1 star anise
  • 1/2 tsp. black peppercorns
  • 1 vanilla bean, split lengthwise
  • 1/2 Tbsp. grated lemon zest
  • 3-4 quince, peeled and halved1

Caramel

  • 1 c. sugar
  • 1/4 c. water
  • 2/3 c. heavy (35%) cream
  • 3 Tbsp. unsalted butter
  • 1/2 tsp. vanilla extract
  • 1/4 tsp. coarse sea salt

Assembly

  • 225g mascarpone
  • 6-8 Tbsp. crushed gingersnaps

Directions

  1. Combine the Riesling, sugar, cinnamon sticks, star anise, black peppercorns, and vanilla bean and bring to a boil over medium heat.
  2. Add the lemon zest and quince and reduce heat to medium-low.
  3. Simmer until quince are tender (~1 hour).
  4. Meanwhile, combine sugar and water for caramel, cover, and bring to a boil over medium-high heat.
  5. Uncover and continue cooking, swirling (but not stirring) often until sugar turns a rich caramel colour2.
  6. Remove from heat and carefully whisk in the cream. Stir until smooth.
  7. Stir in the butter, vanilla, and salt. Set aside.
  8. Once quince are tender, remove from heat and allow to cool in poaching liquid.
  9. Use a spoon or melon baller to scoop out the cores.
  10. Mix 3 Tbsp. of the poaching liquid into the mascarpone.
  11. Place a quince half in each bowl and top with a generous spoonful of mascarpone.
  12. Drizzle with caramel, sprinkle with crushed gingersnaps, and serve.


1 The original recipe calls for poaching the quince first and then coring them. I found this quite tricky to do. Next time I'd be tempted to try coring them before poaching. (With the obvious caveat that I have not had a chance to test this approach yet.) Back
2 I ended up burning the last batch of caramel I made, so I was a little paranoid this time and took mine off the heat a bit too soon. The flavour was fine, but the colour was very pale and unappealing. I think it needed another 30 seconds or so to properly darken. Back

Sunday, 3 November 2024

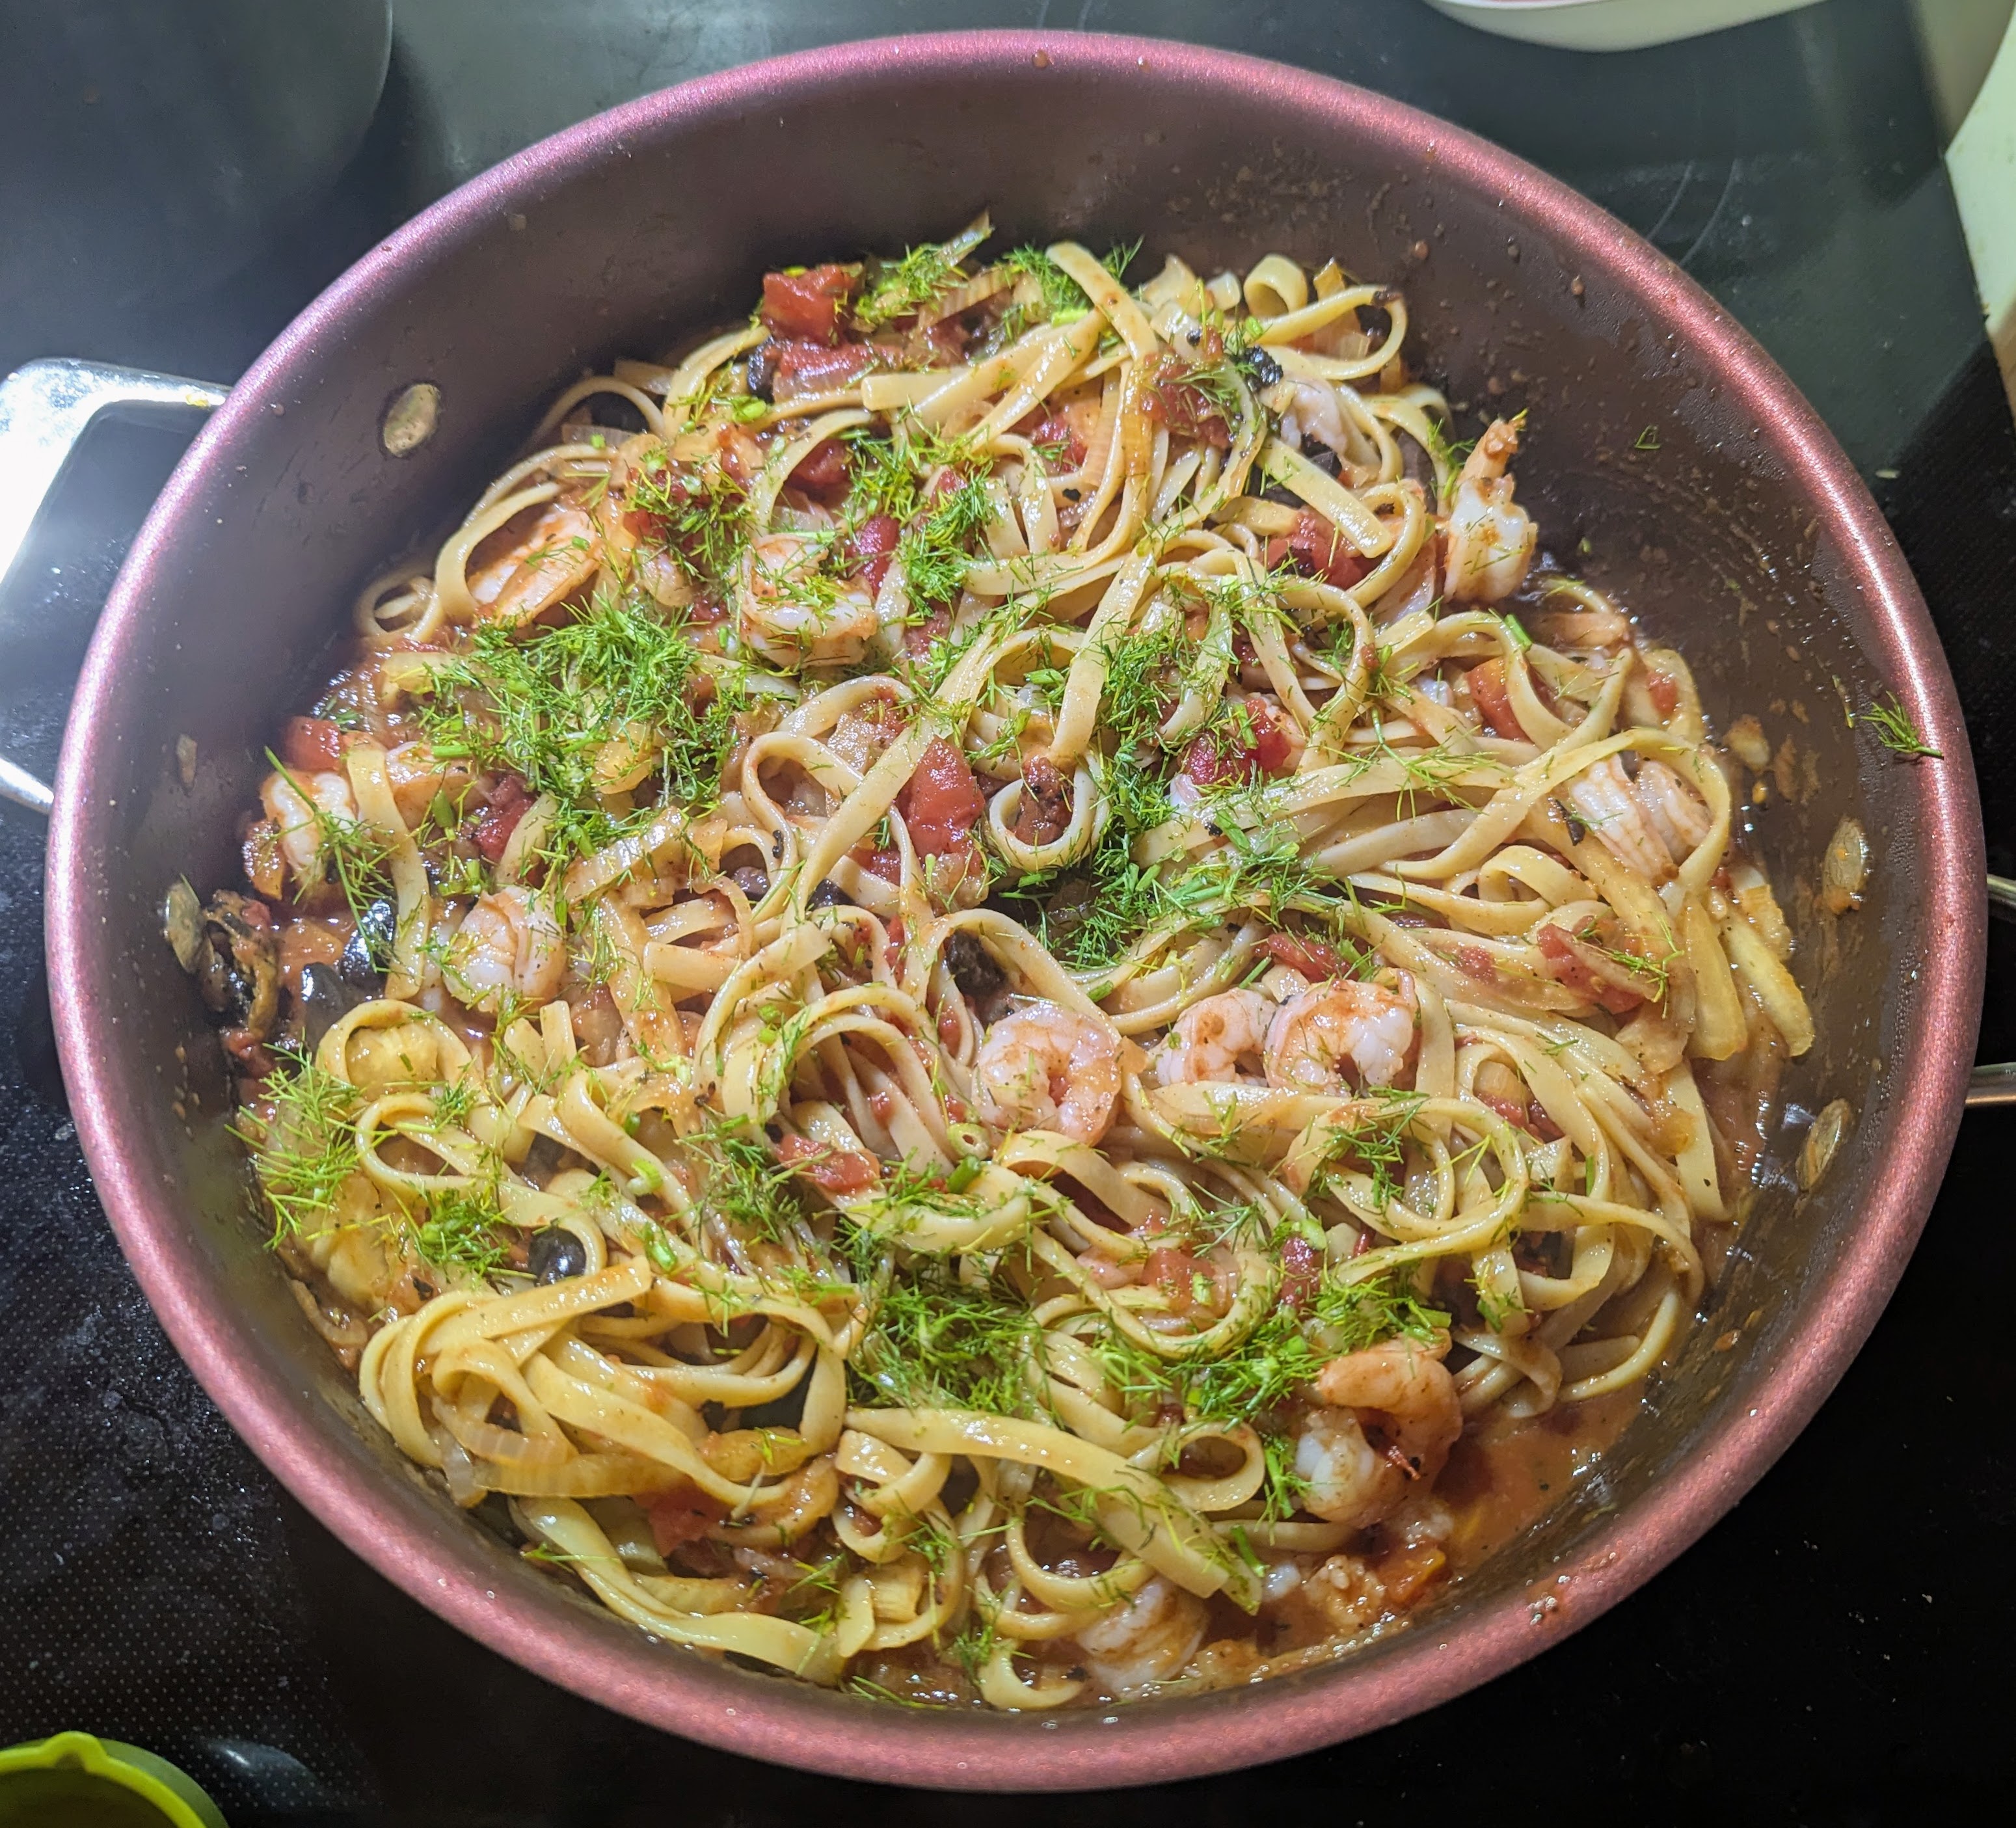
Spaghetti with Shrimp and Fennel

We've been on a bit of a shrimp and pasta kick lately. After six years of avoiding it due to suspected allergies, it's nice to finally be able to enjoy a bit of seafood again. And TF is a big fan of shrimp with pasta, so we've been leaning into that now that the shellfish ban has been lifted.


Spaghetti with Shrimp and Fennel

Slightly adapted from Dish of the Day by Kate McMillan

Ingredients

  • 1 Tbsp. olive oil
  • 1/2 tsp. fennel seeds
  • 1 fennel bulb, cored and thinly sliced, fronds chopped and reserved separately
  • 1 onion, halved and sliced
  • 1/4 tsp. red chile flakes
  • 1/4 tsp. coarse sea salt
  • 1/8 tsp. black peppercorns, ground
  • 1 large (~800mL) can whole or diced tomatoes (preferably San Marzano)
  • 1/4 c. kalamata olives (~15), pitted and quartered
  • 3 Tbsp. dry white wine
  • ~350g spaghetti (or other long pasta, preferably multi-grain or whole wheat)
  • 350g raw shrimp, peeled and deveined
  • Parmesan or pecorino Romano, to serve

Directions

  1. Heat olive oil over medium heat.
  2. Add fennel seeds and sizzle for 10-20 seconds.
  3. Add fennel bulb, onion, chile flakes, salt, and pepper and cook, stirring occasionally, for ~10 minutes.
  4. Add tomatoes, olives, and wine and cook until thickened slightly (5-8 minutes).
  5. Meanwhile, cook spaghetti according to package directions, reserving ~1 c. of the pasta cooking water before draining.
  6. Add shrimp to sauce and cook until shrimp are just done (~3 minutes).
  7. Add reserved pasta water to sauce and stir vigorously.
  8. Add drained spaghetti and toss to combine.
  9. Adjust seasoning to taste, top with reserved fennel fronds and Parmesan, and serve.

Saturday, 2 November 2024

Roasted Pears with Honey, Hazelnuts, and Greek Yogurt

One of TM's friends ended up with a bumper crop of quince this year, so they've been sharing the bounty. And we got extra bonus pears along with our quince!
I have plans for the quince that should hopefully appear on the blog shortly. I actually debated doing up a simple poached quince dessert after dinner tonight. But the pears needed to be used more urgently, so I decided to start there.

I have a lot of pear recipes awaiting testing. But this one had the virtue of being very quick and easy to put together and only needing three pears, which, conveniently, was the exact number we were given. It is also delicious!

The original recipe acutally went for an almond theme. The pears were drizzled with amaretto and topped with toasted sliced almonds after roasting. I didn't have any amaretto, but I did have a bottle of Frangelico in the pantry. And I figured that pear and hazelnut is also a good combo. So I just swapped out the liqueur and replaced the almonds with chopped toasted hazelnuts. It worked very well, if I do say so myself!


Roasted Pears with Honey, Hazelnuts, and Greek Yogurt

Slightly adapted from Dessert of the Day by Kim Laidlaw

Ingredients

  • 3 pears1
  • 1/3 c. honey
  • 4 bay leaves
  • 3 Tbsp. unsalted butter, cut into 6 pieces
  • 2 Tbsp. Frangelico (hazelnut liqueur)
  • 1 1/2 c. plain Greek yogurt
  • 1/4 c. hazelnuts, toasted and chopped

Directions

  1. Preheat oven to 190°C (375°F).
  2. Peel, halve, and core the pears.
  3. Bring the honey and bay leaves to a boil over medium heat.
  4. Reduce heat slightly and simmer for 3-4 minutes.
  5. Place the butter pieces evenly spaced in the pan and place a pear half, cut-side-down, on top of each one.
  6. Cover and bake at 190°C (375°F) for 12 minutes.
  7. Carefully flip pears over and baste with sauce.
  8. Drizzle with Frangelico and return to oven.
  9. Roast, uncovered, at 190°C (375°F) until pears are tender (~10 minutes).
  10. Remove from oven and allow to cool slightly (10-15 minutes).
  11. Place two pear halves in a bowl and drizzle with a little sauce.
  12. Top with ~1/2 c. of yogurt, ~1 Tbsp. of hazelnuts, and a bit more sauce and serve.


1 The original recipe called for 3 "ripe but firm" bosc pears. I'm not sure what variety we were given, but they definitely weren't bosc. They looked a bit like anjou, but I don't know my pears well enough to say for sure. Specifics aside, they were excellent in this application! So, personally, I wouldn't worry too much about what specific type of pears you have as long as they're good ones. Back

Sunday, 27 October 2024

Chocolate Beer Bread

I know I just made a chocolate sourdough, but this is a different chocolate sourdough. This one contains no sugar and no chocolate, but more than twice the amount of cocoa (proportionally). And the liquid is beer, rather than water. (I used a dark ale for mine.)

While the previous chocolate sourdough claimed to be a savoury bread, I actually found it relatively sweet. This one, however, is nothing like that. It is exceptionally dark and somewhat bitter. The recipe recommends pairing it with salty offerings like pickles, cheeses, and/or cured meats. And TF found it to be an excellent substrate for Vegemite. Meanwhile, the Kidlet thinks it will make an ideal bread for grilled cheese and has requested one tomorrow.

This bread also has some of the most impressively crisp, delightful crust that I've ever achieved. And it got great oven spring. (Despite me forgetting about it for an entire afternoon and generally being pretty lax with my care and timings when making it.) Very nice overall!


Chocolate Beer Bread

Slightly adapted from King Arthur Flour

Ingredients

  • 350g hard (strong/high grade/bread) flour
  • 40g Dutched (alkalized) cocoa
  • 300g beer
  • 80g ripe (fed) sourdough starter @ 100% hydration
  • 1/2 Tbsp. coarse sea salt

Directions

  1. Refresh your starter and make sure it's nice and active.
  2. Combine the flour, cocoa, beer, starter, and salt and mix very well.
  3. Let dough rest, covered, for 3-8 hours, stretching and folding every hour or so.
  4. Once dough feels light and well-risen, shape it into a loaf and place it (seam-side-up) in a floured banneton.
  5. Cover and let rest for 2-3 hours at room temperature (or 6-24 hours in the fridge).
  6. When ready to bake: preheat oven to 250°C (475°F) and boil some water.
  7. Grease a baking sheet and dust it with cornmeal.
  8. Turn the loaf out onto the preapred baking sheet.
  9. Gently rub or brush a little water onto the crust and then slash as desired.
  10. Pour some boiling water into a roasting pan and place it on the bottom rack of the oven.
  11. Place the bread on the rack above the water pan and bake at 250°C (475°F) for 15 minutes.
  12. Reduce heat to 200°C (400°F), remove water pan, and bake for another 15-20 minutes.
  13. Turn off oven and allow bread to rest in hot oven for 10 minutes.
  14. Transfer to a wire rack to cool.

Saturday, 26 October 2024

Pasta with Rosemary Lamb Sugo

This is a very simple tomato sauce with lamb and zucchini. It incorporates no herbs or seasonings other than the rosemary and a bit of salt and pepper. (I did add a single clove of garlic as well, but that wasn't in the original recipe.) I also added a bit of tomato paste and some pasta water to give the sauce a little more body.

I think it probably could have done with a little more simmering, just to deepen the flavours a bit more, but it was still quite nice as it was. And doing it with the short simmer recommended by the recipe does, at least, make it a quick meal to prepare.


Pasta with Rosemary Lamb Sugo

Slightly adapted from Dish of the Day by Kate McMillan

Ingredients

  • 2 Tbsp. olive oil
  • 1 large onion, chopped
  • 1 clove garlic, minced
  • 2 Tbsp. fresh rosemary, minced
  • 450g ground lamb
  • 1/2 Tbsp. salt, divided
  • 1/2 tsp. black peppercorns, ground
  • 2 Tbsp. tomato paste
  • 1/4 c. dry white wine
  • 1 (~800mL) can diced tomatoes
  • 2-3 small zucchini, diced
  • 375g rotini (or other short) pasta, cooked
  • 1/4 c. grated pecorino Romano

Directions

  1. Heat oil over medium heat.
  2. Add onion, garlic, and rosemary, and cook until softened and beginning to brown (~10 minutes).
  3. Add lamb, 1 tsp. of the salt, and the pepper and cook until lamb is no longer pink (~5 minutes).
  4. Add tomato paste and cook until darkened (~3 minutes).
  5. Add wine and cook until almost completely evaporated (3-5 minutes).
  6. Add tomatoes, bring to a boil, reduce heat to medium-low, and simmer for 10-20 minutes, stir only very occasionally.
  7. Add the zucchini and cook for another 10-15 minutes.
  8. Meanwhile, cook pasta according to package directions.
  9. Once pasta is al dente, add ~1/4 c. of the pasta water to the sauce and stir it in vigorously.
  10. Drain the pasta (discarding the rest of the pasta water) and add the pasta to the sauce, mixing well.
  11. Stir in the cheese.
  12. Serve topped with additional Romano or Parmesan.

Thursday, 24 October 2024

Bananas Foster

The plan had been to make some rum-glazed pineapple for dessert tonight. But the pineapple had gone off, so I found myself casting about for some other last-minute dessert. There were a few different options, but the bananas foster caught my eye and something tasty, that we had all the ingredients for, and would take very little time to prepare. (And is also delicious!)


Bananas Foster

Slightly adapte from Dessert of the Day by Kate McMillan

Ingredients

  • 3 bananas
  • 3-4 Tbsp. unsalted butter
  • 1/4 c. brown sugar
  • 3 Tbsp. dark rum
  • ~1 c. vanilla ice cream

Directions

  1. Peel the bananas and halve them lengthwise and crosswise.
  2. Melt the butter over medium-high heat.
  3. When the butter foams, place the bananas in the pan, cut-side-down.
  4. Cook for ~5 minutes, then flip and add sugar and rum.
  5. Cook for another 5 minutes.
  6. To serve, place three banana segments in each bowl, spoon a little sauce over them, and top with 3-4 Tbsp. of ice cream.

Thursday, 15 August 2024

Sautéed Apples in Hard Cider

I made up a batch of waffles a few months ago and used half of them in a savoury application. For the remainder, I decided to go for something sweeter and serve them with this apple topping. It was quite good!

Sautéed Apples in Hard Cider

Slightly adapted from Waffles: Sweet, Savory, Simple by Dawn Yanagihara

Ingredients

  • 2-3 Tbsp. unsalted butter
  • 4 apples, peeled and sliced
  • 1/8 tsp. ground nutmeg
  • coarse sea salt, ground
  • 360mL hard apple or pear cider
  • 1/3 c. brown sugar
  • 1/2 tsp. cornstarch (cornflour)
  • 1 tsp. water
  • 1 Tbsp. lemon juice

Directions

  1. Melt butter over medium-high heat and cook until foamy.
  2. Add apples, nutmeg, and a tiny pinch of salt and cook until apples are tender and golden (~7 minutes).
  3. Transfer apples to a bowl.
  4. Return pan to heat and add the cider, brown sugar, and another small pinch of salt.
  5. Bring to a boil and then simmer vigorously until liquid is reduced to ~180mL (~5 minutes).
  6. Meanwhile, combine cornstarch and water in a small bowl.
  7. Stir in the cornstarch slurry and cook for another minute or so.
  8. Stir in lemon juice.
  9. Return the apples to the pan and cook until heated through (2-3 minutes).
  10. Serve over waffles, pancakes, or French toast.