Saturday, 31 August 2024

Aamras (Sweetened Mango Purée)

I was still a bit peckish after dinner and felt like I could go for a sweet treat. But I didn't really want to get back in the kitchen and bake anything and, even if I did, I knew that I probably shouldn't due to the effect it would have on my waistline. Luckily I had a can of mango purée in the pantry, so this was an easy two-minute dessert that was relatively healthy and low-guilt.


Aamras

From 660 Curries by Raghavan Iyer

Ingredients

  • 3 c. canned mango purée or 3-4 ripe mangoes, peeled and diced
  • 1 c. half-and-half (10%) cream
  • 1/4 c. sugar

Directions

  1. Combine all ingredients in blender and purée until smooth.
  2. Serve chilled or room temperature either as-is or with pooris.

Friday, 30 August 2024

Nadru Haak (Lotus Root Curry)

I was a bit dubious of this curry. I find lotus root can be a bit hit-or-miss for me. And I have to admit, curry does not seem like a natural place for it. I mostly associate it with Chinese cooking. This actually came out quite nicely though. I picked up a bag of frozen sliced lotus root from the Indian grocery and, not only did it make this recipe an cinch to prepare, but the roots were much smaller than what I'm used to seeing for sale fresh. I quite liked the dainty, bite-sized pieces!


Nadru Haak

Slightly adapted from 660 Curries by Raghavan Iyer

Ingredients

  • 1-2 Tbsp. canola (or other neutral) oil
  • 2 dried red Thai, cayenne, or arbol chilies
  • 2 black cardamom pods
  • 6 c. shredded fresh kohlrabi leaves
  • 225g frozen sliced lotus root (or fresh lotus root, peeled and sliced)
  • 1 tsp. fennel seeds, ground
  • 1 tsp. ground ginger
  • 1 tsp. coarse sea salt
  • 1 c. water
  • 1/4 c. whipping (35%) cream

Directions

  1. Heat the oil over medium-high heat.
  2. Add the chilies and cardamom pods and sizzle for 15-30 seconds.
  3. Add the kohlrabi leaves a bit at a time, cooking until wilted.
  4. Add the lotus root, ground fennel, ginger, and salt and stir-fry for a minute or two.
  5. Add the water and bring to a boil.
  6. Reduce heat to medium-low, cover, and simmer, stirring occasionally, until lotus root is fork tender (15-20 minutes).
  7. Add the cream and simmer, uncovered, stirring occasionally, until sauce thickens slightly (~5 minutes).

Thursday, 29 August 2024

Sally Lunn Bread

This is an unusual bread. It is a sweet, enriched, white bread made from a thick batter rather than a dough. It is light and delicate and very rich as it includes a generous amount of butter in addition to the eggs, milk, and sugar. Also, it is typically baked in a tube pan rather than a loaf pan or some other more "standard" bread shape. All of this does make for a interesting and very enjoyable bread though! And, if you have a good stand mixer, then it is very quick to mix up and takes very little attention or active time.


Sally Lunn Bread

Slightly adapted from Bernard Clayton's New Complete Book of Breads

Ingredients

  • 490-560g all-purpose flour, divided
  • 60g sugar
  • 1 tsp. coarse sea salt
  • 2 1/4 tsp. active dry yeast (or 1/2 Tbsp. instant yeast)
  • 1/2 c. milk
  • 1/2 c. water
  • 1/2 c. unsalted butter
  • 3 large eggs

Directions

  1. Combine ~200g of the flour with the sugar, salt, and yeast.
  2. Gently warm the milk, water, and until heated through and butter is soft. (Aim for 40-45°C.)
  3. Pour the wet ingredients into the dry and beat on medium speed for 2 minutes. (Or 3-4 minutes by hand.)
  4. Mix in the eggs and an additional 140g of flour.
  5. Beat on high for another 2 minutes. (Give it somewhat longer if mixing by hand.)
  6. Stir in enough of the remaining flour to make a very thick batter.
  7. Cover and let rise at room temperature for ~1 hour.
  8. Stir the batter down and beat for 30-60 seconds.
  9. Spoon the batter into a well-greased tube pan1.
  10. Cover and set aside to rise at room temperature for ~45 minutes.
  11. Preheat oven to 160°C (325°F).
  12. Bake at 160°C (325°F) for 40-50 minutes.
  13. Transfer to wire rack to cool for 5-10 minutes.
  14. Turn loaf out of pan and allow to finish cooling on wire rack.


1 I don't have a tube pan, so I used a Bundt pan for my Sally Lunn loaf. I also decided to flour the pan after greasing it. I usually just grease bread pans, but a) I'm not usually baking my bread in a Bundt pan and b) my bread normally involves doughs, not batters. Given that (and the fact that Clayton specifically warns about how fragile this loaf is when warm), I opted for flouring in the hopes that this would help the finished loaf release from the pan more easily. And it did, in fact, unmold beautifully! Back

Wednesday, 28 August 2024

Pork Batata Curry (Pork and Potato Curry)

The last pork curry that I made only used up half of the package of pork tenderloin that I'd thawed out, which seemed like a good excuse to go hunting through the book for another pork curry to try later in the week. I ended up settling on this one because it looked pleasingly easy and included at least a few veggies. It's still not a balanced meal on its own, but it at least contains a little more than just a big pile of spiced meat. (Not that those sorts of curries aren't delicious, I just like trying to work as many veggies into the meal as possible.)


Pork Batata Curry

Slightly adapted from 660 Curries by Raghavan Iyer

Ingredients

  • 1-2 Tbsp. canola (or other neutral) oil
  • 500g pork tenderloin, cubed
  • 2 Tbsp. ginger paste
  • 1 Tbsp. garlic paste
  • 1 Tbsp. balchao masala
  • 1 tsp. ground Deggi chilies (or 1/2 tsp. each ground cayenne or Kashmiri chilies and sweet paprika)
  • 1-2 carrots, peeled and cut into coins
  • 1 russet (or other floury) potato, cut into 1cm cubes
  • 1 onion, cut into 1cm cubes
  • 1/2 Tbsp. coarse sea salt
  • 1/2 c. water
  • 2 tsp. rice flour (optional)
  • 2 Tbsp. chopped fresh cilantro

Directions

  1. Heat the oil over medium-high heat.
  2. Add the pork, ginger paste, garlic paste, and balchao masala and cook, stirring often, until pork sears (5-7 minutes).
  3. Add the Deggi chilies and cook for another 15-30 seconds.
  4. Add the carrot, potato, onion, and salt and stir to combine.
  5. Cook, stirring occasionally, for ~5 minutes.
  6. Add the water and bring to a boil.
  7. Reduce heat to medium-low, cover, and simmer, stirring occasionally, for 15 minutes.
  8. If you would like a thicker sauce, stir in the rice flour and continue to cook until potatoes are fork tender (3-5 minutes).
  9. Sprinkle with cilantro and serve.

Tuesday, 27 August 2024

Lamb Burgers (Dish of the Day)

This is yet another recipe that I'd forgotten I'd made. (Thank goodness for my notes!)

Unfortunately, I can't say much about this one since I don't even remember making it let alone how it came out. I assume it was good, but not spectacular. Good, because it was lamb (and because if it was bad, it probably would have stood out in my mind). Not spectacular, because that also likely would have stood out in my mind.

I figured I should still do a write-up anyway. Just wish I'd gotten to it a bit sooner.

Lamb Burgers

Slightly adapted from Dish of the Day by Kate McMillan

Ingredients

  • 1 small red onion, chopped and divided
  • 1/2 c. plain Greek yogurt
  • 1/2 tsp. cumin seeds, ground
  • 1/8 tsp. ground Kashmiri chilies
  • 3/4 tsp. coarse sea salt, divided
  • 3/8 tsp. black peppercorns, ground and divided
  • 500g ground lamb
  • 3/4 tsp. allspice berries, ground
  • 4 burger buns
  • ~1 Tbsp. olive oil
  • 1 tomato, sliced
  • ~2 c. fresh baby spinach

Directions

  1. Combine ~1/3 of the onion withe yogur, cumin, ground chilies, 1/4 tsp. of the salt, and 1/8 tsp. of the pepper, mix well, and set aside.
  2. Combine the lamb with the allspice, remaining onion, salt, and pepper and mix well.
  3. Form lamb mixture into 4 patties and cook over medium-high heat until desired doneness is reached (~5 minutes/side for medium)
  4. Meanwhile, split the buns and brush the cut sides with olive oil.
  5. Toast buns under the broiler until lightly browned (2-3 minutes).
  6. Place a lamb patty on each burger bottom.
  7. Top with yogurt sauce, tomato slices, spinach, and the bun tops.

Monday, 26 August 2024

Corn Pancake

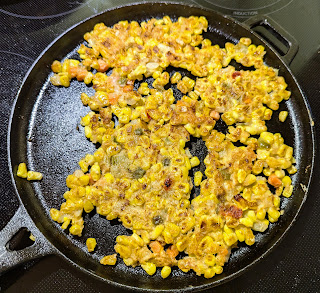
I wanted another simple vegetable side to go with dinner the other night and I had some flour that needed to be used up, so this corn pancake fit the bill. It wasn't amazing, but it was a decent way to add a little bit of extra veg to the meal. The topping was a bit unusual, but did complement the corn well.


Corn Pancake

Slightly adapted from Aaron & Claire

Ingredients

  • 6 Tbsp. cornstarch or flour
  • 3 Tbsp. water
  • 1/8 tsp. coarse sea salt, ground
  • 340g corn
  • 1 Tbsp. oil
  • 1 tsp. grated Parmesan
  • 1/2 tsp. sugar
  • 1/2 tsp. ground Kashmiri chilies
  • 1 Tbsp. sweetened condensed milk (optional)

Directions

  1. Combine flour with water and salt.
  2. Add corn and mix well.
  3. Heat pan over medium heat.
  4. Add oil.
  5. Pour pancake mixture into pan and spread into an even layer.
  6. Cook until brown on the underside.
  7. Flip and cook until browned on the second side.
  8. Combine Parmesan, sugar, and ground chilies.
  9. Sprinkle seasoning mix over pancake.
  10. Drizzle with sweetened condensed milk (if using).

Sunday, 25 August 2024

Yakgochujang (Fried Gochujang)

Gochujang is already delicious, but when Aaron suggested trying out this "upgraded" gochujang, I couldn't resist.


Yakgohujang

From Aaron & Claire

Ingredients

  • 2 Tbsp. oil
  • 1 small yellow onion, chopped
  • 3 green onions, sliced
  • 3-4 Tbsp. minced garlic
  • 250g ground beef, pork, or chicken1
  • 1 Tbsp. dark soy sauce
  • 1 Tbsp. dasida (Korean beef stock powder)
  • 1 1/2 Tbsp. sugar
  • 1 c. gochujang
  • 1/2 c. water
  • 1/2 Tbsp. sesame oil

Directions

  1. Heat wok over medium-high heat.
  2. Drizzle in oil and swirl to coat pan.
  3. Add onion, green onion, and garlic and stir-fry for a minute or two.
  4. Add beef (or protein of choice) and stir-fry for 3-4 minutes.
  5. Add soy sauce, dasida, and sugar and stir-fry for one more minute.
  6. Reduce heat to medium-low, add the gochujang, and cook for another minute or two.
  7. Stir in the water and continue cooking for another five minutes or so.
  8. Add sesame oil and cook until sauce just beings to bubble.
  9. Remove from heat and allow to cool, stiring a few times while it cools.
  10. Transfer to a jar and store in the fridge for up to a month.
  11. Serve over rice or noodles. Also great on eggs or as a dipping sauce.


1 Aaron also suggests tuna or chopped shiitake mushrooms as potential protein/umami sources. Back

Saturday, 24 August 2024

Aehobak Jeon (Korean Zucchini Pancakes)

I wanted a vegetable side to go with my tteobokki and Korean sausage and zucchini pancakes sounded really appealing today. They're very simple. Just slice up some zucchini, dredge it in flour, coat it in egg and fry it up. Ideally with some chile slices for additional colour and flavour, but they're also delicious without them.

You can take the same approach with tofu, SPAM, shiitake mushrooms, eggplant, and a plethora of other things depending on what you have on hand and what sort of flavour you're going for. I was quite fond of how the zucchini ones came out. And it turns out that the Kidlet loves them too!


Aehobak Jeon

From Aaron & Claire

Ingredients

  • 2-3 zucchinis
  • salt
  • 1-2 Tbsp. oil
  • 1/4 c. flour
  • 2 large eggs, beaten
  • 1-2 red chilies, sliced thin

Directions

  1. Trim the ends off the zucchinis and slice them ~1cm thick.
  2. Sprinkle both sides with salt and set aside for 5 minutes.
  3. Heat a wok or frying pan over medium heat and drizzle in a little oil.
  4. Pat dry and dredge in flour.
  5. Dip in beaten egg to coat completely.
  6. Fry over medium heat until underside is beginning to brown.
  7. Press a slice of chile into the top of each pancake.
  8. Flip and cook until other side begins to brown.
  9. Serve immediately.

Friday, 23 August 2024

Sacheon Jjajang (Spicy Jjajangmyeon)

Jjajangmyeon is a popular Korean noodle dish typically made with Chinese-style noodles and a fried black bean sauce. It is closely related to the Chinese 炸酱面 (zhá jiàng miàn). This variant does not involve any black bean paste. It is a somewhat spicier "Sichuan" version that incorporates spicy Sichuan bean paste (辣豆瓣酱 - là dòu bàn jiàng) into the sauce instead.

I still have yet to try the traditional jjajangmyeon, but this Sacheon/Sichuan version was definitely a big hit! TF and the Kidlet are currently threatening to duel for the leftovers, so I'll take that as a compliment and call it a success.

Aaron recommends making this with pork belly, but advises that other (preferably fatty) cuts of meat are also acceptable. I ended up using extra lean ground beef. (Not fatty, I know, but I'm still trying to watch my weight, so I compromised a bit.) I think shiitake mushrooms would also work well in the sauce if you wanted to go for a vegetarian option. Beyond Meat or even firm tofu might also be viable options.

We didn't have any of the recommended zhungwhamyeon or udon noodles on hand, so we ended up going with an Italian-style wheat noodle instead. We had an unusual, long rigatoni in the cupboard, so I decided to give that a try and I think it worked well here. That said, I think cavitapi or buccatini would also be good choices if you didn't have any of the preferred noodle types on hand. Aaron even suggests serving the sauce with rice if you run out of pasta. So really, the sky's the limit and you have lots of options!


Sacheon Jjajang

Slightly adapted from Aaron & Claire

ingredients

Sauce

  • 1 Tbsp. sugar
  • 1 Tbsp. gochugaru
  • 1 Tbsp. dasida (Korean beef stock powder)
  • 1 1/2 Tbsp. 辣豆瓣酱 (spicy Sichuan bean paste)
  • 2 Tbsp. dark soy sauce
  • 1 Tbsp. oyster sauce
  • 1 Tbsp. mirin

Everything Else

  • 2 Tbsp. chili oil
  • 450g ground beef (or sliced pork belly)
  • 4 green onions, sliced
  • 2-3 cloves garlic, minced
  • 1 Tbsp. ginger paste
  • 1 onion, chopped
  • 150g cabbage, chopped
  • 1 1/2 Tbsp. cornstarch
  • 1/4 c. water
  • 1 tsp. Sichuan peppercorn oil
  • 450g udon or noodles of your choice
  • 1/2 cucumber, julienned
  • 1 c. green peas1 (optional)
  • danmuji, chopped
  • 6 large eggs, fried (preferably sunny-side up)

Directions

  1. Combine all sauce ingredients and mix well. Set aside.
  2. Heat a wok over medium-high heat.
  3. Drizzle in the chili oil.
  4. Add the beef and cook, breaking up chunks, until no longer pink (1-2 minutes).
  5. Add green onions, garlic, and ginger and stiry-fry for another 2 minutes.
  6. Add onion and cabbage and stir-fry until softened (~2 minutes longer).
  7. Pour in sauce and stir-fry for another minute or so.
  8. Mix cornstarch with water to make a slurry.
  9. Pour the slurry into the wok and stir-fry until thickened.
  10. Boil and drain the pasta.
  11. Toss the pasta with the sauce.
  12. Mix in the Sichuan peppercorn oil.
  13. Divide the noodles into bowls.
  14. Top each portion with a fried egg, some cucumber, and some danmuji.
  15. Mix well before eating.


Variants

Vegetarian Version

Ingredients

Sauce

  • 1 Tbsp. sugar
  • 1 Tbsp. gochugaru
  • 1 Tbsp. vegetable stock powder or concentrate
  • 1 1/2 Tbsp. 辣豆瓣酱 (spicy Sichuan bean paste)
  • 2 Tbsp. dark soy sauce
  • 1 Tbsp. vegetarian oyster sauce
  • 1 Tbsp. mirin

Everything Else

  • 2 Tbsp. chili oil
  • 450g shiitake mushrooms, chopped
  • 4 green onions, sliced
  • 2-3 cloves garlic, minced
  • 1 Tbsp. ginger paste
  • 1 onion, chopped
  • 150g cabbage, chopped
  • 1 1/2 Tbsp. cornstarch
  • 1/4 c. water
  • 1 tsp. Sichuan peppercorn oil
  • 450g udon or noodles of your choice
  • 1/2 cucumber, julienned
  • 1 c. green peas1 (optional)
  • danmuji, chopped
  • 6 large eggs, fried (preferably sunny-side up)


1 Aaron recommends serving the noodles topped with julienned cucumber, but does suggest green peas as a possible alternative. I was thinking that it might be interesting to try both next time. Back

Thursday, 22 August 2024

Smoked Salmon Cottage Cheese Bowl

Another one of symbol's savoury cottage cheese bowls! This one used salmon that they got for me which I then forgot to eat. symbol attests that it was tasty, but not as good as the chicken and olive version.

Smoked Salmon Cottage Cheese Bowl

Ingredients

  • ½ C cottage cheese
  • ¼ C diced cucumber
  • 3 Tbsp diced tomato
  • 2 slices smoked salmon, chopped
  • 1 Tbsp capers
  • 1 Tbsp chopped chives or green onions
  • 1 tsp chopped fresh dill (or ½ tsp dried)
  • 1 tsp toasted sesame seeds
  • ½ tsp dried garlic
  • ½ tsp dried onion
  • ½ tsp poppyseeds (optional)
  • ½ tsp furikake (optional)
  • ¼ tsp black pepper, ground

Directions

  1. Combine all ingredients, in listed order, in a bowl.
  2. Eat.

Wednesday, 21 August 2024

Olive and Walnut Cottage Cheese Bowl

Back when I was first trying to adjust my diet and lose a little weight, I tried a few different cottage cheese bowls. Mostly sweet ones involving fruit and nuts, maple syrup, chocolate, granola, etc. But I did give one savoury recipe a try. I didn't really care for it, so I've stuck to the sweet versions since then. My go-to involves apples, cinnamon, pecans, raisins, and a bit of maple syrup or stevia. And that's honestly been really great. It's tasty, it's filling, it's easy, and it can be made with staples that I basically always have on hand.

Unfortunately, I wasn't really feeling it this morning.

I had a green smoothie bowl for breakfast yesterday and that was really nice. But I'm pretty sure we're all out of mango now and I know that we don't have any pineapple. I think it would also be good with peaches or nectarines, but we won't have any of those until our produce basket arrives later today. And I wasn't feeling super enthusiastic about any of the other possible toppings I could think of. So I wrote off the smoothie bowl for this morning. But that left me drawing a big, ol' blank for breakfast today.

For whatever reason I really wasn't feeling the sweet cottage cheese bowls this morning, but the idea of cottage cheese itself wasn't unappealing. So I decided to see if I could put something together that hit the right notes for me.

We had some ground chicken and leftover zeytoon parvardeh (Persian marinated olives) in the fridge, so I decided to try to do something that would incorporate those. That said, I think this would also work with green olives and walnuts (and maybe a few extra seasonings) in place of the marinated olives. And you could probably get away with substituting chicken lunch meat for the ground chicken in a pinch (although I think the ground chicken is better here).

I may play around with the exact ingredients and proportions a bit if I make this again. But I think this was a good starting point.

Olive and Walnut Cottage Cheese Bowl

Ingredients

  • 100g ground chicken (chicken breast for low-fat/diet-friendly option)
  • 1/8 tsp. coarse sea salt
  • 1/4 tsp. ras el hanout
  • 1/2 c. cottage cheese (fat-free for low-fat/diet-friendly option)
  • 1/4 c. diced cucumber
  • 4-5 green olives, halved
  • 1 Tbsp. chopped walnuts
  • 1 Tbsp. fried onions
  • 2-3 tsp. pomegranate molasses
  • 1/2 tsp. za'atar
  • 1/8 tsp. black peppercorns, ground
  • 1-2 Tbsp. chopped fresh parsley (optional)

Directions

  1. Season the chicken with the salt and ras el hanout and cook over medium heat until no longer pink.
  2. Place the cottage cheese in a bowl and top with chicken, cucumber, olives, walnuts, and fried onion.
  3. Drizzle with pomegranate molasses and sprinkle with za'atar and pepper.
  4. Garnish with fresh parsley if desired.

Tuesday, 20 August 2024

Sundae Bokkeum (Stir-Fried Korean Blood Sausage)

We picked up some blood sausage at a Korean supermarket in Toronto last week. Initially I was thinking of using it in place of the ground chicken in the tteobokki recipe I was planning on making. But at the last minute, I decided to look up some serving suggestions and decided to go with this stir-fry instead.


Sundae Bokkeum

Slightly adapted from Maangchi

Ingredients

Stir-Fry

  • 85g flat starch noodles1, soaked in cold water for an hour
  • 500g frozen sundae (Korean blood sausage)
  • 1 Tbsp. sesame oil
  • 6 cloves garlic, minced
  • 125g cabbage, cut into bite-sized pieces
  • 1 onion, sliced
  • 1 green finger chile, sliced
  • 1-2 green onions, sliced
  • 8-10 large perilla leaves3, half chopped, half chiffonaded
  • 1 Tbsp. toasted sesame seeds, ground

Sauce

  • 2 Tbsp. gochugaru
  • 2 Tbsp. gochujang
  • 2 Tbsp. corn syrup
  • 2 Tbsp. soy sauce2
  • 1/2 tsp. black peppercorns, ground
  • 3/4 c. water

Directions

  1. Set your noodles to soak.
  2. Thaw the sausage (in its package) and bring a pot of water to a boil.
  3. Place the sausage, still in its sealed package, into the boiling water, reduce heat, and simmer for 10 minutes.
  4. Remove sausage from water and set aside to cool.
  5. Meanwhile, combine the gochugaru, gochujang, corn syrup, soy sauce, and pepper for the sauce.
  6. Gradually mix in the water. Set aside.
  7. Drain the noodles, cut in half, and set aside.
  8. Once the sausage is cool enough to handle, remove from package and carefully cut into discs ~1cm thick.
  9. Heat the oil over medium-high heat.
  10. Add the garlic and stir-fry until just beginning to crisp (~1 minute).
  11. Add the cabbage and stir-fry for 1 minute.
  12. Add the onion, green onion, and green chile and stir-fry for 2 more minutes.
  13. Add the sauce, noodles, and chopped perilla leaves and cook until noodles become transparent (1-2 minutes).
  14. Add the sausage and reduce heat to medium.
  15. Gently stir to coat with sauce being careful not to break up the sausage slices.
  16. Top with perilla chiffonade and ground sesame and serve.
  17. Preferably serve with kimchi and/or other vegetable side dishes.


1 I didn't have any appropriate noodles, so I just omitted them. We did end up cooking up a little rice to serve with the stir-fry and tteobokki though. Back
2 I used a mix of light and dark soy, but I think either would be fine here. Back
3 I didn't have any perilla, so I added a little bit of dried tarragon and some dried basil to the stir-fry. Not the same, of course, but it did at least add another layer of flavour. If I'd had any Thai basil, I probably would have tried adding a bit of that either as well or instead. Back

Monday, 19 August 2024

Jjajang Tteobokki

I've been having trouble finding plain rice cakes lately. Both Korean-style tteobokki and Chinese-style 年糕 (nián gāo) have been hard to come by. For whatever reason, I've only been seeing them sold as meal kits with sauce and other inclusions already mixed in. Which is tasty, but not what I'm looking for when I want to do scratch cooking.

So when TF and I were perusing a Korean grocery store in Toronto last week, I took the opportunity to grab a big package of plain tteobokki to bring home with us.

We also nabbed some chunjang (black bean paste) while we were there since I figured this would make for a good opportunity to finally try this Jjajang Tteobokki recipe.

I think the soy sauce and "classic" tteobokki recipes are still my favourites. But this one was also quite nice and I'm glad we got the chance to try it out!


Jjajang Tteobokki

Slightly adapted from Aaron & Claire

Ingredients

Tteobokki

  • 500g tteobokki (Korean-style rice cakes)
  • 2 Tbsp. canola (or other neutral) oil
  • 2 Tbsp. chunjang (Korean black bean paste)
  • 200g ground chicken
  • 4 green onions, sliced
  • 1 onion, diced
  • 2 c. cabbage, diced
  • 1 Tbsp. minced garlic
  • 1 Korean-style fish cake, chopped
  • 2 c. water
  • 4 hard-boiled eggs

Sauce

  • 3 Tbsp. sugar
  • 2 tsp. soy sauce (pref. mix of light and dark)
  • 1 Tbsp. oyster sauce
  • 1 Tbsp. gochujang (Korean chile paste)
  • 2 Tbsp. water

Directions

  1. If tteobokki are frozen, soak in cold water for 30 minutes before cooking.
  2. Combine all sauce ingredients and mix well.
  3. Heat wok over medium-high heat.
  4. Add oil and swirl to coat.
  5. Add chicken and stir-fry for 1 minute.
  6. Add chunjang and cook for another 2-3 minutes.
  7. Add green onion, onion, cabbage, and garlic and stir-fry for another 1 minute.
  8. Add the sauce and tteobokki and cook for another 2 minutes.
  9. Add the water, bring to a boil, and cook for 5 minutes.
  10. Add the fish cakes and eggs and cook until sauce has thickened.
  11. Serve with kimchi and/or other vegetable sides of your choice.

Sunday, 18 August 2024

Dalgona Coffee (Whipped Coffee)

This is one of the earliest recipes that Aaron and Claire posted on their website. Apparently this interesting whipped coffee went viral during the early days of the pandemic and people started posting lots of videos, challenges, and recipes involving it.

I had completely overlooked it the first few times I went through the blog because I'm not really a big coffee drinker and figured my efforts would be better spent on the food recipes rather than the drinks. But, every once in a while, I do get hit with a hankering for a sweet, milky post-dinner coffee. And this looked like it might fit the bill, so I finally decided to check it out.

The recipe itself is very simple, but quite interesting. It involves combining equal parts instant coffee, sugar, and hot water and vigorously beating them until the mixture becomes light and stiff. Almost like whipped cream or a meringue. The whipped mixture is then spooned over cold (or hot) milk and served.

Based on some quick Googling, this recipe originated in either South Korea or Macau, where it is sometimes served with various toppings. Cocoa, instant coffee crystals, or crushed biscuits are apparently popular garnishes. I'm not really invested enough to try to determine the precise origins. Suffice to say that it is interesting and tasty and, as far as I can tell, popular in both countries.

The coffee foam on its own is quite intense and a bit bitter, but once mixed with the milk, the final result is a bit like a creamy latté or Vietnamese coffee. I quite liked it!


Dalgona Coffee

From Aaron & Claire

Ingredients

Ingredients are per serving. Multiply by the number of servings you'd like to make.
  • 2 Tbsp. instant coffee crystals
  • 2 Tbsp. sugar
  • 2 Tbsp. boiling water
  • 2-4 ice cubes
  • 1-2 c. milk1

Directions

  1. Combine the coffee, sugar, and water and beat with a whisk (or the whisk attachment of a hand or stand mixer) until mixture becomes light, fluffy, and forms soft peaks.
  2. Add ice and milk to a large glass.
  3. Spoon whipped coffee on top of the milk.
  4. Use a straw to mix and drink your coffee.


1 Adjust the quantity of milk depending on how strong you like your coffee. One cup of milk per serving is probably sufficient for those who like relatively strong coffee. One-and-a-half or two cups may be more appropriate for those who like a more dilute, mellow flavour. Back

Saturday, 17 August 2024

Spicy Simmered Eggs with Kale

I made this breakfast quite a while ago. Back in April or May if I recall correctly. But I've been falling a bit behind on write-ups, so I still have quite a few gaps to fill in.

This came out surprisingly tasty! I was expecting it to be passable, but nothing special. But it was actually delicious! I loved this!


Spicy Simmered Eggs with Kale

From Dish of the Day by Kate McMillan

Ingredients

  • 1-2 Tbsp. unsalted butter
  • 4 green onions, sliced
  • 2-3 cloves garlic, minced
  • 2 bunches black kale, chopped
  • 1 c. chicken or vegetable broth
  • 1/8 tsp. coarse sea salt
  • 1/4 tsp. black peppercorns, ground
  • zest and juice of 1 lemon
  • 4-6 eggs
  • 1/4 tsp. red chile flakes

Directions

  1. Melt the butter over medium heat.
  2. Add the green onions and garlic and cook for a minute or two.
  3. Add half the kale and cook until wilted (~2 minutes).
  4. Repeat with remaining kale.
  5. Add broth, salt, pepper, and lemon zest.
  6. Reduce heat and simmer until kale softens (~6 minutes).
  7. Stir in lemon juice.
  8. Make a well for each egg.
  9. Crack the eggs into the wells and sprinkle with salt and pepper.
  10. Cover and cook over medium-low heat until eggs reach desired doneness (5-8 minutes).
  11. Sprinkle with chile flakes and serve.

Friday, 16 August 2024

Coconut Rice Pudding with Gingered Pears

I really liked the pears with this pudding. And the coconut was nice. Although I didn't feel it came through as strongly as I would have liked. The pudding was also very thick. I ended up thinning mine out with milk before eating it. It was good though. We all enjoyed it. I just wonder if it might be improved by using slightly more liquid or less rice during the preparation. That said, adding the milk after the fact also worked fine, so it wasn't a big deal either way. Although, now that I think about it... we also ran out of pears well before we ran out of pudding, so maybe less rice would be the way to go. That way there'd be a better pudding-to-pear ratio and the pudding would hopefully have a somewhat looser consistency. Something to try for next time.

Coconut Rice Pudding with Gingered Pears

Slightly adapted from Dessert of the Day by Kate Laidlaw

Ingredients

  • 1 c. basmati rice1
  • 1 c. half-and-half (10% MF), divided
  • 3 c. milk
  • 1 (~440mL) can coconut milk
  • 1 c. sugar
  • 1/8 tsp. coarse sea salt
  • 1 1/2 c. unsweetened shredded or flaked coconut
  • 2 pears, peeled and chopped
  • 1"/2.5cm piece of fresh ginger, peeled and grated
  • 2 Tbsp. brown sugar

Directions

  1. Combine rice, 1/2 c. of the half-and-half, milk, coconut milk, sugar, and salt and bring to a boil over medium-high heat.
  2. Reduce heat to medium-low, cover, and cook, stirring occasionally, until rice is very tender (~30 minutes). Remove from heat and set aside.
  3. Preheat oven to 180°C (350°F) and spread coconut out on a lined baking sheet.
  4. Toast coconut in oven until golden (3-5 minutes). Set aside to cool.
  5. Toss pears with ginger and brown sugar and set aside for at least 20 minutes to macerate.
  6. Stir remaining 1/2 c. of the half-and-half into the pudding.
  7. Serve topped with pears and toasted coconut.


1 The original recipe called for 1 1/2 c. of rice, but, as noted above, this seemed like a bit too much, so I've scaled it back here. Back

Thursday, 15 August 2024

Sautéed Apples in Hard Cider

I made up a batch of waffles a few months ago and used half of them in a savoury application. For the remainder, I decided to go for something sweeter and serve them with this apple topping. It was quite good!

Sautéed Apples in Hard Cider

Slightly adapted from Waffles: Sweet, Savory, Simple by Dawn Yanagihara

Ingredients

  • 2-3 Tbsp. unsalted butter
  • 4 apples, peeled and sliced
  • 1/8 tsp. ground nutmeg
  • coarse sea salt, ground
  • 360mL hard apple or pear cider
  • 1/3 c. brown sugar
  • 1/2 tsp. cornstarch (cornflour)
  • 1 tsp. water
  • 1 Tbsp. lemon juice

Directions

  1. Melt butter over medium-high heat and cook until foamy.
  2. Add apples, nutmeg, and a tiny pinch of salt and cook until apples are tender and golden (~7 minutes).
  3. Transfer apples to a bowl.
  4. Return pan to heat and add the cider, brown sugar, and another small pinch of salt.
  5. Bring to a boil and then simmer vigorously until liquid is reduced to ~180mL (~5 minutes).
  6. Meanwhile, combine cornstarch and water in a small bowl.
  7. Stir in the cornstarch slurry and cook for another minute or so.
  8. Stir in lemon juice.
  9. Return the apples to the pan and cook until heated through (2-3 minutes).
  10. Serve over waffles, pancakes, or French toast.

Wednesday, 14 August 2024

Broccoli with Cheese Sauce

Classic combination!


Broccoli with Cheese Sauce

Slightly adapted from Vegetable of the Day by Kate McMillan

Ingredients

  • 3 heads broccoli
  • 3 Tbsp. unsalted butter
  • 3 Tbsp. flour
  • 2 c. milk
  • 1/2 tsp. coarse sea salt
  • 1/4 tsp. black peppercorns, ground
  • 1/8 tsp. ground cayenne or Kashmiri chilies
  • 90g sharp Cheddar cheese, grated

Directions

  1. Cut the broccoli heads into halves or thirds and steam until tender (5-7 minutes). Set aside and keep warm.
  2. Melt the butter over medium-high heat.
  3. Whisk in the flour and cook, stirring frequently, for 2-3 minutes.
  4. Gradually whisk in the milk and bring to a boil.
  5. Reduce heat to medium-low and simmer, stirring occasionally, until sauce thickens slightly (7-10 minutes).
  6. Stir in the salt, pepper, and cayenne and continue cooking, stirring occasionally, until sauce is thick enough to coat the back of a spoon (~10 minutes longer).
  7. Stir in the cheese and cook for another 2-3 minutes.
  8. Pour the cheese sauce over the broccoli and serve.

Tuesday, 13 August 2024

Miso-Glazed Grilled Eggplant

I made this as a side dish to go with... something. I no longer remember what. (This is what I get for not posting my recipe write-ups promptly.)

It was good, but not outstanding. I found the glazing while grilling to be a bit fiddly. I think I would have preferred something that I could have grilled without the glaze or vice versa. So, fine overall, but probably not something I'll do again.


Miso-Glazed Grilled Eggplant

Slightly adapted from Dish of the Day by Kate McMillan

Ingredients

  • 6mm piece of fresh ginger, peeled and chopped
  • 1-2 cloves garlic, chopped
  • 1/4 c. white miso
  • 1/2 tsp. Sriracha
  • 2 Tbsp. rice vinegar
  • 1 Tbsp. mirin
  • 1-2 Tbsp. water
  • 4 Asian eggplants, halved lengthwise
  • salt and pepper, to taste
  • canola or peanut oil
  • 3 green onions, sliced

Directions

  1. Prepare gas or charcoal grill for direct heat grilling over medium-high heat.
  2. Combine ginger, garlic, miso, Sriracha, vinegar, mirin, and water and purée until smooth.
  3. Sprinkle eggplant halves with salt and pepper and brush with oil.
  4. Arrange eggplant pieces, cut-side-down, on the grill, cover, and cook until they being to soften and become slightly charred (6-8 minutes).
  5. Flip and cook, covered, for another 3-4 minutes.
  6. Brush with glaze, cover, and cook until eggplant is fully tender (3-4 minutes longer).
  7. Transfer to platter, sprinkle with green onions, and serve.

Monday, 12 August 2024

Bacon and Potato Frittata

This frittata is meant to use slender fingerling potatoes. The potatoes are halved and browned in bacon fat before the rest of the ingredients are added to finish off the frittata. I didn't have any fingerling potatoes, but I did have some waxy red potatoes. I cut them into long pieces to approximate the shape and size of halved fingerling potatoes. Not a perfect solution, to be sure, but it worked well enough. And it did make for a nice, satisfying breakfast.


Bacon and Potato Frittata

Slightly adapted from The Breakfast Bible by Kate McMillan

Ingredients

  • 4 slices bacon
  • 250g fingerling potatoes, halved
  • 1/2 tsp. coarse sea salt, ground
  • 1/4 tsp. black peppercorns, ground
  • 3 green onions, sliced
  • 2-3 cloves garlic, minced
  • 1 Tbsp. fresh rosemary, chopped
  • 3-4 Tbsp. grated Parmesan
  • 10 large eggs
  • 2 Tbsp. milk

Directions

  1. Preheat oven to 200°C (400°F).
  2. Cook the bacon until crisp. Set aside.
  3. If there is more than 2 Tbsp. of fat in the pan, drain the excess. If there's less, add olive oil to bring it up to 2 Tbsp.
  4. Add the potatoes, season with 1/4 tsp. salt and 1/8 tsp. pepper, and cook until golden and tender (8-10 minutes).
  5. Chop bacon and add it to the pan with the green onions, garlic, and rosemary and cook for another 2-3 minutes.
  6. Beat eggs with Parmesan, milk, remaining 1/4 tsp. salt, and 1/8 tsp. pepper.
  7. Spread the potato mixture into an even layer and pour the eggs over. Cook for 2 minutes.
  8. Transfer to oven and bake until eggs are set (10-12 minutes).

Sunday, 11 August 2024

Braised Chicken with Wax Beans and Tomatoes

Unfortunately, I have no recollection of making this recipe. I know I made it because I wrote it down, along with the title and page number of the book it appeared in, in my notes. And TF says she thinks it sounds familiar. But I don't remember it at all!

I suspect that I probably swapped out the fresh wax (yellow) beans for frozen green beans because I often have the later on hand and never the former. But I can't say for sure. It's possible that I went out and got some fresh yellow beans especially for this recipe. But I doubt it.

I may have even swapped out the cherry tomatoes for tinned diced tomatoes. But, again, I can't say for sure. But it's the kind of thing that I could see myself doing for a recipe like this. Especially if I was in a bind over what to have for dinner and trying to cobble something together last-minute.

One change that I'm almost certain I would have made is to the chicken. Recipe as written, it calls for chicken thighs and drumsticks. I suspect that I probably just got a whole chicken and broke it down (breasts, wings, durmsticks, thighs) and used that rather than going for the all dark meat approach. I've written up the recipe to reflect this change, but left everything else as it was in the original recipe since I can't remember exactly what I did. Possibly not the most accurate accont. But, since it wasn't a stand-out in my mind anyway, I doubt we'll be revisiting it, so the details become far less important at that point.

Braised Chicken with Wax Beans and Tomatoes

Slightly adapted from Dish of the Day by Kate McMillan

Ingredients

  • 1 Tbsp. olive oil1
  • 1 whole chicken (~1kg), broken down into pieces (legs, thighs, breasts, wings)
  • 1 tsp. coarse sea salt
  • 1/4 tsp. black peppercorns, ground
  • 1 onion, chopped
  • 1 carrot, chopped
  • 6-8 cloves garlic, minced
  • 1 1/4 c. dry white wine
  • 3 c. chicken stock
  • 3 sprigs fresh thyme2
  • 1/4 c. heavy (35%) cream
  • 3 Tbsp. Dijon mustard3
  • 1 c. cherry tomatoes
  • 125g yellow wax beans
  • 90g arugula (rocket/roquette)

Directions

  1. Preheat oven to 180°C (350°F).
  2. Warm oil over medium-high heat.
  3. Season chicken with salt and pepper.
  4. Sear chicken, turning as needed and working in batches if necessary, until golden-brown (8-10 minutes). Set aside.
  5. Add onion, carrot, and garlic to the pot, season to taste with additional salt and pepper, and sauté until softened (~5 minutes).
  6. Add wine, bring to a simmer, and cook until reduced by half (~5 minutes).
  7. Add chicken stock and bring to a boil.
  8. Return chicken to pot and add thyme.
  9. Cover, transfer to oven, and braise at 180°C (350°F) until chicken is cooked through (50-60 minutes).
  10. Transfer chicken to a plate.
  11. Strain the braising liquid and return to pot.
  12. Bring to a boil and cook until reduced by half (8-10 minutes).
  13. Reduce heat to medium, stir in cream and mustard, and cook until thickened slightly (~5 minutes).
  14. Adjust seasoning to taste.
  15. Return chicken to pot, cover, and cook for another 15 minutes.
  16. Add tomatoes and beans and cook, covered, until softened (~5 minutes).
  17. Uncover, stir in the arugula, and cook until wilted (1-2 minutes).


1 I know I said that I was going to leave everything but the chicken the same, but I realized that this was one other area where I also almost certainly made some adjustments. The original recipe calls for 2 Tbsp. of oil. But it also calls for skin-on chicken. And I always find that a lot of fat renders out of the skin. So I would be reluctant to add that much oil to the pan unless I was going to use skinless chicken pieces. Honestly, with skin-on chicken, I'm not sure you really need any added fat at all! But I decided to write it up with half the amount since, as noted, I can't remember exactly what I did for this. Back
2 I basically never have fresh thyme on hand and I doubt that I would have gone out and gotten any for this. I suspect that I substituted dried thyme. I would guess ~1 tsp. or so. But, as with the other details, I can't say for sure. (This is why it's important to write up your notes promptly! Oh well...) Back
3 I definitely would have used Roman mustard for this. I'm just not sure how much. Sometimes I cut back on the quantity called for somewhat because the Roman mustard is so strong. I probably would have started with ~2 Tbsp. and adjusted from there. Back

Saturday, 10 August 2024

Thai Pumpkin & Chicken Curry

We made this for dinner recently and, while not a favourite, it was tasty. The Kidlet even ate the squash, which she has been averse to lately. It may have helped that we had a surplus of chicken and made it with 750g instead of the 500g called for, so the chicken-to-squash ratio was enhanced.


Thai Pumpkin & Chicken Curry

Dish of the Day by Kate McMillan (p. 270)

Ingredients

  • one 750g baking pumpkin or butternut squash, halved, seeded, peeled, and cut into 2cm cubes
  • 2 shallots
  • 3-4 cloves garlic
  • 400mL coconut milk
  • 1 tbsp red Thai curry paste
  • 2 tbsp fish sauce
  • juice of one lime
  • 2 tsp firmly packed brown sugar
  • 2+1 tbsp oil, divided
  • 500g boneless skinless chicken breasts or thighs, cut into 2cm cubes
  • 2 tbsp sliced fresh thai basil (or 1 tbsp lightly dried basil)

Directions

  1. Bring a pot of water to a boil. Add the pumpkin and cook until just tender, 6-7 minutes. Drain.
  2. Combine shallots, garlic, curry paste, and 2 tbsp of water in a blender, and process until smooth.
  3. Whisk together coconut milk, fish sauce, lime, and brown sugar in a bowl.
  4. In a large, steep-sided skillet, heat 2 tbsp of oil over medium-high heat.
  5. Add chicken and sear until browned on all sides. Remove with a slotted spoon and buffer.
  6. Reduce heat to medium and add remaining oil.
  7. Add the curry paste mixture and cook, stirring, until fragrant, 10-20 seconds.
  8. Stir in the coconut milk mixture and bring to a boil.
  9. Add chicken and pumpkin, reduce heat, and simmer until the chicken is cooked through and the pumpkin is tender.
  10. Top with basil and serve over rice.

Friday, 9 August 2024

Gingered Rhubarb Crisp

I don't tend to do a lot with rhubarb. I enjoy the odd strawberry-rhubarb pie. But I don't think I've ever made one myself. I usually just get them ready-made from shops and restaurants. And, other than that, my rhubarb experience is very limited. But I know that TF enjoys various rhubarb-based confections as an occasional treat. And I do now have a bunch of recipes that call for it. And she also loves ginger. So, when rhubarb came into season this spring, I decided to give it a try. (I then failed to write it up for half a year, but that's beside the point.)

Gingered Rhubarb Crsip

Slightly adapted from Dish of the Day by Kate McMillan

Ingredients

  • 680g rhubarb, cut into 1cm pieces
  • 1 large orange
  • 3/4 c. sugar
  • 2.5cm (1") piece fresh ginger, peeled and grated
  • 3/4 c. flour
  • 1/2 c. brown sugar
  • 1/3 c. rolled oats
  • 1/4 tsp. ground cinnamon
  • 1/8 tsp. coarse sea salt
  • 1/4 c. unsalted butter, melted
  • vanilla ice cream, to serve (optional)

Directions

  1. Preheat oven to 190°C (375°F).
  2. Combine rhubarb with 1 tsp. orange zest, 1/3 c. orange juice, and the (granulated) sugar in a 23cm (9") square baking tin.
  3. In a bowl, combine the flour, brown sugar, oats, cinnamon, and salt and mix well.
  4. Add the butter and stir until evenly mixed.
  5. Sprinkle the oat mixture over the rhubarb.
  6. Bake at 190°C (375°F) until topping is golden and juices are thick (30-40 minutes).
  7. Allow to cool for at least 20 minutes before serving.
  8. Serve as-is or with vanilla ice cream.

Thursday, 8 August 2024

Spring Vegetable Tart

My apologies for yet another write-up where I have become very hazy on the actual details and results of the recipe. I checked this one off in my notbook and TF says that it sounds familiar, but I don't actually remember making it. So this write-up is pretty much just a copy of what's in the book since I can't speak to the results or any modifications that we made. I just want to include it here for the sake of completeness.

Spring Vegetable Tart

From Dish of the Day by Kate McMillan

Ingredients

  • 1 sheet (~250g) frozen puff pastry, thawed
  • 125g fontina cheese, shredded
  • 15-20 thin asparagus spears, trimmed
  • 1 small leek, halved and thinly sliced (white part only)
  • 2 large eggs
  • 1/4 c. milk
  • 1/4 tsp. coarse sea salt, ground
  • 1/8 tsp. black peppercorns, ground

Directions

  1. Preheat oven to 200°C (400°F) and line a baking sheet with parchment paper or a silicone baking mat.
  2. Lay the pastry out on the prepared baking sheet and fold over edges by ~2cm to make a lip (doubling up at the corners). Press lightly to adhere and then prick the centre of the pastry with a fork in several places.
  3. Sprinkle half of the cheese over the bottom of the pastry.
  4. Place the asparagus spears on top and then sprinkle with leeks.
  5. Bake at 190°C (400°F) for 15 minutes.
  6. Meanwhile, beat the eggs with the milk, salt, and pepper.
  7. Once the pastry has been in the oven for 15 minutes, pour the egg mixture over the asparagus and leeks and top with the remaining cheese.
  8. Bake until eggs are just set and pastry is puffed and golden (10-15 minutes longer).
  9. Remove from oven and let stand for 5-10 minutes before serving.

Wednesday, 7 August 2024

Kale and Black Bean Enchiladas

I thought that we had made all of the various enchilada recipes from the Dish of the Day and Vegetable of the Day cookbooks. But it turns out that I'd missed one! This one involves a simple filling of black beans and kale (spinach in the original recipe) with a bit of cheese and some homemade salsa verde to bring it all together.

Personally, I felt like the sauce could have used a bit more kick. I would be tempted to add some jalapeños and/or finger chilies next time. But the kids seemed to enjoy it this way, so that's good at least.

I'm glad that I tried doing the sauce from scratch for these. It was nice. That said, if you're looking for a way to streamline the recipe, I wouldn't hesitate to use store-bought salsa verde in place of the homemade.


Kale and Black Bean Enchiladas

Slightly adapted from Dish of the Day by Kate McMillan

Ingredients

Sauce

  • 12 tomatillos, husked and halved
  • 3 poblanos, halved and seeded
  • 1 jalapeño, halved and seeded (optional)
  • 2-3 cloves garlic
  • 1 large onion, quartered
  • 1 c. fresh cilantro
  • salt and pepper, taste
OR
  • ~1L store-bought salsa verde

Enchiladas

  • 2 Tbsp. canola (or other neutral) oil
  • 1 small onion, chopped
  • 1 small red bell pepper, chopped
  • 1 Tbsp. cumin seeds, ground
  • 1 tsp. dhania-jeera masala
  • ~300g frozen chopped kale or spinach
  • 2 cans (~400mL each) black beans (or 1 1/2 c. dried black beans, cooked), drained and rinsed
  • 1/2 c. chopped fresh cilantro
  • 250g Monterey Jack (or pepper jack) cheese, shredded and divided
  • 1 medium tortillas1
  • 1-2 avocadoes, sliced

Directions

  1. Preheat the broiler (on high if it has multiple settings).
  2. Place the tomatillos and chilies, cut-side-down, on a baking sheet and broil until slightly charred and softened (8-10 minutes).
  3. Transfer tomatillos, chilies, onion, garlic, and cilantro to a blender and purée.
  4. Season to taste with salt and pepper and set aside.
  5. Preheat oven to 180°C (350°F).
  6. Heat oil over medium heat.
  7. Add onion and bell pepper and cook until softened (~5 minutes).
  8. Add the cumin and masala and cook for another minute or two.
  9. Add the frozen greens and cook until thawed.
  10. Remove from heat and stir in the beans, cilantro, half the cheese (~1 c.), and 3/4 c. of the sauce.
  11. Spoon ~1/2 c. of sauce into the bottom of a 23x33cm (9x13") baking dish.
  12. Put ~1/2 c. of filling in the centre of each tortilla, roll up into a tube, and place seam-side-down into the prepared baking dish.
  13. Once all of the tortillas have been filled and placed in the baking dish, pour the rest of the sauce over them.
  14. Sprinkle with remaining cheese, cover with foil, and bake at 180°C (350°F) for 30 minutes.
  15. Remove foil and continue baking for another 10 minutes.
  16. Serve topped with avocado and seasoned to taste with salt and pepper.


1 The recipe calls for flour tortillas and that's what I used this time, but I actually think that corn tortillas would have been better here. They just didn't have any when I went to the grocery store and I didn't feel up to making my own from scratch this time. The flour tortillas were fine. I just think that corn ones tend to work especially well for enchiladas. Back

Tuesday, 6 August 2024

Chia Pudding with Fresh Fruit

So, full disclosure: I was in a bit of a hurry and kind of messed up this pudding. It still turned out reasonably tasty. It was just very lumpy. Since I just dumped the chia into the milk the night before and didn't both to mix it properly. Not the end of the world. Just not ideal either. So, I guess I should let that be a lesson to me to make sure to mix everything very well before I leave it to soak overnight if I'm ever making this again.

You can mix up the fruit to go with this. The original recipe calls for kiwi, blackberries, fresh apricots, pomegranate, and toasted coconut chips. I think I ended up using kiwi, blackberries, nectarines, raspberries, and toasted coconut. But you could try all sorts of things! I've included some ideas in the variations below.


Chia Pudding with Fresh Fruit

Slightly adapted from The Breakfast Bible by Kate McMillan

Ingredients

  • 1 c. oat milk
  • 1/4 c. chia seeds
  • 2 Tbsp. maple syrup
  • 1 tsp. vanilla extract
  • 150g blackberries
  • 2 kiwis, peeled and sliced
  • 4 apricots, sliced
  • 75g pomegranate arils
  • 20g toasted coconut chips

Directions

  1. Combine oat milk, chia seeds, maple syrup, and vanilla and mix well.
  2. Cover and chill for 4-24 hours.
  3. Divide into four bowls, top each with 1/4 of the fresh fruit and coconut chips, and serve.


Variants

Strawberry-Banana

Ingredients

  • 1 c. oat milk
  • 2 Tbsp. peanut butter
  • 1/4 c. chia seeds
  • 2 Tbsp. maple syrup
  • 1 tsp. vanilla extract
  • 150g strawberries
  • 2 bananas, peeled and sliced
  • 20g dark chocolate shavings


Kiwi-Mango

Ingredients

  • 1 c. coconut milk
  • 1/4 c. chia seeds
  • 2 Tbsp. honey
  • 1 tsp. vanilla extract
  • 2 kiwis, peeled and sliced
  • 2 mangoes, sliced
  • 2 passionfruit
  • 20g toasted coconut chips
  • 20g macadamia nuts, chopped


Lemon-Blueberry

Ingredients

  • 1 c. almond milk
  • 1/4 c. chia seeds
  • 2 Tbsp. honey
  • 1 tsp. vanilla extract
  • 1/4 tsp. culinary lavender
  • 150g blueberries
  • 1/2 c. lemon curd
  • 20g slivered almonds, toasted


Blackberry-Melon

Ingredients

  • 1 c. coconut milk
  • 1/4 c. chia seeds
  • 2 Tbsp. honey
  • 1/2 tsp. lime zest
  • 150g blackberries
  • 1/4 cantaloupe, diced
  • 1/4 honeydew melon, diced
  • 20g pine nuts, toasted


Kiwi-Lychee

Ingredients

  • 1 c. coconut milk
  • 1/4 c. chia seeds
  • 2 Tbsp. honey
  • 1 tsp. rosewater
  • 150g blackberries
  • ~20 lycheefruit, peeled and halved
  • 2 kiwis, peeled and sliced
  • 20g slivered almonds, toasted


Cranberry-Quince

Ingredients

  • 1 c. oat milk
  • 1/4 c. chia seeds
  • 2 Tbsp. maple syrup
  • 1 tsp. vanilla extract
  • 2 quince, peeled and diced
  • 1 star anise
  • 1 cinnamon stick
  • 1 c. apple juice
  • 1/4 c. sugar
  • 250g fresh cranberries
  • 1/4 c. raisins
  • 20g walnuts, toasted and chopped

Directions

  1. Combine the oat milk, chia seeds, maple syrup, and vanilla extract as directed above, mixing, covering, and chilling for at least 4 hours.
  2. Meanwhile, combine the quince, star anise, cinnamon stick, apple juice, and sugar and bring to a boil over medium heat.
  3. Reduce heat to medium-low and simmer, covered, for ~20 minutes.
  4. Add the cranberries and raisins and simmer for another 20 minutes.
  5. Divide pudding among four bowls, top with compote and walnuts and serve.


Chocolate-Cherry

Ingredients

  • 1 c. almond milk
  • 1/4 c. chia seeds
  • 1 Tbsp. Dutched (alkalized) cocoa powder
  • 2 Tbsp. honey
  • 1 tsp. vanilla extract
  • 400g fresh cherries, pitted and halved
  • 20g slivered almonds, toasted
  • 20g dark chocolate shavings

Monday, 5 August 2024

Roasted Kabocha Squash with Balsamic Vinegar

I really like kabocha squash. It's sweet like a pie pumpkin, but the flesh is much less wet. It's great roasted and mashed. (As it is for these squash toastsa.)

This recipe calls for a slightly different approach. Rather than roasting it with the skin on and then scooping out the softened flesh, you cut it into wedges and peel it first and then roast the wedges. Sounds good. But, sadly, I had a bit of trouble with this approach. The wedges took much longer to cook than the recipe suggested and, with a longer cooking time, they ended up starting to burn at the tips while still being somewhat underdone in the middle. Next time I think I'd just cut the squash into cubes and roast it that way. Or, possibly better yet, roast unpeeled halves, mash the flesh, and then just drizzle a little balsamic over it before serving. Because, while this approach wasn't terrible, it wasn't great either, so I would definitely like to make some modificaitons next time. (Or just save the squash and use it for something else entirely.)


Roasted Kabocha Squash with Balsamic Vinegar

From Vegetable of the Day by Kate McMillan

Ingredients

  • 1 kabocha squash (~1kg)
  • 1-2 Tbsp. olive oil
  • 1/4 tsp. coarse sea salt, ground
  • 1/8 tsp. black peppercorns, ground
  • 2 Tbsp. balsamic vinegar

Directions

  1. Preheat oven to 200°C (400°F).
  2. Cut squash in half and scoop out seeds. Then cut each half into wedges ~2cm thick1 and peel each wedge.
  3. Toss squash wedges with olive oil and sprinkle with salt and pepper.
  4. Roast at 200°C (400°F) until tender (20-25 minutes).
  5. Drizzle with balsamic and roast for another 2-3 minutes.


1 In retrospect, part of my problem may be that I cut my wedges too thick. But even so, I don't think I'd want to do wedges again. Trying to cut and peel the wedges was annoying. I think I'd still rather just do cubes or mash and drizzle. Back

Sunday, 4 August 2024

Pico de Gallo

I was going to just save myself some time and effort and buy some read-made pico de gallo from the grocery store. But, when I got there, it was so expensive and looked so sad that I couldn't bring myself to do it. I ended up making a small batch from scratch instead. It's not that difficult. It just involves a bunch of chopping (and a little waiting).

Pico de Gallo

Slightly adapted from Cookie and Kate

Ingredients

  • 1 onion, finely chopped
  • 3 cloves garlic, minced
  • 1 jalapeño, seeded and minced
  • 1/4 c. lime juice
  • 1 tsp. coarse sea salt
  • 680g ripe tomatoes, chopped
  • 1/2 c. minced fresh cilantro

Directions

  1. Combine onion, garlic, jalapeño, lime juice, and salt. Mix well and set aside for at least 15 minutes.
  2. Add tomato and cilantro, mix, and let stand for another 15 minutes before serving.

Saturday, 3 August 2024

California Omelette

I've been staring at this omelette recipe for a while. I looked tasty. But it also involved a lot of ingredients that I don't normally keep on hand: pico de gallo, avocado, bacon, alfalfa sprouts, Monterey jack cheese... So, as much as it looked like an appealing breakfast option, it kept getting pushed because I haven't been organized enough to get all the bits. But, I had some leftover pepper jack from another recipe and I figured I could just quickly swing through the grocery store and get the rest of the components a day or two before making it.

In the end, the pepper jack ended up getting eaten before I got around to making the omelette, so I had to use all cheddar, rather than I mix of cheddar and jack. The ready-made pico de gallo at the grocery store was way over-priced and didn't look very good, so I ended up making my own from scratch. I couldn't find any sprouts, so I ended up tossing in a small handful of spring mix instead. And I forgot to get the bacon, so I fried up some thinly sliced smoked tofu and used that instead.

So, in the end, quite a few changes from the original recipe. But it was still very good. Probably not something I'll revisit often due to the ingredient list. But I would definitely consider it as either a special occasion thing or if I somehow ended up with pico, bacon, and avocado sitting around needing to be used.


California Omelette

Adapted from The Breakfast Bible by Kate McMillan

Ingredients

  • 4 large eggs
  • 2 Tbsp. milk
  • salt and pepper, to taste
  • 2 tsp. unsalted butter, divided
  • 1/4 c. grated cheddar, divided
  • 1/4 c. grated Monterey jack (or pepper jack), divided
  • 4 slices bacon (or 8 short slices smoked tofu), cooked until crisp and chopped and divided
  • 1/2 avocado, chopped and divided
  • 1/4 c. pico de gallo, divided
  • 2 small handfulls spring mix or baby spinach, divided

Directions

  1. Beat the eggs with the milk and salt and pepper to taste.
  2. Melt 1 tsp. of the butter over medium heat.
  3. Pour in half the egg mixture and cook until bottom is just set.
  4. Lift up edges and let raw egg flow underneath. Keep cooking until eggs are nearly fully set and just slightly wet on top.
  5. Sprinkle half of the cheese over the omelette.
  6. Add half of the bacon to one side of the omelette along with half of the avocado, pico de gallo, and greens.
  7. Fold the omelette over and cook for another 30-60 seconds.
  8. Transfer omelette to a plate and repeat cooking process with remaining ingredients to make a second omelette.

Friday, 2 August 2024

Stuffed French Toast

The Kidlet loves French toast. (And strawberry jam, for that matter.) So I figured the idea of French toast stuffed with cream cheese and strawberry jam would be a big hit. And it was!

I think the concept for this recipe is sound. I just question their instructions.
As written, the recipe recommends using one loaf of challah and cutting it into six 6-cm thick slices. Now, first of all, even considering that you'll be suffing the slices, that is insanely thick. And, secondly, how big are their loaves of challah that you can get six 6-cm slices out of one loaf? That would mean that the whole loaf would have to be a little over 36cm long! (A little over, because you need to trim the heels off.) I consider a "standard" loaf pan to be between 20 and 23cm long. So, that is one monster loaf of bread they have there.

I asked TF to cut our loaf into four 5-cm thick slices. And even those were (in my opinion) still much too thick. I'd definitely go for five 4-cm slices next time. And TF thinks that those might be too thick even still. She suggested that 3-cm slices might be more appropriate. And, honestly, I think she might be right. That said, I'd want to try it with 4-cm slices first and see how that works out before moving down to even thinner slabs of bread.

Given that we ended up with only four slices for our rendition of this recipe today, I reduced the amount of custard and filling somewhat. However, since I'm writing up the recipe for a larger number of thinner slices, I've scaled the filling and custard amounts back up. Hopefully these amounts should be about right, but feel free to play around with the proportions a bit.


French Toast Stuffed with Cream Cheese and Strawberry Jam

Slightly adapted from The Breakfast Bible by Kate McMillan

Ingredients

  • 1 loaf of bread1
  • 170g cream cheese, softened
  • 1/3 c. strawberry jam
  • 5 large eggs
  • 1 1/4 c. milk
  • 1 tsp. vanilla extract
  • 1 Tbsp. butter, divided
  • maple syrup, to serve

Directions

  1. Trim off the heels and cut the bread into five or six very thick slices (3-4cm each).
  2. Cut a slit into the top of each slice of bread to form a pocket that extends through the centre of the slice to within ~2cm of each of the other three sides.
  3. Combine the jam and cream cheese and mix well.
  4. Carefully spoon some of the cream cheese mixture into each bread pocket, doing your best to divide it evenly.
  5. Beat the eggs with the milk and vanilla.
  6. Melt ~1/2 a tsp. of butter over medium-low heat.
  7. Dip one stuffed bread slice into the custard to thoroughly coat the outside.
  8. Place it in the pan and cook until underside is golden brown. Flip and cook until other side is similarly golden.
  9. Repeat cooking process with remaining slices.
  10. Serve topped with maple syrup.


Variants

French Toast Stuffed with Mascarpone and Apricot Jam

Ingredients

  • 1 loaf of bread
  • 170g mascarpone
  • 1/3 c. apricot jam
  • 5 large eggs
  • 1 1/4 c. milk
  • 1 tsp. vanilla extract
  • 1 Tbsp. butter, divided
  • maple syrup, to serve

French Toast Stuffed with Banana and Nutella

Ingredients

  • 1 loaf of bread
  • 1 banana, mashed
  • 1/3 c. Nutella
  • 5 large eggs
  • 1 1/4 c. milk
  • 1 tsp. vanilla extract
  • 1 Tbsp. butter, divided
  • maple syrup, to serve


1 A relatively close-grained bread will be best for this. Something with a fairly light, but fine crumb so that the filling won't leak out. Challah, brioche, and pain de mie are all good choices. I used a loaf of Sister Virginia's bread based on a 19th century Shaker recipe. It is a fairly basic white bread very slightly enriched with a bit of milk, sugar, and lard. But anything that's not too heavy, too open, or too savoury would work well here. Back

Thursday, 1 August 2024

Quick Anchovy-Garlic Sauce

In The Classic Pasta Cookbook, Hazan talks about the virtues of pasta aglio e olio as a simple, low-effort dish -- basically just pasta tossed with olive oil and a bit of sauteed garlic. And he's not wrong, but often I want something that's no more effort to make, but a has a bit more punch to it. This is that sauce; it's handy when we have a bit of leftover plain pasta after preparing a dish that doesn't quite call for a standard 450g package.

The anchovies described here are found in the grocery store packed whole in oil with generous quantities of red pepper flakes. I do not recommend using anchovy filets; they don't dissolve into the sauce the same way.


Quick Anchovy-Garlic Sauce

Ingredients

  • 60-80 mL olive oil
  • 3-4 whole anchovies packed in oil with chili flakes
  • 1 entire bulb's worth of garlic cloves, peeled and minced
  • basil and/or parseley to taste

Directions

  1. Heat the oil in a small pan over medium heat.
  2. Add the anchovies and cook, stirring occasionally, until they break down and dissolve into the sauce.
  3. Reduce heat to medium low. Stir in the garlic and continue cooking until it is has softened and turned fragrant.
  4. Add herbs if desired, toss with pasta and parmesan, and eat.