Showing posts with label gochujang. Show all posts

Saturday, 19 July 2025

Classic Tteokbokki (Korean Rice Cakes)

This is the classic spicy tteokbokki preparation. And it was... fine? I didn't dislike it. But I have to say, I also didn't enjoy it nearly as much as some of Aaron & Claire's other tteokbokki recipes. So, not a huge success overall, but I'll still make a note of it for compleness' sake.


Classic Tteokbokki

Slightly adapted from Aaron & Claire

Ingredients

  • 600g tteokbokki (Korean rice cakes)
  • 3 sheets of Korean fish cakes
  • 4 green onions
  • 3 c. water
  • 1/2 Tbsp. dasida (Korean beef stock powder)
  • 2-4 hard-boiled eggs

Seasoning Paste

  • 2 Tbsp. gochugaru (Korean chile powder)
  • 2 Tbsp. gochujang (Korean chile paste)
  • 2 Tbsp. sugar
  • 3 Tbsp. corn syrup
  • 1 Tbsp. dasida (Korean beef stock powder)
  • 1/4 tsp. black peppercorns, ground

Directions

  1. If your rice cakes are frozen, soak them in cold water for 20 minutes first.
  2. Cut the fish cakes into bite-sized pieces and the green onions into long strips. Set aside.
  3. Combine the gochugaru, gochujang, sugar, corn syrup, dasida, and black pepper for the seasoning paste. Mix well and set aside.
  4. Combine the water with the 1/2 Tbsp. of dasida. Mix well and set aside.
  5. Combine the tteokbokki, fish cakes, green onions, stock, seasoning paste, and hard-boiled eggs in a large pot and bring to a boil.
  6. Reduce heat to medium and simmer until sauce is thickened and rice cakes reach desired doneness (10-13 minutes).

Sunday, 1 June 2025

Classic Tteokbokki

I was pretty tired when making this one and I think it came through in the final results. It was edible, but not great, honestly. And I've had "classic" tteokbokki before and liked it. Oh well... it happens. Maybe I'll make it again sometime or maybe I'll just stick with some of my more reliable tteokbokki recipes.


Classic Tteokbokki

Slightly adapted from Aaron & Calire

Ingredients

Flavour Paste

  • 2 Tbsp. gochugaru (Korean chile flakes)
  • 2 Tbsp. sugar
  • 1 Tbsp. dasida
  • 2 Tbsp. gochujang (Korean chile paste)
  • 3 Tbsp. corn syrup
  • 1/4 tsp. black peppercorns, ground

Everything Else

  • 600g tteokbokki (Korean-style/long cylinder rice cakes)
  • 3 c. water
  • 1/2 Tbsp. dasida
  • 3 sheets Korean fish cakes, cut into bite-sized pieces
  • 4 green onions, cut into 5cm lengths
  • 2-4 hard-boiled eggs

Directions

  1. Combine gochugaru, sugar, dasida, gochujang, corn syrup, and pepper. Mix well and set aside.
  2. If using frozen rice cakes, soak in cold water for 20-30 minutes, then drain and set aside.
  3. Combine the remaining 1/2 Tbsp. dasida with the water and mix well.
  4. Combine rice cakes, stock, fish cakes, green onions, and eggs and bring to a boil.
  5. Reduce heat to medium and simmer, stirring occasionally, until tteokbokki are cooked through (12-13 minutes).

Tuesday, 11 March 2025

Fried Tteokbokki

Yesterday was a weird day. We were all pretty tired. Reiver spent the day in the office (rather than working from home). I didn't get enough sleep, forgot my meds, and was pretty much a zombie for the whole day. And the Kidlet was still recovering from whatever NZ hell-virus she contracted here. So we were all a little out of it and ended up eating at somewhat weird times.

Since lunch was relatively late and large, none of us felt like a very big dinner. (The Kidlet didn't actually want any dinner.) And I wasn't really feeling energetic enough to make anything too substantial anyway. That said, I knew that I'd want something before bed. So I decided to throw together this quick tteokbokki recipe along with some Korean-style corn cheese as a light supper later in the evening. I think it worked quite well (if I do say so myself)!

Photo goes here.

Fried Tteokbokki

From Aaron & Claire

Ingredients

  • 1 Tbsp. gochugaru (Korean chile pepper flakes)
  • 1 Tbsp. sugar
  • 1 Tbsp. corn syrup or honey
  • 1/2 Tbsp. gochujang (Korean chile paste)
  • 1/2 Tbsp. oyster sauce
  • 1/2 Tbsp. garlic paste
  • black pepper, to taste
  • 250g tteokbokki (Korean-style rice cakes)
  • 1 Tbsp. oil
  • 1 green onion, chopped
  • 1-2 tsp. toasted sesame seeds

Directions

  1. Combine gochugaru, sugar, corn syrup, gochujang, oyster sauce, garlic paste, and pepper and stir to combine.
  2. Bring a pot of water to a boil and add the tteokbokki. Boil until just tender (but still a bit chewy).
  3. Drain the tteokbokki and toss with the sauce and oil.
  4. Heat a pan over medium-low heat and add the tteokbokki along with the sauce.
  5. Pan-fry, stirring often, until sauce is a bit caramelized1 and tteokbokki is cooked through.
  6. Sprinkle with green onion and sesame seeds and serve.


1 I didn't cook mine for long enough. The taste was still excellent, but it didn't get the crispy exterior that Claire raved about in the video. I was just too impatient to wait for the crust to develop. Back

Friday, 14 February 2025

Gochujang Jjigae (Gochujang Stew)

I finally managed to get my hands on some gochugaru over here! Of course, much like at home, they don't appear to believe in selling it in small amounts. So now I have an entire kilo of the stuff! But oh well... I won't use all of it in the next two months, but I'll definitely use some. And now I can make more tasty things like this gochujang stew!

Photo goes here.

Gochujang Jjigae

Slightly adapted from Aaron & Calire

Ingredients

  • 2 Tbsp. gochugaru (Korean chile flakes)
  • 1 Tbsp. dasida (Korean beef stock powder)
  • 1 tsp. sugar
  • 3 Tbsp. gochujang (Korean chile paste)
  • 1 Tbsp. soy sauce
  • 1 Tbsp. fish sauce
  • black pepper, to taste
  • ~750g potatoes
  • 1 large onion
  • 5-10 mushrooms1
  • ~300g zucchini
  • 300g tofu (preferably firm or medium)
  • 3 green onions
  • 5-6 cloves garlic, minced
  • 1 Tbsp. oil
  • ~450g stewing beef
  • 6 c. rice water2
  • 1-2 Cheongyang chile, sliced (optional)
  • 1 mild red chile, sliced (optional)

Directions

  1. Combine the gochugaru, dasida, sugar, gochujang, soy sauce, fish sauce, and black pepper. Mix well and set aside.
  2. Cut the potatoes, onion, and mushrooms into bite-sized pieces and set aside.
  3. Cut the zucchini and tofu into bite-sized pieces and set aside in a separate bowl.
  4. Chop the green onions, keeping the whites and green separated. Add the white parts of the green onions ot the flavour paste.
  5. Mince the garlic and add it to the flavour paste.
  6. Heat the oil over medium-high heat.
  7. Add the beef and cook until seared on all sides.
  8. Reduce heat to medium and add the flavour paste mixture. Cook for 3-5 minutes.
  9. Add the potatoes, onion, and mushrooms along with the rice water and bring to a boil.
  10. Cook until potatoes are just tender (~12 minutes).
  11. Add the zucchini and tofu and cook until zucchini is tender (6-7 minutes longer).
  12. Sprinkle with the green parts of the green onions and chilies (if using).
  13. Serve with rice.


1 Aaron recommends 5 shiitake mushrooms, but suggests oyster, enoki, and/or white button mushrooms as possible alternatives. Given that white button mushrooms were on sale this week (but much less flavourful than some of the other options), I just used them and tossed in twice as many as the recipe called for. Back
2 This stew is best served with a bowl of rice. Save the water you use to rinse it before cooking and use it in this stew. If you forget, plain water is also fine to use. But I prefer using the rice water if I can. Both because it gives the stew a bit of extra starch and because... why waste it? I'd much rather use the rice water than pour it down the drain! Back

Friday, 4 October 2024

Gochujang-Glazed Chicken

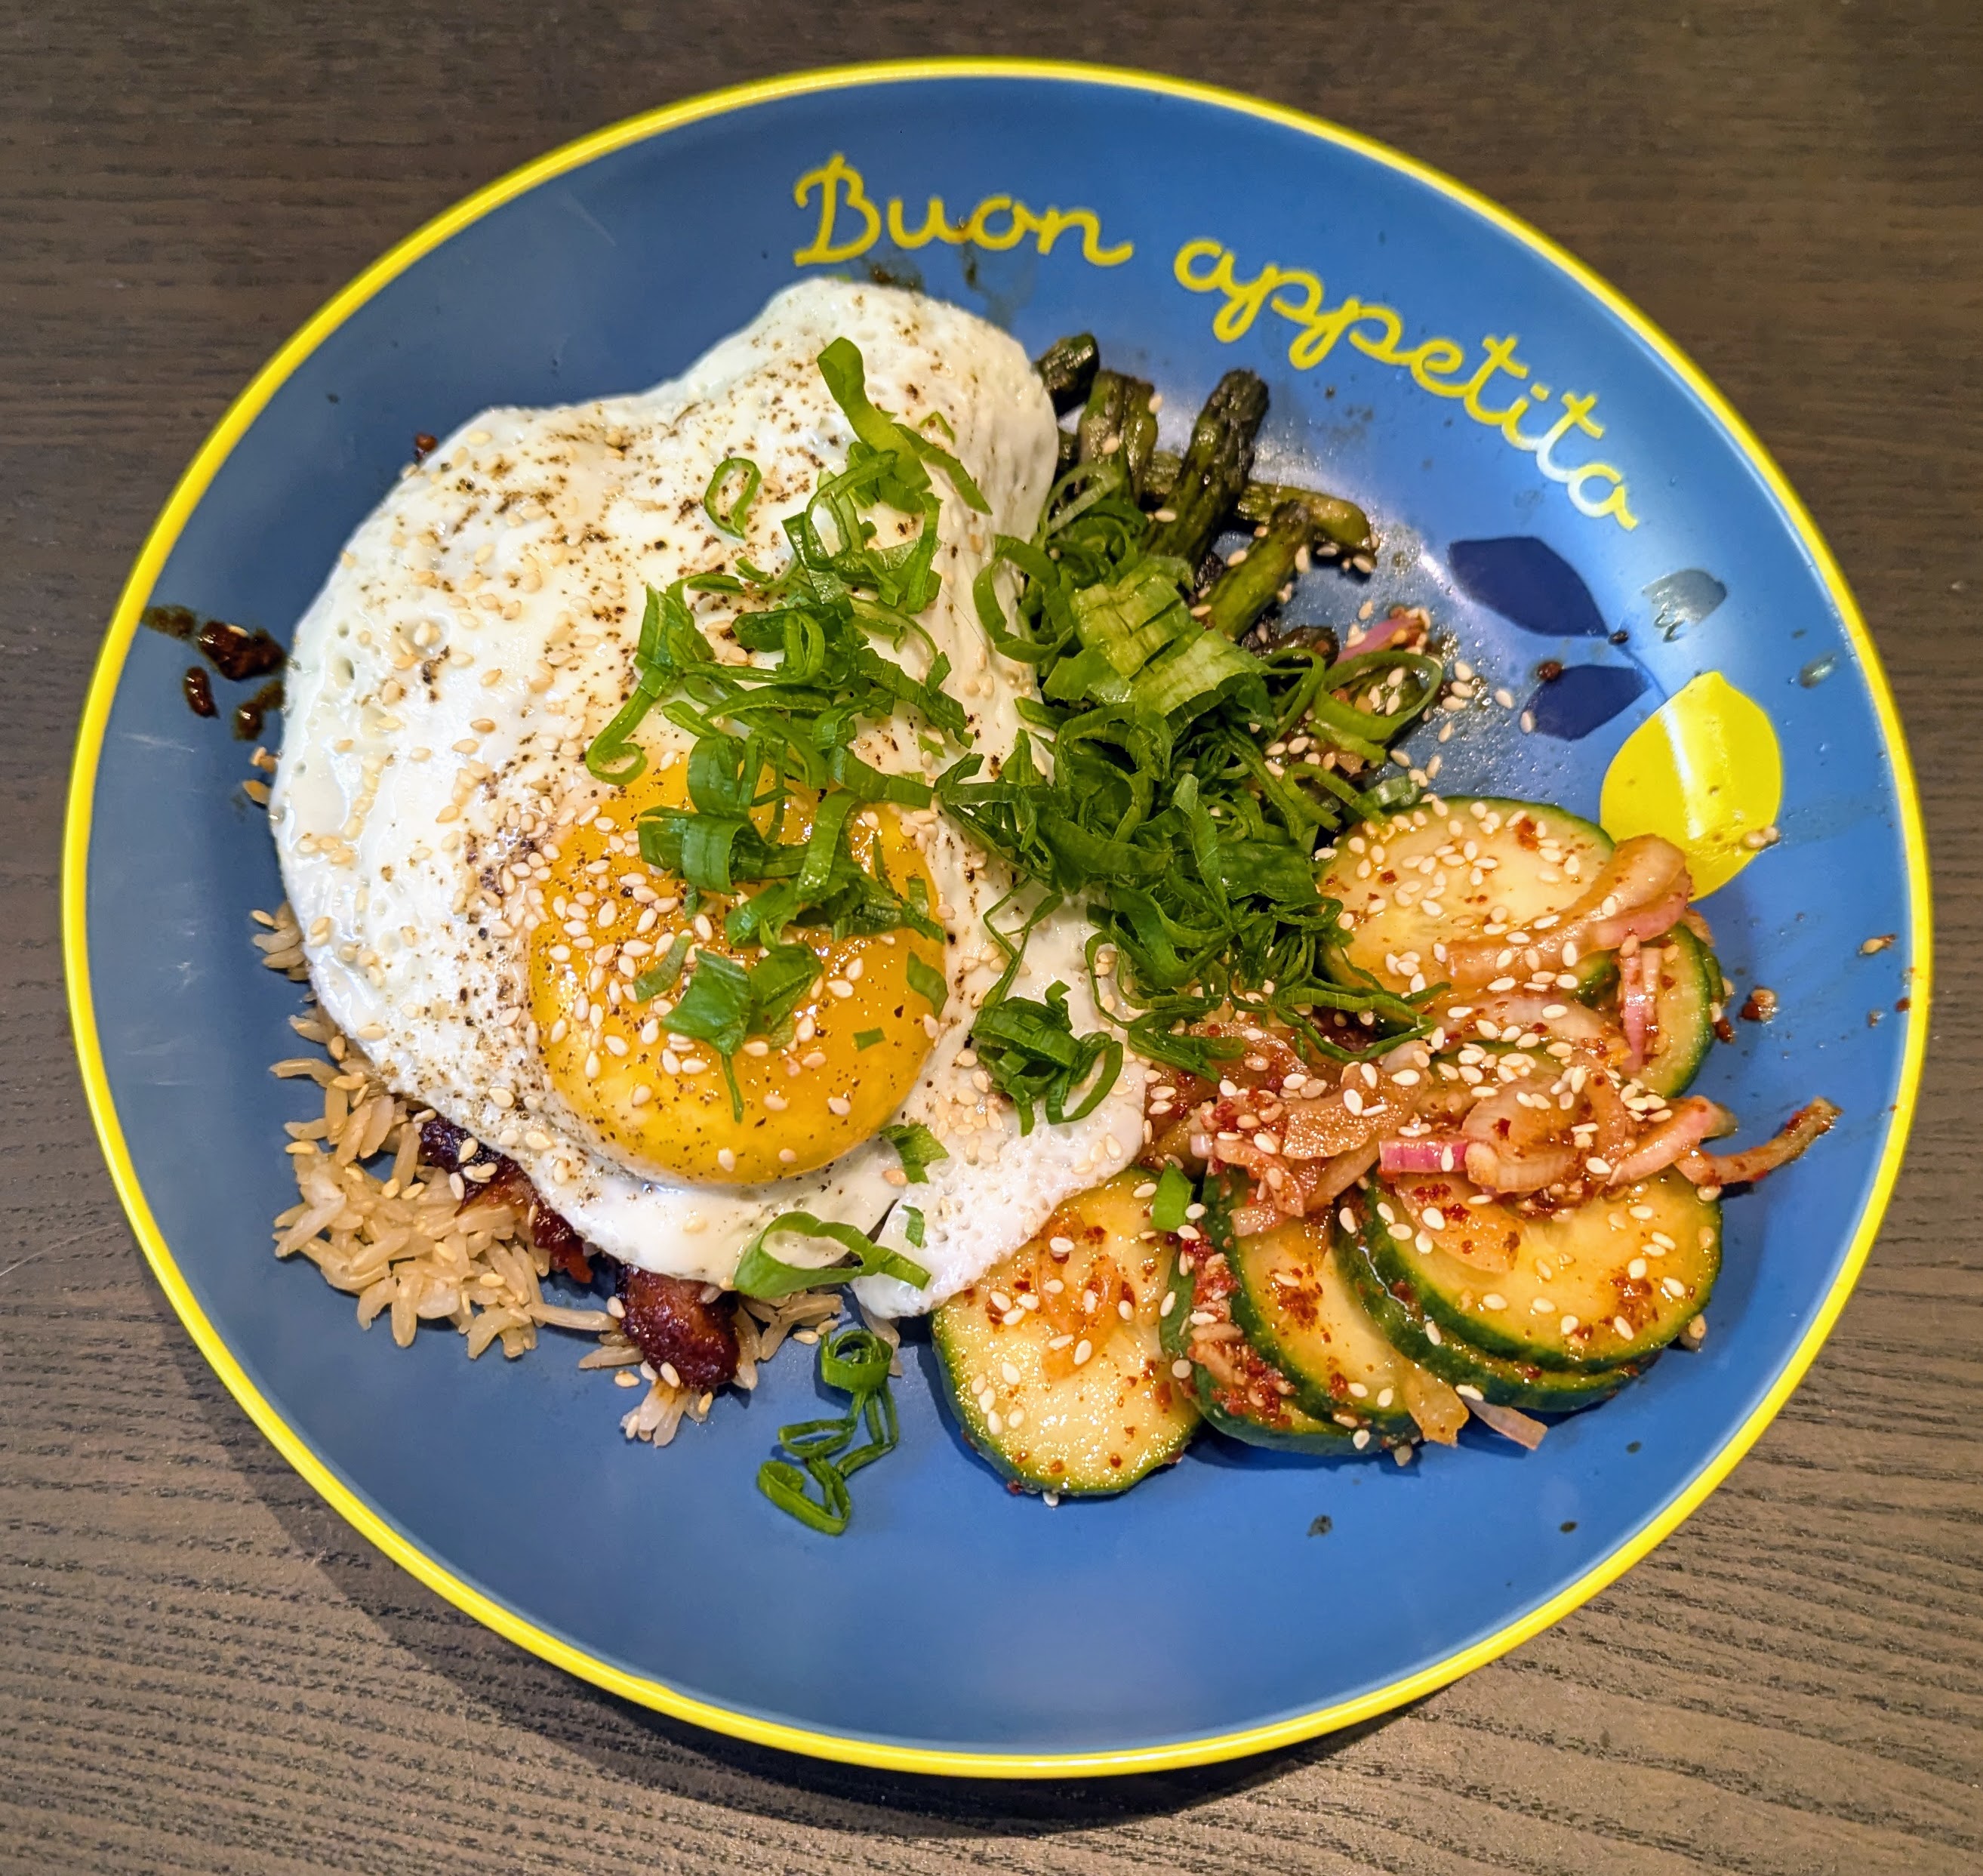
We had a surplus of chicken this week. We thawed out a big package of chicken breasts for a recipe that only actually needed ~1/3 of them. I was planning on making some sort of curry with the remainder. But, in the end, I decided to try something from Aaron & Claire's channel instead. This gochujang chicken looked tasty. And I had everything I needed to make it (except for the asparagus for the side), so I figured I'd give it a try.

The original recipe calls for skin-on chicken thighs, but I figured I could probably make it work with skinless chicken breasts. They're a lot leaner, for sure, so I was somewhat generous with the fat when cooking. And they generally take a lot longer to cook, so I cut each breast into three or four smaller pieces to allow them to cook through more quickly. And, I must say, I really have no complaints with the results! It came out great!

TF even managed to run out and grab some asparagus so we could have our greens with it. And I made a somewhat pared down version of oi muchim (basically just omitting the garlic chives), to give us a few more veggies on our plates. Sadly, I completely forgot about the soft-boiled eggs. Maybe we can have some with the leftovers tonight. But, other than my minor brain fart, this recipe worked out really well! Definitely glad I tried it.


Gochujang-Glazed Chicken

Slightly adapted from Aaron & Calire

Ingredients

Asparagus

  • 1 Tbsp. oil
  • 3-4 cloves garlic, minced
  • 400g asparagus, trimmed and cut into bite-sized pieces
  • 1 mild red chile, thinly sliced (optional)
  • 1/2 Tbsp. light soy sauce
  • 1 Tbsp. oyster sauce

Sauce

  • 2 Tbsp. gochujang
  • 2 Tbsp. gochugaru
  • 1 Tbsp. dark soy sauce
  • 1/2 Tbsp. dasida or chicken bouillon powder
  • 1 tsp sugar
  • 1 Tbsp. honey
  • 2 Tbsp. mirin
  • 1/8 tsp. black pepper, ground
  • 1/2 c. water
  • 1/2 Tbsp. cornstarch (cornflour)

Chicken

  • 600-700g skinless boneless chicken breasts, cut into tender-sized pieces
  • 1/4-1/3 c. cornstarch (cornflour) or potato starch
  • 3-4 Tbsp. schmaltz or lard
  • 5-6 cloves garlic, minced
  • 1 Tbsp. ginger paste
  • 2 green onions, white parts only, chopped

Assembly

  • 2-4 c. cooked rice
  • 4 soft- or medium-boiled eggs
  • 2 green onions, green parts only, chopped
  • 1-2 Tbsp. toasted sesame seeds

Directions

Asparagus

  1. Heat a wok over medium heat.
  2. Drizzle in the oil and swirl to coat.
  3. Add the garlic and stir-fry for 30-60 seconds.
  4. Add the asparagus and stir-fry for 2-3 minutes.
  5. Increase heat to medium-high and add the soy sauce, oyster sauce, and chile (if using) and cook for another 1-2 minutes.
  6. Remove from heat and set aside.

Sauce

  1. Combine all sauce ingredients and mix well. Set aside.

Chicken

  1. Dredge the chicken in the starch to coat completely.
  2. Melt ~1 Tbsp. of fat over medium heat.
  3. Add a few pieces of chicken to the pan and cook, turning every few minutes, until golden-brown on all sides and cooked through (4-5 minutes per side).
  4. Repeat with remaining chicken, adding more fat to pan as needed.
  5. Set chicken aside and add a little more fat to the pan. If there is a lot of fond/stuck-on bits, add a splash of water and deglaze the pan.
  6. Add the garlic, ginger paste, and green onions (white parts only) and stir-fry for 1-2 minutes.
  7. Stir the sauce and pour it into the pan.
  8. Bring to a boil and cook until thickened.
  9. Return the chicken to the pan.
  10. Stir to coat, reduce heat to low, and cook until heated through and well-combined.

Assembly

  1. Place a portion of rice on each bowl/plate.
  2. Top with some chicken, asparagus stir-fry, and a soft-boiled egg (cut in half).
  3. Sprinkle with chopped green onion (green parts only) and sesame seeds and serve.

Sunday, 25 August 2024

Yakgochujang (Fried Gochujang)

Gochujang is already delicious, but when Aaron suggested trying out this "upgraded" gochujang, I couldn't resist.


Yakgohujang

From Aaron & Claire

Ingredients

  • 2 Tbsp. oil
  • 1 small yellow onion, chopped
  • 3 green onions, sliced
  • 3-4 Tbsp. minced garlic
  • 250g ground beef, pork, or chicken1
  • 1 Tbsp. dark soy sauce
  • 1 Tbsp. dasida (Korean beef stock powder)
  • 1 1/2 Tbsp. sugar
  • 1 c. gochujang
  • 1/2 c. water
  • 1/2 Tbsp. sesame oil

Directions

  1. Heat wok over medium-high heat.
  2. Drizzle in oil and swirl to coat pan.
  3. Add onion, green onion, and garlic and stir-fry for a minute or two.
  4. Add beef (or protein of choice) and stir-fry for 3-4 minutes.
  5. Add soy sauce, dasida, and sugar and stir-fry for one more minute.
  6. Reduce heat to medium-low, add the gochujang, and cook for another minute or two.
  7. Stir in the water and continue cooking for another five minutes or so.
  8. Add sesame oil and cook until sauce just beings to bubble.
  9. Remove from heat and allow to cool, stiring a few times while it cools.
  10. Transfer to a jar and store in the fridge for up to a month.
  11. Serve over rice or noodles. Also great on eggs or as a dipping sauce.


1 Aaron also suggests tuna or chopped shiitake mushrooms as potential protein/umami sources. Back

Tuesday, 20 August 2024

Sundae Bokkeum (Stir-Fried Korean Blood Sausage)

We picked up some blood sausage at a Korean supermarket in Toronto last week. Initially I was thinking of using it in place of the ground chicken in the tteobokki recipe I was planning on making. But at the last minute, I decided to look up some serving suggestions and decided to go with this stir-fry instead.


Sundae Bokkeum

Slightly adapted from Maangchi

Ingredients

Stir-Fry

  • 85g flat starch noodles1, soaked in cold water for an hour
  • 500g frozen sundae (Korean blood sausage)
  • 1 Tbsp. sesame oil
  • 6 cloves garlic, minced
  • 125g cabbage, cut into bite-sized pieces
  • 1 onion, sliced
  • 1 green finger chile, sliced
  • 1-2 green onions, sliced
  • 8-10 large perilla leaves3, half chopped, half chiffonaded
  • 1 Tbsp. toasted sesame seeds, ground

Sauce

  • 2 Tbsp. gochugaru
  • 2 Tbsp. gochujang
  • 2 Tbsp. corn syrup
  • 2 Tbsp. soy sauce2
  • 1/2 tsp. black peppercorns, ground
  • 3/4 c. water

Directions

  1. Set your noodles to soak.
  2. Thaw the sausage (in its package) and bring a pot of water to a boil.
  3. Place the sausage, still in its sealed package, into the boiling water, reduce heat, and simmer for 10 minutes.
  4. Remove sausage from water and set aside to cool.
  5. Meanwhile, combine the gochugaru, gochujang, corn syrup, soy sauce, and pepper for the sauce.
  6. Gradually mix in the water. Set aside.
  7. Drain the noodles, cut in half, and set aside.
  8. Once the sausage is cool enough to handle, remove from package and carefully cut into discs ~1cm thick.
  9. Heat the oil over medium-high heat.
  10. Add the garlic and stir-fry until just beginning to crisp (~1 minute).
  11. Add the cabbage and stir-fry for 1 minute.
  12. Add the onion, green onion, and green chile and stir-fry for 2 more minutes.
  13. Add the sauce, noodles, and chopped perilla leaves and cook until noodles become transparent (1-2 minutes).
  14. Add the sausage and reduce heat to medium.
  15. Gently stir to coat with sauce being careful not to break up the sausage slices.
  16. Top with perilla chiffonade and ground sesame and serve.
  17. Preferably serve with kimchi and/or other vegetable side dishes.


1 I didn't have any appropriate noodles, so I just omitted them. We did end up cooking up a little rice to serve with the stir-fry and tteobokki though. Back
2 I used a mix of light and dark soy, but I think either would be fine here. Back
3 I didn't have any perilla, so I added a little bit of dried tarragon and some dried basil to the stir-fry. Not the same, of course, but it did at least add another layer of flavour. If I'd had any Thai basil, I probably would have tried adding a bit of that either as well or instead. Back

Friday, 8 December 2023

Turkey Bulgogi Bowls with Buttery Rice

This Hello Fresh dish was a big hit with everyone, especially with Alex, who actually ate all of the rice as well as the rest of the dish -- almost unheard of.

Turkey Bulgogi Bowls with Buttery Rice

Hello Fresh

Ingredients

  • 1½ C basmati rice
  • 2 tbsp gochuang
  • 4 tbsp mayonnaise
  • 2 tbsp sesame oil
  • 500g turkey
  • 4 green onions, thinly sliced, whites and greens separate
  • 125g carrot, julienned
  • 6 cloves garlic, minced
  • 4 tbsp soy sauce
  • 2 tsp sugar
  • ⅔ C water
  • 250g corn kernels
  • 60g baby spinach
  • 2 tbsp butter

Directions

  1. Cook rice in instant pot using standard procedures.
  2. Whisk together gochujang and mayo in a small bowl.
  3. Heat sesame oil in a large pan over medium-high heat.
  4. Add turkey and cook, breaking up, until fully cooked, 4-5 minutes.
  5. Add onion whites, carrots, and garlic. Cook, stirring occasionally, until carrots begin to soften, 2-3 minutes.
  6. Add soy sauce, sugar, water, and spinach. Continue cooking until most of the liquid has been absorbed.
  7. Season with black pepper to taste.
  8. Once the rice is finished, stir in the onion greens, corn, and butter. Stir over keep-warm until the rice is well buttered and the corn is heated through.
  9. Serve rice topped with turkey mixture and gochujang mayo.

Wednesday, 5 July 2023

Gochujang Garlic Tofu

This tofu was AMAZING! I mean, with 15 cloves of garlic, how could it not be?! And, of course, the gochujang and sesame oil and frying didn't hurt either. That said, I think it also would have been very good baked.

I over-cooked my egg, but it was still tasty!

Gochujang Garlic Tofu

Slightly adapted from Aaron & Claire

Ingredients

  • 1 Tbsp. gochugaru
  • 1 tsp. dasida
  • 1 Tbsp. sugar
  • 1/8 tsp. black peppercorns, ground
  • 2 Tbsp. gochujang
  • 1 Tbsp. light soy sauce
  • 1 Tbsp. oyster sauce
  • 1 Tbsp. corn syrup
  • 2 Tbsp. mirin
  • 1/2 c. water
  • 1/2 Tbsp. cornstarch
  • 350g extra-firm tofu, frozen and thawed
  • 1/2 c. potato starch
  • 2-4 Tbsp. canola oil
  • 1 head of broccoli, cut into florets
  • 1 tsp. garlic paste
  • 1 tsp. dark soy sauce
  • 1 Tbsp. sesame oil, divided
  • 1 Tbsp. toasted sesame seeds
  • 2-4 green onions, chopped, greens and whites kept separate
  • 10-15 cloves of garlic, chopped
  • 2 Tbsp. ginger paste
  • 2 fresh chilies, sliced (optional)
  • cooked rice, to serve
  • soft-boiled or fried eggs, to serve

Directions

  1. Combine the goochugaru, dasida, sugar, pepper, gochujang, light soy sauce, oyster sauce, corn syrup, and mirin in a large measuring cup.
  2. Stir in the water and cornstarch and set aside.
  3. Drain the tofu and press out as much liquid as possible.
  4. Cut the tofu into cubes and dry it a little more.
  5. At this point you can either proceed with the recipe as written, or make a batch of extra delicious tofu and use that as the tofu component of this recipe. The tofu won't be quite as crispy, but you'll use a lot less oil.
  6. Coat the tofu in potato starch (if not using the "extra delicious tofu recipe").
  7. Heat 2-3 Tbsp. of oil over medium heat and add the tofu.
  8. Cook, turning occasionally, until tofu is crispy on all sides (7-8 minutes).
  9. Meanwhile, steam the broccoli for 3-4 minutes, then shock it in cold water.
  10. Toss the broccoli with the garlic paste, dark soy sauce, 1/2 Tbsp. of the sesame oil, and toasted sesame seeds and set it aside.
  11. Once the tofu is cooked remove it from the pan and set it aside.
  12. Add a bit more oil to the pan (1/2-1 Tbsp.) and fry the garlic, ginger, and the white parts of the green onions for a minute or two.
  13. Pour in the gochujang sauce and cook for 3-4 minutes.
  14. Add the fried tofu and stir until it's well-coated in the sauce.
  15. Stir in the remaining 1/2 Tbsp. of sesame oil.
  16. Place some hot rice in a bowl and top it with tofu and broccoli.
  17. Garnish with the green parts of the green onions, toasted sesame seeds, sliced chilies, and a halved soft-boiled (or fried) egg and serve.


Variants

Vegetarian Version

Ingredients

  • 1 Tbsp. gochugaru
  • 1 tsp. vegetable bouillon powder
  • 1 Tbsp. sugar
  • 1/8 tsp. black peppercorns, ground
  • 2 Tbsp. gochujang
  • 1 Tbsp. light soy sauce
  • 1 Tbsp. vegetarian oyster sauce
  • 1 Tbsp. corn syrup
  • 2 Tbsp. mirin
  • 1/2 c. water
  • 1/2 Tbsp. cornstarch
  • 350g extra-firm tofu, frozen and thawed
  • 1/2 c. potato starch
  • 2-4 Tbsp. canola oil
  • 1 head of broccoli, cut into florets
  • 1 tsp. garlic paste
  • 1 tsp. dark soy sauce
  • 1 Tbsp. sesame oil, divided
  • 1 Tbsp. toasted sesame seeds
  • 2-4 green onions, chopped, greens and whites kept separate
  • 10-15 cloves of garlic, chopped
  • 2 Tbsp. ginger paste
  • 2 fresh chilies, sliced (optional)
  • cooked rice, to serve
  • soft-boiled or fried eggs, to serve

Sunday, 11 June 2023

Tuna Cabbage Rice Bowl

This was pretty tasty and also pretty easy to make. Not an all-time favourite, but I'd make it again next time we have cabbage to destroy. It requires a bunch of ingredients, but apart from the cabbage they're all things we have on hand reliably, and half of them are just combined to make the sauce so it's not as complicated as it looks.


Tuna Cabbage Rice Bowl

Aaron & Claire

Ingredients

  • 3 tbsp gochujang
  • 2 tbsp gochugaru
  • 2 tbsp soy sauce
  • 2 tbsp mirin
  • 1 tbsp oyster sauce
  • 1 tbsp minced garlic
  • 2 tsp sugar
  • 800g green cabbage, cored and cut into bite-sized pieces
  • 1 yellow onion, thinly sliced
  • 4 green onions, sliced, whites and greens divided
  • 1 tbsp oil
  • 300g tinned tuna, drained
  • 1 tbsp toasted sesame oil
  • black pepper
  • 2 C cooked rice
  • 4-6 soft-boiled eggs
  • toasted sesame seeds

Directions

  1. Whisk together the gochujang, gochugaru, soy sauce, mirin, oyster sauce, garlic, and sugar to form the sauce; set aside.
  2. Heat the oil in a large, deep skillet over medium-high heat.
  3. Add the green onion whites and cook until fragrant, ~1 minute.
  4. Add the cabbage and onion and stir-fry until the cabbage softens, 3-5 minutes.
  5. Add the tinned tuna and continue stir-frying for another 3 minutes.
  6. Remove from heat. Add the sesame oil and black pepper to taste.
  7. Serve over rice, garnished with the eggs, sesame seeds, and green onion greens.

Tuesday, 1 March 2022

Bibim Ramen

For this one we actually had packages of "bibim ramen" on hand, so I skipped the sauce described here and just used the sauce in the packet. I've included the full sauce recipe here, but if making it with bibim ramen packages from the cupboard, skip all the sauce assembly.


Bibim Ramen

Aaron & Claire

Ingredients

  • 1 package ramen
  • 1 tbsp sugar
  • 1 tbsp gochujang
  • 1 tbsp vinegar
  • 1 tbsp sesame oil
  • ⅓ of the ramen packet
  • 1 hard-boiled egg, bisected
  • ¼ apple or pear, julienned
  • 2-3 slices cucumber, julienned
  • a bit of cabbage, julienned
  • sesame seeds

Directions

  1. Cook ramen in boiling water for 2-3 minutes, then quench in cold water.
  2. Whisk together sugar, gochujang, vinegar, sesame oil, and ramen powder to form sauce; toss with noodles.
  3. Top with egg, apple, cucumber, cabbage, and sesame seeds.

Monday, 28 February 2022

Bibimbap (Mixed Rice)

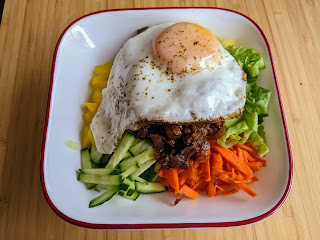
I love bibimbap. It's the dish that introduced me to Korean food and it's still one of my favourites. But it's always been one of those things that I only ever get from restaurants. I've never made my own bibimbap at home. As usual though, Aaron makes things easy and approachable and my first foray into homemade bibimbap was a huge success. TF and I both loved it and so did the Kidlet. She said it was a "super favourite" and asked for it in her lunch tomorrow as well.

I played a bit fast-and-loose with the vegetables and toppings, but you can get away with doing that with dishes like this. Aaron recommended carrots, zucchini, shiitake mushrooms, lettuce, salted daikon with gochugaru, soy bean sprouts, cucumbers, saucy ground beef, and a sunny side up egg. We didn't have the zucchini, bean sprouts, or any fresh daikon, so we swapped them out for bell pepper and danmuji (pickled daikon). And we swapped out the ground beef for chopped, thinly sliced beef. Really though, I think as long as you have rice, at least a few different veggies, some protein (meat, tofu, tempeh, seitan, etc.), and an egg... you're good to go! Make it what you want.


Bibimbap

Slightly adapted from Aaron & Claire

Ingredients

Vegetables

All of the veggies should be considered optional, but you should try to make sure you have at least four different things if possible.
  • shiitake mushrooms, sliced
  • cucumber, julienned
  • bell pepper, thinly sliced
  • lettuce, cut into bite-sized pieces
  • cabbage, shredded
  • corn
  • fresh daikon or danmuji, julienned
  • coarse sea salt
  • fine gochugaru
  • carrot, julienned
  • zucchini, julienned

Beef

  • 1 onion, chopped
  • 4 green onions, chopped
  • 1 Tbsp. sugar
  • 1 Tbsp. minced garlic or garlic paste
  • 5 Tbsp. light (regular) soy sauce
  • 3 Tbsp. oyster sauce
  • 1 Tbsp. sesame oil
  • 200g beef, ground or thinly sliced
  • pepper, to taste

Sauce

  • 3 Tbsp. gochujang
  • 1 Tbsp. corn syrup
  • 1 Tbsp. water

Assembly

  • cooked rice (~3/4 c. per person)
  • sesame oil (1 tsp. per person)
  • eggs (1 per person)

Directions

Vegetables

  1. If you're using dried mushrooms, soak them in hot water for a while before you start cooking. Sometimes they can take a long time to soften up. If you're using fresh, you can just slice them while prepping the rest of the veggies.
  2. Chop all your veggies.
  3. If using fresh daikon, sprinkle some salt on it and let it sit for at least 15 minutes. Then drain off any liquid and sprinkle with gochugaru.
  4. Cook the carrot in a little oil until slightly softened. Sprinkle with a little salt if you wish.
  5. Give the zucchini the same treatment. Be careful not to overcook it!
  6. Cook the mushrooms in a little oil too. Season with sesame oil, pepper, and either salt or soy sauce. (I like soy sauce.)
  7. Set the veggies aside while you get everything else ready.

Beef

  1. Combine onion, green onion, sugar, garlic, soy sauce, oyster sauce, and sesame oil in a bowl.
  2. Cook beef in a little oil and season with some pepper.
  3. Pour in the sauce and cook over medium-low until most of the liquid has evaporated.

Sauce

  1. Combine gochujang, corn syrup, and water and mix well.

Assembly

  1. Put some rice in a bowl and drizzle with a teaspoon of sesame oil.
  2. Top with veggies. Try to keep each veggie separate so you get lots of different colours each in their own section.
  3. Place a spoonful of beef in the centre.
  4. Fry an egg1 and place it on top.
  5. Serve with sauce on the side.
  6. Instruct diners to add some sauce to their bowl and then mix everything up before eating.


1 Sunny side up is generally preferred. The runny yolk acts as a sauce for the rice and veggies. I like to do "sunny side up in the shade" where you cover the pan so that the egg steams a little bit and sets the thin film of albumen over the yolk. This makes the yolk look a little cloudy, so it's not as aesthetically pleasing, but I don't mind that. If you're not big on runny yolks, you could have your egg scrambled or boiled instead. Or if you don't like fried eggs, soft poached eggs would also work quite well. Much like with the vegetables, there's a lot of flexibility here. Back

Tuesday, 22 February 2022

Mandu Gangjeong (Dumplings in Sweet Sauce)

Fried dumplings coating in a sweet and mildly spicy sauce. It's extra-good if you deep fry the dumplings, but pan-frying works well too. Aaron calls for 12 dumplings for this amount of sauce, but I felt like that was too much sauce for the amount of dumplings. (Maybe my dumplings are smaller.) I think this amount of sauce would probably be about right for 24 dumplings, but adjust according to your own tastes and the size of your dumplings.

Mandu Gangjeong

Slightly adapted from Aaron & Claire

Ingredients

  • 2 Tbsp. oil
  • 24 frozen dumplings
  • 1 Tbsp. gochujang
  • 1 Tbsp. gochugaru
  • 2 Tbsp. sugar
  • 1 Tbsp. oyster sauce
  • 6 Tbsp. corn syrup
  • 1 Tbsp. light (regular) soy sauce
  • 1 Tbsp. garlic paste (or minced fresh garlic)
  • 5 Tbsp. ketchup
  • 1 green onion, chopped
  • 1 tsp. sesame seeds

Directions

  1. Heat oil over medium-low heat.
  2. Add dumplings in a single layer and cook (slowly) until browned and crispy on the bottom. As each side becomes crispy, turn them to cook another side until as much of the surface as possible has been crisped.
  3. Meanwhile, combine gochujang, gochugaru, sugar, oyster sauce, corn syrup, soy sauce, garlic, and ketchup and mix well.
  4. Once dumplings are crisped all over, pour in the sauce and stir to coat the dumplings all over.
  5. Cook until sauce thickens and clings to the dumplings.
  6. Sprinkle with green onions and sesame seeds and serve.

Sunday, 20 February 2022

Rabokki (Ramyun + Tteokbokki)

I had intended this to be a sort of fridge clean-out dinner. Sadly my fried tofu had gone off, so the protein was a little lacking. And I forgot to boil the egg in advance, so the everything else was bit overcooked by the time the egg was ready to go. It was still tasty, but it would've been improved by better planning and organization.


Rabokki

Slightly adapted from Aaron & Claire

Ingredients

  • 2 Tbsp. gochugaru
  • 2 1/2 Tbsp. sugar
  • 1/2 Tbsp. ramyun powder
  • 2 Tbsp. gochujang
  • 2 Tbsp. corn syrup
  • 1 Tbsp. light (regular) soy sauce
  • 1/2 Tbsp. oyster sauce
  • 1 Tbsp. mirin
  • 1/2 Tbsp. dashida (or beef stock concentrate)
  • black pepper, to taste
  • 200g rice cakes
  • 2 Korean fish cakes (or fried tofu), cut into bite-sized pieces, divided
  • 1 onion, sliced
  • 2 green onions, sliced
  • 3 c. water
  • 1 c. cabbage, cut into bite-sized pieces
  • 1-2 hard-boiled egg(s)
  • 1 package ramyun (soup kind)
  • 2 slices cheese (optional)

Directions

  1. Combine gochugaru, sugar, and 1/2 Tbsp. of powder from the ramyun.
  2. Add gochujang, corn syrup, soy sauce, oyster sauce, mirin, dashida/beef stock, and pepper and stir to combine.
  3. For best results, cover and chill overnight.
  4. If using frozen rice cakes, soak them in cold water for 20 minutes, then drain.
  5. Add rice cakes, half the fish cakes, half the onion, and half the green onions to a pot along with the water.
  6. Bring to a boil over medium-high heat.
  7. Cook for a couple minutes, stirring occasionally.
  8. Reduce heat to low.
  9. Andd the remining fish cakes, onion, and green onions.
  10. Add the cabbage, egg(s), ramyun noodles, and falkes/dried veggies from the ramyun package.
  11. If desired, top with cheese, sesame seeds, and more green onions.
  12. Cook until noodles are done (2-3 minutes).
  13. Serve with fried dumplings for dipping in the sauce.


Variations

Vegetarian Version

Ingredients

  • 2 Tbsp. gochugaru
  • 2 1/2 Tbsp. sugar
  • 1/2 Tbsp. ramyun powder
  • 2 Tbsp. gochujang
  • 2 Tbsp. corn syrup
  • 1 Tbsp. light (regular) soy sauce
  • 1/2 Tbsp. vegetarian oyster sauce
  • 1 Tbsp. mirin
  • 1/2 Tbsp. vegetable stock concentrate
  • black pepper, to taste
  • 200g rice cakes
  • 2 fried tofu, cut into bite-sized pieces/slices, divided
  • 1 onion, sliced
  • 2 green onions, sliced
  • 3 c. water
  • 1 c. cabbage, cut into bite-sized pieces
  • 1-2 hard-boiled egg(s)
  • 1 package ramyun (soup kind)
  • 2 slices cheese (optional)

Vegan Version

  • 2 Tbsp. gochugaru
  • 2 1/2 Tbsp. raw sugar or 5 1/2 tsp. agave syrup
  • 1/2 Tbsp. ramyun powder
  • 2 Tbsp. gochujang
  • 2 Tbsp. corn syrup
  • 1 Tbsp. light (regular) soy sauce
  • 1/2 Tbsp. vegetarian oyster sauce
  • 1 Tbsp. mirin
  • 1/2 Tbsp. vegetable stock concentrate
  • black pepper, to taste
  • 200g rice cakes
  • 2 fried tofu, cut into bite-sized pieces/slices, divided
  • 1 onion, sliced
  • 2 green onions, sliced
  • 3 c. water
  • 1 c. cabbage, cut into bite-sized pieces
  • 1 package ramyun (soup kind)
  • 2 slices non-dairy cheese (optional)

Thursday, 10 February 2022

Ssamjang (Korean Dipping Sauce)

You can get ready-made ssamjang at many Asian grocery stores, but I didn't have any easily to hand, so this recipe was a life-saver. If you are looking to buy ready-made ssamjang, look for the green tub. (Red tub is gochujang, brown tub is doenjang, green tub and ssamjang.)

Ssamjang

Slightly adapted from Maangchi

Ingredients

  • 1/4 c. doenjang1
  • 1 Tbsp. gochujang
  • 1 scallion, minced
  • 1/4 c. minced onion
  • 1 clove garlic, minced
  • 2 tsp. honey
  • 2 tsp. sesame oil
  • 2 tsp. toasted sesame seeds

Directions

  1. Combine all ingredients and mix well.
  2. Serve as a dipping sauce or topping with rice, veggies, meat, or anything else that strikes your fancy!


1 I didn't have any doenjang on hand and I really didn't want to have to leave the house again today, so I made do with a mix of white miso paste and hoisin sauce. Red miso generally makes a better substitute for doenjang, but I didn't have any of that either. I used 2 Tbsp. of white miso + 2 Tbsp. of hoisin in place of the doenjang. My ssamjang was delicious! Back

Friday, 7 January 2022

Tteokbokki Ramen

The classic flavours of Korean tteokbokki, but with ramen taking the place of the rice cakes. The sauce has been simplified a bit, but the key elements of gochujang, sugar, and garlic are still there.


Tteokbokki Ramen

Slighlty adapted from Aaron & Claire

Ingredients

  • 1 Tbsp. gochujang
  • 1 Tbsp. sugar
  • 1/2 Tbsp. garlic paste
  • 1/2 tsp. ramen powder
  • 300mL water
  • Korean fish cakes1
  • 1/2 small onion, sliced
  • 1-2 baby bok choy, sliced (optional)
  • 1-2 cabbage leaves, sliced thin and cross-cut into bite-sized pieces
  • 1 package Korean-style ramen (ramyun)
  • 1 green onion, sliced

Directions

  1. Mix gochujiang, sugar, garlic, and 1/2 of the ramen powder to make the sauce.
  2. Bring the water to a boil and add the fish cakes, onion, bok choy (if using), cabbage, ramen noodles, and sauce. Also add the vegetable packet if your ramen comes with one.
  3. Cook until noodles are done (~3 minutes).
  4. Sprinkle with green onion and serve.


1 I couldn't find any Korean-style fish cakes, so I got a bag of fried tofu triangles instead. I sliced them thin and used them in place of the fish cakes. I'm sure it's quite different from actual fish cakes, but it was still good and it was what I had available. It's also an easy way to make the dish vegetarian. If you're going for a vegan meal, just make sure your sugar is vegan are you should be all set! Back

Saturday, 20 February 2021

Gochujang Tuna Rice Breakfast Bowl

This breakfast dish comes from one of Aaron & Claire's youtube videos. It's a bit involved, although you can speed things up by preparing the sauce the previous night and leaving it in the fridge. We had two bowls worth of rice and lettuce, and it turns out this produces quite a lot of tuna topping, especially with the addition of the frozen vegetables; it made two very hearty breakfast bowls with some tuna left over. I think four bowls would be a natural amount for this recipe, and you can always make less and fridge the remaining tuna for the next morning.

I don't think I would want to put in the time to make this every morning, but it was very tasty and very filling, so I'd definitely make it again sometime.

Gochujang Tuna Rice Breakfast Bowl

Aaron & Claire

Ingredients

  • 1 tbsp Korean chili flakes (substitute chili powder 1:1 if needed)
  • 1 tbsp gochujang
  • ½ tbsp oyster sauce
  • 1 tbsp corn syrup
  • ½ tbsp sesame oil, plus extra for serving
  • ½ tbsp chili oil
  • 2 tbsp corn oil
  • 2 garlic cloves, minced
  • 2+2 green onions, chopped, divided
  • ½ onion, finely chopped
  • 1 fresh red Thai chili, minced
  • 2 tins (170g wet/120g dry) tuna
  • ¼ C frozen peas (optional)
  • ¼ C frozen corn (optional)
  • rice (already cooked)
  • shredded vegetables to taste (carrot, lettuce, cucumber, cabbage, etc)
  • 4 eggs
  • sesame seeds for garnish

Directions

  1. Whisk together chili flakes, gochujang, oyster sauce, corn syrup, sesame oil, and chili oil to form the sauce.
  2. Heat the corn oil over medium heat.
  3. Add the garlic and two of the green onions and cook until fragrant, ~30 seconds.
  4. Add the onion and chili and cook, stirring often, until translucent.
  5. Add the tuna, sauce, peas, and corn, and mix well.
  6. Meanwhile, prepare four bowls by putting the rice in them, warming it up, and topping with the shredded vegetables.
  7. When the tuna is warmed through, top the rice-vegetable mix with the tuna.
  8. Quickly fry the eggs (or cook them alongside the tuna, if your pan is large enough) and place atop the tuna.
  9. Garnish with sesame seeds, the remaining green onions, and a drizzle of sesame oil.