Showing posts with label Laurel's Kitchen Bread Book. Show all posts

Friday, 5 May 2023

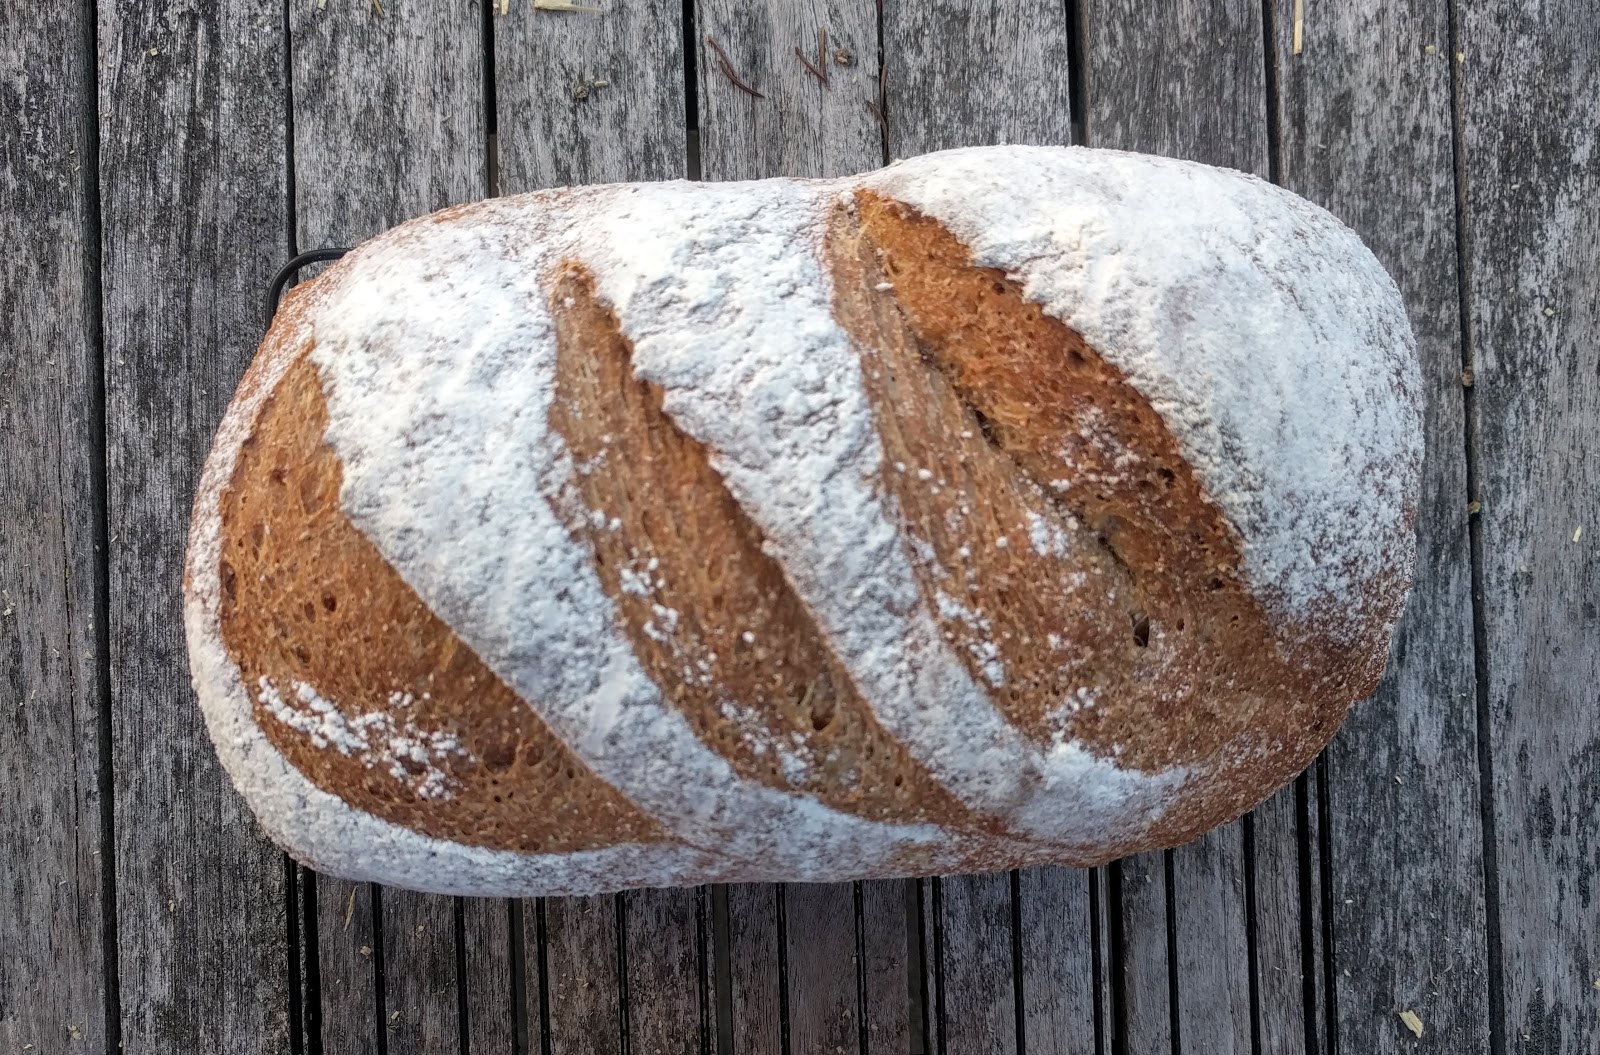
Kasha Bread

It's been a while since I've done any new Laurel's Kitchen recipes. I've mostly been doing sourdough lately to maintain the starter. But I was in the mood for something different this time, so I figured I'd crack Laurel's back open and see what looked good.

This would be just your basic, everyday whole wheat bread with a few buckwheat groats mixed in. Except for the fact that the liquid -- rather than being water or even milk -- is a raisin purée! It makes the bread a bit denser and moister than it would otherwise be. Between that and the kasha, I found it a bit tricky to get the hydration levels and baking times just right, but I'm decently happy with how it came out in the end.

Kasha Bread

From the Laurel's Kitchen Bread Book

Ingredients

  • 1 c. raisins
  • 1 1/2 c. water
  • 122g kasha (buckwheat groats)
  • 14g coarse sea salt
  • 830g hard (strong/high grade/bread) whole wheat flour
  • 2 tsp. active dry yeast
  • 1/2 c. warm water
  • 2 Tbsp. oil

Directions

  1. Combine the raisins with the water and bring to a simmer over medium heat. Cook until raisins are very soft.
  2. Purée raisins with their cooking liquid and add enough cold water to bring the total volume to 2 1/2 c. Set aside to cool.
  3. In a large bowl, combine the kasha, salt, and flour, mix, and make a well in the centre.
  4. In a small bowl or measuring cup, combine the yeast and warm water. Set aside for ~5 minutes.
  5. Once raisin mixture has sufficiently cooled (to ~40°C), pour it into the well in the centre of the dry ingredients along with the yeast mixture.
  6. Gradually mix the dry ingredients into the wet, working from the centre outward.
  7. Knead for 5-10 minutes, then begin working in the oil.
  8. Once all of the oil has been worked in, knead for 10-15 minutes more, adjusting hydration of dough as necessary.
  9. Cover and ferment at room temperature for ~90 minutes.
  10. Use finger poke test to determine when dough is ready to knock back.
  11. Once ready, knock it back and knead it a few strokes.
  12. Divide dough into two equal portions, cover, and rest for 10-15 minutes.
  13. Meanwhile, grease two loaf pans.
  14. Shape loaves and drop them into the pans.
  15. Cover and proof at room temperature for 45-60 minutes.
  16. Use finger poke test to determine when dough is done rising.
  17. Preheat oven to 200°C (400°F).
  18. Carefully slash loaves.
  19. Bake at 200°C (400°F) for 10 minutes.
  20. Reduce heat to 180°C (350°F) and bake for another 40 minutes.
  21. Transfer to wire rack to cool.

Monday, 31 May 2021

Crunchy Millet Bread

symbol made this (they make all the bread), but asked me to do the writeup. I have strong feelings about this bread: it is delicious. It's light and fluffy and the millet makes a nice crunch in it without being overbearing. It doesn't have the firm durability of the sourdoughs but it's a delightful sandwich bread.


Also -- and I feel like I should mention this specifically -- it toasts up beautifully. The inside remains light and fluffy, the outside gets brown and crispy, and it has a pretty wide time band in which it is crispy without being burnt or overtoasted. Look at this:


Crunchy Millet Bread

Laurel's Kitchen Bread Book, p.214

Ingredients

  • 2 tsp (7g) active dry yeast
  • ½ C (120mL) warm water
  • 2 tbsp (30mL) honey
  • 1 C (235mL) cottage cheese
  • 1¼ C (300mL) hot water
  •  ½ C (100g) millet
  • 5 C (750g) whole wheat flour
  • 2½ tsp (14g) salt
  • 2 tbsp (28g) butter

Directions

  1. Dissolve yeast in warm water.
  2. Stir together honey, cottage cheese, and hot water.
  3. Mix the millet, flour, and salt together.
  4. Make a well in the middle; pour in the yeast and cottage cheese mixtures.
  5. Adjust as needed to make a soft dough by adding flour or water.
  6. Knead until very elastic, ~20 minutes; after ten minutes, smear the butter onto the countertop and work it into the dough.
  7. Form the dough into a smooth ball, cover it, and let rise once in a warm place.
  8. Divide into two balls, and let them rest, covered, until they regain their suppleness, ~15 minutes.
  9. Shape the loaves carefully, dusting the counter with flour to help prevent tearing. Proof in a warm place.
  10. Bake at 400°F for 10 minutes, then reduce heat to 325°F and bake for another 35.

Saturday, 10 April 2021

Peanut-Corn Muffins

I could not get over how incredibly odd this recipe sounded. The authors swore it was delicious and an especially big hit with kids. I wasn't entirely sold, but I was curious.

The peanuts and the corn both came through nicely. I don't think they really complement each other, but they don't clash either. I feel like maybe they need another element to tie them together. I think adding a few blueberries might make the peanuts feel a little more harmonious and like they're actually meant to be there. Overall, I can't say that I think this will become a new favourite, but the muffins were tasty enough. I might try them again sometime. Especially if I have blueberries to use up.

Peanut-Corn Muffins

Slightly adapted from the Laurel's Kitchen Bread Book

Ingredients

  • 3/4 c. whole wheat flour
  • 1 tsp. baking powder
  • 1/4 tsp. coarse sea salt, ground
  • 3/4 c. cornmeal
  • 1/4 c. roasted, unsalted peanuts, chopped
  • 1 Tbsp. oil
  • 1/4 c. natural (no salt or sugar added) peanut butter
  • 2-3 Tbsp. honey
  • 1 1/2 c. buttermilk
  • 1 large egg
  • 1 c. blueberries, tossed in 1-2 tsp. of additional flour (optional)

Directions

  1. Preheat oven to 180°C (350°F) and grease a muffin tin.
  2. Sift baking powder into flour.
  3. Add salt, cornmeal, and peanuts.
  4. Whisk oil and honey into the peanut butter.
  5. Add buttermilk and egg and mix thoroughly.
  6. Add the dry ingredients and stir to combine.
  7. Stir in blueberries (if using).
  8. Scoop batter into prepared muffin tin.
  9. Bake at 180°C (350°F) for 18-20 minutes.
  10. Remove from oven and let cool in tin for 5-10 minutes.
  11. Turn muffins out onto wire rack to finish cooling.

Monday, 29 March 2021

German (Faux-)Sourdough Rye

I'm still learning how to work with rye flour. I struggle to get good structure, even with rye-wheat blends. I feel like I did fairly decently with this mixed wheat-rye sourdough. It sitll wasn't perfect, but it was much better than my previous ventures into rye breads.

I will note that this isn't a "true" sourdough. It does use sourdough starter to add some flavour and acidity, but it also relies on commercial yeast for much of the leavening power.

German Sourdough Rye

Slightly adapted from the Laurel's Kitchen Bread Book

Ingredients

Basic Sour

  • 1/3 c. ripe/fed sourdough starter
  • 60g whole rye flour
  • 70g hard (strong/high grade/bread) whole wheat flour
  • ~1/4 c. water

Full Sour

  • basic sour (see above)
  • 1 c. water + 2-4 Tbsp. water, divided
  • 255g whole rye flour

Dough

  • 4 tsp. active dry yeast (or 1 Tbsp. instant yeast)
  • 1 1/2 c. warm water
  • full sour (see above)
  • 385g whole rye flour
  • 450g hard (strong/high grade/bread) whole wheat flour
  • 3 1/2 tsp. coarse sea salt
  • 1/2 tsp. caraway seeds
  • up to 1 1/2 c. water

Directions

Basic Sour

  1. Combine the starter, flours, and enough water to make a stiff dough.
  2. Cover and allow to rest at room temperature for ~12 hours.

Full Sour

  1. Soften the basic sour in the water.
  2. Work in the flour to make a very stiff, clay-like dough. You may need to add a little bit of extra water, but the dough should remain quite stiff.
  3. Knead the dough a little bit, working in another 2-4 Tbsp. of water to soften it slightly. Do not add so much water that the dough becomes sticky.
  4. Cover and let stand for ~4 hours.

Dough

  1. Dissolve the yeast in the warm water.
  2. Combine the yeast mixture with the full sour, rye flour, wheat flour, salt, and caraway seeds to make a stiff dough.
  3. Begin kneading the dough, working in up to another 1 1/2 c. of water to make a soft dough. Do not add so much water or knead for so long that the dough becomes sticky. (Rye doughs can become sticky or slimy if overworked.)
  4. Cover and let rest for 10-15 minutes.
  5. Divide dough into two equal portions and shape into loaves. (Round/freeform is preferable for this bread.) Use lots of water during shaping to prevent the dough from tearing.
  6. If desired, you may transfer the shaped loaves to well-floured bannetons at this point. If not using bannetons, let the dough rise in greased bowls instead.
  7. Cover and let rise until dough becomes soft. (This will likely only take 30 minutes for a warm rise or up to an hour for a room temperature rise. You may also choose to do a cold rise in the fridge. This will likely take 4-8 hours depending on the dough and its treatment up to this point.)
  8. Preheat oven to 230°C (450°F) and prepare a baking sheet and/or Dutch oven. (I recommend using parchment paper in the Dutch oven. On the baking sheet greasing and dusting with cornmeal works well.)
  9. Carefully transfer a loaf to the baking sheet or Dutch oven.
  10. Bake with steam (by adding water to the Dutch oven and covering it, adding ice cubes to the baking sheet, or placing a pan of boiling water below the baking bread) for 15-20 minutes.
  11. After 20 minutes reduce the temperature to 190°C (375°F). At this point you can remove the source of steam/uncover the Dutch oven. Continue baking for 45-60 minutes.

Wednesday, 24 February 2021

Anadama

I grew up hearing the story of anadama -- a bread which supposedly arose when a fisherman got tired of his wife Anna making the same cornmeal porridge every day -- but I'd never actually tried it before. I generally like cornbread and other baked goods containing cornmeal, so I was hopeful that this bread would also be a success.

I think it was reasonably successful in the end. The flavour is good and everyone seems to like it. But man-oh-man, this was by far the most miserable, difficult dough I've ever had to work with! And I got ZERO oven spring from it. Which was somewhat disappointing. I am inclined to experiment with some different recipes and mixing techniques to see if I can find something that works a little better.

I'm writing this version up now, just to have a record of what I did and how it behaved. I wouldn't recommend trying to follow this recipe unless you're prepared for a big mess and a relatively dense (but flavourful) bread though.

Anadama

Slightly adapted from The Laurel's Kitchen Bread Book

Ingredients

  • 1 c. water
  • 1 c. cornmeal
  • 2 tsp. active dry yeast (or 1/2 Tbsp. instant yeast)
  • 1 2/3 c. warm water
  • 600g hard (strong/high grade/bread) whole wheat flour
  • 1 Tbsp. coarse sea salt
  • 1/3 c. molasses
  • 1/4 c. oil

Directions

  1. Combine the cornmeal with 1 c. of water and bring to a simmer over medium-low heat.
  2. Cook until thick and just starting to stick to the bottom a little.
  3. Remove from heat, cover, and set aside to cool and hydrate. Time needed will vary from 15 minutes to as long as overnight depending on how coarse your cornmeal is.
  4. Once the cornmeal has cooled and softened, dissolve the yeast in the warm water and set aside for 10 minutes.
  5. Combine flour and salt and mix well.
  6. Make a well in the centre of the flour and pour in the yeast mixture.
  7. Gradually incorporate flour into liquids, working from the centre outward.
  8. Once a stiff dough has formed, turn it out and kead it for ~10 minutes.
  9. Use a fork to mix the molasses and oil into the cornmeal, breaking up any lumps.
  10. Press dough flat and spread cornmeal mixture on top.
  11. Knead cornmeal mixture into dough. This will be very messy. The dough will become quite wet. Mine became so soupy that I had to add a couple Tbsp. of flour despite the authors' dire warnings not to add any flour at this stage. Once the cornmeal was incorporated, it basically became a batter. It was pourable. The addition of a couple Tbsp. of gluten flour took it to being merely incredibly messy, sticky, and sloppy rather than actually runny.
  12. Transfer the sloppy mess to a bowl, cover, and set aside to rise for ~90 minutes.
  13. Even after sitting for an hour and a half, my dough was still completely unworkable, so I worked in ~1/4 c. more flour at this point to try to make it a little more manageable. It was still extremely sticky and wet even so.
  14. Return to bowl, cover, and allow to rise for another hour or so. (I found it completely impossible to do a finger poke test with this dough, even with a very wet finger. The dough was just way too sticky.)
  15. Turn dough out onto a well-floured surface and divide into two equal portions.
  16. I found trying to round the portions to be a fool's errand. It was just too wet and too lacking in structure. I probably ended up working in another 2-3 Tbsp. of flour at this stage.
  17. Cover and let rest for 10-15 minutes.
  18. Shape into loaves (as best you can) and place into greased loaf pans.
  19. Cover and allow to rise for another 45 minutes or so.
  20. Bake at 180°C (350°F) for ~1 hour.

Monday, 22 February 2021

Yogurt Bread

MamaEarth has started selling a few products from a local Jersey cow dairy. I was planning on making a yogurt-based kadhi anyway, so I figured this would be a good opportunity to give their yogurt a try. It was lovely and rich. And I appreciate that it came in a reusable glass jar -- which can even be returned for a rebate!

Our yogurt curry was a great success, but that only used up about half of the 1L jar. So I decided that maybe it was finally time to get around to trying the yogurt bread recipe from the Laurel's Kitchen Bread Book.

I've kind of made it before, since it's the basis for the Loaf for Learning. The only difference here is that it uses a full 900g of flour (to make two loaves rather than just one) and it's made using an overnight sponge rather than mixing the dough all up at once and baking it the same day.

I have to admit, my bread confidence has been somewhat shaken since the move. I just haven't been able to devote the necessary time and concentration to it. And, between that and the new kitchen/appliances, I've had some pretty tragic bread failures over the last couple months. So, with how things have been going lately, it was incredibly gratifying to put these loaves in the oven and see almost immediate oven spring. They still weren't perfect but, oh my goodness, they were so much better than what I've been turning out over the past few weeks that I was NOT about to complain or nit-pick! Finally, a success!

Apologies, I don't have a photo for this one. I gave one loaf away and we devoured the other one before I remembered to take a picture of it. Maybe I'll manage to snap one next time.

Yogurt Bread

From the Laurel's Kitchen Bread Book

Ingredients

Sponge

  • 1 tsp. active dry yeast (or 3/4 tsp. instant yeast)
  • 1/4 c. warm water
  • 450g hard (strong/high grade/bread) whole wheat flour
  • 2 tsp. coarse sea salt
  • 3 Tbsp. honey
  • 2/3 c. plain yogurt
  • 1/3 c. cold water

Full Dough

  • 1 tsp. active dry yeast (or 3/4 tsp. instant yeast)
  • 1 1/2 c. warm water
  • 1/4 c. oil
  • 450g hard (strong/high grade/bread) whole wheat flour

Directions

Sponge

  1. Dissolve the yeast in the warm water and set aside for ~10 minutes.
  2. Combine the flour and salt and mix well.
  3. Make a well in the centre of the flour and add the yeast mixture, honey, yogurt, and cold water.
  4. Mix to form a stiff dough.
  5. Knead for 5-10 minutes (depending on the efficiency of your technique).
  6. Shape into a ball, place in a bowl, cover, and set aside for 6-10 hours. It will need closer to six hours for a warmer room (maybe 21-23°C) and closer to 10 hours for a cool room (maybe 16-18°C). If you're somewhere in the middle (~20°C), eight hours will probably do.

Full Dough

  1. Once the sponge has had ample time to ferment, dissolve the remaining yeast in the remaining warm water (from the "full dough" ingredients).
  2. Add the yeast mixture to the sponge and work it with your hands to soften/loosen it, making a sort of sponge slurry.
  3. Work in the oil and remaining flour.
  4. Turn out onto your work surface and knead thoroughly (15-20 minutes).
  5. Form into a ball, place in a bowl, cover, and set side to rise for ~1 hour.
  6. Knock back, knead a few strokes if desired, shape back into a ball, return to covered bowl, and let rise for another 45-60 minutes.
  7. Knock back again, divide into two equal portions, and round each one.
  8. Cover and let rest for 10-15 minutes.
  9. Shape into loaves -- folding into thirds and rolling up -- and place into greased loaf pans.
  10. Cover and let rise for 30-45 minutes.
  11. Slash tops as desired and bake at 180°C (350°F) for 45-60 minutes.

Saturday, 13 February 2021

Scottish Sponge Bread

I can't believe I never wrote this up when I originally made it! It was a huge undertaking and I was so pleased with the result, I was sure I must had posted about it. But, searching the blog, apparently not. I'll have to go back through my photos and see if I took any photos of the finished breads but, in the meantime, here's the recipe.

This one is a bit of a doozy. Not because of any unusual ingredients or techniques, but simply due to the enormous volume! Most bread recipes will make one or two 20cm by 10cm (8"x4") pan loaves (or their equivalent in rolls or other shapes. This recipe makes FIVE. It is apparently traditionally batch baked as four 10cm by 25cm loaves in a 40cm by 25cm pan. My roasting pan happens to be exactly those dimensions, so I was able to go the bath baking route. If you don't have such a pan, you may have to divide the dough and bake it separately or get creative with your baking vessels, unless you happen to have five loaf pans lying around.

Scottish Sponge Bread

From the Laurel's Kitchen Bread Book

Ingredients

Sponge

  • 1-2 tsp. active dry yeast
  • 1/4 c. water
  • 900g hard (strong/high grade/bread) whole wheat flour
  • 1 Tbsp. coarse sea salt
  • 2 1/2 c. cold water
  • 1/4 c. malt syrup (or other sweetener of your choice)

Full Dough

  • 3 1/2 c. warm water
  • 1 1/2 Tbsp. coarse sea salt
  • 1/3 c. honey
  • 1/3 c. oil (optional)
  • 900g hard (strong/high grade/bread) whole wheat flour
  • 450g soft (plain/standard/pastry) whole wheat flour

Directions

Sponge

For a 16-18 hour sponge: Use 1 tsp. of yeast and ice water.
For a 10-12 hour sponge: Use 2 tsp. of yeast and warm water.
  1. Dissolve the yeast in the water.
  2. Combine the flour and salt.
  3. Make a well in the centre of the flour and add the cold water, malt syrup, and yeast mixture.
  4. Combine to form a slightly stiff dough.
  5. Knead the sponge for 10-15 minutes. (The gluten needs to be developed enough to trap gas, but not so much that it will end up overworked when making the full dough later.)
  6. Place in a bowl, cover, and let rise until it begins to recede slightly.

Full Dough

You will need a GIANT bowl for mixing up the dough. I believe I actually ended up only mixing it partially in a bowl and switched to just mixing everything together directly on the counter part-way through. You could also divide the sponge and dough ingredients and mix it up as two or three separate batches if that's easier.
  1. Combine the warm water, salt, honey, and oil (if using) in your bowl.
  2. Add the sponge to the liquid mixture and break it into little pieces.
  3. Begin mixing in the flour. If the bowl gets too full, you can turn it out onto your work surface and continue mixing in flour there.
  4. Press the dough hard to make sure everything is well blended.
  5. Feel the dough and evaluate its water content. If it feels too stiff/dry/tight, mix in additional water ~1/2 c. at a time until the desired consistency is achieved.
  6. Knead the dough for 20-40 minutes (depending on your technique and speed).
  7. Place in a large container (I used my roasting pan), cover, and let rise for ~1 hour.
  8. Knock the dough back, round it, return to its container, cover, and let rise again for 45-60 minutes.
  9. Divide dough into four or five equal pieces. (Four equal pieces if you intend to batch bake in a large 40cm by 25cm (16"x10") pan, five pieces if you intend to bake in regular 20cm by 10cm (8"x4") loaf pans. You could also put two loaves together in one 20cm/8" square pan.)
  10. Round each piece, cover, and let rest for ~10 minutes.
  11. Shape each piece into a loaf by pressing it flat, folding into thirds, and then rolling up jelly-roll style.
  12. Place shaped loaves into greased pan(s).
  13. If batch baking on one large pan, butter the sides of the loaves to facilitate separation after baking.
  14. Cover and let rise (30-60 minutes depending on room temperature). If you can't bake all five loaves at once, put two or three of them in the fridge to rise while the others rise at room temperature.
  15. For individual loaves, bake at 190°C (375°F) for 50-60 minutes. Batch bread baked in one large pan may need as much as 90 minutes to bake through.

Friday, 12 February 2021

Black Bean Raisin Bread

When I think of adding things to bread dough, I have to admit that beans aren't generally my first thought. Fruit, nuts, seeds? Sure! Potatoes? Yes! Eggs, honey, milk, yogurt, etc.? Of course! Cheese, zucchini, herbs, even meat? I can dig it. Beans? Not my first pick. I wasn't sure what dumping a bunch of mashed black beans into my dough would do to it. Would the gluten be disrupted? Would it make it heavy? Dense? Wet? All of the above?! But it turns out that black bean bread is amazing and magical and wonderful! It tastes delicious, it rises beautifully, it has a rich dark colour, and it keeps incredibly well. It's now one of my favourite breads. And the raisins are just the icing on the already wonderful cake! Perfection.

Black Bean Raisin Bread

From the Laurel's Kitchen Bread Book

Ingredients

  • 1 c. uncooked black turtle beans
  • 2 c. liquid from cooking the beans
  • 1/4 c. molasses
  • 2 Tbsp. oil
  • 4 tsp. active dry yeast1
  • 1/4 c. warm water
  • 750g hard (strong/high grade/bread) whole wheat flour
  • 1 Tbsp. coarse sea salt
  • 1 c. raisins, steamed or soaked for 5-10 minutes and drained

Directions

  1. Cook the beans and drain, reserving the cooking liquid.
  2. Add or pour off water as needed to bring the measurement to 2 c.
  3. Mash beans with potato masher or combine with cooking liquid and blend with electric blender or food processor.
  4. Add molasses and oil to bean mixture and allow to cool slightly. (It should be somewhere around 35-40°C.)
  5. Dissolve yeast in 1/4 c. warm water and let stand for ~10 minutes.
  6. Mix flour and salt in a bowl.
  7. Make a well in the centre of the flour and pour in the bean mixture and the yeast mixture.
  8. Gradually incorporate the flour into the liquids, working from the centre outward.
  9. Knead dough very well (20-40 minutes depending on your technique).
  10. Add the raisins toward the end of kneading.
  11. Shape dough into a ball, place in bowl, cover, and let rise for ~1 hour. Poke dough with a wet finger to test if it's done. If the hole doesn't fill in at all, it's ready. (If it sighs and/or sinks back, it's gone past the ideal point to knock it back.)
  12. Knock the dough back by pressing it flat. Knead it a few strokes if you wish, but not too much!
  13. Shape it into a smooth ball again and return it to the covered bowl to rise again. This rise may go slightly faster. (Depending on the temperature of your room, of course.)
  14. Use the same finger poke to test doneness. Once ready, knock the dough back again.
  15. Divide it into two equal portions and round each one. Cover and let rest for 10-15 minutes.
  16. Shape each portion into a loaf as desired. (Hearth loaves or pan loaves.)
  17. Cover and let rise for 30-45 minutes. (The finger poke test should have it filling in slightly/slowly.)
  18. DO NOT slash the crust!
  19. Bake at 180°C (350°F) for ~1 hour.


1 If you're using "instant" yeast, reduce the amount by 25%. (ie. Use 1 Tbsp. rather than 4 tsp.) You may also mix the yeast in with the dry ingredients rather than hydrating it first. Back

Saturday, 6 February 2021

Simple Wheat Germ Quick Bread

We're running low on bread again and I decided to try out a quick bread recipe rather than making another yeasted bread. Many quick breads lean toward the sweet and are basically cakes in loaf form. This one claimed to be "not too sweet" and appropriate for savoury applications, so I figured I'd give it a go.

The original recipe called for a mix of hard and soft whole wheat flour. I still don't have my grain mill set up yet, so I wasn't in a position to make any soft whole wheat flour. I ended up tossing in a little (white) all-purpose flour and just using hard whole wheat for the rest. The loaf came out very tender and a bit crumbly. I think I'd probably just use all hard whole wheat flour next time. I'd probably toss in an extra egg as well and reduce the water a little bit.

Simple Wheat Germ Quick Bread

Adapted from the Laurel's Kitchen Bread Book

Ingredients

  • 2 1/4 c. hard (strong/high grade/bread) whole wheat flour
  • 1/2 tsp. coarse sea salt, ground
  • 2 Tbsp. powdered milk
  • 1 Tbsp. baking powder
  • 1/2 c. wheat germ
  • 1/4 c. unsalted butter, softened
  • 1/4 c. honey
  • 2 large eggs
  • 1 c. water

Directions

  1. Preheat oven to 180°C (350°F) and grease and flour a 20cm x 10cm (8"x4") loaf pan.
  2. Combine flour, salt, and powdered milk.
  3. Sift in baking soda.
  4. Stir in wheat germ and mix well.
  5. Cream honey with butter.
  6. Beat in eggs one at a time.
  7. Add dry ingredients alternately with water.
  8. Pour batter into prepared pan and bake at 180°C (350°F) for about an hour.
  9. Remove from oven and let cool in pan for 10-15 minutes.
  10. Turn out of pan and transfer to wire rack to finish cooling.

Tuesday, 26 May 2020

Extra Soft Dinner Rolls

With eggs, honey, dairy, plenty of butter, and a measure of soft flour included in the dough, these rolls are incredibly tender and high rising. I did find them somewhat lacking in structural integrity. They were very tender, but also a bit crumbly. Of course, that could be because I overproofed them slightly. I was trying to give them a very full proof and overshot the mark slightly. Only by about 5 or 10 minutes by the look of it, but enough that they sank a bit in the oven and the gluten had broken down a bit. I'll be sure to get them in the oven promptly next time.

Extra Soft Dinner Rolls

From the Laurel's Kitchen Bread Book

Ingredients

  • 2 tsp. active dry yeast
  • 1 c. warm water
  • 3 Tbsp. honey
  • 1 c. buttermilk
  • 1 large egg
  • 750g hard (strong/bread/high grade) whole wheat flour
  • 150g soft (plain/pastry/standard) whole wheat flour
  • 2 tsp. coarse sea salt
  • 1/4 c. unsalted butter

Directions

  1. Dissolve the yeast in the warm water and set aside for ~10 minutes.
  2. Dissolve the honey in the buttermilk and mix in the egg.
  3. Combine the flours and salt and mix thoroughly.
  4. Make a well in the centre of the dry ingredients and pour in the yeast mixture.
  5. Mix a bit of the flour into the liquids in the centre to form a loose batter.
  6. Pour the buttermilk mixture into the batter in the centre of the bowl.
  7. Gradually mix flour into liquids working from the centre outward.
  8. Once most of the flour has been incorporated, turn the dough and any remaining flour out onto the work surface and begin kneading.
  9. Knead for at least 12 minutes, working in a bit more water or flour as needed. (Err toward a softer, looser dough.)
  10. Begin working in the butter by smearing it on the work surface and kneading the dough on top of it until the butter has been incorporated.
  11. Once all the butter has been worked in and the dough is thoroughly kneaded and very supple, shape it into a ball and place in a covered bowl to rise.
  12. Allow to rise until 1cm deep fingerprint (made with a wet finger) no longer fills in (1-2 hours).
  13. Knock back, reshape into a ball, and return to covered bowl to rise again.
  14. Allow to rise the same as before, until finger print is no longer returned. The second rise shouldn't take more than an hour.
  15. Knock back dough and divide into four equal portions.
  16. Round each portion and pull the gluten taut across the top. Cover and let rest for at least 10 minutes.
  17. Divide each portion into six equal pieces and round each one.
  18. Place dough balls in a greased 28x40cm (11x16") pan, cover, and set aside to rise.
  19. Allow to rise for 45-60 minutes. Only let them go to 60 minutes if your room is fairly cool (20°C or less).
  20. Bake at 200°C (400°F) for 20 minutes.

Sunday, 24 May 2020

Petaluma Rye

I abused this recipe quite a bit. First I halved it. Then I converted it to use sourdough starter. And then I converted that to a sponge method. I think it's gonna be okay in the end but it was touch-and-go for a while. I was going for a very stiff sponge since I wanted to do a long room temperature ferment. I think I may have made it a bit too stiff though. I also didn't properly feed and activate my starter before using it. (I've been a bit stingy on my feedings and the starter is a bit more sluggish than it probably should be.) This all contributed to a very, very slow rise. The sponge hardly did anything overnight and the full dough, once it was mixed and kneaded, took ~9 hours to complete its first rise!

I think next time I'd try making the sponge a little wetter. If I'm still not happy with the results I get from that, I'll see if adding a bit of fresh yeast when mixing up the full dough improves matters. If nothing else, it should help speed up the rise (which is mostly what I'm after here). I think I probably also should've swapped the buttermilk out for milk since the starter is already lowering the pH. Leaving out the lemon juice might've been a good idea as well.

What follows is not what I did this time, but rather my notes-to-myself ideas for what I'd like to try next time.

Petaluma Rye

Adapted from the Laurel's Kitchen Bread Book

Ingredients

Sponge

  • 100g hard (bread/strong/high grade) whole wheat flour
  • 1 tsp. coarse sea salt
  • 6 Tbsp. water
  • 1 Tbsp. honey
  • 1 c. sourdough starter (100% hydration)

Full Dough

  • 1/2 c. + 2 Tbsp. milk
  • 1 Tbsp. lemon juice
  • 1 Tbsp. oil
  • 175g hard (bread/strong/high grade) whole wheat flour
  • 65g rye flour
  • 1/2 Tbsp. caraway seeds

Directions

Sponge

  1. Combine the flour and salt.
  2. Dissolve the honey in the water.
  3. Make a well in the centre of the flour and pour in the starter and the honey-water.
  4. Mix to form a stiff dough.
  5. Cover and let sit at room temperature for 18 hours.

Dough

  1. Combine the lemon juice and oil with the milk.
  2. Combine both flours and the caraway seeds.
  3. Add milk mixture to sponge and squish and squeeze until it's thoroughly mixed.
  4. Make a well in the centre of the flour mixture and pour in the sponge mixture.
  5. Mix, working from the centre outward.
  6. Once most of the flour has been incorporated, turn the dough out onto a work surface and begin kneading.
  7. Knead for ~10 minutes.
  8. Shape into a ball and place in a covered bowl to rise.
  9. Once dough no longer returns a wet fingerprint, knock it back.
  10. Shape into a ball and return to bowl to rise again.
  11. Knock back again, shape into a ball, and pull gluten taut across the top surface.
  12. Cover and let rest for 10 minutes.
  13. Shape into a loaf by pressing flat, folding into thirds, and rolling up.
  14. Place in a greased loaf pan, cover, and set to rise for ~45 minutes.
  15. Bake at 180°C (350°F) for 45 minutes.

Friday, 15 May 2020

Spicy Currant Bread

I usually don't eat much of the breads I bake. I love baking them and the rest of the family loves eating them, but I usually only have a slice or two from each pair of loaves. This bread was different. I couldn't get enough of it! And when the end of the last loaf started to go a bit stale, it made phenomenal bread pudding.


Spicy Currant Bread

From the Laurel's Kitchen Bread Book

Ingredients

  • 1 c. dried currants
  • 2 c. apple juice
  • 1/3 c. (17g) wheat bran1
  • 1 tsp. allspice berries, ground
  • 1/2 c. warm water
  • 2 tsp. active dry yeast
  • 1/4 c. oil
  • 2 Tbsp. molasses
  • 830g hard (bread/strong/high grade) whole wheat flour
  • 2 1/2 tsp. (14g) coarse sea salt
  • extra juice and/or water

Directions

  1. Rinse the currants.
  2. Add the currants to the apple juice and simmer for five minutes.
  3. Drain the currants reserving the juice.
  4. Add water to the juice to bring the volume back up to 2 c.
  5. Stir the bran and allspice into the juice. Cover and set aside to cool for an hour or two or as long as overnight.
  6. Dissolve the yeast in the warm water.
  7. Stir the oil and molasses into the juice mixture.
  8. Combine the flour and salt in a large bowl and mix thoroughly.
  9. Make a well in the centre of the flour and pour in the yeast mixture as well as the apple juice mixture.
  10. Gradually incorporate the flour into the liquids, working from the centre outward.
  11. Knead for 15-20 minutes, then work in the currants.
  12. Shape dough into a ball and place in a covered bowl to rise.
  13. When dough no longer returns a 1cm deep wet fingerprint it is ready to be knocked back. Knead it a few strokes and return it to its covered bowl to rise again.
  14. Once the second rise is complete, knock it back again and divide into two equal portions.
  15. Round each portion, stretch the gluten tight across the top surface, cover, and set aside for at least 10 minutes.
  16. Shape each portion into a loaf by flattening it, folding it into thirds, and rolling it up. Place in greased loaf pans.
  17. Cover and allow to rise until fingerprint is only gently returned. (This usually takes ~45 minutes for me, but will vary with the temperature of your room.)
  18. Bake at 180°C (350°F) for ~45 minutes.


1 I didn't have any wheat bran, so I just used a bit of oat bran instead. Back

Thursday, 7 May 2020

Potato Bread

I'm really pleased with how these loaves came out! They look beautiful and they rose wonderfully. The herbed potato bread I did a couple weeks ago was extremely tasty and also by far the best keeping bread I've made yet. I have high hopes for this one!


Potato Bread

From the Laurel's Kitchen Bread Book

Ingredients

  • 1 (225g) potato
  • 1/4 c. warm water
  • 2 tsp. active dry yeast
  • 1 c. fresh buttermilk or yogurt
  • 1 c. hot potato cooking water
  • 2 Tbsp. honey
  • 2 Tbsp. oil
  • 900g hard (bread/strong/high grade) whole wheat flour
  • 14g (~2 1/2 tsp.) coarse sea salt

Directions

  1. Cut the eyes out of the potato, rinse it, slice it, and boil until tender.
  2. Drain the potato reserving the cooking water.
  3. Dissolve the yeast in the warm water and set aside for ~10 minutes.
  4. Mash the potato and combine it with the buttermilk, 1 c. of reserved cooking water, honey, and oil.
  5. Combine the flour and salt and mix thoroughly.
  6. Make a well in the centre of the flour and pour in the yeast mixture and the potato mixture.
  7. Mix the flour into the liquids working from the centre outward.
  8. Once most of the flour's been incorporated, turn it out onto the counter and begin kneading.
  9. Knead for 20-30 minutes working in more water as needed. (Feel free to use more cooking water for this.)
  10. Shape into a ball and place in a covered bowl to rise.
  11. Once dough no longer returns a 1cm deep wet fingerprint, then it's ready to knock back. (This should take 1-2 hours depending on the temperature of the room.)
  12. Knock back the dough and set it to rise in the covered bowl again.
  13. After another hour or so, the dough should be ready to knock back again.
  14. Knock back the dough again and divide it into two even portions.
  15. Shape each dough portion into a ball and pull the gluten tight across the top of each ball. Cover and set aside for 10 minutes.
  16. Shape each ball into a loaf. Hearth loaves or pan loaves work well for this bread.
  17. Cover and set to rise for 30-45 minutes.
  18. Uncover, dust with pastry flour, and slash the tops of the loaves.
  19. Bake at 180°C (350°F) for 45-60 minutes.
  20. Cool in pans for 10 minutes, then remove from pans and set on a wire rack to cool.

Wednesday, 29 April 2020

Semi-Sourdough Seed Bread

The yeast is all gone. The yeast has been all gone for over a month now. Where is all the yeast?

There has been a lot of panic buying during this pandemic. I think there have also been a lot of people who are suddenly doing a lot more home cooking, so there's a bit of increased demand right now. This is all understandable. And, given that, I was expecting a few things to become grocery store rarities for a little while: frozen veggies, toilet paper, rice, beans, maybe even milk and eggs. (Eggs have turned out to be even more in demand and harder to get than I had guessed, but I was at least expecting some increased demand. Also, we have chickens, so not being able to get eggs at the grocery store really isn't an issue for me.) What caught me completely by surprise was the sudden run on flour and yeast. And the yeast part of the equation, in particular, has been especially problematic.

Flour has been in stock (at admittedly low levels) intermittently since this whole thing started. Yeast, on the other hand, just flat-out vanished pretty much immediately and hasn't been seen since. During my first pandemic grocery shop I saw that all but two industrial-sized packages of instant yeast had gone. I thought about grabbing one but concluded that a) even I don't need to buy my yeast in bulk quantities quite that large and b) I really prefer "traditional", non-instant yeast. I figured I'd just grab some in a week or two once they'd restocked. My yeast supplies were getting a little low, but they weren't critical yet, I'm sure it'll be fine, right?

Fast forward a few weeks and now I'm almost completely out of yeast and there's still none to be had at the grocery store. Uh-oh...

This bread was my stop-gap solution. I made bagels on Monday. I made enough dough for 12 bagels, but I only baked 11. I mixed some water into the remaining dough, plonked it into a mason jar and let it ferment overnight. The next day I made what was supposed to be an unleavened/naturally fermented seed bread. But I dumped my faux starter in along with the other liquids and mixed it into the dough. I then proceeded to make bread as normal.

The resulting bread definitely isn't a sourdough, but it is distinctly flavourful. It's a hearty loaf, to be sure. Not as light and fluffy as many of the breads I've made, but it's decidedly lighter than other unleavened/naturally fermented loaves I've experimented with in the past. I'd say this is a nice middle ground. And I was able to pinch off a bit of the dough and pop it back into the mason jar with a bit of water to ferment and get ready for the next batch of bread!


Semi-Sourdough Seed Bread

Adapted from the Laurel's Kitchen Bread Book

Ingredients

  • 430g hard whole wheat flour
  • 1 tsp. coarse sea salt
  • 100g of bagel dough mixed with 100mL of water and left to ferment overnight
  • 1 1/2 c. water
  • 3 Tbsp. sunflower seeds
  • 2 Tbsp. everything bagel topping
  • 1 tsp. sesame seeds

Directions

  1. Combine flour and salt and mix thoroughly.
  2. Make a well in the centre of the flour and add the reserved dough mixture and 1 c. of water.
  3. Mix the flour into the liquids working from the centre outward.
  4. Pinch off ~1/4 c. of the dough and combine with 1/4 c. of water in a mason jar. Set aside for your next batch of bread.
  5. Turn the rest of the dough out onto the counter and begin kneading. Work in additional water as you knead. You may not need the full 1/2 c.
  6. Once the dough has taken up enough water, begin kneading in the seeds. Aim to knead for a total of 20-30 minutes.
  7. Shape into a ball and set in a covered bowl to rise. It will likely need 2-4 hours for this first rise.
  8. Once the dough no longer rebounds after a wet finger is pressed ~1cm into it, knock it back. Knead for a few strokes if you wish.
  9. Shape into a ball and allow to rise again. This rise will probably only take ~2 hours. Maybe less.
  10. Knock the dough back again and shape it into a loaf. (I chose a round hearth loaf for this one.)
  11. Allow to rise for an hour or so.
  12. Preheat oven to 230°C (450°F) and place a pan of boiling water on the bottom rack once the oven is preheated.
  13. Spritz the loaf with water and slash the top.
  14. Bake at 230°C (450°F) for ~10 minutes.
  15. Reduce oven temperature to 180°C (350°F) and remove water pan.
  16. Bake at 180°C (350°F) for another 30 minutes.

Friday, 24 April 2020

Lemony-Fennelly Bread

The lemon and fennel in this bread are a subtle presence. Very mild, but they add a nice extra layer to the flavours.

Lemony-Fennelly Bread

From the Laurel's Kitchen Bread Book

Ingredients

  • 2 tsp. active dry yeast
  • 1/2 c. warm water
  • 830g hard (strong/bread/high grade) whole wheat flour
  • 1/2 Tbsp. fennel seeds
  • 2 1/2 tsp. coarse sea salt
  • 1 Tbsp. lemon zest
  • 1 c. warm buttermilk
  • 1/4 c. honey
  • juice of one lemon
  • 1 c. water
  • 2 Tbsp. unsalted butter

Directions

  1. Dissolve the yeast in the warm water and set aside for ~10 minutes.
  2. Combine flour, fennel seeds, salt, and lemon zest and mix thoroughly.
  3. In a separate bowl, combine buttermilk and honey.
  4. Stir buttermilk mixture into dry ingredients until partially mixed.
  5. Combine lemon juice and water and add it to the flour mixture.
  6. Finally add yeast mixture and mix well. (Mixing in this order protects the yeast.)
  7. Knead for at least 20 minutes, then smear the cold butter onto the counter and continue kneading the dough on top of the butter. Knead for another 10-20 minutes.
  8. Shape the dough into a ball and set in a covered bowl to rise for ~90 minutes.
  9. Knock dough back, knead for a few strokes, shape back into a ball and return to the covered bowl to rise for another hour or so.
  10. Knock back again, divide into two equal portions, and round each one, smoothing the gluten layer on top and pulling it taut. Cover and allow to rest for 10 minutes.
  11. Shape the dough into loaves (pressing flat, folding into thirds, and then rolling up jelly-roll-style).
  12. Place, seam-side-down, into greased 8x4" loaf pans, cover, and set to rise for 30-45 minutes.
  13. Bake at 180°C (350°F) for 50 minutes.

Friday, 17 April 2020

Herbed Dinner Loaf

We were getting pretty low on bread and the weather is still too cold to really be pleasant outside, so I figured it'd be a good day to do some baking. Flipping through the cookbook, I found this potato bread recipe. Not only did it sound like a lovely, herby loaf, but it would also perfectly use up that last half cup of cottage cheese that's been sitting in the fridge for weeks now. And, I just happen to have fresh dill on hand at the moment. Perfect!

This is an absolutely wonderful bread. Very tender and moist with a mild, herby flavour. Even after being cut for a couple days, it's still just as soft and fresh as the first day. Very impressive!


Herbed Dinner Loaf

From the Laurel's Kitchen Bread Book

Ingredients

  • 2 tsp. active dry yeast
  • 1/2 c. warm potato cooking water
  • 2/3 c. mashed potatoes
  • 1/2 c. cottage cheese
  • 1/2 c. hot potato cooking water
  • 1 Tbsp. oil
  • 1/2 Tbsp. coarse sea salt
  • 1 tsp. minced fresh dill
  • 2 tsp. minced fresh flat-leaf parsley
  • 1 tsp. minced celery leaves
  • 1/8 tsp. dried thyme
  • 450g hard (strong/bread/high grade) whole wheat flour

Directions

  1. Sprinkle yeast into warm water and set aside for ~10 minutes.
  2. Combine mashed potatoes, cottage cheese, hot water, oil, salt, dill, parsley, celery leaves, and thyme and mix well.
  3. Measure out flour into large bowl and make a well in the centre.
  4. Pour potato mixture into well.
  5. Add yeast mixture.
  6. Mix, working from the centre outward.
  7. Once most of the flour in incorporated, turn out onto the counter and begin kneading.
  8. Knead for 10-20 minutes adjusting with more flour or water as necessary. Dough should be quite soft.
  9. Set in a covered bowl to rise for ~1 hour.
  10. Knock back and set to rise for another 30-45 minutes.
  11. Knock back again and shape as desired. I made a pan loaf, but it could also be baked as a "cottage loaf" in a casserole dish or pie plate. Allow ~30 minutes for proofing.
  12. Bake at 180°C (350°F) for 40-45 minutes.
  13. Let cool in pan for 10 minutes, then turn out to finish cooling on wire rack.

Monday, 11 November 2019

Cottage Herb Loaf

This makes a lovely, fragrant, flavourful loaf. The dough was a bit strange, but the resulting bread was very nice. My only regret was that I didn't double the recipe. We're almost out already! I've still got some dill and cottage cheese left though, so hopefully I can do another batch sometime in the next few days. And this time I will double it.


Cottage Herb Loaf

From the Laurel's Kitchen Bread Book

Ingredients

  • 2 Tbsp. oil
  • 1/4 c. minced onion
  • 1/2 c. warm water
  • 2 tsp. active dry yeast
  • 1 c. cottage cheese
  • 1/2 c. chopped fresh parsley
  • 1 Tbsp. chopped fresh dill
  • 1 1/2 Tbsp. honey
  • 1 large egg
  • 1/2 Tbsp. coarse sea salt
  • 375g hard (bread/strong/high grade) whole wheat flour

Directions

  1. Heat oil over medium heat.
  2. Cook onion in oil until softened and beginning to brown.
  3. Dissolve yeast in warm water and set aside.
  4. Add cottage cheese, parsley, and dill to onion and gently warm.
  5. Remove onion mixture from heat and stir in honey and egg.
  6. In a large bowl, combine flour and salt and mix thoroughly.
  7. Make a well in the centre of the flour mixture and pour in the yeast mixture and the cheese mixture. (Make sure that the cheese isn't too hot when you add it. If it seems overly warm, give it another few minutes to cool before mixing it in.)
  8. Working from the centre outward, gradually mix the flour into the liquids until most of it has been incorporated.
  9. Turn out onto your work surface and begin kneading. The dough may be quite sticky. Try to knead it for at least 10 minutes before you make a call on adding extra flour.
  10. Knead for 15-30 minutes1.
  11. Shape into a smooth ball and place in a covered bowl to rise2. Rise is done when a 1cm deep fingerprint (with a wet finger) doesn't fill in at all.
  12. Knock dough back. Knead for a few more strokes if desired.
  13. Shape back into a smooth ball and return to the covered bowl to rise again. Use the same test to determine when the second rise is done.
  14. Knock back again and shape into a smooth ball, stretching gluten taut across the top.
  15. Place the dough ball into a greased casserole dish or deep dish pie plate, cover, and let rise one more time. For the final rise, the dough should still slowly return the wet fingerprint.
  16. Gently brush the top of the dough with oil and slash it if you like.
  17. Bake at 180°C (350°F) for 45-50 minutes.


1 You can probably get away with only 15 minutes if your kneading is very efficient. I always err toward kneading my bread for longer though since I don't seem to have a very efficient technique. Back
2 The original recipe suggests a warm rise for this bread. They recommend aiming for a temperature of ~32°C (90°F) for 45 minutes for the first rise. I didn't want to mess around with trying to set up a warm rise, so I just went with a longer, cooler rise: 20°C (68°F) for ~75 minutes. Back

Monday, 14 October 2019

Oatmeal Bread

After my semi-failed attempt to make rye bread last week, I wanted something wheat-based and relatively simple this time. I debated going for a basic whole wheat or French bread since I've had really good results with them in the past. But I like variety and wanted to try something different. This oatmeal bread looked approachable and tasty, so I figured I might as well give it a whirl.

It made a nice bread overall. Good colour and crumb with a bit of spring in the oven. I didn't get quite as much gluten development as I would've liked and the dough wasn't quite as stretchy and elastic and I'd hoped. But maybe that's just a consequence of adding other grains into the mix. Whatever the case, it does seem to have baked up nicely and the Kidlet approves, so I'll take it!


Oatmeal Bread

Slightly adapted from the Laurel's Kitchen Bread Book

Ingredients

  • 105g oats1
  • 2 c. water
  • 2 1/2 Tbsp. coarse sea salt
  • 3 Tbsp. honey
  • 1/2 c. warm water
  • 2 tsp. active dry yeast
  • 750g whole wheat bread flour
  • 4 Tbsp. unsalted butter
  • extra water, for kneading
  • extra rolled oats, for coating (optional)

Directions

  1. Combine oats and water and bring to a boil. Reduce to medium-low and simmer until thickened.
  2. Stir in salt and honey and set aside to cool.
  3. Sprinkle yeast into warm water and set aside for ~10 minutes.
  4. Make a well in the centre of the flour and add cooled oatmeal and yeast mixture.
  5. Working from the centre outward, gradually incorporate the flour into the liquids.
  6. Turn dough out onto work surface and begin kneading. It will be very stiff at first. Don't add more water yet.
  7. After 10-15 minutes of kneading, smear 2 Tbsp. of butter in the work surface and knead it in.
  8. Once first measure of butter has been fully incorporated, add the remaining 2 Tbsp. in the same way.
  9. One all of the butter has been worked into the dough, evaluate to see if it needs more water.
  10. Work in additional water by wetting hands every few strokes as needed.
  11. Knead dough for 20-40 minutes total. (Timing will depend on how efficient your kneading is.)
  12. Shape into a ball and set in a covered bowl to rise for 60-90 minutes. Rise is done when 1cm (~0.5") deep fingerprint doesn't fill in at all.
  13. Knock back, shape into a ball again, and return to covered bowl to rise again. This rise should take 45-60 minutes.
  14. Knock back again, divide into two equal portions, and shape each portion into a ball, stretching the gluten taut across the top of each ball. Cover and set aside for 10 minutes.
  15. Shape into loaves by pressing each ball flat, folding into thirds, and rolling up like a jelly roll.
  16. If desired, roll each loaf in rolled oats to coat the outside.
  17. Place shaped loaves into greased loaf pans, cover, and set aside to rise for 30-45 minutes.
  18. If they rise very well, slash the tops.
  19. Bake at 180°C (350°F) for 45 minutes.


1 The authors recommend either old-fashioned rolled oats or steel-cut oats for this recipe. I had ~120g of quick oats left in the cupboard, so I just tossed them in. Rolled oats will make for a lighter bread with a milder flavour. Steel-cut oats will make for a slightly denser, heartier bread with a stronger flavour. Back

Friday, 20 September 2019

Whole Wheat Raisin-Walnut Bread

I'm really enjoying breads with inclusions these days. I've also been finding myself craving sweets quite a bit. I've been eyeing up the recipe for "health nut bread" in the Laurel's Kitchen Bread Book, but then TF spotted this recipe for "deluxe raisin bread" and suggested giving it a try. This is, indeed, a very nice raisin bread! I was a bit pressed for time, so I ended up cutting the kneading a little short, but I still got a lovely rise and not bad oven spring from it and the flavour is excellent so, all-in-all, I'm pretty pleased.


Deluxe Raisin Bread

Slightly adapted from Laurel's Kitchen Bread Book

Ingredients

  • 1 c. raisins
  • 1 1/2 c. water
  • 1/2 c. warm water
  • 2 tsp. active dry yeast
  • 2 Tbsp. honey
  • 1/4 c. oil
  • 1 large egg
  • 790g hard (strong/bread/high grade) whole wheat flour
  • 2 tsp. (~10g) coarse sea salt
  • 3/4 c. chopped walnuts, toasted1
  • ~1 Tbsp. butter (optional)

Directions

  1. Heat raisins and water over medium-high heat. Bring to a boil, then reduce to medium-low and simmer2 for 5 minutes.
  2. Meanwhile, add yeast to warm water and set aside for ~10 minutes.
  3. Once the raisins are done simmering, drain them, reserving the liquid. Set the raisins aside.
  4. Add cold water to the raisin water to bring the volume back up to 1 1/2 c.
  5. Dissolve honey into the raisin water.
  6. Stir in oil and -- when it is cool enough not to cook it -- the egg and mix well. If egg mixture is still very warm, transfer it to the fridge or freezer for a few minutes or set it in a bowl of ice to cool further.
  7. Combine flour and salt and mix thoroughly.
  8. Make a well in the centre of the flour and pour in the yeast mixture and the egg mixture. (Make sure the egg mixture isn't too hot!)
  9. Working from the centre outward, gradually incorporate the flour into the wet ingredients.
  10. Once most of the flour has been incorporated, turn the dough out onto the work surface (along with any residual flour) and begin kneading.
  11. Knead for at least 20 minutes. (I find I usually need 30-40.) Add small amounts of extra flour or water as needed to achieve a good consistency.
  12. Knead raisins and walnuts into dough.
  13. Form the dough into a ball and place in a covered bowl to rise. Rise is done when dough does not spring back/fill in when a wet finger is poked ~1cm deep. (Check after ~1 hour, but it could take 2 if your kitchen is on the cooler side.)
  14. Knock the dough back. Knead it a few strokes if you like. Return to covered bowl to rise again. Use the same test to determine when rise is done.
  15. Knock the dough back. Press out as much accumulated gas as possible. Divide into two equal portions.
  16. Form each portion into a round ball and smooth the top as best you can. Cover and set aside for ~10 minutes.
  17. For each ball: Flip smooth side down, press into a wide flat disc, fold the bottom edge up and the top edge down and press flat again to form a long rectangle, grab a narrow edge and roll up the rectangle to make a cylinder.
  18. Place each cylinder seam side down into a greased loaf pan.
  19. Cover and set aside to rise for at least half an hour. Rise is done when 1cm fingerprint fills in very slowly.
  20. Bake at 190°C (375°F) for 10 minutes. Reduce temperature to 160°C (325°F) and bake for an additional 30 minutes. Loaf is done when it sounds hollow.
  21. If desired, brush crust with butter while loaf is still warm.


1 Toasting the walnuts will make them taste "nuttier" and less bitter. It will also keep them crunchy. If you forget to toast them (like I did), not to worry! This loaf is sweet enough to balance the bitterness of untoasted walnuts. And, the while untoasted walnuts aren't as crunchy and assertive as their toasted counterparts, I still find them firm enough to add a pleasant textural contrast to the loaf. Back
2 I simmered my raisins covered. Next time I would simmer them uncovered to allow for more evaporation. Back

Thursday, 19 September 2019

Prosciutto Bread

I don't normally make white bread these days. When I came across this recipe for prosciutto bread in Cook's Country though, I figured I could make an exception. I made the bread exactly as recommended in the recipe: white flour, small loaves, hot oven... everything it said. And the bread was alright. TF really liked it. I tried a slice and was fairly underwhelmed.

I decided to try it again today but this time in a pan and with whole wheat flour. For me, this made all the difference. This new version is lovely! It's still not something I'd do all the time, but it's good enough that I can definitely see myself making it again at some point. (I won't be making the white flour version again.)

Sorry it's only a picture of half a loaf; it was really good bread!


Whole Wheat Prosciutto Bread

Adapted from the Laurel's Kitchen Bread Book and Cook's Country February/March 2018

Ingredients

  • 1/2 c. warm water
  • 2 tsp. active dry yeast
  • 900g hard (strong/bread/high grade) whole wheat flour
  • 2 tsp. (~10g) coarse sea salt
  • 2 1/4 c. water
  • 2 Tbsp. honey
  • 2 Tbsp. olive oil
  • 180g prosciutto, cut into 6 or 7mm cubes
  • 180g pepperoni, cut into 6 or 7mm cubes
  • 180g capicola, cut into 6 or 7mm cubes
  • 250g provolone, cut into 6 or 7mm cubes
  • 2 tsp. black peppercorns, coarsely ground

Directions

  1. Combine yeast with warm water and set aside for 10 minutes or so.
  2. Combine flour and salt and mix well.
  3. Mix honey with second measure of water.
  4. Make a well in the centre of the flour and pour the honey-water in. Add the yeast mixture as well.
  5. Working from the centre outward, gradually incorporate the flour into the liquids.
  6. When most of the flour has been incorporated, turn the dough out onto the work surface (with the remaining flour) and begin to knead it.
  7. After kneading dough for ~10 minutes, add the oil.
  8. Knead for at least another 10 minutes -- another 20 would be better -- adding a little extra flour or water as necessary.
  9. Shape into a ball and place in a covered bowl to rise.
  10. Rise is done when dough neither sinks back nor fills in after being poked (~1cm deep) with a wet finger1.
  11. Knock the dough back. Knead it a few strokes if you like.
  12. Shape it back into a ball and set it in the covered bowl to rise again.
  13. Use the same test to determine when the second rise is done.
  14. Knock the dough back again and divide into two equal portions.
  15. Knead the meat, cheese, and pepper into the dough a handful at a time. (Half of the inclusions should be allotted for each portion of dough.)
  16. Round the dough portions as best you can and place each one under an upside-down bowl to rest for 10 minutes.
  17. One at a time, flatten each round. Fold the bottom up and the top down to make a roughly rectangular shape. Grab a short side and roll up.
  18. Place each shaped loaf seam side down in a greased loaf pan.
  19. Cover with a shower cap, plastic wrap, or a damp tea towel and set to rise.
  20. For the last rise, the hole should still be filling in slowly by the end, but not too much or too quick.
  21. Bake at 220°C (425°F) for 10 minutes then reduce heat to 160°C (325°F) and continue baking for an additional 45-60 minutes.


Variants

White Prosciutto Bread

From Cook's Country February/March 2018

Ingredients

  • 3 c. bread flour
  • 1/2 Tbsp. instant (rapid-rise) yeast
  • 1 tsp. salt
  • 1 c. mild lager, room temperature
  • 6 Tbsp. water, room temperature
  • 3 Tbsp. olive oil
  • 85g prosciutto, sliced 6mm thick and cut into 12mm pieces
  • 85g pepperoni, sliced 6mm thick and cut into 12mm pieces
  • 85g capicola, sliced 6mm thick and cut into 12mm pieces
  • 140g provolone, sliced 6mm thick and cut into 12mm pieces
  • 1/2 Tbsp. coarsely ground pepper
  • cornmeal

Directions

  1. Combine bread flour, yeast, and salt and mix well.
  2. Combine lager, water, and oil in a separate bowl.
  3. Pour lager mixture into flour and mix to combine (~2 minutes by machine).
  4. Use dough hooks in stand mixer to knead for another 8 minutes.
  5. Add meat, cheese, and pepper and mix for another couple minutes.
  6. Turn dough out onto work surface and work in any remaining bits of meat and cheese by hand.
  7. Set in a covered, greased bowl to rise until doubled in size.
  8. Knock back and divide dough into two equal portions.
  9. Shape as for whole wheat version but instead of using a greased loaf pan, place both loaves on a cornmeal dusted2 baking sheet.
  10. Cover (as best you can) and set dough to rise. (Use the same test as with whole wheat to determine when the rise is done. Because this is the last rise, hole should fill in slowly/slightly.)
  11. Bake at 230°C (450°F) for 22-25 minutes.


1 If the hole fills in, it needs more time to rise. If it sinks back, it's gone a bit past the ideal point so, knock it back and try to catch it a bit sooner next time. Back
2 Greased and cornmeal dusted if you prefer. Back