Showing posts with label peanuts. Show all posts

Thursday, 5 June 2025

Lazy Zongzi Rice

粽子 (zòngzǐ) are sticky rice dumplings. They're the tetrahedral ones that you see wrapped in bamboo leaves and tied up with string. They are made with glutinous rice, can be savoury or sweet, and are traditionally eaten during 端午节 (duānwǔ jié) or Dragon Boat Festival, which occurs sometime between late May and mid-June each year.1

Unlike "real" 粽子, this version is not wrapped into individual bamboo leaf packets before steaming or boiling. Instead, all of the ingredients are mixed together in a leaf-lined steamer basket. This gives you all of the same flavours without going to the effort of making individual dumplings.

I didn't have any dried bamboo leaves on hand and I did have a surplus of lettuce. So I just ended up using that to line my steamer basket. This did not, of course, impart any of the traditional bamboo flavour to the rice, but it worked just fine to prevent the rice from sticking to its cooking vessel. And we still got to enjoy all of the other flavours in the rice. So, all-in-all, I'd call this a success. Even if not necessarily a super traditional one.


Lazy Zongzi Rice

Slightly adapted from The Woks of Life

Ingredients

Rice

  • 1 1/2 c. uncooked glutinous (sticky/sweet) rice
  • 8-10 dried bamboo leaves
  • 1/2 c. shelled raw peanuts (without skin)
  • 3-5 Chinese sausages, sliced thin
  • 3-4 green onions, chopped
  • 1 Tbsp. light soy sauce
  • 1 tsp. coarse sea salt

Pork Belly

  • 450g pork belly2, cut into 1cm dice
  • 2 Tbsp. light soy sauce
  • 1/2 tsp. coarse sea salt
  • 1 tsp. dark soy sauce
  • 2 Tbsp. Shaoxing wine (绍兴酒)
  • 1 tsp. sugar
  • 1 tsp. white peppercorns, ground

Directions

  1. Place the rice in a large bowl with enough water to cover by at least 2-3cm. Cover and soak for at least 6 hours or as long as overnight.
  2. Soak the bamboo leaves for at least 3 hours (or overnight).
  3. Soak the peanuts for 1 hour, then boil for 10 minutes.
  4. Meanwhile, combine the pork belly, light soy, salt, dark soy, wine, sugar, and white pepper and mix well. Cover and chill for 1-2 hours.
  5. Drain the rice and the peanuts.
  6. Combine the rice, peanuts, Chinese sausages, green onions, soy sauce, and salt and mix well.
  7. Line a steamer basket with some of the bamboo leaves.
  8. Place a layer of rice over the leaves, followed by a layer of pork belly. Repeat once more.
  9. Cover the last layer of pork belly with the remaining bamboo leaves.
  10. Place the steamer basket into a pot/steamer over cold water.
  11. Cover, bring to a boil, and steam for 60-90 minutes. Or, if pressure steaming, cook on high pressure for 45 minutes with a 10-minute natural release.
  12. Keep warm until ready to serve. (Rice will harden when cooled.)


1 Meaning that I even managed to make this dish at a vaguely seasonally appropriate time! Back
2 The original recipe only called for 225g of pork belly, but I had extra, so I used it all and just scaled up the marinade accordingly. I liked these proportions, but feel free to use more or less as you see fit. Back

Friday, 30 May 2025

Kung Pao Beef

Yes, kung pao beef. I know that chicken is the traditional choice. But Woks of Life had a recipe for it using steak, so I decided to give it a try. And, I gotta say, while it wasn't a favourite, it was very good.

Like many stir-fries, the mise en place takes longer than the actual cooking, but I don't mind that. Just be sure to do all of your chopping before you start cooking. Because once you're underway, there won't be much time to stop until it's done.


Kung Pao Beef

Slightly adapted from The Woks of Life

Ingredients

Beef

  • 400g steak (preferably flank steak or similar), sliced ~5mm thick against the grain
  • 2 tsp. cornstarch
  • 2 tsp. Shaoxing wine (绍兴酒)
  • 2 tsp. oil
  • 2 tsp. oyster sauce
  • 1/8 tsp. baking soda

Sauce

  • 3 Tbsp. water
  • 1 Tbsp. light soy sauce
  • 1 Tbsp. rice vinegar
  • 1 tsp. sugar
  • 1 tsp. cornstarch
  • 1 tsp. hoisin sauce
  • 1/2 tsp. Sichuan peppercorn powder
  • 1/2 tsp. sesame oil
  • 1/2 tsp. dark soy sauce

Everything Else

  • 1 tsp. minced ginger
  • 5 dried chiles1, chopped
  • 1 bell pepper, chopped
  • 2-3 cloves garlic, minced
  • 2-3 green onions, chopped with greens and whites kept separate
  • 1 c. roasted (unsalted) peanuts
  • 2 Tbsp. oil

Directions

  1. Combine the beef, cornstarch, wine, oil, oyster sauce, and baking soda. Mix well and set aside for 1-2 hours.
  2. Meanwhile, combine the water, light soy sauce, vinegar, sugar, cornstarch, hoisin sauce, Sichuan peppercorns, sesame oil, and dark soy sauce and mix well. Set aside.
  3. Combine the ginger and chiles and set aside.
  4. Combine the bell pepper, garlic, and the white parts of the green onions and set aside.
  5. Combine the peanuts and the green parts of the green onions and set aside.
  6. Heat a wok over high heat.
  7. Drizzle in the oil and swirl to coat.
  8. Add the beef and cook for 3-4 minutes, flipping and turning once or twice until seared on the outside, but not quite cooked through.
  9. Reduce temperature to medium-low, remove beef from wok, and set aside.
  10. Add the ginger and dried chiles and cook for a minute or two.
  11. Add the bell peppers, garlic, and white parts of the green onion and stir-fry for another 2 minutes.
  12. Return the beef to the wok.
  13. Give the sauce a good stir and pour it over the beef.
  14. Stir-fry until beef is desired doneness (2-3 minutes longer).
  15. Add the peanuts and the green parts of the green onions and stir-fry for one more minute.
  16. Serve over rice.


1 The original recipe calls for removing the seeds from the chiles, which I did. I found this made for a very mild final dish however. And while I suppose that this could be addressed by adding more chilies, I do wonder if simply leaving the seeds in might be the better way to go next time. Back

Sunday, 24 November 2024

Thai Cucumber Salad

We got a surprise cucumber in our produce basket last week. Normally I wouldn't worry about it because cucumbers and bell peppers were the Kidlets main school snacks for several years. But she seems to have gone off them lately. So the cucumber was going begging and I needed to find a use for it.

Enter this delightlfully low-effort cucumber salad. Just toss everything in a bowl and let it sit for half an hour. Boom! Done.


Thai Cucumber Salad

Slightly adapted from Vegetable of the Day by Kate McMillan

Ingredients

  • 1/3 c. rice vinegar
  • 1 1/2 Tbsp. sugar
  • 1/4 tsp. coarse sea salt
  • 1/8 tsp. black peppercorns, ground
  • 1/2 small red onion (or 1/4 large), thinly sliced
  • 1 English cucumber, sliced into 1cm thick discs
  • 1 fresh chile1, thinly sliced
  • 1/2 c. chopped fresh cilantro
  • 1/4 c. roasted unsalted peanuts2, chopped

Directions

  1. Combine vinegar, sugar, salt, and pepper in a small pot and bring to a boil.
  2. Cook for 2-3 minutes. Remove from heat and set aside.
  3. Add onion to vinegar mixture and allow to cool.
  4. Pour vinegar mixture over cucumber slices.
  5. Add chile and toss to combine.
  6. Set aside for at least 30 minutes.
  7. Stir in cilantro and peanuts and serve.


1 The recipe calls for a jalapeño, but I thought that a Thai or finger chile would go better and I already had a bunch of those on hand, so that's what I went with. I think either a red or green Thai, cayenne, serrano, or finger chile would work here. (Or a jalapeño in a pinch, I guess.) Use whatever you've got. Back
2 The recipe only calls for 2 Tbsp. of peanuts and that's what we used when we made this. That said, I feel that it would have benefitted from more peanuts, so I've upped the quantity here. Back

Friday, 20 September 2024

Lasoon Sengdane Batate chi Bhajee (Garlic-Peanut Potato Curry)

We had some potatoes that needed to be used up and I needed another dish to go with the eggplant curry for dinner last night, so this potato curry was a natural choice. (I had originally been hoping to also make a dal go to with it to add a little more protein to the meal, but I ran out of energy and just stuck with the two veggie curries in the end.)

TF usually isn't that big a fan of potato curries. But surprisingly, in this case she actually preferred this to the eggplant one! Honestly, they were both excellent. Although grinding up the peanuts and garlic and whatnot for the initial step of the recipe did take a bit of elbow grease. Next time I might try using the "food chop" setting on the blender rather than doing it in the molcajete. Hopefully that will streamline the process a bit.


Lasoon Sengdane Batate chi Bhajee

Slightly adapted from 660 Curries by Raghavan Iyer

Ingredients

  • 2 Tbsp. sesame seeds
  • 2 Tbsp. raw peanuts (without skins)
  • 4-5 cloves garlic
  • 3 dried red Thai, cayenne, or arbol chilies
  • 2 Tbsp. peanut oil1
  • 450g potatoes, cut into 2cm cubes
  • 1/2 tsp. ground turmeric
  • 1 small (~400mL) can diced tomatoes
  • 1 c. water
  • 2 tsp. coarse sea salt
  • 2 Tbsp. chopped fresh cilantro
  • 12 fresh or frozen curry leaves

Directions

  1. Combine the sesame seeds, peanuts, garlic, and chilies in a blender, food processor, or molcajete and pulse to form a finely chopped, slightly gritty blend. (If using a molcajete, you may want to add a small portion of the salt to help aid in breaking down and grinding the garlic and chilies.)
  2. Heat the oil over medium-low heat.
  3. Add the minced blend to the oil and cook, stirring, until the mixture turns brown and begins to get somewhat crumbly (5-8 minutes).
  4. Add the turmeric and cook for another 5-10 seconds.
  5. Add the potatoes, tomatoes, water, and salt and stir to combine.
  6. Raise heat to medium-high and bring to a boil.
  7. Reduce heat to medium and cook, stirring occasionally, until potatoes are tender (30-40 minutes).
  8. Stir in the cilantro and curry leaves and serve.


1 I didn't have any peanut oil, so I decided to go for sesame oil instead. If you don't have either of those, then I think that canola oil or ghee would also be fine. (Although obviously don't use ghee if you need to keep things vegan.) Back

Monday, 17 June 2024

Bund Gobhi Kakadi nu Salade (Cabbage-Cucumber Salad)

I had initially been intending to do some baked cod for dinner last night, but, when dinner time rolled around... I just wasn't feeling it. So I flipped through the curry cookbook instead. I started at the back and worked my way forward until I got to this interesting salad recipe.

It's hot here right now, so the idea of a nice, cool salad for dinner was quite appealing. And it meant that I could finally use up the cabbage and cucumber out of the fridge! Granted it was napa cabbage rather than the green cabbage the recipe called for, but I had a hunch that I could get away with making that swap in this instance.

I made the recipe to spec initially and it was good. That said, I felt like it could stand to be a little punchier, so I added a couple tsp. of Maharashtrian garam masala. I think that helped, but I might be inclined to add a minced green chile next time as well. Still... it was a tasty refreshing salad for a hot day.


Bund Gobhi Kakadi nu Salade

Slightly adapted from 660 Curries by Raghavan Iyer

Ingredients

  • 1 small head cabbage, shredded
  • 1 English cucumber, halved lengthwise and thinly sliced crosswise
  • 1/2 c. shredded fresh coconut1
  • 1/4 c. chopped fresh cilantro
  • 1 fresh green Thai, finger, or serrano chile, minced (optional)
  • 1 Tbsp. sugar
  • 1 tsp. coarse sea salt
  • 1/2 c. raw peanuts (without skins)
  • 1-2 Tbsp. mustard oil
  • 1 tsp. mustard seeds
  • 1/4 tsp. ground asafetida
  • juice of 1 lime
  • 1-2 tsp. Maharashtrian garam masala (optional)

Directions

  1. Combine the cabbage, cucumber, coconut, cilantro, chile (if using), sugar, and sea salt and mix well.
  2. Toast the peanuts over medium-high heat until brown and spotty.
  3. Transfer to a molcajete or large mortar and pestle and coarsely grind (to the texture of coarse breadcrumbs). If using a food processor, blender, or spice grinder wait until the peanuts have cooled completely before grinding or else they will become cakey.
  4. Add the peanuts to the salad.
  5. Heat the oil over medium-high heat.
  6. Add the mustard seeds, cover, and cook until they've stopped popping (30-60 seconds).
  7. Remove from heat and stir in the asafetida.
  8. Allow to cook in the residual heat for 5-10 seconds, then pour the oil mixture over the salad and stir to combine.
  9. Add the lime juice and garam masala (if using) and mix well.
  10. Serve cold or room temperature.


1 Alternatively, use 1/4 c. of dried, unsweetened shredded coconut. Pour over 1/4 c. of boiling water, let stand for 10-15 minutes, then drain and use as directed. Back

Monday, 10 June 2024

Toovar Mandvishing nu Dal (Pigeon Pea and Peanut Dal)

I have not been very good about keeping on top of the meal planning and groceries lately. I had been trucking along with the "<x> of the Day" cookbooks pretty well so far. But... I kind of lost my momentum and I've been having trouble getting back in the groove again. So, when dinner time rolled around and I still hadn't gotten together any of the supplies I needed for the other recipes I'd been looking at, I turned to my trusty copy of 660 Curries and paged through the legume section until I found something suitable.

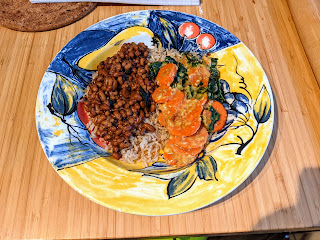
Although this dal couldn't hold a candle to the green pea curry I ended up making to go with it, it was still very nice. The legumes made it filling enough to serve as a main course and the fenugreek added enough greens that it felt like we were getting our veggies as well.

Photo goes here.

Toovar Mandvishing nu Dal

Slightly adapted from 660 Curries by Raghavan Iyer

Ingredients

  • 1 c. skinned, split pigeon peas
  • 1/2 c. raw peanuts, skinned
  • 4 c. water
  • 2 c. chopped fresh or frozen fenugreek leaves
  • 1/4 c. shredded, unsweetened dried coconut (or 1/2 c. fresh)
  • 1 Tbsp. crumbled jaggery
  • 1 tsp. coarse sea salt
  • 1 tsp. tamarind concentrate
  • 1/4 tsp. ground turmeric
  • 4-6 fresh green Thai, finger, or serrano chilies, halved lengthwise
  • 2 Tbsp. ghee
  • 1 tsp. mustard seeds
  • 1/4 tsp. ground asafetida

Directions

  1. Combine the pigeon peas and peanuts and rinse well and drain.
  2. Add the water and bring to a boil over medium-high heat.
  3. Skim off and foam and add the fenugreek.
  4. Reduce heat to medium-low, cover, and cook, stirring occasionally, until the peas are tender (20-25 minutes).
  5. Add the coconut, jaggery, salt, tamarind, turmeric, and chilies and continue to simmer, uncovered, stirring occasionally, for 5 minutes.
  6. Melt the ghee over medium-high heat.
  7. Add the mustard seeds, cover, and cook until they've stopped popping (30-60 seconds).
  8. Stir in the asafetida and immediately remove from heat.
  9. Pour the ghee mixture over the dal and serve.


Variants

Vegan Version

Ingredients

  • 1 c. skinned, split pigeon peas
  • 1/2 c. raw peanuts, skinned
  • 4 c. water
  • 2 c. chopped fresh or frozen fenugreek leaves
  • 1/4 c. shredded, unsweetened dried coconut (or 1/2 c. fresh)
  • 1 Tbsp. crumbled jaggery
  • 1 tsp. coarse sea salt
  • 1 tsp. tamarind concentrate
  • 1/4 tsp. ground turmeric
  • 4-6 fresh green Thai, finger, or serrano chilies, halved lengthwise
  • 2 Tbsp. coconut oil or vegetable ghee
  • 1 tsp. mustard seeds
  • 1/4 tsp. ground asafetida

Tuesday, 4 April 2023

Sweet Potato Salad

I like sweet potatoes, but it's always nice to find new ways of preparing them. I thought this salad looked intriguing, so I decided to add it to the dinner menu for tonight to give us an extra vegetable side. The sriracha-soy-peanut variant also looks delicious, but I decided to go with the cumin-paprika-almond version for today.

Sweet Potato Salad with Cumin, Smoked Paprika, and Toasted Almonds

Slightly adapted from Cook's Country October/November 2020

Ingredients

  • 700g sweet potatoes, cut into 2cm cubes
  • 2 Tbsp. olive oil, divided
  • 1/2 tsp. coarse sea salt, ground
  • 2 small scallions, sliced thin
  • 1 1/2 Tbsp. lime juice
  • 6-8 slices pickled jalapeño, chopped
  • 1/2 tsp. cumin seeds, ground
  • 1/2 tsp. black peppercorns, ground
  • 1/4 tsp. allspice berries, ground
  • 1/2 tsp. smoked paprika1
  • 1 clove garlic, minced
  • 1/4 c. chopped fresh cilantro
  • 1/4 c. slivered almonds, toasted

Directions

  1. Preheat the oven to 230°C (450°F).
  2. Toss the sweet potatoes with 1 Tbsp. of the oil and the salt.
  3. Spread the potato cubes in a single layer on the baking sheet.
  4. Roast for 20-25 minutes, stirring halfway through.
  5. Remove from oven and allow to cool.
  6. Meanwhile, combine the scallions, lime juice, jalapeños, cumin, pepper, allspice, paprika, and garlic with the remaining 1 Tbsp. of oil and mix well.
  7. Add the cooled sweet potato cubes, cilantro, and almonds and toss to combine and coat the sweet potatoes.
  8. Serve at room temparature.


Variations

Sweet Potato Salad with Sriracha, Soy sauce, and Peanuts

Ingredients

  • 700g sweet potatoes, cut into 2cm cubes
  • 2 Tbsp. olive oil, divided
  • 1/2 tsp. coarse sea salt, ground
  • 2 small scallions, sliced thin
  • 1 1/2 Tbsp. lime juice
  • 4-6 slices pickled jalapeño, chopped
  • 1 Tbsp. soy sauce
  • 1 Tbsp. sriracha
  • 1 tsp. sugar
  • 1 tsp. grated fresh ginger
  • 1 clove garlic, minced
  • 1/4 c. chopped fresh cilantro
  • 1/4 c. unsalted dry-roasted peanuts2, chopped


1 I didn't have any smoked paprika, so I just used the same amount of sweet paprika + a dash of liquid smoke. Back
2 The original recipe calls for salted dry-roasted peanuts here, but I feel like that would make the final result too salty. The soy sauce is already going to add a bunch of extra salt; I don't think the peanuts need to be salted too! Back

Monday, 3 April 2023

Hare Tamatar Til chi Bhajee (Green Tomato Curry)

We keep getting offered green tomatoes in our produce basket. And I keep swapping them out for other things because I have no idea what to do with green tomatoes. Well... fry them, I suppose. But my understanding is that they're meant to be sliced, breaded, and fried, and that sounds very labour-intensive (not to mention not terribly compatible with my current calorie-restricted diet). So, what does one do with green tomatoes besides frying them? Make curries, apparently!

Once I noticed this curry recipe in the book, I eagerly ordered a few green tomatoes for it. The results were excellent; a bit nutty, mildly spicy, and very satisfying.


Hare Tamatar Til chil Bhajee

Slightly adapted from 660 Curries by Raghavan Iyer

Ingredients

  • 1 Tbsp. peanut or canola oil
  • 1/4 c. raw peanuts, chopped
  • 1 Tbsp. sesame seeds
  • 1 tsp. cumin seeds
  • 450g unripe green tomatoes, cut into large chunks
  • 1 tsp. coarse sea salt
  • 1/2 tsp. ground kashmiri chilies or cayenne
  • 1/4 tsp. ground turmeric
  • 1 c. water
  • 1/4 c. chopped fresh cilantro
  • 1 tsp. sugar

Directions

  1. Heat oil over medium-high heat.
  2. Add peanuts, sesame seeds, and cumin seeds and cook, stirring constantly until nuts have browned (1-2 minutes).
  3. Add the tomatoes, salt, ground chilies, and turmeric and cook, stirring, for 1-2 minutes.
  4. Add water and bring to a boil.
  5. Reduce heat to medium and cook, uncovered, stirring occasionally, until some of the water has evaporated and sauce thickens slightly (6-8 minutes).
  6. Add cilantro and sugar, reduce heat to medium-low, cover, and cook, stirring occasionally, until tomato is tender but not mushy (8-10 minutes).

Sunday, 12 March 2023

Chocolate-Peanut Butter Waffles

I've been trying to come up with different healthy breakfast ideas. My problem is that I get bored pretty easily, so I don't like to have the same thing too many days in a row. And I also want my breakfasts to be filling. I hate it when I eat breakfast only to feel hungry again half an hour later.

To that end, oatmeal is generally out. People always talk about how filling oatmeal is -- how it's a good stick-to-your-ribs breakfast that keeps you feeling full -- but I've never found it to be so. Oatmeal can be really tasty, but even if I have a big bowl of it, I'm ALWAYS hungry ~20 minutes later. Very disappointing. I still eat oatmeal occasionally becuase I do like it. I just wish that it didn't mean either feeling ravenously hungry for half the day or accepting that I'll need to have second breakfast halfway through the morning.

So, oatmeal is a sometimes food, but not a good breakfast go-to for me. Eggs in various forms have been a pretty good bet lately. I had scrambled eggs with feta and spinach for a few days. Then egg salad on bread. Then I switched to salmon salad for a few days. And now I've finished off all of those and I was on the hunt for some new breakfast options.

I probably should have made some sourdough okonomi yaki this morning. But I was feeling extremely tired and flattened and I've also been craving chocolate a lot lately so, in the end, I went with some purportedly healthy chocolate waffles instead.

I will grant that these waffles have very little added sugar. And almost no added fat. So they have that going for them. Unfortunately they are also incredibly bitter. Like, pretty much inedibly so.

The author said that she deliberately didn't add much sweetener to the recipe because she knows how much syrup her family drowns their waffles in, but... man, the amount of syrup these need to be palateable pretty much negates their healthfulness.

I've modified the recipe a bit. I haven't had a chance to test this (hopefully) improved version yet. But I'm optimistic that these changes will cut some of the bitterness without reducing the healthfulness of the recipe.

My first idea was to swap out some of the cocoa powder for powdered peanut butter. I figured that less cocoa == less bitter. And while, yes, that will also mean less chocolate flavour, I'm hoping that replacing some of the chocolate with peanut butter will still result in something pleasingly tasty, even if it is less chocolate-y.

The second change isn't so much a change as a restoration. I normally halve the salt most recipes. I did that here as well. But I think maybe it would be best to keep the original quantity of salt as salt also helps to mask bitterness in food.

And finally -- and this one is probably the riskiest -- I think I'd like to try swapping out the natural cocoa powder for Dutch-processed cocoa. The recipe author gives dire warnings against doing this because of the difference in pH and because natural cocoa powder has a stronger chocolate flavor than Dutched1. This recipe contains a lot of baking soda, so switching from acidic natural cocoa powder to neutral Dutch-processed is a bit risky. That said, there is also a massive quantity of vinegar in the batter. Way more than I would've thought necessary to react with 2 tsp. of baking soda. So, I suspect that I will be able to get away with the swap here. But I haven't tested that theory yet. If I can though, that should also help cut the bitterness. We'll see how it goes...


Chocolate-Peanut Butter Waffles

Adapted from Amy's Healthy Baking

Ingredients

  • 150g whole wheat flour
  • 60g Dutched cocoa powder
  • 1/4 c. peanut butter powder (de-fatted peanut flour)
  • 2 tsp. baking soda
  • 1 tsp. baking powder
  • 1/2 tsp. coarse sea salt, ground
  • 1 tsp. coconut oil, melted
  • 2 large egg whites
  • 2 tsp. vanilla extract
  • 1 Tbsp. maple syrup
  • 1/2 c. fat-free Greek yogurt
  • 1/4 c. vinegar
  • 3/4 c. milk
  • 5 Tbsp. water

Directions

  1. Get your waffle iron out and start it preheating.
  2. Meanwhile, combine flour, cocoa, peanut flour, baking soda, baking powder, and salt and mix well.
  3. In a separate (large) bowl, combine the coil, egg whites, vanilla, maple syrup, yogurt, vinegar, and milk and mix well.
  4. Add ~1/3 of the dry ingredients to the wet and stir until just combined.
  5. Mix in ~2 Tbsp. of the water followed by half the remaining dry ingredients.
  6. Mix in the remaining 3 Tbsp. of water followed by the remaining dry ingredients.
  7. Scoop the batter into your waffle maker and cook according to the instructions for your model.
  8. Carefully remove waffles from waffle iron and set on wire rack.
  9. Serve with syrup, jam, yogurt, fresh fruit, and/or peanut butter fluff2.


1 Interestingly, I was always told the opposite: that Dutched cocoa was both darker and carried a richer, deeper chocolate flavour than natural. Now I don't know who was right. But, either way, the point about the pH is relevant regardless of what the flavour is like. Back
2 I actually made a slightly variant on the original peanut butter fluff recipe to top my waffle with. I'm trying to keep things low calorie, so I replaced the peanut butter with powdered peanut butter (same volume, but 1/2 c. of peanut flour is equivalent to roughly 1/4 c. of actual peanut butter, so I effectively halved the peanut butter). I also swapped out the honey for Splenda since we have a bit left and it should be used up anyway. I think the Splenda gives it a weird flavour. It's not my favourite sweetener. I'm just trying to use up what we have because I don't want to throw it out. Might try the new monk fruit sweetener or some stevia at some point in the future and see if I like that any better. But the Splenda was good enough to get the job done today. Back

Wednesday, 21 December 2022

Crunchy Chocolate Peanut Butter Bars

Got this as an extra Hello Fresh inclusion and it was delicious, and also really quick and easy to put together. Based on personal experience I recommend doubling the recipe and making it in a larger pan because once made it goes fast.

Crunchy Chocolate Peanut Butter Bars

Hello Fresh

Ingredients

  • 2 tbsp butter
  • ½ C bittersweet chocolate
  • 1 tbsp honey
  • 3 tbsp smooth peanut butter
  • ⅛ tsp salt
  • 2 C cornflakes
  • 4 tbsp chopped peanuts

Directions

  1. Initialize a double boiler.
  2. Add butter, chocolate chips, honey, peanut butter, and salt. Whisk together until chips melt and mixture is smooth.
  3. Gently stir in cornflakes.
  4. Line an 8" loaf pan with parchment paper. Pour in chocolate-cornflake mix.
  5. Sprinkle peanuts overtop.
  6. Refrigerate until set, ~2 hours.

Saturday, 8 October 2022

Gyin Thoke (Ginger Salad)

This was part of the spread for TF's birthday dinner. I wasn't really expecting to like it since I don't really care for pickled ginger. But I wasn't making it for me, I was making it for her and she quite enjoys pickled ginger.

In the end everyone liked this salad! Well, except for the Kidlet who couldn't eat it due to the shrimp powder. I didn't worry about including the shrimp since I was so sure the ginger would put her off anyway. I think next time I'll try it without the shrimp so the Kidlet can eat it too. It's really delicious! And, having tried it, I think she probably would like it after all.

Gyin Thoke

Slightly adapted from Burma: Rivers of Flavor by Naomi Duguid

Ingredients

  • 1 c. pickled ginger1
  • 1/2 c. pumpkin seeds, toasted
  • 1/2 c. chopped roasted peanuts2
  • 1/2 c. roasted or fried split soybeans or split peas3
  • 1/2 c. sesame seeds, toasted
  • 1/4 c. dried shrimp powder (optional4)
  • 1-2 Roma tomatoes, cut into thin wedges
  • 1 c. shredded Napa cabbage
  • 1/4 c. fried garlic5
  • 2 Tbsp. lime juice
  • 2 Tbsp. garlic oil
  • 1 tsp. coarse sea salt

Directons

  1. Rinse the ginger in cold water, then drain and slice into thin strands.
  2. Combine ginger, pumpkin seeds, peanuts, fried soybeans, sesame seeds, dried shrimp powder, tomatoes, Napa cabbage, fried garlic, and lime juice in a bowl and mix to combine.
  3. Add garlic oil and salt and mix again.
  4. Adjust seasoning as desired and serve.


1 Japanese gari works well for this purpose. Back
2 You can toast raw peanuts in a dry pan and then chop them or chop commercial dry-roasted unsalted peanuts. Back
3 You can substitute an extra 1/2 c. of peanuts for the soybeans if you can't find or make fried split soybeans. Back
4 Obviously you would need to omit the shrimp to keep this vegetarian. If you're going for vegan as well, you may need to make your own pickled ginger from scratch as not all sugar is vegan and you generally can't tell just by looking at the ingredients. Back
5 Duguid actually suggests slicing the garlic fairly thick when making fried garlic for Burmese recipes. Either way will work; you may just need to adjust your cooking times accordingly. Back

Saturday, 17 September 2022

Mutter Murghi (Chicken with Peas)

I picked up some chicken thighs on sale a few weeks ago and just tossed them in the freezer for future use. Freezer space is at a premium right now though, so I've been trying to find recipes to use up frozen ingredients. I had originally been thinking I might do a Moroccan dish with them, but I was low on spoons which means that I reverted to the kitchen comfort zone that is Indian cooking for me.
I selected this recipe because, unlike many others in the book, it specifically calls for bone-in chicken thighs. The recipe on the facing page also uses chicken thighs, but has a peanut-based sauce, so I opted for this one because I thought it would be school safe. It wasn't until I realized that the Maharashtrian garam masala wasn't already in our spice cupboard and checked the recipe that I saw that it was full of peanuts as well. So, not school safe after all, but still very delicious!


Mutter Murghi

Slightly adapted from 660 Curries by Raghavan Iyer

Ingredients

  • 1/2 c. plain yogurt
  • 2 Tbsp. heavy (35%) cream
  • 2 Tbsp. ginger paste
  • 1/2 tsp. coarse sea salt
  • 1/4 tsp. ground turmeric
  • 6-7 cloves garlic, minced
  • 1-2 fresh green Thai, finger, or serrano chilies, minced
  • 680g bone-in chicken thighs, skin removed
  • 2 Tbsp. schmaltz1
  • 1 onion, halved and sliced
  • 1/2 c. water
  • 1 c. frozen peas
  • 2 Tbsp. chopped fresh cilantro
  • 1 Tbsp. Maharashtrian garam masala

Directions

  1. Combine the yogurt, cream, ginger paste, salt, turmeric, garlic, and chilies and mix well.
  2. Add the chicken thighs and turn to coat.
  3. Cover and chill for 1-24 hours.
  4. Heat the schmaltz over medium-high heat.
  5. Add the onion and stir-fry until it begins to brown (3-5 minutes).
  6. Add the chicken pieces in a single layer along with the marinade and cook for 4-6 minutes.
  7. Flip the chicken over and cook for another 4-6 minutes.
  8. Add the water and deglaze the pan.
  9. Add the peas, cilantro, and garam masala and stir to combine.
  10. Reduce heat to medium-low, cover, and simmer, turning and stirring occasionally until the chicken is cooked through (15-18 minutes).
  11. Transfer the chicken to a serving platter (leaving the sauce behind).
  12. Increase heat to medium-high and boil the sauce for ~5 minutes.
  13. Pour the sauce over the chicken and serve.


1 I got my chicken thighs skin on and then just pulled the skin off before marinating. TF then fried up the skins (and chunks of fat) with a little salt and pepper to make what basically amounted to chicken craklings. This also left us with a fair amount of schmaltz. The original recipe calls for using canola oil as the fat, but I figured that the schmaltz would be even better, so I just swapped that in. If you don't feel like frying up your chicken skins (or your thighs didn't come with any) then canola oil or ghee will work just fine here. Back

Wednesday, 14 September 2022

Maharashtrian Garam Masala

I was not expecting to see peanuts in a garam masala. Nor coconut. The mix smells delicious, but it definitely defies my expectations for an Indian spice blend.

Maharashtrian Garam Masala

From 660 Curries by Raghavan Iyer

Ingredients

  • 1/4 c. raw peanuts (without skin)
  • 2 Tbsp. sesame seeds
  • 1 Tbsp. coriander seeds
  • 1 tsp. cumin seeds
  • 8-10 dried red Thai, arbol, or cayenned chilies
  • 3 blades mace
  • 1/4 tsp. nutmeg shavings or 1/2 tsp. ground nutmeg
  • 1/4 c. unsweetened shredded dried coconut

Directions

  1. Preheat a pan over medium-high heat.
  2. Add the peanuts, sesame seeds, coriander seeds, cumin seeds, chilies, mace, and nutmeg if using shavings. If using ground nutmeg, omit it for now.
  3. Toast until and peanuts and sesame seeds look nicely browned (3-4 minutes).
  4. Remove from heat and transfer mixture to a plate to cool.
  5. Return the pan to the heat and add the coconut.
  6. Cook until the coconut is brown but not burnt (15-30 seconds).
  7. Transfer the coconut to the plate with everything else.
  8. Once cool, grind (in batches) in a spice grinder.
  9. If using ground nutmgeg, stir it in now.
  10. Normally I don't advise storing spices in the fridge, but with all the high-fat ingredients in this one, I feel it's best kept in the fridge and used relativley quickly. (Iyer says it may be stored at room temperature in an airtight container for up to two months, but I'm not sure I'd be willing to keep it for that long.)

Thursday, 9 June 2022

Masala Bhaat (Maharashtrian-Style Fried Rice)

I wanted a rice dish to serve with my bean korma/chili and figured I'd finally give this fried rice recipe a go. The flavour is quite different from Chinese-style fried rices that I've tried. TM quite liked the peanuts in the mix. The Kidlet decidedly did not. I was pretty ambivalent overall, but it did make a nice accompaniment to the korma, so that was all I really needed from it.

Masala Bhaat

Slightly adapted from 660 Curries by Raghavan Iyer

Ingredients

  • 1 potato, cubed and immersed in cold water
  • 2 Tbsp. oil
  • 1 tsp. mustard seeds
  • 1 tsp. cumin seeds
  • 1 onion, chopped
  • 1/3 c. raw peanuts
  • 1 Tbsp. sesame seeds
  • 3 c. cooked rice, cooled
  • 1 c. frozen green peas
  • 1 tsp. sambhar masala
  • 15 fresh or frozen curry leaves
  • 1 tomato, chopped
  • 2 Tbsp. chopped fresh cilantro

Directions

  1. Drain the potato cubes and set aside.
  2. Preheat a wok over medium-high heat.
  3. Once the wok is good and hot, drizze the oil down the sides and swirl it in the bottom.
  4. Add the mustard seeds, cover, and cook until they've stopped popping (30-60 seconds).
  5. Add the cumin seeds and let them sizzle for 5-10 seconds.
  6. Add the onion, peanuts, sesame seeds, and potatoes and stir-fry for until the potatoes start to crisp up (5-10 minutes).
  7. Break up the rice and add it to the wok.
  8. Stir-fry for a minute or two, then add the peas, masala, and curry leaves.
  9. Stir-fry for another 5 minutes.
  10. Add the tomato and cook, stirring frequently, until warmed (2-4 minutes).
  11. Sprinkle with cilantro and serve.

Monday, 31 January 2022

Chori Ane Sengdana nu Dal (Cowpea-Peanut Dal)

I was in the mood for beans tonight. I felt like some sort of small whole legume would go well: mung beans, mapte beans, cowpeas, moth beans, etc. In the end I settled on this cowpea dal. It takes a while to cook but is quite straightforward to make. And I enjoyed the sweet, sour, and spicy aspects of it. It doesn't need much to round it out to a full meal. I served it with a simple carrot curry and some rice and paratha. If you wanted to dress it up a bit, I think sonth (tamarind-date chutney) would complement and accentuate the flavours. But I really liked it just as it was honestly.


Chori Ane Sengdana nu Dal

Slightly adapted from 660 Curries by Raghavan Iyer

Ingredients

  • 1 c. red cowpeas (chori/sabud chowli/adzuki beans)
  • 4 c. water
  • 6 pieces dried black kokum
  • 2 Tbsp. unsalted roasted peanuts
  • 1 Tbsp. jaggery
  • 1 tsp. coarse sea salt
  • 1/4 tsp. ground turmeric
  • 1/4 tsp. ground asafetia
  • 2-3 Tbsp. ghee
  • 1 tsp. cumin seeds
  • 1 Tbsp. ginger paste
  • 12-15 fresh or frozen curry leaves
  • 2-4 fresh green Thai chilies, halved lengthwise

Directions

  1. Rinse the beans thoroughly, then add hot water to cover and set aside for 1-2 hours.
  2. Drain the beans, return to pot, add water, and bring to a boil.
  3. Skim off any foam, add kokum, reduce heat to medium, partially cover, and simmer, stirring occasionally, for ~20 minutes.
  4. Add peanuts, jaggery, salt, turmeric, and asafetida, cover, and simmer, stirring occasionally, for another 20 minutes.
  5. Meanwhile, melt 2 Tbsp. of ghee over medium-high heat.
  6. Add cumin seeds and sizzle for ~10 seconds.
  7. Stir in ginger paste and cook for ~1 minute.
  8. Toss in curry leaves and chilies, stir once or twice, remove from heat, and set aside.
  9. Once beans have finished their second 20-minute cooking period, stir in the ghee and spices.
  10. Cover and simmer for another 20-25 minutes.
  11. If desired, stir in 1 additional Tbsp. of ghee.
  12. Serve with rice.

Sunday, 23 January 2022

Gajar, Palak, Ane Sengdane chi Bhajee (Carrot, Spinach, and Peanut Curry)

I needed a vegetable dish to round out tonight's dinner. I was initially planning on doing something with peas and spinach... until I remembered we were all out of cream. A bunch of the other curries I was looking at relied on cabbage or cauliflower -- neither of which we have right now. And the bell pepper curry that I'd finally settled on making turned out not to be a viable option either. Of course, I didn't realize this until I'd already started the mise en place for it. Luckily I hadn't done much yet, just mixed a bit of turmeric with some chickpea flour. And, since this recipe took the exact same amount of turmeric, I just decided to toss my extra-yellow flour in so as not to waste the ingredients.

Given that the original recipe doesn't call for any chickpea flour, it did come out a bit different than if I'd made it as written, but I was happy with the result. And it saved me having to either throw out or store the turmeric'd chickpea flour. I just added a bit extra water (~125mL) to compensate for the chickpea flour's thickening effect.


Gajar, Palak, Ane Sengdane chi Bhajee

Slightly adapted from 660 Curries by Raghavan Iyer

Ingredients

  • 1/4 c. raw peanuts
  • 2 Tbsp. sesame seeds
  • 2 Tbsp. unsweetened shredded coconut
  • 2-3 dried red Thai, cayenne, or arbol chilies
  • 2-3 cloves garlic
  • 2 Tbsp. canola (or other neutral) oil
  • 1/4 tsp. ground turmeric
  • 2 Tbsp. chickpea flour (optional)
  • 450g carrots, peeled and sliced crosswise
  • 3/4 tsp. coarse sea salt
  • 1 tsp. sugar
  • 1-1 1/2 c. water
  • 100g fresh kale or spinach, chopped

Directions

  1. Combine peanuts, sesame seeds, coconut, chilies, and garlic in a food processor (or blender with a "chop" setting) and process until the texture of breadcrumbs.
  2. Heat oil over medium heat.
  3. Add peanut mixture and cook for 1-2 minutes.
  4. Add turmeric and chickpea flour (if using) and cook for another minute or so.
  5. Add carrots, salt, sugar, and water. Use more water if using chickpea flour, less if making without flour.
  6. Bring to a boil and cook for 5-7 minutes.
  7. Add greens and cook for another 3-5 minutes.
  8. Serve with rice and/or flatbreads.

Tuesday, 27 July 2021

Peanut Butter Mug Cookie

I've made a few differen mug cakes over the years, but it never really occurred to me to try a mug cookie before. I'm actually pretty pleased with how this one turned out. It's especially good with a square of chocolate plopped on top to get all melty and delicious during the last minute or so of cooking.

The original recipe called for 3 Tbsp. of smooth peanut butter + 1 Tbsp. of chopped peanuts. I only had crunchy peanut butter on hand, so I decided to just go with 1/4 c. of crunchy and that worked out great. I like using a "natural", just-peanuts-style peanut butter. It should work fine with sweetened (and salted) peanut butters as well, but I would be inclined to cut back on the sugar slightly if using one of those.

Peanut Butter Mug Cookie

Slightly adapted from Taste of Home

Ingredients

  • 1 Tbsp. butter1
  • 1/4 c. crunchy peanut butter (preferably "natural")
  • 3 Tbsp. sugar
  • 1 large egg yolk2
  • 1/4 c. all-purpose flour
  • 3 Tbsp. milk
  • 1/8 tsp. vanilla extract
  • 1 square of chocolate (optional)

Directions

  1. Place the butter and peanut butter in a large mug and microwave for 30-60 seconds to soften.
  2. Mix to combine.
  3. Stir in sugar.
  4. Add egg yolk and mix well.
  5. Stir in flour.
  6. Now add the milk and vanilla and mix well.
  7. Microwave for 1-3 minutes in 1-minute bursts. The exact amount of time needed will depend on the mug and the microwave being used. Microwave until set and cooked through.
  8. If desired, once the cookie is almost done, add a square of chocolate on top before putting it in for the last 1-minute burst.


1 I used unsalted butter. I think salted would also be okay for this application. Back
2 In future, I'd be inclined to try making this with a whole egg. I suspect 1 medium egg would work in place of the large egg yolk. It'd be a little less rich, of course, but I think it'd still work. Back

Wednesday, 2 June 2021

Chinese Eight Treasure Stir-Fry

It takes a bit of time to get your eight treasures ready but, once you've got all the prep out of the way, it goes really fast. I appreciate the use of garlic as a vegetable rather than a seasoning here. And I think the use of Szechuan spicy bean paste and black bean Laoganma works very nicely too.

I made a few substitutions for my version. I swapped out the edamame for sweet peas. And I used rehydrated dried mushrooms instead of pork. I kept the peanuts in, but I'd be tempted to try it with cashews next time. I think I'd prefer their slightly softer texture.


Chinese Eight Treasure Stir-Fry

Slightly adapted from Woks of Life

Ingredients

  • 1 c. cubed spiced dried tofu (五香豆腐干)
  • 1 c. diced carrot
  • 3/4 c. dried shiitake (Chinese black mushrooms), rehydrated and quartered
  • 2 bulbs/heads of garlic, large cloves cut in half
  • 1/2 c. dried shrimp, rinsed
  • 1 c. raw peanuts
  • 1 c. diced pepper (hot or sweet according to your preference)
  • 1 c. frozen peas
  • 2 Tbsp. Shaoxing wine (绍兴酒)
  • 2 Tbsp. Szechuan spicy bean paste (辣豆瓣酱)
  • 1/2 tsp. sugar
  • 1 Tbsp. sesame oil
  • 1 tsp. black bean Laoganma
  • 3 Tbsp. oil, divided

Directions

  1. Prep all your treasures and get them ready to go by the wok.
  2. Combine wine, bean paste, sugar, sesame oil, and Laoganma to make a sauce.
  3. Heat wok over medium heat.
  4. Add 1/2 Tbsp. of oil and swirl to coat the wok.
  5. Add tofu and stir-fry for ~2 minutes.
  6. Remove from wok and set aside.
  7. Add another 1/2 Tbsp. of oil and the carrots.
  8. Stir-fry for ~2 minutes.
  9. Remove from wok at set aside. (You can combine it with the tofu at this point if you like.)
  10. Add another 1/2 Tbsp. of oil and stir-fry the mushrooms for 2 minutes.
  11. Remove from wok and set aside. (The mushrooms can also go with the carrots and tofu.)
  12. Add 1 Tbsp. of oil to the wok and stir-fry the garlic for ~1 minute.
  13. Add the (rinsed) shrimp and stir-fry for a few seconds.
  14. Add the peanuts and stir-fry for 3-5 minutes.
  15. Add the (bell or hot) pepper and stir-fry for ~1 minute.
  16. Add the peas and stir to combine.
  17. Return the cooked ingredients (tofu, carrot, and mushrooms) to the wok and stir to combine.
  18. Add the sauce and continue to stir-fry until most of the liquid has evaporated.
  19. Serve over rice.

Tuesday, 18 May 2021

Squash Pancakes

Apparently these pancakes are normally made with soi guah or "water squash". These squash are not commonly available in North America, so the author suggests zucchini as a substitute. She says that relatively small zucchini, around 15cm (6") long are best.

I found the insturctions for how to cut the zucchini for this recipe a little odd: 1cm discs cut into 5mm sticks? We did it this way, but it made for very awkward, chunky pancakes. I think I'd prefer smaller pieces in the future. I think I might try 5mm by 5mm or even 3mm by 5mm sticks next time.

Squash Pancakes

Slightly adapted from Mastering the Art of Chinese Cooking by Eileen Yin-Fei Lo

Ingredients

  • 2 Tbsp. dry-roasted, unsalted peanuts
  • 1 1/2 c. 5mm thick zucchini slices, cut into 5mm sticks
  • 3 Tbsp. scallions, sliced
  • 1 large egg
  • 1 Tbsp. ligh soy sauce
  • 1/2 Tbsp. Shaoxing wine
  • 4 1/2 Tbsp. all-purpose flour
  • 1/2 tsp. sugar
  • 1/8 tsp. white peppercorns, ground
  • 2-4 Tbsp. oil, for frying

Directions

  1. Crush or finely chop the peanuts.
  2. Combine peanuts, zucchini, scallions, egg, soy sauce, wine, flour, sugar, and white pepper and mix well.
  3. Heat wok over high heat for ~1 minute.
  4. Add 2 Tbsp. oil and use a spatula to coat the wok with it.
  5. Pour batter into the oiled wok and swirl it around to keep the pancake moving and prevent it from sticking.
  6. Cook for 2-3 minutes, swirling or shaking the wok frequently to prevent sticking.
  7. Slide the pancake onto a plate and then invert it onto a second plate.
  8. Slide the pancake back into the wok, cooked-side-up.
  9. Reduce heat to medium and cook for another 2-3 minutes.
  10. Add additional oil as needed.
  11. Pancake is donw when zucchini is softened and cooked through and golden-brown on both sides.
  12. Cut into wedges and serve.

Saturday, 10 April 2021

Peanut-Corn Muffins

I could not get over how incredibly odd this recipe sounded. The authors swore it was delicious and an especially big hit with kids. I wasn't entirely sold, but I was curious.

The peanuts and the corn both came through nicely. I don't think they really complement each other, but they don't clash either. I feel like maybe they need another element to tie them together. I think adding a few blueberries might make the peanuts feel a little more harmonious and like they're actually meant to be there. Overall, I can't say that I think this will become a new favourite, but the muffins were tasty enough. I might try them again sometime. Especially if I have blueberries to use up.

Peanut-Corn Muffins

Slightly adapted from the Laurel's Kitchen Bread Book

Ingredients

  • 3/4 c. whole wheat flour
  • 1 tsp. baking powder
  • 1/4 tsp. coarse sea salt, ground
  • 3/4 c. cornmeal
  • 1/4 c. roasted, unsalted peanuts, chopped
  • 1 Tbsp. oil
  • 1/4 c. natural (no salt or sugar added) peanut butter
  • 2-3 Tbsp. honey
  • 1 1/2 c. buttermilk
  • 1 large egg
  • 1 c. blueberries, tossed in 1-2 tsp. of additional flour (optional)

Directions

  1. Preheat oven to 180°C (350°F) and grease a muffin tin.
  2. Sift baking powder into flour.
  3. Add salt, cornmeal, and peanuts.
  4. Whisk oil and honey into the peanut butter.
  5. Add buttermilk and egg and mix thoroughly.
  6. Add the dry ingredients and stir to combine.
  7. Stir in blueberries (if using).
  8. Scoop batter into prepared muffin tin.
  9. Bake at 180°C (350°F) for 18-20 minutes.
  10. Remove from oven and let cool in tin for 5-10 minutes.
  11. Turn muffins out onto wire rack to finish cooling.