Sunday 31 January 2021

"Stick" Curry

I think I probably would've preferred to just toss all the "stick" components of this curry into the sauce and serve it as a saucy, chunky stew. But the Kidlet loves any sort of food on sticks and I had the skewers already anyway, so I figured I'd give it a go. It was fun, but the chunky tomato sauce didn't really cling to the meat very well. Serving it as a more traditional curry with chunks of meat in a savoury sauce would've made it easier to enjoy everything together. Plus it saves you the effort of making the little kebabs!

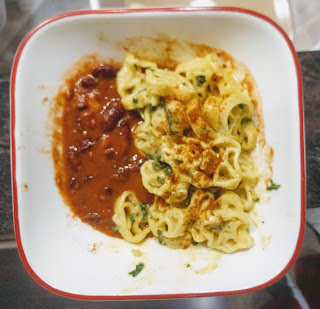
Somewhat out-of-focus photo of "stick" curry (upper left), served with sing pitta (right) and zarda chaawal (lower left).

"Stick" Curry

Slightly adapted from 660 Curries by Raghavan Iyer

Ingredients

  • 450g stewing beef, cut into 3cm cubes
  • 12-15 cloves garlic
  • 4-6 fresh green Thai chilies or 1 green bell pepper, cut into 1cm pieces
  • 12-15 nickel-sized slices of peeled fresh ginger
  • ~12 short bamboo skewers (10-15cm long)
  • 2 Tbsp. canola (or other neutral) oil
  • 1 tsp. cumin seeds
  • 1 onion, halved and thinly sliced
  • 1 c. diced tomatoes (fresh or canned)
  • 1 Tbsp. Dhania-Jeera Masala
  • 1/2 tsp. ground turmeric
  • 1 tsp. coarse sea salt
  • 1/4 c. malt vinegar
  • 2 Tbsp. chopped fresh cilantro

Directions

  1. Place beef in a pot and add water to cover.
  2. Bring to a boil then reduce heat to medium, cover, and simmer for 20-25 minutes.
  3. Drain beef and set aside. (You may save the liquid for anothe use or discard it.)
  4. Create small kebabs out of the cooked beef chunks, whole cloves of garlic, ginger slices, and chile/pepper pieces.
  5. Heat oil over medium heat.
  6. Add cumin seeds and cook for 15-30 seconds.
  7. Add onion, cover, and cook, stirring occasionally, until onion begins to turn caramel-brown (15-20 minutes).
  8. Add the tomato, masala, turmeric, and salt and cook, uncovered, stirring occasionally for ~5 minutes.
  9. Add the skewers and coat them with sauce.
  10. Reduce heat to medium-low, cover, and simmer for 10 minutes.
  11. Remove skewers to a serving platter.
  12. Stir the vinegar into the sauce and pour it over the skewers.
  13. Sprinkle with cilantro and serve.

Saturday 30 January 2021

Muttu Sambha (Sri Lankan Pearl Rice)

I wanted some rice to serve with the beef rendang I made the other day. Plain boiled/steamed rice is perfectly acceptable, but I wanted to try something a little different. Possibly I should've looked for a Malaysian or Indonesian coconut rice recipe, but I had this recipe handy already, so I went with that.

I chose to make this with brown rice. If you want to use white rice (which is what the original recipe is written for), you'll need to reduce the cooking time accordingly. (I realize that swapping out the rice probably means it's not technically muttu sambha anymore, but it was tasty and I'm not sure what other name to give it so, oh well...)


Muttu Sambha

Slightly adapted from 660 Curries by Raghavan Iyer

Ingredients

  • 2 Tbsp. coconut oil
  • 1 onion, chopped
  • 2 Tbsp. minced lemongrass
  • 4 green cardamom pods
  • 4 whole cloves
  • 1 (3") cinnamon stick
  • 1 c. short-grain brown rice
  • 1/2 tsp. coarse sea salt
  • 1/4 tsp. ground turmeric
  • 1 c. coconut milk
  • 2 Tbsp. water

Directions

  1. Heat oil over medium-high heat (sauté medium on InstantPot).
  2. Add onion, lemongrass, cardamom pods, cloves, and cinnamon and cook until onion is light brown (~5 minutes).
  3. Add rice, salt, turmeric, coconut milk, and water.
  4. Cover and pressure cook on high for 14 minutes.
  5. Allow a 10-minute natural release, then remove lid and fluff the rice.

Friday 29 January 2021

Beef Rendang

We've had a couple of beef roasts languishing in the freezer for... longer than I'd care to admit now. I'm just not a big roast person. I tried cooking up one of them as an actual roast and it was okay, but I couldn't help thinking that I would've enjoyed it so much more as a nice curry, stew, or chili. So, rather than trying to do another roast, I figured I'd thaw one of the remaining ones out and chop it up for curry. I know this may sound sacreligious; hacking up a beautiful roast and using it for stew/curry. But if I enjoy it more that way than I would as a roast, then why not?!

I initially ran across a simple recipe for beef rendang on a Dutch blog. It was enough to pique my interest, but the recipe looked a little plain. So I went search for other beef rendang recipes to compare and contrast and see if I could find any that looked a little more punchy. The chilies and kerisik (toasted coconut) sold me on this one.


Beef Rendang

Slightly adapted from Rasa Malaysia

Ingredients

  • 5-12 dried arbol or cayenne chilies1
  • 5 shallots
  • 2-3cm piece galangal2
  • 4 stalks lemongrass, divided; 1 cut into 10cm lengths and pounded, 3 green parts removed and white parts coarsely chopped (or 3 Tbsp. frozen minced lemongrass, divided)
  • 5 cloves garlic
  • 3-4cm piece fresh ginger, peeled
  • 4-5 Tbsp. oil3
  • 1 (3") cinnamon stick
  • 3 whole cloves
  • 3 star anise
  • 3 green cardamom pods
  • 700g boneless beef short ribs (or other cut of your choice), cut into cubes
  • 1 c. coconut milk
  • 1 c. water
  • 1-2 tsp. tamarind concentrate4
  • 6 kaffir lime leaves, very finely sliced5
  • 6 Tbsp. kerisik (toasted coconut)6
  • 1 Tbsp. palm sugar
  • salt, to taste

Directions

  1. Pour hot water over chilies to cover and set aside for at least 10 minutes.
  2. Remove chilies from water and remove stems and seeds.
  3. Add deseeded chilies, shallots, galangal, white parts of three stalks of lemongrass (or 2 Tbsp. frozen minced lemongrass), garlic, and ginger to blender or food processor and process into a paste. If needed, add some of the oil from the next step to the blender jar to help it break down into a nice smooth paste.
  4. Heat oil over medium heat. (Sauté medium on InstantPot.)
  5. Add paste, cinnamon, cloves, star anise, and cardamom and stir-fry until aromatic (1-2 minutes).
  6. Add beef and pounded lemongrass and cook for another minute or two.
  7. Add coconut milk, water, and tamarind concentrate and cook, uncovered, over medium heat until meat is almost cooked (~10 minutes).
  8. Add lime leaves, kerisik, and sugar and stir to combine.
  9. Reduce heat to low (slow cook medium on InstantPot), partially cover, and cook until pot is almost dry7.
  10. Season to taste with salt and sugar.
  11. Serve with rice.


1 The original recipe calls for 10-12 and I think that would've been a nice number. I scaled it back to five because I was worried that the Kidlet would object otherwise. With only 5 chilies, there is no detectable spiciness whatsoever -- not even to the Kidlet's super-sensitive tongue! Back
2 I was all out of fresh galangal so I substituted 1 tsp. of galangal powder. Definitely use fresh if you have it though! Back
3 The original recipe calls for 5 Tbsp. oil. I used this amount but found the final dish somewhat fattier than I would've preferred. I'd try cutting it back to 3 or 4 Tbsp. next time. Back
4 The original recipe calls for 2 tsp. of tamarind pulp (presumably from fresh tamarind). I was going to use 2 tsp. of tamarind concentrate, but then got worried that this might be too much. I scaled it back to 1 tsp. I was happy with the final result, but I think 1 1/2 or 2 tsp. probably would've been fine. Back
5 I didn't have any fresh lime leaves, so I crumbled a few dried ones instead. Back
6 To make kerisik, slowly and gently toast fresh or dried shredded coconut in a dry pan. It's important to get it dark enough to impart good flavour without getting it so dark that it becomes burnt. Watch it carefully and stir often. Remove from heat promptly once browned. If your coconut was coarsely shredded, pound it thoroughly after toasting to break it down into very small pieces. Back
7 I initially fully covered the pot and set it to low for 8 hours. It was still looking very soupy after the first few hours though, so I bumped the temperature up a bit (from slow cook low to slow cook medium) and set the lid slightly askew. It still needed another 12-ish hours after that to cook down enough. The end result was delectably tender and flavourful though. The exact cooking time will vary depending on your pot and stove/slow cooker/etc. Check it periodically and use your best judgement. Back

Thursday 28 January 2021

Zarda Chaawal (Saffronated Rice)

This simple rice recipe from 660 Curries results in bright yellow, slightly sweet rice that was a huge success with the Kidlet. For my part, I wouldn't rank it as one of my top rice recipes, but it's tasty enough, a bit more interesting than plain rice, and comes together very quickly and easily using ingredients we always have on hand.

This version has been altered slightly to use brown rice and cook in the Instant Pot.


Zarda Chaawal

660 Curries

Ingredients

  • 1 C long-grain brown rice
  • 2 tbsp ghee
  • ½ tsp saffron threads
  • 2 tsp granulated sugar
  • ½ tsp coarse salt

Directions

  1. Configure the instant pot for sauté and melt the ghee in it.
  2. Add the rice and saffron and stir, toasting gently, for 1-2 minutes, until the rice is coated with saffron.
  3. Add sugar, salt, and 1 C water. Seal and pressure cook on high for 20 minutes.1
  4. Let pressure release naturally for 10 minutes, then fluff rice and serve.


1 Normally we use 18 minutes for brown rice, but as the pot is already hot it doesn't benefit from the preheating time; thus, the cooking time needs to be extended slightly. Back


Wednesday 27 January 2021

"Mexican" Hot Chocolate

This is not really a traditional Mexican hot chocolate recipe, but it does contain the crucial elements of vanilla, chile, and cinnamon that Canadians and Americans tend to associate with "Mexican" hot chocolate. It is incredibly rich and extremely thick. You're basically drinking warm ganache. Recipe as written, the implication is that this is meant to serve one, but I'd recommend divying it up between at least two or three people!


I wasn't sure whether I was going to like this hot chocolate or not. Honestly, even after drinking a bunch, I still wasn't entirely sure whether I liked it or not. I came to the conclusion that I do, in fact, like it. The flavour is quite nice and it's pleasingly chocolate-y, but I think it's too rich for me to want to drink more thank a few sips of it. I actually found I enjoyed it more when I used it to dip things in. It's got plenty of body and clings and coats things well. And the flavour is bold enough that it'll hold its own against anything you care to dip in it.

This makes a nice hot chocolate and it's wonderfully quick and easy to put together. But, after my experiences with it today, I actually think its true calling might be as chocolate fondue! I would be VERY keen on making this again and assembling an assortment of fruit, cookies, marshmallows, and various other goodies and having myself a little fondue party. And the great thing is that the added milk means it remains liquid over a wider range of temperatures so, once cooked, you should be able to serve it up without the need of any sort of portable heat source or fondue pot. I'm really quite excited to give this a go!

Watch this space for updates and, in the meantime, here's the recipe:

Mexican Hot Chocolate (or Fondue)

Slightly adapted from Joshua Weissman

Ingredients

  • 1 (3") cinnamon stick
  • 1 whole dried chile1
  • 1 1/2 c. milk
  • 225g dark chocolate, broken into pieces
  • 1/2 vanilla bean2
  • 2 Tbsp. brown sugar
  • small pinch (maybe 1/16 tsp.) coarse sea salt

Directions

  1. Toast the cinnamon stick and chile over medium heat.
  2. Reduce heat to low and add milk and chocolate.
  3. Slice open the vanilla bean and scrape out the paste. Add both the paste and the empty pod.
  4. Stir in sugar and salt.
  5. Continue to cook over low or medium-low heat, stirring constantly, until mixture thickens (5-6 minutes).
  6. Remove from heat and pour into mug(s), removing cinnamon stick, chile3, and vanilla pod as they surface.
  7. Top with whipped cream, marshmallows, or other toppings of choice.


1 I used an arbol chile but I think a pasilla would've also worked well. Back
2 I was all out of vanilla beans, so I fished an expended vanilla pod out of my vanilla sugar jar and steeped the hot chocolate with that and then stirred in 1 tsp. of vanilla extract just after taking it off the heat. Back
3 If you like your hot chocolate with a little more kick, leave the chile in and give the mixture a quick whiz in the blender before serving to puré the chile into the mixture. Back

Tuesday 26 January 2021

Cabbage & Bacon

A quick and simple veggie side. The original called for 6 Tbsp. of bacon fat. I made it with four and found it a little greasy for my taste. I've reduced the fat further in this version, calling for only 3 Tbsp. Feel free to adjust according to your taste.

Added a bit of fried pepperoni in place of bacon.

Cabbage & Bacon

Slightly adapted from The Spruce Eats

Ingredients

  • 450g streaky (side) bacon, coarsely chopped
  • 1 onion, chopped
  • 1 carrot, chopped
  • 1 small head of cabbage, shredded (or 1 bag of coleslaw mix)
  • salt & pepper, to taste
  • 1 Tbsp. apple cider vinegar
  • 1 tsp. celery seeds

Directions

  1. Fry bacon until crisp.
  2. Remove bacon from pan.
  3. Remove all but 2 Tbsp. of the bacon fat from the pan.
  4. Add onion and carrot and cook until softened.
  5. Add 1 more Tbsp. of bacon fat along with cabbage and cook until softened/wilted.
  6. Season to taste with salt and pepper.
  7. Remove from heat and stir in vinegar, celery seeds, and bacon pieces.
  8. Serve warm.

Monday 25 January 2021

Vegetarian Keema Naan

I think my naan probably could've used a longer rise. But I was hungry and tired, so I went ahead with the recipe anyway. It was still tasty, just not as well-proofed as it probably should've been. My pan was also too hot. So the first couple ended up coming out a little burnt.


Vegetarian Keema Naan

Adapted from The Complete Vegetarian Cookbook by America's Test Kitchen

Ingredients

Dough

  • 1/2 c. cold water
  • 1/3 c. yogurt
  • 3 Tbsp. oil
  • 1 large egg yolk
  • 2 c. hard (strong/high grade/bread) flour
  • 1/2 Tbsp. sugar
  • 1/2 tsp. instant yeast
  • 1 tsp. coarse sea salt

Filling

  • 2 Tbsp. oil
  • 1 oinon, chopped
  • 3 cloves garlic, minced
  • 1 Tbsp. ginger paste
  • 3/4 tsp. coriander seeds, ground
  • 1 fresh green Thai chile, chopped
  • 1/2 tsp. Bin Bhuna Hua Garam Masala
  • 1/4 tsp. black peppercorns, ground
  • 160g rehydrated dried seitan, crumbled
  • 1 Tbsp. tomato paste
  • 1 c. mushroom stock
  • 1 tsp. dark soy sauce
  • 2 Tbsp. kasoori methi
  • 1/4 tsp. Punjabi Garam Masala
  • 2 Tbsp. chopped fresh cilantro

Directions

Dough

  1. Combine water, yogurt, oil, and egg yolk and set aside.
  2. Combine flour, sugar, and yeast in a large bowl.
  3. Pour wet ingredients into dry and mix well.
  4. Cover and let rest for 10-20 minutes.
  5. Work in salt and knead for 10-15 minutes.
  6. Cover and rest for 30 minutes then stretch and fold. Grab one edge of the dough and stretch it up and over the centre, rotate 90° and repeat stretching and folding. Do 8-10 folds.
  7. Repeat step six 2-3 more times.
  8. Divide dough into four equal portions.
  9. Round each portion, cover, and rest for 20-30 minutes.
  10. Meanwhile, make the filling.

Filling

  1. Heat oil over medium heat.
  2. Add onion and cook for 5-7 minutes.
  3. Add garlic, ginger paste, coriander, chili powder untoasted garam masala, and pepper and cook for 30-60 seconds.
  4. Add seitan, tomato paste, mushroom stock, soy sauce, and methi and cook until pan is almost dry.
  5. Stir in Punjabi garam masala and cilantro.
  6. Remove from heat and set aside.

Assembly

  1. Preheat oven to 180°C (350°F).
  2. Working with one portion of dough at a time, roll the dough out flat.
  3. Place ~1/3 c. of filling in the centre of the dough.
  4. Bring the edges of the dough up toward the centre and seal it closed.
  5. Roll the package flat and prick all over with a fork.
  6. Lightly grease a cast iron skillet and heat over medium heat.
  7. Place a naan in the well-preheated pan and brush or spritz the top with water.
  8. Cover the pan and cook for 1 minute.
  9. Flip the naan over, brush/sprtiz the other side with water, cover, and cook for 1 minute.
  10. Remove naan from pan and transfer to a wire rack set in a rimmed baking sheet.
  11. Once all four naan have been browned in the skillet and transferred to the wire rack/baking sheet, place in the oven and bake at 180°C (350°F) for 10-15 minutes.

Sunday 24 January 2021

Fideos with Chickpeas and Garlic Mayo

We've run out of a lot of staples and I desperately need to do a grocery shop. In the meantime, we didn't quite have enough leftovers to feed everyone for dinner, so I needed to come up with something pretty quick-like. I briefly entertained the idea of trying to make some stuffed naan, but figured that'd be way too slow for today. In the end I settled on this chickpea and spaghetti dish.

I was worried that this was going to turn out bland but, with the garlic mayo, it's actually really good! I think it'd be better with a bit of kale or spinach mixed in. And possibly a drizzle of lemon juice along with the mayo, but it's very nice as is.


Fideos with Chickpeas and Garlic Mayo

Adapted from The Complete Vegetarian Cookbook by America's Test Kitchen

Ingredients

  • 3 Tbsp. canola (or other neutral) oil, divided
  • 375g whole wheat spaghetti, broken into 5cm pieces
  • 2 small onion, chopped
  • 1/2 tsp. coarse sea salt
  • 400mL diced tomatoes, drained, juice reserved
  • 3-4 cloves garlic, minced
  • 1 1/2 tsp. smoked or sweet paprika
  • 3 c. water
  • 1/2 c. vegetable broth
  • 2 c. cooked chickpeas
  • 150g chopped kale (optional)
  • 1/2 c. dry white wine
  • 1/2 tsp. black peppercorns, ground
  • 1 Tbsp. chopped fresh parsley
  • 1/2 c. Garlic Mayo

Directions

  1. Heat 1 Tbsp. of the oil over medium-high heat in a broiler safe pan.
  2. Add spaghetti pieces and mix/stir to coat in oil.
  3. Cook, stirring constantly, until noodles are toasted (~6 minutes).
  4. Remove noodles from pan and set aside.
  5. Add remaining 2 Tbsp. oil to pan.
  6. Add onion and 1/4 tsp. of the salt.
  7. Cook, stirring occasionally until onion is softened (~5 minutes).
  8. Add drained tomatoes and cook for another 4 minutes.
  9. Reduce heat to medium.
  10. Stir in garlic and paprika and cook for 30-60 seconds.
  11. Stir in toasted spaghetti.
  12. Add water, chickpeas, kale, wine, reserved tomato juice, pepper, and remaining 1/4 tsp. salt.
  13. Increase heat to medium-high and bring to a boil.
  14. Cook, uncovered, stirring occasionally, until noodles are just tender (15-18 minutes).
  15. Meanwhile, adjust oven rack to upper position and preheat broiler.
  16. Transfer pan to oven and broil until slightly brown and crisp on top (~5 minutes).
  17. Sprinkle with parsley and served topped with garlic mayo.

Saturday 23 January 2021

Healthy-ish Skillet Cookie

I made a chocolate chunk skillet cookie last week. It was delicious and I quite enjoyed it. I liked the idea of making more skillet cookies in the future but I thought it'd be nice to make a healthier version. I figured I'd just search for "breakfast" skillet cookies and be all set. I wasn't able to turn up very many breakfast skillet cookie recipes though and the ones I did find didn't really appeal to me. They weren't quite what I wanted. Nor were any of the oatmeal cookie recipes I found. After wandering around the internet for a bit, I decided that I'd probably be best served by coming up with my own recipe.

This cookie definitely tastes healthier than the classic chocolate chunk version. I think it's still sweet and tasty enough to make for a pleasant dessert though. If I was in the mood for a slightly less indulgent dessert that didn't leave me wracked with guilt, this would be a good bet!


Healthy-ish Skillet Cookie

Ingredients

  • 1/4 c. unsalted butter, melted
  • 1 banana, mashed
  • 1/4 c. unsweetened applesauce
  • 1/4 c. brown sugar
  • 1 large egg
  • 1 tsp. vanilla extract
  • 1 c. whole wheat flour
  • 1/2 c. rolled oats
  • 1/4 c. ground flax
  • 1 tsp. baking powder
  • 1/2 tsp. baking soda
  • 1/4 tsp. coarse sea salt, ground
  • 3/4 c. chopped chocolate (dark or milk)
  • 1/2 c. dried cranberries or cherries
  • 1/3 c. quartered cherries (or blueberries)
  • 1/4 c. slivered almonds

Directions

  1. Preheat oven to 180°C (350°F) and grease a 12" cast iron skillet.
  2. Combine butter, banana, applesauce, sugar, egg, and vanilla and mix well.
  3. Without mixing, add flour, oats, flax, baking powder, baking soda, and salt on top.
  4. Stir until just combined.
  5. Stir in chocolate, fresh and dried berries, and almonds.
  6. Press dough into greased skillet and bake at 180°C (350°F) for 30 minutes.

Guacamole

I made an Indian-inspired burrito bowl the other day and needed some guacamole to top it with. I was just going to order a container of ready-made guacamole, but just getting the avocado and making it myself was a lot cheaper and I was able to make only as much as I needed. Plus, it was fresh, garlic-y, and delicous!

Guacamole

Slightly adapted from Downshiftology

Ingredients

  • 1 ripe avocado
  • 1/4-1/2 roma tomato, chopped
  • 1 green onion, minced
  • 1 clove garlic, minced
  • 1 Tbsp. chopped fresh cilantro
  • 3-5 slices pickled jalapeño, minced
  • 1/8 tsp. coarse sea salt, ground
  • juice of 1/2 a lime

Directions

  1. Mash the avocado and stir in the other ingredients.
  2. Adjust seasoning to taste.
  3. Cover any leftovers tightly and store in the fridge.

Friday 22 January 2021

Kai Ishto (Potato, Carrot, and Peas in Coconut Milk)

We had a selection of leftovers available for dinner tonight, but they were all a little light on the veg so I wanted to put together an extra vegetable side to round things out. We already have a bunch of starch options, so I was a little wary of doing another potato curry, but I'm hoping that the carrots and peas make it vegetably enough.


Kai Ishto

Slightly adapted from 660 Curries by Raghavan Iyer

Ingredients

  • 400g russet (or other floury) potatoes, cut into 1cm cubes
  • 3-4 medium carrots, cut into 1cm cubes
  • 1 tsp. black peppercorns
  • 1/4 tsp. whole cloves
  • 1/4 tsp. cardamom seeds from green pods
  • 1 (3") cinnamon stick
  • 2 Tbsp. coconut oil
  • 1 small red onion, halved and sliced thin
  • 15 fresh (or frozen) curry leaves
  • 4-5 cloves garlic, sliced thin
  • 3 (20mm x 30mm x 3mm) slices of ginger, julienned
  • 1-2 fresh green Thai chilies, sliced thin lengthwise
  • 1 c. coconut milk
  • 1 c. frozen green peas
  • 1 tsp. coarse sea salt

Directions

  1. Place potatoes and carrots in a pot with enough water to cover them.
  2. Bring to a boil over medium-high heat and cook until fork tender (~8 minutes).
  3. Meanwhile, coarsely grind the pepper, cloves, cardamom, and cinnamon. I should be the texture of very coarsely ground pepper.
  4. Heat the oil over medium heat.
  5. Add the onion, curry leaves, garlic, ginger, and chilies and cook, stirring frequently until just softened (~4 minutes).
  6. Drain the potatoes and carrots and set aside until the onion mixture is cooked.
  7. Add onion mixture to potatoes and carrots.
  8. Add coconut milk, peas, and salt.
  9. Cover and simmer over medium heat for 5 minutes.
  10. Idiappam or another accompaniment of your choice.

Thursday 21 January 2021

Sourdough Biscuits

These are light and flaky and wonderful. There's a tiny hint of sweetness from the small amount of sugar in, but not enough that they really register as "sweet". They're mostly buttery and tender with slight undercurrents of buttermilk tartness, sourdough tang, and that little bit of sweetness from the sugar.

I was tempted to go for a whole wheat biscuit, but I decided to make them recipe as written the first time 'round. I do like the white flour version. For something this fatty and unhealthy, white flour just feels like the right choice. That said, I think you could probably sub in some whole wheat flour and still have a nice biscuit. I'd be inclined to use a hard whole wheat flour in place of the all-purose and toss in an extra 2-3 Tbsp. of buttermilk. I think that would probably work decently well.


Sourdough Biscuits

Slightly adapted from Baking Sense

Ingredients

  • 280g all-purpose flour
  • 240g soft (cake/plain/standard) flour
  • 4 tsp. baking powder
  • 1 tsp. baking soda
  • 1 Tbsp. sugar
  • 1/2 tsp. coarse sea salt, ground
  • 1 c. unsalted butter
  • 250g unfed sourdough starter (sourdough discard)
  • 1 c. buttermilk + extra for brushing tops

Directions

  1. Preheat oven to 200°C (400°F) and line a baking sheet with parchment paper or a silicone baking mat.
  2. Combine flours, baking powder, baking soda, sugar, and salt and mix well.
  3. Cut in butter until mixture is sandy with a few larger chunks.
  4. Combine starter and buttermilk and mix well.
  5. Pour buttermilk mixture into flour mixture and stir until not quite combined.
  6. Turn out dough and mix by hand/kneading until dry ingredients are incorporated. It shouldn't take more than half a dozen strokes.
  7. Pat into a rectangle about 1-1.5cm thick.
  8. Fold in half and pat down a little. Then fold in half again.
  9. Pat into a 2cm thick disc.
  10. Cut out circles about 7-8cm in diameter and place on baking sheet, rerolling dough as necessary.
  11. Brush tops with a little milk or buttermilk.
  12. Bake at 200°C (400°F) for 12-14 minutes.

Wednesday 20 January 2021

Bacon and Egg Pie

Peameal bacon was on sale a couple weeks ago, so I grabbed a big chunk and tossed it into the freezer for future use. I figured that since peameal bacon is pretty close to NZ bacon (ie. not streaky bacon) I'd have a go at making a bacon and egg pie. I ended up with a bit of a soggy bottom. I probably should've partially baked the bottom crust before baking or something. It was still delicious though.

I made the variant listed at the bottom of the page that adds onion, veggies, and chutney. I figured that would make it both a little more interesting and a little more nutritionally balanced. (Still not healthy, but at least there's some veg in there!) I used kale as my veg. I think a bit of garlic would've been nice with the veggies too. I'll add it next time.

I made this with puff pastry as Edmonds calls for either rough puff or store-bought puff pastry. I didn't feel like making my own pastry today, so I just grabbed a package of frozen puff pastry and used that. That being said, I've run into some comments from Kiwis online saying that using anything other than flaky (aka rough puff) pastry for this pie is just wrong. Use at your own risk!


Bacon and Egg Pie

Slightly adapted from Edmonds Cookery Book

Ingredients

  • 1 Tbsp. butter (optional)
  • 1 small onion, chopped (optional)
  • 2 cloves garlic, minced (optional)
  • 1 c. frozen chopped kale or other vegetables (optional)
  • 400-450g puff pastry or rough puff (flaky) pastry
  • 250g back bacon, cut into pieces
  • 4-6 Tbsp. Tomato & Date Chutney or other chutney (optional)
  • 6-8 eggs
  • pepper, to taste
  • milk or beaten egg

Directions

  1. If using veggies, sauté the onion in the butter until softened, then toss in the garlic and cook for another minute or two. Add the kale and cook until thawed. Remove from heat and set aside.
  2. Preheat oven to 200°C (400°F), place a baking sheet in the oven, and grease a 20cm (8") square pan.
  3. Roll out half the puff pastry and line the greased tin with it.
  4. At this point, I proceeded with the recipe as written. However, this resulted in a soggy bottom. I'd be tempted to try tossing the bottom crust in the oven for a bit at this point (with the caveat that I don't know whether it will actually work or not or whether or not it will actually help with the soggy bottom). Next time I'd prick the bottom with a fork and try baking at 200°C (400°F) for 20 minutes and then proceed with the recipe as written.
  5. Add bacon pieces followed by veggie mixture (if using).
  6. Top with the chutney (if using).
  7. Crack the eggs and add them in on top of the other ingredients.
  8. Prick each yolk with a fork to break it.
  9. Sprinkle with pepper.
  10. Roll out remaining pastry and cover the pie.
  11. Trim edges of pastry. Use the off-cuts to make a pretty design on the top if you wish.
  12. Brush the top crust with milk or beaten egg.
  13. Cut a few holes/slashes in the top.
  14. Place the pie tin on the hot baking sheet1 and bake at 200°C (400°F) for 40-50 minutes2.
  15. Serve with ketchup and/or additional chutney (if using).


1 There was no mention of a baking sheet in the original recipe, but I've used this method to help with soggy bottoms on shotrcrust pies. I figure it's at least worth a shot for the puff pastry version. Back
2 Edmonds only calls for a 30-minute bake, but it was definitely still underbaked after only half an hour. I baked mine for a good 50 minutes, I think it probably still would've been fine with another 5-10. Back

Tuesday 19 January 2021

Saucy Spiced Meat and Potatoes

This reminds me a bit of Hamburger Helper, if Hamburger Helper had flavours other than salty. Rather than ground beef and pasta, it's ground beef and potatoes, but it's a similar idea. We served it with a simple Indian bell pepper and pea curry to add a little veg to the meal. I think it would probably also be good with some peas stirred right into the pan during cooking.

The author actually lists a spicy variant of this recipe from Rakhine. It adds minced galangal and several fresh green chilies. I think I'd like that version even better, but I refrained from using those additions because I figured it would make the Kidlet sad. (Also, I was all out of galangal.)

Duguid also notes that this is a very flexible dish. She mentions that it takes well to having mushrooms added along with the meat. It can calso be made with ground lamb or goat instead of beef. (Personally, I'd be tempted to try chunks of bone-in stewing goat as well.) And she said that adding cubes of eggplant either in addition to or instead of the potato makes for a pleasant dish as well. So, basically, keep the spices the same, but use whatever meat, starch, and/or veg you have and feel free to experiment and change it up!


Saucy Spiced Meat and Potatoes

Slightly adapted from Burma: Rivers of Flavor by Naomi Duguid

Ingredients

  • 450g lean ground beef
  • 1 tsp. coarse sea salt
  • 1/8 tsp. ground turmeric
  • 1/2 tsp. cumin seeds, ground
  • 1/2 tsp. coriander seeds, ground
  • 1 Tbsp. minced galangal (optional)
  • 2 Tbsp. peanut (or other neutral) oil
  • 1/4 c. minced shallot or 1 small red onion, minced
  • 1 1/2 Tbsp. ginger paste
  • 450g potatoes, cut into 2-3cm cubes
  • 1-2 c. water
  • 3 fresh green Thai chilies, halved lengthwise
  • 1 c. diced tomatoes (fresh or canned)
  • 1/2 tsp. chili powder
  • 1/4 tsp. black peppercorns, ground (optional)

Directions

  1. Mix salt, turmeric, cumin, coriander, and galangal (if using) into beef, cover, and set aside for 30-60 minutes.
  2. Heat oil over medium heat1.
  3. Add shallot and ginger and cook until softened (~5 minutes).
  4. Add potatoes and cook until lightly browned (~5 minutes).
  5. Raise heat to medium-high and add 1 c. water2 and chilies (if using), cover, and bring to a boil.
  6. Reduce heat and simmer until potatoes are just shy of being tender (~10 minutes).
  7. Add the meat mixtures along with another 1/2 c. of water if it seems to need it.
  8. Stir in the tomatoes and chili powder.
  9. Add a little more water if you like a thinner sauce or if the pan is getting dry.
  10. Simmer, uncovered, until meat is cooked through and potatoes are tender.
  11. Stir in black pepper (if using) and adjust seasoning to taste.
  12. Serve with salad and/or a vegetable side.


1 Either a wok or a skillet will work for this recipe. That said, having now cooked it once in a skillet, I do think a wok would be the better tool for the job. Next time I'll definitely make it in a wok. Back
2 I added the full 2 c. of water at this point because I was using a large skillet and 1 c. wasn't enough to cover the potatoes. The large surface area also meant the water boiled off relatively quickly. And, because I was waiting on another curry to finish cooking, I ended up leaving it on low for quite a while after it was done. All this meant that even with the full 2 c. of water, the sauce was quite thick by the time it was done. If you're using a wok or don't need to hold it on the heat after cooking, then 1 c. may be all the water you need. Back

Monday 18 January 2021

Simla Mirch Kadhi (Spicy-Tart Bell Peppers and Peas)

This was a last-minute choice to accompany our dinner, but it turned out to be a good one -- it came together really easily and (apart from the lengthy simmer at the end) quickly, and it was delicious! Even with the chilies halved the Kidlet found it a bit spicy, but symbol and I enjoyed it a great deal and would absolutely make it again.


Simla Mirch Kadhi

660 Curries

Ingredients

  • 1 C plain yoghurt
  • 1 tbsp chickpea flour
  • 4 fresh green Thai chilies, stems removed, finely chopped
  • 1 tbsp ginger paste
  • 2 tbsp finely chopped fresh cilantro
  • 1 tsp coarse salt
  • 1 tsp sugar
  • ½ tsp cayenne
  • ½ tsp sweet paprika
  • 1 tsp toasted cumin-coriander blend
  • ½ tsp ground turmeric
  • 1 C frozen peas
  • 2 tbsp oil
  • 1 tsp mustard seeds
  • 1 tsp cumin seeds
  • 2 bell peppers, stemmed, seeded, and finely chopped
  • 10-12 medium to large fresh curry leaves
  • 1 tbsp ghee

Directions

  1. Whisk together the yoghurt with 1 C water in a medium bowl until smooth.
  2. Sprinkle in the chickpea batter and whisk it in.
  3. Whisk in the chilies, ginger, cilantro, salt, sugar, cayenne, paprika, spice blend, turmeric, and peas.
  4. Heat the oil in a medium saucepan over medium-high heat.
  5. Add the mustard seeds, cover, and wait until they stop popping, ~30 seconds.
  6. Add the cumin seeds and cook for another 10 seconds or so, then immediately add the peppers and curry leaves.
  7. Stir-fry until the peppers are starting to blister and the leaves are crinkly, 8-10 minutes.
  8. Stir in the yoghurt mixture.
  9. Reduce heat to medium and simmer, uncovered, until the sauce thickens and the raw taste of the chickpea flour disappears, 15-20 minutes.
  10. Stir in the ghee and serve.

Sunday 17 January 2021

Chocolate Chip Skillet Cookie

I've never actually made a skillet cookie before. I have to admit, they don't normally appeal to me all that much. They're almost always chocolate chip and I usually prefer other cookie flavours. I was in the mood for dessert last night though and a skillet cookie sounded both easy and appealing.

I actually really like how this came out. It was rich and chewey and delicious without being too heavy on the chocolate. I think I'd probably do it in the 12" skillet next time rather than the 9". The original recipe calls for a 10" skillet, which I don't have. I figured that the 9" was pretty close and maybe I'd just bake it for a bit longer. I ended up baking it for TWICE the recommended amount of time! And even so, it was still a bit raw in the centre. I didn't really mind the rawness, but I probably should aim to have it actually fully baked next time. I'm hoping that putting it in a larger skillet will do the trick.


Chocolate Chip Skillet Cookie

Slightly adapted from Delish.com

Ingredients

  • 1/2 c. unsalted butter, softened
  • 1/2 c. sugar
  • 3/4 c. brown sugar
  • 2 large eggs1
  • 1 tsp. vanilla extract
  • 1 3/4 c. all-purpose flour
  • 2 tsp. baking powder2
  • 1/4 tsp. coarse sea salt, ground
  • 1 c. chopped chocolate (dark and/or milk)
  • 1/3 c. cherries, quartered

Directions

  1. Preheat oven to 180°C (350°F).
  2. Cream butter with sugars.
  3. Beat in eggs and vanilla.
  4. Sift in flour, baking powder, and salt and mix until just combined.
  5. Mix in chocolate.
  6. Grease a 12" cast iron skillet and press dough into pan.
  7. Top with cherries.
  8. Bake at 180°C (350°F) for 15-20 minutes.
  9. Serve with vanilla ice cream, caramel sauce, and/or chocolate sauce.


1 The original recipe only called for one egg and that's what I used. That said, the dough seemed a bit drier than I'd normally want for chocolate chip cookies. The cookie came out fine in the end (rawness notwithstanding), but I'd like to try it with two eggs next time and see how it goes. Back
2 The original recipe called for 3/4 tsp. baking soda. I thought this was strange as there aren't really any acidic ingredients for the soda to react with. I used it, but I'd be interested to see if swapping in some baking powder in place of the soda makes a noticeable difference. Back

Saturday 16 January 2021

Frikandel Speciaal Poutine

I recently took a trip to the Dutch grocery store and picked up a package of frikandellen. I had no idea what they were, but I figured I could look it up and figure out how to serve them.

I discovered that they're normally deep fried and popularly served as frikandel speciaal which means topping them with mayo, curry ketchup, and finely chopped raw onion. I thought this sounded great. I wanted to serve it with mashed potatoes and some sort of vegetable dish. The vegetables weren't a problem, but we were fresh out of potatoes. In lieu of the mash, I decided to order some poutine and top it with all the frikandel speciaal fixings. This worked quite well. To the point that I'm contemplating sending the photos and instructions to the local poutine place as a suggestion to be added to their menu.

Frikandel special poutine, pictured here without the raw onion because I forgot to add it 'til after I'd taken the photo.

Frikandel Speciaal Poutine

Ingredients

  • 1 frikandel sausage
  • 1 order of poutine (fries + cheese curds + gravy)
  • 1 Tbsp. mayonnaise
  • 1-2 Tbsp. Curry Ketchup
  • 2-3 Tbsp. finely chopped raw onion

Directions

  1. Pour 1-2cm of oil into a pan and preheat over medium-high heat.
  2. Slice the frikandel open lengthwise.
  3. Fry the frikandel, turning as necessary, so that it gets crispy all over.
  4. Remove from oil and drain on a paper towel for a few minutes.
  5. Cut into bite-sized pieces and place on top of poutine.
  6. Top with mayo, curry ketchup, and raw onion.

Curry Ketchup

I picked up some frikandellen at the Dutch grocery store the other day, not being entirely sure what they were. Upon returning home with them, TF and I did a bit of research and discovered that they're Dutch fried hotdogs/sausages. They're normally made from a mixture of spiced beef, pork, and chicken. They're first boiled (or steamed) and then deep fried. For frikandel speciaal you cut them open lengthwise (either before or after frying) and top them with mayo, curry ketchup, and finely chopped raw onion. I figured I'd like to try doing them up that way, but this meant that I needed curry ketchup. They had tonnes of curry ketchup for sale at the Dutch grocery store, but I didn't think to get any because I didn't know what frikanellen were yet!

Some casting about on the internet turned up this recipe for curry ketchup. It's part of a German currywust preparation. I'm hoping that Dutch curry ketchup and German curry ketchup are similar enough as to make no odds. It's not like I'll be able to tell anyway given that I've never had either!

Curry Ketchup

Slightly adapted from The Daring Gourmet

Ingredients

  • 1 Tbsp. canola (or other neutral) oil
  • 1 small onion, chopped
  • 1 clove garlic, minced
  • 1 1/2 Tbsp. Madras Curry Powder
  • 1 Tbsp. sweet paprika
  • 1/8 tsp. ground cloves
  • 1/8 tsp. ground cinnamon
  • 1 c. ketchup
  • 1 Tbsp. tomato paste
  • 5 Tbsp. chicken or vegetable stock
  • 1 Tbsp. apple cider vinegar
  • 1 Tbsp. honey
  • 1 tsp. Worcestershire sauce
  • 1 tsp. sugar
  • 1/4 tsp. prepared yellow mustard
  • 1/8 tsp. black peppercorns, ground

Directions

  1. Heat oil over medium heat.
  2. Add onion and cook until softened, but not browned (3-4 minutes).
  3. Add garlic and cook for another minute or two.
  4. Add curry powder, paprika, cloves, and cinnamon and cook for another 30-60 seconds.
  5. Add ketchup, tomato paste, stock, vinegar, honey, Worcestershire sauce, sugar, mustard, and pepper, reduce heat to medium-low, and cook, uncovered, stirring occasionally, for 15 minutes.
  6. Remove from heat and allow to cool for 5-10 minutes.
  7. Transfer to blender jar and puré (or use an immersion blender).
  8. Allow to cool, cover, and transfer to fridge. Let sit overnight before serving.
  9. Enjoy with sausages and/or fries.

Friday 15 January 2021

Lẩu (Vietnamese Hotpot)

I've never made or eaten hotpot before, but I was suddenly overcome with the desire to try it. We don't have a portable burner or hotpot... pot. But we do have an InstantPot. It's not ideally shaped for the task, but I figured it would due in a pinch just to try it out. If we really get into doing hotpot often I might consider buying a dedicated burner and pot for it. In the meantime, the InstantPot worked quite well.

There are loads of different hotpot recipes. Many different countries and regions have their own versions of hotpot and there are often several different types and/or flavours common within a single region. I found a recipe for vegan Lẩu and decided to give that a go. The broth smelled delicious while it was cooking. And that was before adding the vibrant red, garlic-y aromatic oil!

I didn't have a lot of the suggested dippers, but I did my best to put together a nice spread with what I had. We all enjoyed the meal and came away full, so I'm gonna call it a success. I've put in a grocery order so hopefully we can heat up the broth again tonight and enjoy some different things cooked in it. I've got a bunch of mushrooms, bean sprouts, yard-long beans, and dumplings on the way!

The broth (Not the best lighting or pot for it but, trust me, it was delicious!)

The dippers: baked tofu, blue pearl oyster mushrooms, baby mustard greens, and dried seitan. Also available but not pictured here: spinach rice vermicelli and buckwheat-sweet potato soba noodles.


Lẩu

Slightly adapted from The Viet Vegan

Ingredients

Broth

  • 3L water
  • 1 daikon, peeled and very roughly chopped
  • 4-5 carrots, peeled and very roughly chopped
  • 2-3 onions, peeled and halved
  • 1 c. dried mushrooms, soaked for 10 minutes and rinsed1
  • 4-5 ears of corn2
  • 7-8cm piece of ginger, peeled and very roughly chopped
  • several leek tops/leaves (optional)
  • 2 Tbsp. frozen chopped lemongrass or the white parts of 3 stalks of lemongrass, sliced thin
  • 2-3 Tbsp. mushroom stock concentrate, to taste

Aromatic Oil

  • 3 Tbsp. canola (or other neutral) oil
  • 1 bulb garlic (~6-12 cloves), minced
  • 1 Tbsp. frozen chopped lemongrass or the green parts of 3 stalks of lemongrass, minced
  • 2 Tbsp. sweet paprika
  • 1-3 tsp. red chile flakes, to taste

Dippers

These are just suggestions/ideas. Use as many or as few as you'd like!

Vegetables

  • bok choy
  • yu choy
  • pea sprouts
  • bean sprouts
  • kale (mature or baby)
  • mustard greens (mature or baby)
  • broccoli
  • green beans and/or yard-long beans
  • nappa cabbage

Protein

  • tofu puffs
  • vegan shrimp
  • seitan (dried or fresh)
  • yuba
  • sliced tofu (baked or fresh)

Mushrooms

  • cremini
  • oyster (regular oyster mushrooms or any of the "colour" varieties)
  • king oyster
  • enoki

Noodles

  • rice noodles (vermicelli or ribbon)
  • udon
  • shirataki noodles
  • bean thread noodles
  • wontons/dumplings

Sauces

Again, use as many or as few as you'd like.
  • sambal olek
  • hoisin
  • sriracha
  • light soy sauce
  • black vinegar
  • dumpling sauce
  • laoganma
  • peanut sauce
  • Vietnamese spring roll sauce

Directions

Broth

  1. Combine all broth ingredients in pot.
  2. Bring to a boil, then reduce to a simmer and cook for at least an hour and up to 5 hours. (I used the InstantPot slow cook setting on high for this.)
  3. Strain the broth. Solids may be eaten with dipping sauce or discarded.

Aromatic Oil

  1. Heat oil over medium heat.
  2. Add garlic and lemongrass and cook until garlic starts to turn golden.
  3. Remove from heat and add paprika and chile flakes.
  4. Scoop a ladel-full of the strained broth into the pan to loosen any stuck on bits.
  5. Dump the broth and oil into the main broth pot. Broth is now ready to go!

Serving

  1. Prepare all your dippers by slicing thin and/or cutting into bite-sized pieces as appropriate.
  2. Set out your dipping sauces and utensils. (Chopsticks, tongs, spider/strainer, etc.)
  3. Set the broth pot (and a portable burner) on the table and bring to a boil.
  4. Diners can now drop in their desired foodstuffs to cook in the pot. Retrieve them with the spider when they're done.
  5. Dip in desired sauce(s) and enjoy!


1 I filled the measuring cup most of the way with Chinese black mushrooms and then topped up the last little bit with some black fungus. Back
2 I can't really get corn on the cob here right now, so I substituted 2 c. frozen corn kernels + the empty cob left over after popping some popcorn on the cob. Back

Thursday 14 January 2021

Vegetarian Jamaican Patties

It's been quite a while since I made this recipe, so I've probably forgotten some of the precise preparation details. I don't remember having any issues with the recipe as written though, so hopefully it's fine as is.

I was concerned that this recipe would be lacklustre and bland. I'm used to Jamaican patties being filled with delicious spiced beef. A meatless version seemed like it might not pack much punch flavour-wise. Boy was I wrong! These were delicious! The seasonings are superb and the combination of veggies called for works really well together. Just serve them with a nice spicy, vinegar-y hot sauce and you're good to go!


Vegetarian Jamaican Patties

Slightly adapted from 101 Cookbooks

Ingredients

Filling

  • 2 Tbsp. coconut oil
  • 1 onion, chopped
  • 1/4 tsp. ground cinnamon
  • 1/2 tsp. allspice berries, ground
  • 1 tsp. cumin seeds, ground
  • 1/4-1/2 tsp. red chile flakes
  • 1/8-1/4 tsp. ground cayenne
  • 1/2 tsp. coarse sea salt
  • 4-5 cloves garlic, minced
  • 1 1/2 c. coconut milk
  • 1/2 c. diced carrots
  • 1/2 c. diced potato
  • 1 c. fresh or frozen green peas
  • 1 c. fresh or frozen corn kernels
  • 1 c. shredded cabbage
  • 2 Tbsp. fresh thyme (or 2 tsp. dried)
  • 2 Tbsp. lemon juice
  • 1 tsp. ground white pepper

Pastry

  • 360g all-purpose flour
  • 300g whole wheat flour1
  • 4 tsp. turmeric
  • 1/2 tsp. coarse sea salt, ground
  • 1 1/2 c. coconut oil2
  • 4 tsp. apple cider vinegar
  • 1 1/4 c. ice water

Directions

Filling

  1. Melt oil over medium-low heat.
  2. Add onion, cinnamon, allspice, cumin, chile flakes, cayenne, and salt and cook, stirring occasionally, until onion has browned (8-10 minutes).
  3. Add garlic and cook for another 2-3 minutes.
  4. Add coconut milk, carrots, and potatoes and cook until tender (~10 minutes).
  5. Add peas, corn, cabbage, and thyme and cook for 3 more minutes.
  6. Stir in lemon juice and white pepper and season to taste with additional salt.

Pastry

  1. Combine all-purpose flour with whole wheat flour, turmeric, and salt.
  2. Cut in coconut oil until mixture looks crumbly and sandy.
  3. Stir vinegar into water.
  4. Add water mixture to flour mixture 2-3 Tbsp. at a time until the dough just comes together.
  5. Form into a ball, wrap tightly, and chill for at least 1 hour.
  6. 1 egg, beaten (optional)

Assembly and Baking

  1. Dust work surface with additional flour.
  2. Roll dough out quite thin (~3mm). (It may be easiest to work with just half of it at a time.)
  3. Cut out 13-15cm (~5-6") circles.
  4. Spoon a couple Tbsp. of filling onto each pastry circle.
  5. Fold pastry over to make a half moon shape.
  6. Press with a fork to seal the edges.
  7. If edges are not sealing well, try dabbing a little water onto the pastry before closing to help form a better seal.
  8. If desired, brush with a little beaten egg.
  9. Transfer to parchment-lined baking sheet and bake at 180°C (350°F) for 30-35 minutes.
  10. Serve with hot sauce. (Preferably something vinegar-y and acidic.)


1 The recipe calls for whole wheat pastry flour. I think I just used my regular (hard) whole wheat flour. This didn't seem to hurt it any. That said, if you have soft whole wheat flour handy, definitely go ahead and use it! Back
2 The recipe calls for chilled coconut oil. My house was cool enough the day I made this that I didn't feel the need to chill the oil first, but if you're doing this on a very hot day, you might want to measure out the oil and then stick it in the fridge for a bit to firm up. Back

Wednesday 13 January 2021

Kashmiri Rajma (Kashmiri Kidney Beans)

We were planning a mac & cheese for dinner tonight, but mac & cheese isn't really a meal in and of itself. We added a bit of chopped kale to the pasta to give it a veggie boost and I whipped up this kidney bean curry to add some protein. I think the kidney beans complemented the mac & cheese really well! And this did come together quite easily in the InstantPot. I think the only change I'd make next time is to reduce the water a bit since I prefer thicker curries.

The recipe calls for a small amount of garam masala. Since this author tends to assume that you'll only have one (likely store-bought) garam masala on hand, I just used a basic bin bhuna hua garam masala for it. That said, it was tempting to swap in some Kashmiri garam masala since I had some made up already and it seemed fitting with the Kashmiri kidney beans. I might try that next time.

Kashmiri rajma (left) pictured with masala mac & cheese (right).

Kashmiri Rajma

Slightly adapted from Vegetarian Indian Cooking with Your Instant Pot by Manali Singh

Ingredients

  • 1 c. kashmiri kidney beans1
  • 2 Tbsp. canola (or other neutral) oil
  • 1/2 (3") cinnamon stick
  • 4 green cardamom pods
  • 3 whole cloves
  • 1/2 tsp. cumin seeds
  • 1/8 tsp. ground asafetida
  • 1 onion, chopped
  • 1 Tbsp. ginger paste
  • 1 Tbsp. garlic paste
  • 400mL diced tomatoes (fresh or canned)
  • 1 tsp. coriander seeds, ground
  • 3/4 tsp. fennel seeds, ground
  • 1 tsp. coarse sea salt
  • 1/8-1/4 tsp. chili powder
  • 1/2-1 tsp. ground Kashmiri chilies
  • 3/4 tsp. ground ginger
  • 2 c. water
  • 2-3 Tbsp. chopped fresh cilantro
  • 1 tsp. ghee, to serve (optional)

Directions

  1. Soak the beans overnight. Alternatively, for a quick soak, pour boiling water over the beans to cover and let soak for 1 hour.
  2. Drain the beans and set aside.
  3. Set InstantPot to sauté (medium) and, once pot has preheated, add oil, cinnamon, cardamom, cloves, and cumin seeds and cook for 30-60 seconds.
  4. Add onion and asafetida and cook for 2-3 minutes.
  5. Add ginger and garlic and cook for another minute or so.
  6. Add tomato, cover with glass/slow cooker lid, and cook for 3-4 minutes.
  7. Stir in coriander, fennel, salt, chili powder, Kashmiri chilies, and ginger and cook for a minute more.
  8. Add water and cilantro along with drained beans.
  9. Seal InstantPot and set to pressure cook on high for 35 minutes. Allow a 15 minute natural release.
  10. Set InstantPot to sauté on high.
  11. Use a potato masher to mash some of the beans.
  12. Simmer the curry until desired consistency is achieved, then stir in ghee (if using).
  13. Serve with rice and/or your favourite mac & cheese!


1 Kashmiri kidney beans tend to be smaller and darker than standard North American kidney beans. If you can't find them, try looking for dry "chili beans". If you can't find those either, then regular kidney beans will work. Back

Tuesday 12 January 2021

Keerai Masiyal (Stewed Spinach with Coconut, Chiles, and Curry Leaves)

I think this is the first recipe I've cooked that calls for a volume of curry leaves rather than just an integer quantity of them! This is a nice, mild curry that I don't think could hold its own as a main dish but makes a nice side. It was also an unexpected hit with the Kidlet, who declared it a favourite.

The original recipe uses fresh spinach, and boils it first. I've adapted it here for frozen, which means we need to add a bit of water later since you don't get the additional water from the boiling process.

Keerai masiyal (bottom right) pictured with chicken tikka masala (top), onion kulchi (left), and mitty chawal (centre).

Keerai Masiyal

660 Curries

Ingredients

  • 1 lb frozen chopped spinach
  • 1 C shredded fresh coconut, or ½ C dried unsweetened
  • ¼ C curry leaves
  • 4 dried whole chiles, stems removed
  • 2 tbsp ghee
  • 1 tsp mustard seeds
  • 1 tbsp urad dal (skinned split black lentils)
  • ½ tsp salt

Directions

  1. If using dried coconut, reconstitute it first by pouring ½ C of boiling water over it and letting it stand for 15 minutes; do not drain.
  2. Combine coconut, curry leaves, half the chiles, and ½ C water in a blender. Blend until they form a smooth paste.
  3. Heat the ghee in a small pot or deep skillet over medium-high heat.
  4. Add the mustard seeds and cover until they stop popping, ~30 seconds.
  5. Add the lentils and remaining chiles, and and stir-fry until the lentils turn golden-brown and the chiles start to blacken, another 30 seconds.
  6. Add the spinach, salt, and coconut paste, and mix together. If it looks too dry, add a bit of water.
  7. Bring to a boil, then reduce heat to medium, cover, and simmer, stirring occasionally, for about ten minutes.

Tomato & Date Chutney

This is written as an InstantPot recipe with fresh tomatoes. I didn't have any fresh tomatoes on hand, but I did have some canned diced tomatoes. I figured that the canning process would have the same effect as the pressure cooking, so I just skipped over the first cooking stage and continued on from there.

Tomato & Date Chutney

Slightly adapted from Vegetarian Indian Cooking with Your Instant Pot by Manali Singh

Ingredients

  • 2 Tbsp. canola (or other neutral) oil
  • 3/4 tsp. mustard seeds
  • 400mL diced tomatoes (canned)
  • 8-9 medjool dates, chopped
  • 1/4 c. jaggery
  • 1/4 c. chili powder
  • 1/4 tsp. Bin Bhuna Hua Garam Masala
  • 3/4 tsp. cumin seeds, ground
  • 1/8 tsp. ground ginger
  • 1/2 tsp. coarse sea salt
  • 2 Tbsp. sultanas

Directions

  1. Heat oil over medium-high heat.
  2. Add mustard seeds, cover, and cook until seeds have stopped popping (30-60 seconds).
  3. Add tomatoes, dates, jaggery, chili powder, garam masala, cumin seeds, ginger (if using), and salt.
  4. Cook for 5 minutes.
  5. Add sultanas and cook for another 5 minutes.

Monday 11 January 2021

Chicken Tikka Masala

This was so, so good! The sauce was rich and creamy (thanks to the almonds and cream) with a pleasant sweetness from the bell peppers and raisins. And the chicken is superbly flavourful and tender with a slight char thanks to its time spent under the broiler (or on the grill). I really, really liked this one. Everyone really liked this one!

Chicken (without the sauce)

Finished chicken tikka masala

Chicken Tikka Masala

Slightly adapted from 660 Curries by Raghavan Iyer

Ingredients

Chicken

  • 1/2 c. plain yogurt
  • 2 Tbsp. garlic paste
  • 2 Tbsp. ginger paste
  • 2 Tbsp. chopped fresh cilantro
  • 2 tsp. coriander seeds, ground
  • 1 tsp. cumin seeds, ground
  • 1-2 tsp. ground Kashmiri chilies
  • 1 tsp. coarse sea salt
  • 1/2 tsp. ground turmeric
  • 1/2 tsp. Punjabi Garam Masala
  • 680g skinless, boneless chicken breasts and/or thighs, cut into 1" strips

Sauce

  • 2 Tbsp. ghee
  • 1 onion, chopped
  • 1 red bell pepper, chopped
  • 1/4 c. slivered almonds
  • 1/4 c. golden raisins or sultanas
  • 1 c. diced tomatoes (fresh or canned)
  • 1/4 c. heavy (35%) cream
  • 1/4 tsp. coarse sea salt
  • 1/8-1/4 tsp. ground cayenne
  • 1/4 tsp. Punjabi Garam Masala
  • 2 Tbsp. chopped fresh cilantro, to garnish1

Directions

Chicken

  1. Combine yogurt, garlic paste, ginger paste, cilantro, coriander, cumin, Kashmiri chilies, salt, turmeric, and garam masala and mix well.
  2. Toss chicken with yogurt mixture to coat.
  3. Cover and chill/marinate for 1-6 hours.
  4. Meanwhile, make the sauce.
  5. Once sauce is made, spread chicken (along with its marinade) on a baking sheet and broil on hi for 6-8 minutes. The chicken should be cooked through and get a little char on the top. If you have access to a grill/barbecue, thread the chicken pieces onto skewers and grill them for 6-8 minutes until cooked through and lightly charred.
  6. Combine chicken with sauce, garnish with cilantro, and serve with rice and your choice of vegetables.

Sauce

  1. While chicken marinates, melt ghee over medium-high heat in a smallish pan (~23cm or 9" works well).
  2. Add onion, bell pepper, almonds, and raisins and cook for 10-12 minutes.
  3. Add tomato and deglaze the pan.
  4. Transfer the contents of the pan to a blender jar, add the cream, salt, cayenne, and garam masala, and blend until smooth.
  5. Return sauce to pan and simmer over low heat while chicken cooks.


1 Just realized that I totally forgot to add the cilantro garnish before serving! Oh well... Back

Sunday 10 January 2021

Sambar

I believe that Sambar is usually more of a breakfast food but, what can I say, I'm a rule-breaker! I needed something to add to the dinner spread to round things out and this looked like a good bet. It's full of delicious veggies and pigeon peas. I used a mix of carrot, tomato, onion, okra, and green beans, but you could use just about any veggies you wanted depending on what's available.

Sambar

Slightly adapted from Vegetarian Indian Cooking with Your Instant Pot by Manali Singh

Ingredients

  • 1/2 c. split pigeon peas (toor dal)
  • 2 1/2 c. water, divided
  • 1/2 tsp. ground turmeric, divided
  • 3/4 tsp. coarse sea salt, divided
  • 1 c. diced tomato (fresh or canned)
  • 1 carrot, cut into coins
  • 1 onion, diced
  • 5 okras, cut into 2cm pieces
  • 1 c. green beans, cut into 2cm pieces
  • 1 tsp. jaggery
  • 4 tsp. Sambhar Masala
  • 1 tsp. tamarind concentrate
  • 1 Tbsp. mustard oil
  • 1/2 tsp. mustard seeds
  • 1/4 tsp. asafetida
  • 15 curry leaves
  • 1 fresh green Thai chile, sliced
  • 1 Tbsp. chopped fresh cilantro

Directions

  1. Place pigeon peas in InstantPot along with 1 c. of the water, 1/4 tsp. of the turmeric, and 1/2 tsp. of the salt.
  2. Close the lid and set to pressure cook on high for 8 minutes.
  3. Allow a 15 minute natural release and then remove the lid and add the tomato, carrot, onion, okra, beans, jaggery, sambhar masala, tamarind, remaining 1/4 tsp. of salt, and remaining 1/4 tsp. of turmeric.
  4. Close the lid and set to pressure cook on high for 5 minutes.
  5. Meanwhile, heat oil over medium-high heat.
  6. Add mustard seeds, cover, and cook until they've stopped popping (30-60 seconds).
  7. Stir asafetida, curry leaves, and chile and remove from heat.
  8. Once the vegetables have finished cooking, do a quick release and stir in the tadka (oil-curry leaf mixture).
  9. Garnish with cilantro and serve with idli or dosas for breakfast!

Saturday 9 January 2021

Garlic Mayo

We made this as part of Fideos with Chickpeas and Garlic Mayo, and it really is not an optional part of the recipe; topping each bowl of fideos with it is mandatory. The original recipe calls for making garlic aioli from scratch, but we just winged it with some mayo in the fridge.

All quantities are very approximate, since I just put things together until it tasted right.

Garlic Mayo

The Complete Vegetarian Cookbook

Ingredients

  • ¼ C mayo
  • 1-2 garlic cloves, minced
  • ½ tsp powdered mustard
  • ¼ tsp black pepper
  • ⅛ tsp coarse salt

Directions

  1. Whisk together all ingredients in a small bowl.

Sookha Kala Chana (Spiced Black Chickpeas)

I don't think this is any of our favourites, but it is easy to put together and pretty tasty, and while it's not fast, most of the time is spent waiting for the chickpeas to cook -- it requires some forward planning but very little time investment. The recipe suggests serving with halwa and poori; we went with garlic naan and onion kulcha.

The Kidlet was highly suspicious of the "weird-looking" chickpeas but was ok with the taste.

Sookha Kala Chana

Vegetarian Indian Cooking with your Instant Pot

Ingredients

  • 1 C black chickpeas
  • 3 C water
  • 1+½ tsp salt, divided
  • 1 tbsp ghee
  • 1 bay leaf
  • 3 green cardamom pods
  • ½ tsp cumin seeds
  • 1-2 tbsp ginger paste
  • 1-2 green chilies, sliced
  • 1 tsp coriander, ground
  • ¼ tsp cumin, ground
  • ¼ tsp bin bhuna hua garam masala
  • ¼ tsp amchor
  • cilantro to taste

Directions

  1. Rinse the chickpeas and place them in the instant pot with the water and 1 tsp of salt. Select bean/chili mode, 40 minutes, and allow for a 15 minute natural release once cooking is complete.
  2. Drain the water and remove the chickpeas to a bowl.
  3. Wipe out the pot and set it to sauté medium.
  4. Once hot, add the ghee, bay leaf, and green cardamom. Sauté until fragrant, 15-30 seconds.
  5. Add the cumin and sizzle for 5-10 seconds.
  6. Add the ginger and chilies and cook for 1-2 minutes, until the ginger starts to darken.
  7. Finally, add the ground spices and 2 tbsp water. Deglaze briefly and then immediately add the chickpeas.
  8. Stir chickpeas together with spices, then remove from the heat and stir in the cilantro and remaining ½ tsp of salt.

Friday 8 January 2021

Masala Mac & Cheese

This was delicious! It came together really easily, too. We used rotelle instead of the macaroni called for in the recipe, and shortened the cooking time slightly as well, since we generally like our pasta al dente. We also halved the chiles and made the paprika garnish optional for the Kidlet, and upped the onion slightly since we had a spare half onion.


Masala Mac & Cheese

Vegetarian Indian Cooking with your Instant Pot

Ingredients

  • 2 tbsp butter
  • 1-2 yellow onions, chopped
  • 2 green chiles, chopped
  • 1 tsp ginger paste
  • 1 tsp garlic paste
  • ½ tsp turmeric
  • ½ tsp cumin, ground
  • ¼ tsp chili powder
  • ½ tsp garam masala
  • 1½ tsp salt
  • 4 C water
  • 1 lb rotelle, macaroni, radiatori, or similar pasta
  • ½ C heavy cream
  • ½ C whole milk
  • 2 C shredded cheese (we used a mix of mozarella and cheddar; the original recipe also recommends monterey jack)
  • 2 tbsp chopped fresh cilantro
  • smoked or hot paprika for serving

Directions

  1. Set instant pot to sauté medium.
  2. Melt the butter. Add onion and chiles and cook for 2-3 minutes, until onion softens.
  3. Add garlic and ginger pastes and cook until fragrant, another ~30 seconds.
  4. Stir in turmeric, cumin, chili powder, garam masala, and salt, then immediately add water and pasta.
  5. Close pot and pressure cook, high, for 3 minutes; release pressure immediately.
  6. Return pot to sauté mode. Stir in the heavy cream and milk, then stir in the cheese, a handful at a time, until melted.
  7. Stir in the cilantro.
  8. Serve topped with paprika.

Thursday 7 January 2021

Masala Chai Crème Brûlée

I'm too tired to do a properly detailed write-up for this right now, but it was really tasty despite my repeated goofs while preparing it. I've cut back the sugar slightly as I found it a tiny bit too sweet for my taste.


Masala Chai Crème Brûlée

Slightly adapted from Vegetarian Indian Cooking with Your Instant Pot

Ingredients

  • 1 c. heavy (35%) cream
  • 1 c. whole (3.25%) milk
  • 3 black tea bags
  • 6 green cardamom pods
  • 6 black peppercorns
  • 4 whole cloves
  • 1/2 (3") cinnamon stick
  • 1/4 tsp. ground ginger
  • 5 large egg yolks
  • 9 Tbsp. sugar, divided
  • 1 tsp. vanilla extract
  • pinch of salt

Directions

  1. Combine cream, milk, tea bags, cardamom, peppercorns, cloves, cinnamon, and ginger in a heatproof (glass or steel) container.
  2. Pour 1 1/2 c. of water into the InstantPot and then place the container of cream mixture on a trivet in the InstantPot.
  3. Seal the InstantPot and pressure cook on high for 1 minute. Immediately release the pressure and remove the container from the pot. Set aside for 5-10 minutes.
  4. Meanwhile, combine egg yolks with 5 Tbsp. of the sugar, vanilla, and salt.
  5. Whisk the egg yolk mixture until it becomes pale yellow.
  6. Once steeped, strain the cream mixture, reserving the liquids and discarding the solids.
  7. Gradually whisk the cream mixture into the egg yolk mixture.
  8. Pour the custard into a casserole dish or several small ramekins.
  9. Cover the casserole/ramekins with foil or a heatproof lid.
  10. Add another 1/2 c. of water to the InstantPot and place the casserole/ramekins into the pot on a trivet so that they're elevated above the water. (If using a casserole dish, make sure that you can get it back out again when you're done; if it's a tight fit consider running twine or similar below it that you can use to pull it out.)
  11. Seal the InstantPot and pressure cook on high for 7 minutes. Allow a 10 minute natural release.
  12. Remove casserole/ramekins from InstantPot and allow to cool to room temperature.
  13. Sprinkle with remaining sugar and place under broiler for 3-5 minutes to melt and caramelize the sugar.

Wednesday 6 January 2021

Black Forest Pavlova

I really enjoyed this take on a pavlova. It tops the meringue with a chocolate mousse and macerated cherries. I original recipe calls for macerating the cherries with marsala wine and dried fruit. I didn't like the sound of that, so I just macerated the cherries with a bit of vanilla sugar. If you wanted to go for an even more black forest-y flavour, you could add a bit of kirsch to the cherries. I thought about adding a bit, but I didn't think that TF or the Kidlet would like it, so I just left it out.


Black Forest Pavolva

Adapted from Delicious.com

Ingredients

Meringue

  • 190g sugar
  • 1/2 Tbsp. cornstarch (cornflour)
  • 4 egg whites
  • 1/4 tsp. cream of tartar
  • 1/2 tsp. vinegar
  • 1 tsp. vanilla extract

Mousse

  • 200g dark chocolate
  • 100g milk chocolate
  • 1/2 c. boiling water
  • 2 egg whites
  • 1/2 c. heavy (35%) cream
  • 1/2 tsp. vanilla extract

Cherries

  • 1 1/2 c. halved cherries
  • 1/4 c. sugar (vanilla sugar, if possible)
  • 1 tsp. kirsch (optional)

Assembly

  • 1 c. heavy (35%) cream (optional)
  • 2 Tbsp. icing (powdered/confectioners') sugar (optional)
  • 1/2 tsp. vanilla extract (optional)

Directions

Meringue

  1. Combine cornstarch with sugar and set aside.
  2. Add cream of tartar to egg whites and beat until thick and foamy.
  3. Begin adding sugar a Tbsp. at a time while still beating.
  4. Beat until stiff peaks form.
  5. Beat in vinegar and vanilla.
  6. Scoop meringue out onto parchment-lined baking sheet and shape into a large bowl/nest.
  7. Bake at 135°C (275°F) for 40-45 minutes.
  8. Turn oven off and leave meringue in oven to cool overnight (or at least for a few hours).

Mousse

  1. Break the chocolate into smallish pieces and place it in a blender jar.
  2. Pour in boiling water and blend until smooth.
  3. Add egg whites and blend until fully incorporated.
  4. Add cream and vanilla and blend until well-combined.
  5. Pour into bowl and chill until firm.

Cherries

  1. Toss cherries with sugar and kirsch (if using) and set aside to macerate for at least 2 hours.

Assembly

  1. Beat the mousse to losen it.
  2. If topping with cream, combine the vanilla and cream and sift in the icing sugar, then whip the cream.
  3. Spoon the mousse into the meringue.
  4. Top with cherries.
  5. Top with whipped cream (if using).

Tuesday 5 January 2021

Makkai nu Shaak (Corn with Cumin and Curry Leaves)

There's not much to this curry, but it makes a great side to go along with more substantial curries. And it is extremely easy to put together. The Kidlet loved it too!


Makkai nu Shaak

Slightly adapted from 660 Curries by Raghavan Iyer

Ingredients

  • 1 Tbsp. ghee
  • 1 tsp. cumin seeds
  • 1/4 tsp. ground turmeric
  • 1/4 tsp. ground asafetida
  • ~3 c. corn kernels
  • 1 c. water
  • 2 Tbsp. chopped fresh cilantro
  • 1/2 tsp. coarse sea salt
  • 12 fresh (or frozen) curry leaves
  • 1-2 fresh green Thai chilies, cut into 2cm pieces

Directions

  1. Heat ghee over medium-high heat.
  2. Add cumin and cook for 10-20 seconds.
  3. Add turmeric and asafetida.
  4. Immediately add corn, water, cilantro, salt, curry leaves, and chilies and bring to a boil.
  5. Reduce heat to medium-low, cover, and cook, stirring occasionally for 8-10 minutes.
  6. Serve with rice and curries of your choice. (Iyer recommends Toovar nu dal and rotis.)