Saturday 30 November 2019

Ravioli Squash Bake

This was ok but I didn't love it. It has a rich cheesy sauce, but I feel like it's too cheesy for a cream sauce and not cheesy enough for a cheese sauce.

It was part of a meal with caramelized pear salad.

Ravioli Squash Bake

Hello Fresh

Ingredients

  • 500g ravioli
  • 340g butternut squash, cubed
  • 100g shallots, cubed
  • 10g thyme, chopped
  • 10g parsley, chopped
  • 30mL oil
  • 90mL cream cheese
  • 180mL sour cream
  • 250mL grated mozarella

Directions

  1. Toss squash, shallots, thyme, and oil. Roast at 425°F until tender, 22-25 minutes, turning halfway through.
  2. While squash is baking, cook ravioli. Reserve 250mL of pasta water, drain, and buffer.
  3. In pot, whisk cream cheese and sour cream into pasta water.
  4. Return ravioli to pot with sauce. Mix in squash, shallots, and parsley.
  5. Pour ravioli with sauce into a greased 9×13" baking dish. Top with mozarella. Broil on high until mozarella melts, ~5 minutes.

Friday 29 November 2019

Caramelized Pear Salad

This recipe was part of a Hello Fresh dinner that included baked ravioli, but works fine on its own. The pears take a little while to cook but require almost no attention while doing so, so you can easily build this in parallel with something else.

I think this could probably have taken considerably more greens, perhaps twice as many, but it was tasty as is. It would probably also have taken very well to blue cheese.

Caramelized Pear Salad

Hello Fresh

Ingredients

  • 2 pears
  • 113g baby spinach, spinach-arugula blend, or similar greens
  • 56g pepitas (shelled pumpkin seeds)
  • 30mL white wine vinegar
  • 15mL dijon mustard
  • 20+5mL sugar
  • 30mL olive oil

Directions

  1. Core pears. Slice into thin wedges.
  2. Toast pepitas over medium heat, 3-5 minutes, stirring occasionally. Remove to plate.
  3. Put pear slices, 20mL sugar, and 30mL water in pan over medium heat. Cook, stirring often, until starting to brown, 10-15 minutes. Remove from heat.
  4. Whisk together vinegar, mustard, remaining 5mL sugar, olive oil.
  5. Combine greens, pears, pepitas, and dressing.

Thursday 28 November 2019

Pumpkin Waffles

I may have gone slightly pumpkin crazy this year: two batches of Pumpkin Snack Cake, two different types of pumpkin soup, and a pumpkin chiffon pie. And I'm not done yet! We got two more pie pumpkins with our last produce basket. Some of it is earmarked for pumpkin pie. But I decided that some of it should go into waffles. There are a lot of different pumpkin waffle recipes out there. I looked at a few, but I was intrigued by the use of oat flour in this one.

Pumpkin Waffles

Slightly adapted from Cookie + Kate

Ingredients

  • 200g oat flour1
  • 1 Tbsp. baking powder
  • 1/2 tsp. coarse sea salt, ground
  • 1 tsp. ground cinnamon
  • 1/2 tsp. ground ginger
  • 1/4 tsp. ground nutmeg
  • 1/4 tsp. ground allspice
  • 3 large eggs
  • scant 2/3 c. milk
  • 7 Tbsp. unsalted butter, melted
  • 1/2 c. pumpkin purée
  • 3 Tbsp. maple syrup
  • 1 Tbsp. vanilla extract

Directions

  1. Sift baking powder into flour.
  2. Add salt, cinnamon, ginger, nutmeg, and allspice and mix well.
  3. In a separate bowl, whisk eggs.
  4. Add milk, butter, pumpkin, maple syrup, and vanilla to eggs and mix well.
  5. Add dry ingredients to wet and stir to just combine. (It will be a bit lumpy.) Set aside for 10 minutes.
  6. Pour batter into preheated waffle iron and cook until done. (Amount of batter and cooking time will vary according to waffle iron and settings.)
  7. Repeat until all batter has been used up.
  8. Serve with maple syrup, fruit, and/or whipped cream.


1 I had a bit of extra whole wheat flour left over from making bread, so I used that and then added oat flour to make 200g. Back

Wednesday 27 November 2019

Calabacitas

I needed something to go with our Bean and Cheese Sopaipillas and I had this recipe kicking around and zucchini just happened to be on sale...

I'm not normally a big fan of zucchini (unless it's in the form of zucchini bread), but this was really good! I mean, cheese and heavy cream will go a long way toward making most things good, but still... it was better than I was expecting. The Kidlet didn't care for it (I thought she'd like the corn at least), but everyone else liked it. Definitely worth keeping in mind when looking for a good vegetable side.

Calabacitas

Slightly adapted from Cook's Country August/September 2017

Ingredients

  • 3 Tbsp. unsalted butter
  • 1 onion, chopped
  • 1 poblano chile, seeded and chopped
  • 1 red bell pepper, seeded and chopped
  • 1/2 tsp. coarse sea salt
  • 1/2 tsp. black peppercorns, ground
  • 2-3 cloves garlic, minced
  • 1 (~230g) zucchini, diced
  • 1 (~230g) yellow summer squash1, diced
  • 3-4 ears corn, kernels cut from cobs
  • 1/4 c. heavy (35%) cream
  • ~1/2 c. crumbled feta2
  • lime wedges (optional)

Directions

  1. Melt butter over medium-high heat.
  2. Add onion, poblano, bell pepper, garlic, salt, and pepper and cook until softened (~4 minutes).
  3. Add zucchini and summer squash and cook until tender (~6 minutes).
  4. Stir in corn and cream.
  5. Pat into and even layer and cook, without stirring, until liquid has evaporated and vegetables have browned slightly (~7 minutes).
  6. Sprinkle with feta (or Cotija).
  7. Serve with lime wedges.


1 I couldn't find any yellow summer squash this time of year, so I just tossed in an extra zucchini instead. Back
2 Use Cotija cheese if you can find it. I don't think I've ever seen it for sale around here, so I generally just substitute feta instead. Back

Tuesday 26 November 2019

Bean and Cheese Sopaipillas with Green Chile Sauce

These were delicious! Not particularly healthy, but definitely delicious. I thought they'd be bland without the sauce, but they're still amazing even on their own. The sauce just takes them to the next level. We had our sopaipillas with calabacitas. I feel like they probably could've used another vegetable side as well, but this dinner already had enough moving parts as it was. Maybe some sort of simple garden salad next time?

Sopaipillas, as it turns out, can take on many different forms. Sometimes they're made entirely with masa harina; sometimes wheat flour is added. Sometimes they're stuffed; sometimes they're not. They may be flat or puffy. And they can run the gamut from sweet to savoury; part of the main course or a sweet treat for dessert. Based on a quick internet search, the sweet varieties seem to be more widespread than the savoury ones. So the "default" sopaipilla (as much as there can be said to be a default) might be something along the lines of a corn-based doughnut/fry-bread possibly coated in sugar and/or served with honey. These stuffed, savoury sopaipillas seem to be somewhat less common. Which is a shame because they are wonderful!

Bean and Cheese Sopaipillas with Green Chile Sauce

From Cook's Country October/November 2019

Ingredients

Dough

  • 2 3/4 c. all-purpose flour
  • 1 tsp. coarse sea salt, ground
  • 1/2 tsp. baking powder
  • 6 Tbsp. lard
  • 14 Tbsp. water

Refried Beans

  • 1/4 c. lard
  • 1 onion, finely chopped
  • 4 c. cooked pinto beans
  • 1 c. chicken broth

Green Chile Sauce

  • 900g fresh Anaheim chiles
  • 1 fresh jalapeño chile
  • 2 Tbsp. lard
  • 1 onion, finely chopped
  • 3-4 cloves garlic, minced
  • 1 Tbsp. flour (hard or soft is fine)
  • 1 c. chicken broth

Assembly

  • ~2 c. shredded Cheddar cheese
  • oil for frying

Directions

Dough

  1. Sift together flour, salt, and baking powder and mix well.
  2. Cut lard into flour.
  3. Stir in water.
  4. Turn out dough and knead a little (1-2 dozen strokes).
  5. Divide into 8 equal portions, cover and chill for at least 30 minutes1.

Refried Beans

  1. Melt lard over medium heat.
  2. Add onion and cook until softened (~4 minutes).
  3. Add beans and broth.
  4. Mash beans with potato masher and cook until thickened (~8 minutes).
  5. Season to taste and set aside to cool.

Green Chile Sauce

  1. Adjust oven rack to ~15cm (6") from broiler element and preheat broiler.
  2. Line a rimmed baking sheet with aluminum foil.
  3. Place whole chiles (Anaheims and jalapeño) in single layer on prepared sheet.
  4. Broil until blackened all over, turning every 4-5 minutes so that all sides get charred.
  5. Remove from oven and quickly wrap chiles and foil to trap steam. Set aside for ~10 minutes.
  6. Unwrap chiles and remove skins.
  7. Stem and seed Anaheims.
  8. Stem (but do not seed) jalapeño.
  9. Chop all chiles into half cm (~1/4") pieces.
  10. Melt lard over medium heat.
  11. Add onion and cook until softened (~4 minutes).
  12. Add garlic and cook for another minute or so.
  13. Stir in flour and cook for 1 minute.
  14. Stir in broth and chiles and bring to a simmer.
  15. Simmer until thickened (~6 minutes).
  16. Season to taste, cover, and set aside.

Assembly

  1. Retrieve dough balls from fridge and keep all but the one you're currently working with covered with a damp tea towel.
  2. Working with one dough ball at a time, roll into an 18cm (~7") circle on a floured surface.
  3. Squeeze ~1/4 of Cheddar to form a slight oblong shape (vaguely like an American football or rugby ball).
  4. Place your cheesy ovoid in the centre of the dough round and top it with ~1/4 c. of refried beans.
  5. Fold the dough round in half to create a semi-circle/half moon shape.
  6. Press around edges to seal.
  7. Moisten the top of the sealed edge with a bit of water and pinch the dough diagonally up and over the sealed edge to seal again and create a decorative rope-like border.
  8. Repeat with remaining dough and fillings. (You may have some beans left over.)
  9. Use a paring knife to poke a 1cm (~1/2") hole in the top of each sopaipilla2.
  10. Line a baking sheet with paper towels (preferably a double or triple layer).
  11. Heat frying oil to 190°C (375°F). Oil should be ~4cm (1.5") deep.
  12. Add 2-4 sopaipillas at a time to the oil (depending on the size of your fryer/Dutche oven) and fry until golden brown (~3-4 minutes per side).
  13. Transfer fried sopaipillas to prepared baking sheet.
  14. Reheat green chile sauce over medium-high heat.
  15. Serve sopaipillas smothered in chile sauce and accompanied by vegetable side(s) of your choice.


Variations

Vegetarian Bean and Cheese Sopaipillas

Ingredients

Dough

  • 2 3/4 c. all-purpose flour
  • 1 tsp. coarse sea salt, ground
  • 1/2 tsp. baking powder
  • 6 Tbsp. vegetable shortening
  • 14 Tbsp. water

Refried Beans

  • 1/4 c. vegetable shortening
  • 1 onion, finely chopped
  • 4 c. cooked pinto beans
  • 1 c. vegetable broth

Green Chile Sauce

  • 900g fresh Anaheim chiles
  • 1 fresh jalapeño chile
  • 2 Tbsp. vegetable shortening
  • 1 onion, finely chopped
  • 3-4 cloves garlic, minced
  • 1 Tbsp. flour (hard or soft is fine)
  • 1 c. vegetable broth

Assembly

  • ~2 c. shredded Cheddar cheese
  • oil for frying


1 If you want to make ahead, dough will keep in fridge for up to 2 days. Back
2 Assembled but uncooked sopaipillas can be covered and refrigerated for up to 24 hours. Back

Monday 25 November 2019

Potato and Blue Cheese Tart

We had a bunch of potatoes and blue cheese that needed to be used up so it seemed like a good opportunity to try out this recipe. The instructions having you making the pastry from scratch and rolling it out into a rectangle, but I already had some frozen pastry rounds in the fridge, so I just used one of them.

This is quite rich and very starchy: three kinds of cheese + potatoes and pastry. I served it with a salad to try to get some more vegetables and variety in the mix. Possibly a goat cheese and prosciutto salad was a bit too rich to be paired with this particular tart, but I really wanted to try it! I think, if I were to do it again, I'd go with a slightly lighter salad and probably add a soup as well just so the meal doesn't lean quite so heavily on the tart. I think a spinach salad with some fruit and nuts (maybe strawberries and almonds) and a nice balsamic vinaigrette would be a good complement to the tart. And maybe a fresh, homemade (not-too-creamy) tomato soup to go along with it.


Potato and Blue Cheese Tart

Slightly adapted from Cook's Country December/January 2020

Ingredients

  • ~200g pie crust pastry
  • 120g cream cheese, softened
  • ~1/2 c. grated Parmesan cheese, divided
  • 1/2 c. crumbled blue cheese, divided
  • 2 Tbsp. olive oil
  • 2 tsp. Roman Mustard
  • 3/4 tsp. dried rosemary, divided
  • 1/4 tsp. black peppercorns, ground
  • 1/4 tsp. coarse sea salt
  • 1 large egg, separated
  • 450g russet (or other floury) potatoes, sliced thin
  • 1-2 shallots, sliced thin

Directions

  1. Roll pastry into a large circle or rectangle and transfer to a parchment-lined baking sheet.
  2. Whisk 1/4 c. of Parmesan and 1/4 c. of blue cheese into the softened cream cheese.
  3. Add oil, mustard, 1/2 tsp. of rosemary, pepper, and salt and mix well.
  4. Mix in egg yolk.
  5. Add potatoes and shallot to cream cheese mixture and stir/toss to coat.
  6. Transfer potato mixture to centre of dough and spread evenly to cover, leaving a border for folding up edges later.
  7. Sprinkle filling with remaining 1/4 c. of blue cheese and 2 Tbsp. of the remaining Parmesan.
  8. Fold edges of crust over filling. (The aim isn't to cover all the filling, just give it a neat border.)
  9. Lightly whisk the egg white and brush it onto the exposed bits of crust. (You won't need it all.)
  10. Sprinkle the crust with the remaining 2 Tbsp. of Parmesan.
  11. Bake at 190°C (375°F) for 45 minutes.
  12. Remove from oven and let cool on baking sheet for 10 minutes.
  13. Carefully transfer to wire rack to cool for another 20 minutes or so before serving.


Variations

Potato and Parmesan Tart

Just replace all the blue cheese with more Parmesan. Done.

Saturday 23 November 2019

Spicy Sesame Noodles with Tofu & Mushrooms

This Cook's Country recipe was inspired by Dan Dan Mien; their goal was to make something based on dan dan noodles that could be easily cooked on a weeknight and relied on ingredients that could be easily found in a north american supermarket. For the most part, I think they succeeded, and the result is very tasty indeed.

As written, the recipe calls for ground pork. We swapped that out for mushrooms and tofu, and I have no complaints, although I think it might have been even better with seitan or tempeh; the tempeh, in particular, would more closely match the texture of the ground pork.

A few other adjustments have been made: the original uses tapwater instead of reserved pasta water for the sauce, and sherry instead of shaoxing wine. They also recommend making (or buying) sichuan chili oil as an optional topping.

Spicy Sesame Noodles with Tofu & Mushrooms

Cook's Country

Ingredients

  • 15mL butter
  • 200g cremini mushrooms, sliced
  • 200g extra firm smoked tofu, sliced and chopped into ~1cm squares
  • 500g whole wheat spaghetti
  • 30mL toasted sesame oil
  • 45+15mL soy sauce (I used a 1:1 light:dark soy mix)
  • 15+10mL hoisin sauce
  • 15mL shaoxing wine or white wine
  • 60mL tahini
  • 30mL rice vinegar
  • 15mL sambal oleck
  • 10mL sugar
  • 60mL oil
  • 6 green onions, sliced thin, green and white parts separated
  • 3 garlic cloves, minced, or 30mL garlic paste
  • 5mL red pepper flakes
  • 2mL ground Sichuan peppercorns

Directions

  1. Melt butter in a large skillet over medium heat.
  2. Sautée mushrooms and tofu until mushrooms have released their liquid and softened and tofu has started to brown, ~10? minutes. Remove from skillet and buffer.
  3. Meanwhile, boil water. Add pasta and 15mL salt and cook until just past al dente. Drain, reserving 250mL of the pasta water, and return noodles to the pot. Toss with sesame oil and cover to keep warm.
  4. Whisk together tahini, vinegar, sambal oleck, sugar, salt, 45mL soy sauce, 10mL hoisin sauce, and the reserved pasta water in a medium bowl.
  5. Add oil, the white parts of the green onions, garlic, pepper flakes, and Sichuan pepper to the skillet. Cook over medium heat until fragrant, ~2 minutes.
  6. Pour contents of skillet into pasta pot. Add tahini sauce, green onions, mushrooms, and tofu. Toss to combine.

Sautéed Baby Bok Choi

This definitely isn't substantial enough to be a main dish, but it makes a tasty and very quick to put together side, and goes well both on its own or mixed in with noodles or rice. Note that the bok choi cooks down significantly; if you want to have lots of bok choi, double or even triple this recipe.

Sautéed Baby Bok Choi

Cook's Country

Ingredients

  • 700g baby bok choi
  • 10mL toasted sesame oil
  • 1 garlic clove, minced
  • 1mL red pepper flakes
  • 15mL corn oil
  • 1mL salt

Directions

  1. Cut leaves from bok choi heads, chop coarsely, and rinse.
  2. Cut base off each head and discard. Detach stalks from each other and core; discard core. Rinse stalks and store separately from leaves.
  3. Combine sesame oil, garlic, and red pepper flakes in a small bowl.
  4. Heat corn oil in a large skillet over medium-high heat. Add stalks, sprinkle with salt, and cook without stirring until stalks start to brown, ~5 minutes.
  5. Stir and continue cooking until stalks are just starting to become tender, ~1 minute.
  6. Add leaves and sesame oil mixture and continue to cook, stirring often, until leaves are wilted, 1-2 minutes. Eat.

Wednesday 20 November 2019

Prosciutto, Apple and Goat Cheese Salad with Fig Vinaigrette

This comes together pretty easily, although the toasting of the hazelnuts and crisping of the prosciutto can be time consuming. (The original recipe doesn't call for crisping, but I find it both makes the prosciutto easier to work with and tastier.) The biggest problem with it is that the goat cheese likes to form clumps once stirred in, so occasionally you'll spear what looks like a ball of leaves and find out that it's actually a ball of goat cheese in a leafy shell.

As written, it calls for mesclun as the greens. We used spinach and lettuce and that worked fine. I think kale would be excellent, although you might need to either dial back the quantity or use a bigger bowl, as it doesn't deflate the way spinach or lettuce do when wet.

Prosciutto, Apple and Goat Cheese Salad with Fig Vinaigrette

Cook's Country

Ingredients

  • 60mL olive oil
  • 60mL cider vinegar
  • 45mL fig preserve
  • 1mL salt
  • 1mL freshly ground black pepper
  • ~2.5L greens
  • 1-2 sweet apples (Fuji, Gala or Honeycrisp work well), cored and sliced thin
  • 125mL hazelnuts
  • 170g thinly sliced prosciutto
  • 250mL goat cheese, crumbled

Directions

  1. Whisk together oil, vinegar, fig preserve, salt, and pepper in a small bowl.
  2. Heat a large skillet over medium heat. Add hazelnuts and toast, stirring occasionally, until just starting to brown, 5-10 minutes. Remove hazelnuts to a plate to cool.
  3. In the same skillet, cook the prosciutto slices until just starting to crisp, 1-2 minutes per slice. You will likely need to do multiple batches. Remove these to cool as well.
  4. Peel the hazelnuts (if they had the skin on); after toasting, it should come off easily. Chop coarsely.
  5. Slice or tear the prosciutto coarsely.
  6. Toss greens, apple slices, hazelnuts, prosciutto, cheese, and dressing together. Serve.

Quick Candied Orange Peel

This is "quick" candied peel because it only involves one round of simmering in sugar syrup. There are other methods that involve multiple simmers in increasingly concentrated syrups. I didn't bother going through that whole process here.

Quick Candied Orange Peel

Slightly adapted from BBC Good Food

Ingredients

  • Orange peels1
  • water
  • sugar

Directions

  1. Place orange peels in a pot and add enough cold water to cover.
  2. Bring to a boil and simmer for 5 minutes.
  3. Drain and add fresh, cold water to cover.
  4. Bring to a boil and simmer for 30 minutes.
  5. Drain, reserving liquid.
  6. Measure the strained liquid and add 100g of sugar for every 100mL of liquid.
  7. Stir to dissolve sugar and return mixture to pot with peels.
  8. Bring to a boil and simmer for 30 minutes.
  9. Remove from heat and set aside to cool.
  10. Remove peel from syrup and spread in a single layer on a cooling rack set on a baking sheet.
  11. Bake on lowest oven setting for ~1 hour.
  12. Remove from oven and toss with sugar.
  13. Set aside to dry for another hour or so.
  14. Store in an airtight container in a cool, dry place for up to 2 months.


1 If you'd like very pretty, presentable pieces of candy, you can cut your oranges into quarters and then scoop out the flesh and cut the remaining peel/pith into neat little sticks. I was going to be juicing a bunch of oranges, so I just peeled them with a vegetable peeler and then coarsely chopped the peels. Back

Monday 18 November 2019

Penne with Pancetta & Asparagus

This was absolutely delicious and surprisingly easy to assemble. Most of the prep time was spent cutting the asparagus.

Penne with Pancetta & Asparagus

Cook's Country

Ingredients

  • 125g pancetta, diced
  • 700g asparagus, trimmed and cut into 5cm lengths
  • 1 large garlic clove, minced
  • 500g store-bought dry penne rigate or similar pasta
  • 250mL mascarpone
  • 15mL lemon juice
  • ~200mL freshly grated parmesan
  • 80mL coarsely chopped fresh basil
  • salt and pepper

Directions

  1. Cook pancetta in a large, deep pan over medium heat, stirring occasionally, until lightly browned and crispy, ~10 minutes.
  2. Remove pancetta with a slotted spoon and reserve.
  3. Increase heat to high. Add asparagus and cook, without stirring, until starting to brown, ~3 minutes. Stir vigorously and continue to cook until browned and starting to become tender, ~2 minutes.
  4. Remove from heat and stir in garlic and pancetta.
  5. Cook pasta al dente. Reserve 250mL of pasta water and drain.
  6. Return asparagus to low heat. Stir in mascarpone, parmesan, lemon juice, the reserved pasta water, and pepper to taste.
  7. Add pasta and basil and toss to combine. Serve.

Sunday 17 November 2019

Israeli Couscous with Tomatoes and Chickpeas

This looks like it wants to be a curry and tastes like it want to be an Italian pasta dish. Either way, it makes for a great one-pot offering that can be thrown together quickly. It's a little lacking in the vegetable department, but a good salad or vegetable side can remedy that. You could even try adding a bit of chopped spinach or something similar to it if you wanted to keep everything to one pot.

Israeli Couscous with Tomatoes and Chickpeas

Slightly adapted from Cook's Country June/July 2019

Ingredients

  • 3 Tbsp. olive oil
  • 1 onion, chopped
  • 3 cloves garlic, minced
  • 1/2 tsp. black peppercorns, ground
  • 1/2 tsp. red pepper flakes
  • 1L vegetable broth
  • 1 (~800mL) can crushed tomatoes
  • 1 1/2 c. Israeli couscous
  • 2 c. cooked chickpeas
  • 1 Tbsp. dried oregano (or 2 Tbsp. fresh)
  • Parmesan, to serve

Directions

  1. Heat oil over medium heat.
  2. Add onion and cook for ~4 minutes.
  3. Add garlic, pepper, and pepper flakes and cook for another minute or so.
  4. Add broth, tomatoes, and couscous.
  5. Bring to a vigorous simmer and cook, stirring often, until couscous is tender (~15 minutes).
  6. Stir in chickpeas and oregano.
  7. Serve topped with Parmesan.

Saturday 16 November 2019

Crunchy Tortilla Chip Cheeseburgers with Guacamole and Salad

This Hello Fresh recipe was really tasty and not at all hard to put together. As written it uses Beyond Meat fakemeat patties, but you should be able to swap in pretty much any other burger patty you like, including home-made meat patties, without issues. You can also omit the cheese to make it vegan, or the jalapeños for people who don't like spicy things.

This was a big hit with the whole house; even the kidlet ate all of hers (although she disassembled it first), which is unusual when it comes to burgers.

Despite having a lot of moving parts, this recipe comes together fairly easily.

Crunchy Tortilla Chip Cheeseburgers with Guacamole and Salad

Hello Fresh

Ingredients

  • 2 avocados
  • 1 fresh jalapeño, stemmed
  • 2 limes
  • 4 garlic cloves, minced
  • 60mL white wine vinegar
  • 10mL sugar
  • 4 burger buns
  • garlic butter
  • 85g tortilla chips
  • 4 burger patties
  • cheddar cheese
  • 1 tomato, sliced (optional)
  • 125g baby kale
  • 125g mini cucumbers
  • 30mL olive oil

Directions

  1. Guacamole
    1. Halve and pit avocados. Scoop flesh into a medium bowl.
    2. Mince 30mL of the jalapeño (about half of it). Leave the rest intact.
    3. Add minced garlic, minced jalapeño, and the juice of one of the limes to the avocado flesh. Mash together.
  2. Burgers
    1. Slice the remaining jalapeño into thin discs.
    2. Combine jalapeño slices, vinegar, the juice of one lime, 30mL water and 10mL sugar in a small pot.
    3. Cook over medium heat, stirring occasionally, until tender-crisp, ~5 minutes. Transfer quick-pickled jalapeños to a small bowl; reserve pickling liquid.
    4. Halve buns. Spread with garlic butter, and toast.
    5. Toast tortilla chips at 450° for 3-4 minutes, until golden brown but not yet dark. (A toaster oven works well here.)
    6. Cook burger patties until browned on both sides and cooked through. Remove from the heat, top with cheddar, and cover the pan until the cheese melts, 30-60 seconds.
    7. Assemble the burgers: spread toasted buns with guacamole, then put pickled jalapeño slices, burger patty, and tomato onto the bun. Top with toasted tortilla chips, then add the top half of the bun and press down so that the chips crunch into the guacamole.
  3. Salad
    1. Cut cucumber into 5mm half-moons.
    2. Whisk together pickling liquid from jalapenos with olive oil.
    3. Combine dressing, cucumber, and kale in a bowl and toss to combine.

Monday 11 November 2019

Cottage Herb Loaf

This makes a lovely, fragrant, flavourful loaf. The dough was a bit strange, but the resulting bread was very nice. My only regret was that I didn't double the recipe. We're almost out already! I've still got some dill and cottage cheese left though, so hopefully I can do another batch sometime in the next few days. And this time I will double it.


Cottage Herb Loaf

From the Laurel's Kitchen Bread Book

Ingredients

  • 2 Tbsp. oil
  • 1/4 c. minced onion
  • 1/2 c. warm water
  • 2 tsp. active dry yeast
  • 1 c. cottage cheese
  • 1/2 c. chopped fresh parsley
  • 1 Tbsp. chopped fresh dill
  • 1 1/2 Tbsp. honey
  • 1 large egg
  • 1/2 Tbsp. coarse sea salt
  • 375g hard (bread/strong/high grade) whole wheat flour

Directions

  1. Heat oil over medium heat.
  2. Cook onion in oil until softened and beginning to brown.
  3. Dissolve yeast in warm water and set aside.
  4. Add cottage cheese, parsley, and dill to onion and gently warm.
  5. Remove onion mixture from heat and stir in honey and egg.
  6. In a large bowl, combine flour and salt and mix thoroughly.
  7. Make a well in the centre of the flour mixture and pour in the yeast mixture and the cheese mixture. (Make sure that the cheese isn't too hot when you add it. If it seems overly warm, give it another few minutes to cool before mixing it in.)
  8. Working from the centre outward, gradually mix the flour into the liquids until most of it has been incorporated.
  9. Turn out onto your work surface and begin kneading. The dough may be quite sticky. Try to knead it for at least 10 minutes before you make a call on adding extra flour.
  10. Knead for 15-30 minutes1.
  11. Shape into a smooth ball and place in a covered bowl to rise2. Rise is done when a 1cm deep fingerprint (with a wet finger) doesn't fill in at all.
  12. Knock dough back. Knead for a few more strokes if desired.
  13. Shape back into a smooth ball and return to the covered bowl to rise again. Use the same test to determine when the second rise is done.
  14. Knock back again and shape into a smooth ball, stretching gluten taut across the top.
  15. Place the dough ball into a greased casserole dish or deep dish pie plate, cover, and let rise one more time. For the final rise, the dough should still slowly return the wet fingerprint.
  16. Gently brush the top of the dough with oil and slash it if you like.
  17. Bake at 180°C (350°F) for 45-50 minutes.


1 You can probably get away with only 15 minutes if your kneading is very efficient. I always err toward kneading my bread for longer though since I don't seem to have a very efficient technique. Back
2 The original recipe suggests a warm rise for this bread. They recommend aiming for a temperature of ~32°C (90°F) for 45 minutes for the first rise. I didn't want to mess around with trying to set up a warm rise, so I just went with a longer, cooler rise: 20°C (68°F) for ~75 minutes. Back

Sunday 10 November 2019

French Buttercream

This is quite different from other buttercream icings that I've had. I am, of course, familiar with American buttercream: overly sweet and greasy, but very quick and easy to make. And I've made Swiss meringue buttercream before. I quite like that one since the meringue base means it's not so cloying and doesn't taste quite so fatty and greasy. I'd never heard of French buttercream before though. It's very rich with its egg yolk base. And pouring the boiling sugar into the eggs made me a bit nervous. It does make a pretty nice icing in the end though. I think it's probably a bit too butter-forward to be my favourite, but it's still an improvement over American buttercream IMHO.

The original recipe provides instructions for making 3 c. (just the right amount to frost a dozen cupcakes), 5 c. (should be enough for a 23cm (9") round two-layer cake), and 6 c. (enough to ice a three-layer cake). It also suggests a couple flavour variations in addition to the basic vanilla.

Vanilla French Buttercream (for Cupcakes)

Makes ~3 c.

Ingredients

  • 3 large egg yolks
  • 1/2 c. sugar
  • 1/3 c. corn syrup
  • 1/2 Tbsp. vanilla extract
  • pinch of salt (optional)
  • 1 1/4 c. (20 Tbsp.) unsalted butter, softened

Directions

  1. Beat egg yolks on medium speed for 4-6 minutes.
  2. Combine sugar and corn syrup and bring to a boil, stirring occasionally.
  3. Reduce mixer speed to low and pour hot sugar mixture into the whipped yolks in a thin, steady stream. Don't let the sugar directly touch the sides of the bowl or the beaters/whisk.
  4. Increase speed to medium-high and whip for 5-10 minutes. Mixture should be well-aerated and no longer warm.
  5. Reduce speed to medium low and beat in butter 1 Tbsp. at a time.
  6. Increase speed to medium-high and whip for another minute or two.


Variations

Almond French Buttercream (for Cupcakes)

Ingredients

  • 3 large egg yolks
  • 1/2 c. sugar
  • 1/3 c. corn syrup
  • 1/2 Tbsp. vanilla extract
  • 1 tsp. almond extract
  • pinch of salt (optional)
  • 1 1/4 c. (20 Tbsp.) unsalted butter, softened

Coconut French Buttercream (for Cupcakes)

Ingredients

  • 3 large egg yolks
  • 1/2 c. sugar
  • 1/3 c. corn syrup
  • 1/2 Tbsp. vanilla extract
  • 1 tsp. coconut extract
  • pinch of salt (optional)
  • 1 1/4 c. (20 Tbsp.) unsalted butter, softened

French Buttercream (for a Two-Layer Cake)

Makes ~5 c.

Ingredients

  • 7 large egg yolks
  • 3/4 c. sugar
  • 2/3 c. corn syrup
  • 2 1/2 tsp. vanilla extract
  • 1/2 Tbsp. almond or coconut extract (optional)
  • 1/8 tsp. salt (optional)
  • 2 1/4 c. unsalted butter, softened
For this larger amount you can add the butter 2 Tbsp. at a time rather than 1.

French Buttercream (for a Three-Layer Cake)

Makes ~6 c.

Ingredients

  • 8 large egg yolks
  • 1 c. sugar
  • 3/4 c. corn syrup
  • 1 Tbsp. vanilla
  • 2 tsp. almond or coconut extract
  • 1/8 tsp. salt (optional)
  • 2 1/2 c. unsalted butter, softened
Butter can be added 2 Tbsp. at a time rather than 1.

Yellow Cupcakes with Vanilla French Buttercream

All the Kidlet wanted to do yesterday was watch TV and play video games. She did stop to do her chess homework and I suggested that some of the video game time be spent on Khan Academy, so it wasn't all brain-melting, but still... Not really the best way to spend the day.

Yesterday was swimming lessons as well, so that got us out of the house for a bit. And we stopped at the craft store on the way home to pick out some new beads. After that I was casting around for fun things to do that didn't involve a screen. I suggested colouring, painting, macaroni art, collages, board games, and baking. And the promise of fresh baked goods did pique her interest. Initially she wanted to bake cookies, but the only recipe she would consider used a boxed cake mix and made these weird sort of cake-cookies. I suggested that maybe if she wanted something cake-like we should just make a cake or cupcakes. She was keen on the cupcakes.

There is a simple vanilla cupcake recipe in the "Young Chefs" cookbook I got her. But we've made that one before and I really wanted to try something different. We flipped through every cupcake recipe in The Perfect Cake and, after looking at each of them, she decided that she wanted to make the yellow cupcakes. So, yup, after all that we just ended up making plain vanilla cupcakes after all. Oh well. At least these were different vanilla cupcakes.


Yellow Cupcakes

From the Perfect Cake by America's Test Kitchen

Ingredients

  • 1 1/2 c. all-purpose flour
  • 1 c. sugar
  • 1/2 Tbsp. baking powder
  • 1/4 tsp. salt
  • 1/2 c. unsalted butter, softened
  • 1/2 c. sour cream
  • 1 large egg
  • 2 large egg yolks
  • 1/2 Tbsp. vanilla extract
  • 3 c. icing of choice (I used a Vanilla French Buttercream)

Directions

  1. Preheat oven to 180°C (350°F) and line muffin tin with paper/foil liners.
  2. Combine flour, sugar, baking powder, and salt and mix well.
  3. Add butter, sour cream, egg, egg yolks, and vanilla and beat on medium speed for ~1 minute.
  4. Scrape down bowl and give a final stir by hand, making sure there are no residual flour pockets.
  5. Scoop into prepared muffin tin. (Should exactly fill a dozen 5cm (2") wells.)
  6. Bake at 180°C (350&de;F) for ~20 minutes.
  7. Remove from oven and cool in tin for 15 minutes, then turn out and finish cooling on wire rack.
  8. Wait until cupcakes are completely cool before icing.

Pan-Roasted Pear Salad

I really liked this salad! I ended up making it with mature black kale, but I think it would've been even better with baby kale. That said, the mature kale was fine, just make sure you get enough of it. You may need more than one bunch depending on how big your bunches/packages are.

You can make this salad with romaine lettuce if you want. Personally I think it's better with kale though. I also think it'd be nice with a handful of toasted chopped pecans added. I don't think it needs the nuts, but they'd definitely be nice.

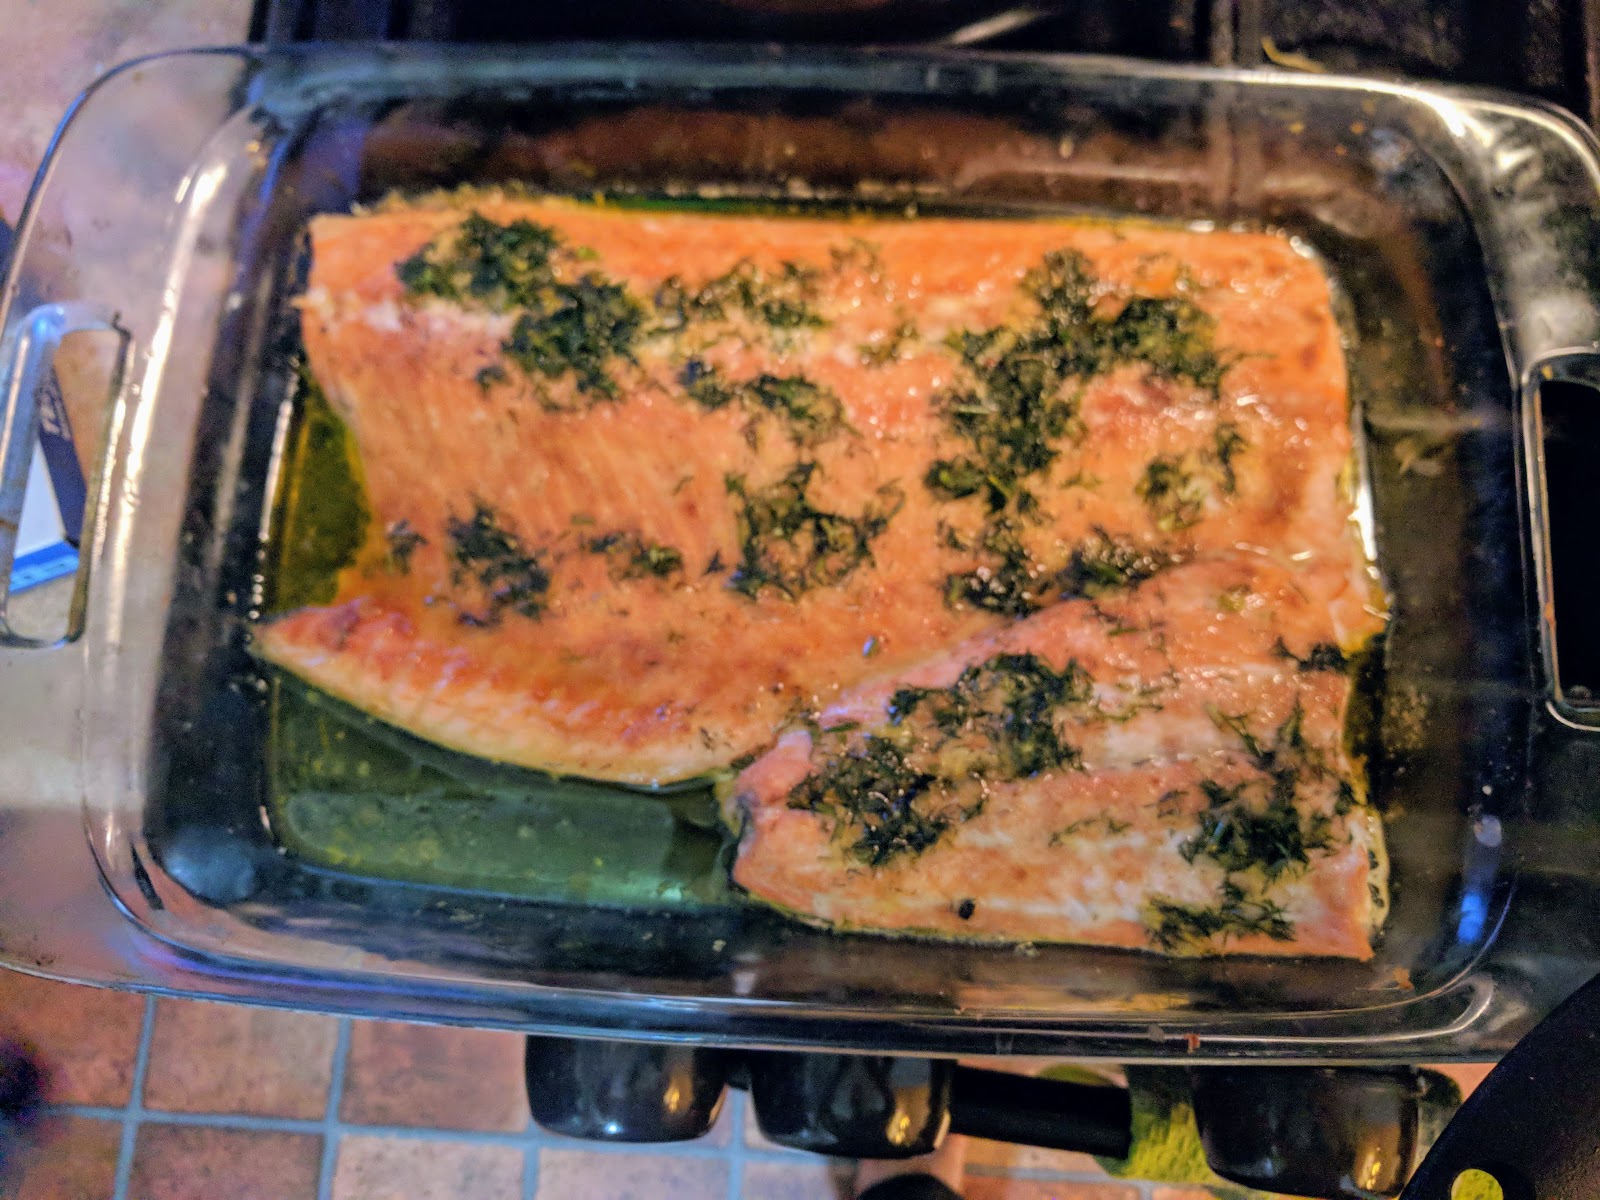
Apologies for the terribly presentation and badly lit photo; I was in a hurry.

Pan-Roasted Pear Salad

Adapted from Cook's Country October/November 2018

Ingredients

  • 2 Tbsp. lard1
  • 200g bacon-flavoured tempeh
  • 3 slightly underripe Bosc pears, quartered and cored
  • 2 tsp. sugar
  • ~1/2 c. vinaigrette2
  • 3 Tbsp. maple syrup
  • ~350g kale3
  • 1/4 c. fresh chives, chopped
  • ~1 c. crumbled blue cheese
  • 1/4 c. chopped pecans, toasted

Directions

  1. Melt lard over medium heat.
  2. Add tempeh and cook until well-browned.
  3. Remove tempeh from pan and set aside.
  4. Toss pears with sugar.
  5. Add pears to pan and cook, cut-side down, until well-browned (2-4 minutes). Flip to brown the other cut side (another 2-4 minutes).
  6. Remove from heat and set aside.
  7. Toss kale with vinaigrette and maple syrup.
  8. Add tempeh, pears, chives, and blue cheese and serve.


Variations

Dressing Recipe

Ingredients

  • 1/4 c. olive oil
  • 1/4 c. apple cider vinegar
  • 3 Tbsp. maple syrup
  • 1 tsp. salt
  • 1/2 tsp. pepper

Directions

  1. Combine all ingredients and whisk vigorously.
  2. Omit maple syrup listed in main salad recipe as it will be incorporated into the dressing.


1 I used lard because I had some on hand and I figured why not make the tempeh extra bacon-y? If you don't have any lard lying around or you'd like to keep things vegetarian, feel free to substitute an oil of your choice. I'd probably roll with coconut or corn oil, but it doesn't really need to be anything specific. Back
2 The original recipe comes with instructions for making the dressing from scratch. We already had a bottle of homemade vinaigrette in the fridge, so I just used some of that. The original was pretty similar except that it used apple cider vinegar for the acid component whereas we'd used a mix of lemon juice and red wine vinegar. It also included a bit of maple syrup, so I just added the same amount of maple syrup after the fact. I think it worked out quite well. Back
3 If you end up using baby kale, you can probably reduce the vinaigrette and maple syrup slightly. (Maybe cut it back to 6 Tbsp. and 2 Tbsp. respectively.) Back

Friday 8 November 2019

Sweet Potato Crunch

I might call this "sweet potato crumble". It's mashed sweet potatoes with a sweet, crunchy sugar-and-flour topping. It's not quite sweet enough that I'd count it as a dessert, I think, but not really savoury either.

It takes a long time to come together, but is pretty easy. The original version called for Grand Marnier and orange zest; we used a bit of orange extract, although I'm not sure how much it contributed. This version is also modified somewhat from the original to use a pressure cooker rather than slow roasting.


Sweet Potato Crunch

Cook's Country

Ingredients

  • Potatoes
    • 2kg sweet potatoes
    • 60mL (4tbsp) unsalted butter, melted
    • 15mL (1tbsp) brown sugar
    • 5mL (1tsp) salt
    • 2.5mL (½tsp) orange extract
  • Topping
    • 80mL (⅓C) brown sugar
    • 160mL (⅔C) all-purpose flour
    • 1mL (¼tsp) salt
    • 0.5mL (⅛tsp) cayenne
    • 60mL (4tbsp) unsalted butter, melted

Directions

  1. Put sweet potatoes in pressure cooker and cook for 15 minutes on high. Wait for pressure to decrease naturally, then remove from cooker and set aside until cool enough to handle, 20-30 minutes.
  2. Meanwhile, prepare the topping:
    1. Whisk together sugar, flour, salt, and cayenne.
    2. Mix in butter until it forms pea-sized lumps.
  3. Once potatoes have cooled, peel them. Discard flesh and any accumulated juices, and mash potato flesh.
  4. Stir in butter, brown sugar, salt, and orange extract.
  5. Pour into an 8x8" baking dish.
  6. Top evenly with topping.
  7. Bake at 400°F for 25 minutes.

Slow-Roasted Salmon with Garlic and Dill

I've been trying to reduce my meat intake in general. I do still allow myself some every once in a while though. And TF was craving fish this week so I figured this would be a good opportunity to try one of the slow-roasted salmon recipes from last month's Cook's Country.

I'm really happy with how this came out. I takes time. You need at least an hour to roast it. But there's almost zero prep work involved. It's extremely easy to throw together and doesn't take that many ingredients either. So, assuming you can afford a giant slab of salmon and have the time to roast it low and slow, this is a great easy dinner option. I served it with a Pan-Roasted Pear Salad, Sweet Potato Crunch, and a freshly baked Cottage Herb Loaf for a very satisfying dinner.

Terrible photo of delicious fish.

Slow-Roasted Salmon with Garlic and Dill

From Cook's Country October/November 2019

Ingredients

  • 1 Tbsp. brown sugar
  • 3/4 tsp. kosher salt, divided
  • 1 tsp. dry mustard powder
  • 1 tsp. granulated garlic
  • 1 (~1.1kg) centre-cut salmon fillet
  • 1/4 c. olive oil
  • 2 Tbsp. chopped fresh dill
  • 2 tsp. grated lemon zest
  • 1 1/2 Tbsp. lemon juice

Directions

  1. Combine sugar, 1/2 tsp. salt, mustard, and garlic and mix well.
  2. Rub sugar mixture all over salmon.
  3. Place salmon in a 23x33cm (9x13") baking dish and roast at 120°C (250°F) for ~1 hour.
  4. Meanwhile, combine olive oil, dill, lemon zest, lemon juice, and remaining 1/4 tsp. salt in a small bowl.
  5. Once salmon is done roasting, remove from oven and immediately pour oil mixture over the fish. Let stand for 5 minutes.
  6. Spoon sauce over fish and serve.


Variations

Slow-Roasted Salmon with Chives and Lemon

Ingredients

  • 1 Tbsp. brown sugar
  • 3/4 tsp. kosher salt, divided
  • 1/2 tsp. black peppercorns, ground
  • 1 (~1.1kg) centre-cut salmon fillet
  • 1/4 c. olive oil
  • 2 Tbsp. chopped fresh chives
  • 2 tsp. grated lemon zest
  • 1 1/2 Tbsp. lemon juice

Slow-Roasted Salmon with Parsley and Cayenne

Ingredients

  • 1 Tbsp. brown sugar
  • 3/4 tsp. kosher salt, divided
  • 1/2 tsp. ground cayenne
  • 1 (~1.1kg) centre-cut salmon fillet
  • 1/4 c. olive oil
  • 2 Tbsp. chopped flat-leaf parsley
  • 2 tsp. grated lemon zest
  • 1 1/2 Tbsp. lemon juice

Tuesday 5 November 2019

Coconut Dal with Spinach

Overall, last week's Hello Fresh recipes were kind of disappointing, but this coconut dal was alright. I don't think it's going to make any of our favourite lists, but it was easy to make and reasonably tasty.

The hard part, if cooking it again, is going to be replicating the "dal spice blend".

Coconut Dal with Spinach

Hello Fresh

Ingredients

  • 2 medium-sized yellow onions, chopped
  • 4 large garlic cloves, minced, or 60mL garlic paste
  • 30mL ginger paste
  • 60mL "dal spice blend"
  • 375mL red lentils, rinsed
  • 10mL[?] vegetable broth concentrate
  • 330mL coconut milk
  • 250g baby spinach
  • 30mL shredded unsweetened coconut
  • 30mL fresh cilantro, chopped

Directions

  1. Heat 30mL oil in a deep pot over medium heat. Add onions and cook until golden-brown and softening, ~5 minutes.
  2. Add garlic, ginger, and spices, and cook, stirring often, until fragrant, ~1 minute.
  3. Add broth concentrate, coconut milk, lentils, and 375mL water. Bring to a boil, then reduce heat and simmer until lentils soften, ~12-15 minutes. (If it seems to be getting too thick but the lentils aren't soft enough for your taste yet, add a bit more water and keep simmering.)
  4. Stir in spinach. If needed, put spinach on top and cover briefly to wilt it before attempting to stir it in.
  5. Once spinach has wilted, stir in cilantro and coconut. Serve with naan.

Monday 4 November 2019

Pasta with Hearty Greens and Beans

I was going back through some old issues of Cook's Illustrated and found this interesting-looking dish in the pasta "special edition" from 2015. I liked that it was vegetarian and also a bit more balanced than many of the pasta dishes I'm familiar with. The beans add a little protein and the kale and tomatoes add a vegetable component. It's still pretty starch-heavy to be sure, but it's definitely moving in the right direction.

Pasta with Hearty Greens and Beans

From Cook's Illustrated January/February 2015

Ingredients

  • 3 Tbsp. olive oil
  • 8 cloves garlic, 3 minced, 5 sliced
  • 2 tsp. coarse sea salt, divided
  • pepper
  • 1 onion, chopped
  • 1/2 tsp. red pepper flakes
  • 700g kale, stemmed and cut into 2-3cm pieces
  • 1 (400mL) can diced tomatoes
  • 3/4 c. vegetable broth
  • 2 c. cooked cannellini (white kidney) beans
  • 3/4 c. pitted kalamata olives, chopped
  • 450g whole wheat spaghetti
  • ~1 c. grated Parmesan cheese

Directions

  1. Heat oil and sliced garlic over medium heat.
  2. Cook until garlic turns golden. Do not brown!
  3. Remove garlic and set aside.
  4. Add onion to the remaining oil in the pan and cook until softened and beginning to brown (~5 minutes).
  5. Add minced garlic and pepper flakes and cook for another minute or so.
  6. Add half the kale and cook until it starts to wilt.
  7. Add tomatoes, broth, and 1/2 tsp. salt along with the remaining kale.
  8. Bring to a simmer, cover, and cook, tossing occasionally for ~15 minutes.
  9. Stir in beans and olives.
  10. Meanwhile, bring ~4L of water to a boil.
  11. Add pasta and remaining 1/2 Tbsp. salt and cok, stirring often until molto al dente (slightly less done than al dente).
  12. Reserve 1/2 c. of the cooking water.
  13. Drain pasta and return to pot.
  14. Add kale mixture and cook over medium heat, tossing to combine until most of the liquid has been absorbed.
  15. Remove from heat and stir in Parmesan.
  16. Adjust the consistency with the reserved cooking water as desired.
  17. Season to taste with salt and pepper.
  18. Serve with garlic chips and extra Parmesan.

Smoked Tofu and Cheddar Frittata with Baby Kale Salad

This is based on a ham and jack frittata recipe from Cook's Country. I decided to swap the ham out for smoked tofu to make it vegetarian. I also replaced a bunch of the whole eggs with egg whites to cut the fat down and make it a little lighter. I was happier with the frittata recipe after making those changes, but it still wasn't a balanced meal. I was initially going to buy one of those salad-in-a-bag kits just to have something quick and easy to round out the meal. Once I was at the grocery store though, I managed to snag some organic baby kale on sale and figured maybe it'd be worthwhile to put together my own salad. Doubling the sautéed veggies and tofu and adding half to the kale gave me a good start. Then it was just a matter of adding some tomato, cheese, crispy fried onions, and vinaigrette to finish it off. I made for a delicious salad and I'm pleased that I was able to add some interesting toppings with basically no extra effort by piggy-backing on the frittata prep.

Smoked Tofu and Cheddar Frittata with Baby Kale Salad

Adapted from Cook's Country June/July 2019

Ingredients

  • 2 Tbsp. olive oil
  • 1 onion, quartered and sliced thin
  • 2 bell peppers, quartered and sliced thin
  • 340g smoked tofu, sliced thin and cut into 1cm pieces
  • 140g baby kale
  • 3 large eggs
  • 500mL liquid egg whites (equivalent to the whites of 17-18 eggs)
  • 1/4 c. light (5%) cream
  • 2 tsp. Roman Mustard
  • 1/4 tsp. kosher salt
  • 1/4 tsp. black peppercorns, ground
  • 2 c. shredded Cheddar cheese1
  • 1 tomato, cut into bite-sized pieces
  • ~1/4 c. Fried Onions
  • ~1/4 c. vinaigrette2

Directions

  1. Heat oil over medium heat.
  2. Add onion and bell pepper and cook for a couple minutes.
  3. Add smoked tofu and continue cooking until veggies are softened and everything is beginning to brown.
  4. Meanwhile, preheat the oven to 200°C (400°F) and beat the eggs with egg whites, cream, mustard, salt, and pepper.
  5. Stir half the cheese into the egg mixture.
  6. Once the veggie-tofu mixture is sufficiently cooked, remove half the mixture from the pan and add it to the kale along with the tomato and fried onion.
  7. Toss with vinaigrette.
  8. Distribute the remaining veggie-tofu mixture evenly in the pan and pour the egg mixture on top.
  9. Cook, scraping the bottom of the pan until soft "curds" begin to form.
  10. Transfer the pan to the oven and bake at 200°C (400°F) for 8-10 minutes.
  11. Remove from oven and let cool for ~5 minutes.
  12. Slide out of pan and onto plate.
  13. Cut into wedges and serve with salad.


1 I used an old Cheddar. I think a medium Cheddar, monterey jack, or even a Colby would probably all be reasonable choices. Back
2 I made a simple vinaigrette of olive oil, red wine vinegar, lemon juice, roasted garlic paste, dry mustard, paprika, and a bit of salt and pepper. Feel free to use whatever vinaigrette or dressing you prefer. Back