Tuesday, 31 December 2024

Nut-Crusted French Toast with Blueberries

Happy New Year!

I'm still somewhat jet lagged and didn't manage to stay up to ring in the new year last night. I think I conked out around 10pm. But the trade-off is that I woke up around six this morning, so I was able to get a nice early start!

This worked out well since we polished off the last of the banana bread yesterday. So I was able to get up and make some French toast for everyone for breakfast. Reiver was definitely pleased to wake up to a hot breakfast. The Kidlet was somewhat more subdued. Apparently the neighbours were having a bit of a party last night and the noise kept her up so the poor dear hadn't gotten much sleep and is looking a little worse for wear this morning. Still, she did seem reasonably enthused about breakfast, even if she was somewhat less chipper than usual.

The recipe called for making these with either walnuts or pecans. I would honestly be somewhat reluctant to go with walnuts; I think they could be a bit overpowering. And apparently pecans are somewhat hard to come by in New Zealand, so I settled for some chopped almonds instead. I do think that pecans would have been nice. That said, I also think the almonds worked quite well.


Nut-Crusted French Toast with Blueberries

Slightly adapted from The Breakfast Bible by Kate McMillan

Ingredients

  • 3 large eggs
  • 3/4 c. milk
  • 1/2 Tbsp. vanilla extract
  • 1/4 tsp. ground cinnamon
  • pinch of ground nutmeg
  • 1/2-3/4 c. almonds, chopped
  • 6-8 slices bread
  • ~1 Tbsp. butter
  • ~1 c. blueberries
  • ~1/4 c. maple syrup
  • whipped cream (optional)

Directions

  1. Beat the eggs with the milk, vanilla, cinnamon, and nutmeg.
  2. Chop the nuts and place them on a plate.
  3. Dip the bread in the custard, then press it into the nuts to coat one side in chopped almonds.
  4. Melt a bit of the butter over medium-low heat and place the bread, nut-side-down, into the pan.
  5. Cook until the nuts begin to brown and the custard on that side sets.
  6. Flip and cook until heated through and browned on both sides.
  7. Top with blueberries and maple syrup and garnish with a bit of whipped cream.
  8. Repeat dipping and cooking with remaining bread and custard.

Monday, 30 December 2024

Coconut-Macadamia Waffles with Lemon Mascarpone

I am continuing to work my way through the various combinations of waffle batters, mix-ins, and toppings in the Breakfast Bible. Today I decided to try the "classic" batter with coconut and macadamia nuts mixed in. And, since we still have a surplus of mascarpone, I decided to top it with that (and a bit of maple syrup). It made for a very nice combo! Although I've scaled up the inclusions here as I didn't feel like 1 Tbsp. each of the nuts and coconut was sufficient.


Coconut-Macadamia Waffles with Lemon Mascarpone

Slightly adapted from The Breakfast Bible by Kate McMillan

Ingredients

  • 190g all-purpose flour1
  • 3 Tbsp. sugar
  • 2 Tbsp. unsweetened dried shredded coconut
  • 2 Tbsp. chopped macadamia nuts
  • 1/8 tsp. coarse sea salt, ground
  • 1 Tbsp. baking powder
  • 1 1/2 c. milk
  • 2 large eggs
  • 1/4 c. unsalted butter, melted
  • 1 tsp. vanilla extract
  • 150g mascarpone
  • 2 tsp. grated lemon zest
  • 1 Tbsp. vanilla sugar
  • maple syrup, to serve (optional)

Directions

  1. Preheat your waffle iron.
  2. Combine the flour, sugar, coconut, macadamia nuts, and salt.
  3. Sift in the baking powder and mix to combine.
  4. Beat the eggs with the milk.
  5. Add the butter to the milk mixture and mix in the vanilla.
  6. Pour the wet ingredients into the dry and stir to combine.
  7. Pour one portion of batter into the waffle iron and cook according to manufacturer directions. Repeat with remaining batter.
  8. Meanwhile, mix the lemon zest and vanilla sugar into the mascarpone and stir to combine.
  9. Serve the waffles topped with mascarpone and maple syrup (if using).


1 I don't have any all-purpose flour right now, so I just used 120g of bread flour mixed with 70g of pastry flour. Back

Sunday, 29 December 2024

Buttery Vanilla Shortbread

This is my second attempt at making a moulded shortbread. On the bright side, I liked the flavour of this one much better than my previous attempt and the dough was also much easier to work with. Unfortunately, this one fell apart even worse than the last one when I tried to unmould it. Possibly I should have let it cool a bit more first. But I didn't want to leave it too long as my understanding is that they need to be unmoulded and cut while still at least somewhat warm. I guess I'll try going for a 30-minute, rather than a 20-minute, rest next time? Hopefully that will help. Beyond that, I'm not sure what else to do.

The first time around, I tried buttering the pan and the centre stuck and came apart. The second time I tried spraying it with cooking spray and basically the same thing happened. The first time I used the traditional 1:2:3 ratio of sugar:butter:flour. This time I used a different recipe that was closer to 2:5:5. (So, proportionally more butter and less flour than the traditional version.) Still the same result. If anything, I think it had slightly less structural integrity this time! The first time I used all wheat flour. This time I used ~25% rice flour. No joy. I do think that the rice flour improved the texture, but it didn't make it unmould any better than the first time around. So, at this point, I'm really not sure what else to try. Beyond that slightly longer cooling period, I'm pretty much out of ideas at this point. Oh well, at least I still got tasty cookies out of it!


Ugly, but tasty.

Buttery Vanilla Shortbread

Slightly adapted from Dessert of the Day by Kim Laidlaw

Ingredients

  • 225g unsalted butter, softened
  • 30g icing (confectioners'/powedered) sugar
  • 60g sugar
  • 2 tsp. vanilla extract
  • 55g rice flour
  • 1/4 tsp. coarse sea salt
  • 170g soft (plain/standard/cake) flour

Directions

  1. Preheat oven to 180°C (350°F) and grease, oil, or spray a ceramic shortbread mould or 23cm (9") loose-bottom tart tin.
  2. Beat the butter until light.
  3. Sift in the icing sugar and beat until incorporated.
  4. Beat in the sugar and cream until light and fluffy.
  5. Beat in the vanilla.
  6. Add the rice flour and salt and mix in.
  7. Add the wheat flour in three additions, stirring to combine between each one.
  8. Press the dough into the prepared mould or tin.
  9. Bake at 180°C (350°F) for 50-60 minutes.
  10. Remove from oven and allow to cool for 20-30 minutes.
  11. Loosen edges and turn out onto plate or cutting board.
  12. Cut into wedges and allow to finish cooling.

Saturday, 28 December 2024

Steak and Eggs

I've been meaning to try this recipe for ages. I keep telling myself that I'm going to do it and then bailing and making something else instead. For whatever reason, I just find it difficult to motivate myself to cook a steak first thing in the morning. Even though it's not really any more difficult or time-consuming than a lot of the other breakfast stuff that I've made. Not sure why. It just doesn't seem to jive with my brain.

I finally sucked it up and did it though! And, I gotta say, it was pretty tasty. I mean, I don't think it's going to become my new favourite breakfast or anything, but it was good! And TF enjoyed it too. (The Kidlet didn't really like the steak and just ate the eggs and toast, but still... two out of three ain't bad!)


Steak and Eggs

Slightly adapted from The Breakfast Bible by Kate McMillan

Ingredients

  • 3 Tbsp. unsalted butter, divided
  • 1 large (~700g) T-bone or porterhouse steak
  • 1 tsp. coarse sea salt, divided
  • 1/2 tsp. black peppercorns, ground and divided
  • 280g cherry tomatoes, halved
  • 1 Tbsp. chopped fresh chives
  • 1/2 tsp. fresh thyme (or 1/4 tsp. dried)
  • 8 large eggs
  • 4 slices bread, toasted and buttered

Directions

  1. Melt 1 Tbsp. of the butter over medium heat.
  2. Season the steak with 3/4 tsp. of the salt and 3/8 tsp. of the pepper.
  3. Sear the steak on both sides until it develops a nice colour (3-5 minutes per side).
  4. If you like your steak more rare, remove from heat and set aside until ready to serve.
    If you like your steak more well-done, then transfer to oven and bake at 180°C (350°F) while you prepare the sauce and cook the eggs.
  5. Melt 1 Tbsp. of the remaining butter in the now-empty pan.
  6. Add the tomatoes and season with remaining 1/4 tsp. of salt and 1/8 tsp. pepper.
  7. Cook until tomatoes soften and being to break down.
  8. Stir in chives and thyme and remove from heat.
  9. Melt 1/2 Tbsp. of the remaining butter in a separate pan.
  10. Crack in four of the eggs and season to taste with salt and pepper.
  11. Cover and cook until whites are set (~3 minutes).
  12. If you prefer set yolks, flip the eggs and continue cooking for another couple of minutes.
  13. Transfer eggs to plates, add the remaining 1/2 Tbsp. butter to the pan, and cook the remaining eggs the same way.
  14. Place 2 eggs and 1 slice of buttered toast on each plate.
  15. Slice the steak and place ~1/4 of it on each plate.
  16. Top the steak with the tomatoes and serve.

Friday, 27 December 2024

Lavender Shortbread

I haven't really made shortbread before. I know the theory. But my mom makes such good shortbread at Christmas-time, that I usually just enjoy hers, so I've never gotten much practice making my own.

It's a simple enough concept: use a 3:2:1 ratio of flour:butter:sugar by mass. Cream the butter and sugar together, mix in the flour, bake until delicious! You can add flavourings in if you want. Shape them. Decorate them. But the foundation is that 3:2:1 ratio.

I believe they are traditionally made with soft flour (aka plain/standard flour in the UK/NZ respectively). Which is usually sold as "cake & pastry" flour1 here.
Most North American recipes (including my mom's) seem to use all-purpose flour mixed with cornstarch (cornflour). This is something I often see with North American versions of European recipes. If your flour is hard, cutting it with cornstarch will effectively "soften" it. So, you can still have the effect of using a soft flour without having to go out and buy a specialty ingredient. Which suits me just fine. Except I actually have a surplus of soft flour right now, so I decided to just omit the cornstarch this time and make my shortbread with cake flour.

Armed with that knowledge (and my soft flour), I was hoping that this would be a nice, easy dessert to pull off. Sadly, it didn't quite work out.
The flavour was nice enough!, but it didn't unmould cleanly and my cookie came apart when I tried to turn it out. I think I probably should have given it five more minutes in the oven and then let it cool for a little longer before trying to unmould it. I may also take the advice of using ~25% rice flour next time as well. It seems that a lot of bakers swear by it. I just didn't want to make too many changes all at once on my first attempt.


Lavender Shortbread

Adapted from Dessert of the Day by Kim Laidlaw

Ingredients

  • 250g unsalted butter, softened
  • 125g sugar
  • 1-2 Tbsp. fresh or dried lavender
  • 1/4 tsp. coarse sea salt (optional)
  • 280g soft (plain/standard/cake) flour, sifted
  • 90g rice flour

Directions

  1. Preheat oven to 180°C (350°F) and lightly oil a shortbread mould or 23cm (9") loose-bottom tart tin.
  2. Cream the butter with the sugar.
  3. Beat in the lavender and the salt (if using).
  4. Add both types of flour and mix until fully combined.
  5. Press the dough into the prepared mould.
  6. Dock (prick) all over with a fork.
  7. Bake at 180°C (350°F) on bottom oven rack for 50-60 minutes.
  8. Allow to cool in mould/tin for at least 20 minutes.
  9. Turn out onto cutting board.
  10. Cut into wedges and allow to cool.


1 I see a lot of discussion online about how cake flour is different than pastry flour and pastry flour is actually closest to British "plain" flour and cake flour is even softer/lower-protein. But I've never actually seen that in the wild. We just get "all-purpose" and "cake & pastry". (Plus stuff like whole wheat, rye, spelt, rice, pasta/00, bread, etc.) But I have literally never seen "cake flour" as a separate and distinct thing from "pastry flour". Not saying that it doesn't exist! Just saying that it doesn't seem to exist here. So, for my purposes, I treat them as the same thing and roughly equivalent to what is sold as "plain" or "standard" flour in other parts of the world. Back

Thursday, 26 December 2024

Glass Noodle Salad with Chicken and Shrimp

I wasn't a huge fan of this salad. I find glass noodles can be pretty hit-or-miss for me. And I think this preparation was more miss than hit. I mean, they were okay they just weren't great. I think I probably prefer my bean noodles in soups rather than as a salad in general.

That said, the Kidlet liked these. And they weren't bad, just not my favourite.


Glass Noodle Salad with Chicken and Shrimp

Slightly adapted from Dish of the Day by Kate McMillan

Ingredients

  • 150g bean thread noodles
  • 1/2 c. chicken stock
  • 200g ground chicken
  • 2 green onions3, greens and whites separated and chopped
  • 150g shrimp, peeled and deveined
  • juice of 2 limes
  • 3 Tbsp. fish sauce
  • 2 tsp. sugar
  • 1 Tbsp. nam prik pao (Thai roasted chile paste)1
  • 2 large red Fresno chilies2, seeded and minced
  • 1/4 c. chopped fresh cilantro
  • 1 Tbsp. chopped fresh mint
  • 2-3 Tbsp. fried shallots (or onions)
  • red or green leaf lettuce, to serve
  • 老干妈 (Laoganma/spicy chili crisp), to serve (optional)

Directions

  1. Soak the noodles in cold water for 10 minutes.
  2. Meanwhile, bring the broth to a boil and add the chicken and white parts of the green onions.
  3. Cook, breaking up the chicken, until meat is cooked through.
  4. Remove the chicken and green onions with a slotted spoon and set aside.
  5. Add the shrimp and simmer until cooked through (~1 minute).
  6. Remove with slotted spoon and set aside.
  7. Add water to the pot with the broth until the pot is at least half full and bring to a boil.
  8. Drain the noodles and add to the boiling water.
  9. Boil until tender (1-2 minutes).
  10. Drain noodles and rise thoroughly with cold water.
  11. Combine the lime juice, fish sauce, sugar, nam prik pao, and chilies in a large bowl and mix well.
  12. Add the chicken and shrimp and toss to combine.
  13. Add the noodles and toss to coat.
  14. Add the cilantro, mint, and green parts of the green onions and toss to combine.
  15. Top with fried shallots (or onions).
  16. Serve on a bed of lettuce and top with Laoganma (if using).


1 The original recipe just called for "roasted chile paste" and didn't specify what kind. That could plausibly be any number of things! 辣豆瓣酱 (là dòubàn jiàng/Sichuan spicy bean paste), gochujiang (Korean red chile paste)... possibly even red curry paste or chipotle chile paste. Based on the rest of the recipe and the other ingredients, I'm pretty confident that they wanted nam prik pao for this, but I wish they'd been explicit about that in the instructions! Also, I didn't have any nam prik pao on hand, so I ended up substituting gochujang instead. Back
2 I couldn't find any Fresno chiles, so I just minced a jalapeño and tossed it in instead. I used only one, since jalapeños tend to be a bit hotter than Fresnos. That said, the overall dish was still pretty mild, so I think it would have been fine to use two. Maybe I'll add another jalapeño and/or a bell pepper to the leftovers... Back
3 The original recipe only calls for 1 green onion and that's all I used, but, having tasted it, I really think it would be better with more. Acutally... Now that I think of it, I think putting one in with the chicken and the rest at the end would be excellent! Or maybe, put the whites with the chicken and save the greens as a garnish for the end... Yes! Brb, updating recipe. Back

Wednesday, 25 December 2024

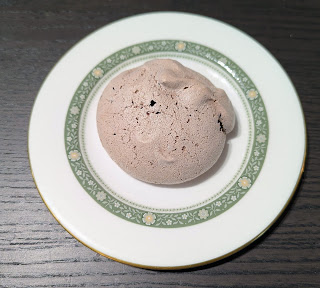
Chocolate Meringues

These are pretty simple, but really good! They're just simple baked meringues with a bit of cocoa and dark chocolate stirred in. But they're pleasantly crisp on the outside and soft in the centre, with just a bit of chew to them. I suspect that comes from using a Swiss (rather than French) meringue as the base. You can get French meringues that are crisp on the outside and soft in the middle, but in my experience, they're normally more fluffy than chewy.

I always find Swiss meringues a bit trickier to get right and somewhat more difficult to get to the stiff peak stage. They never seem to have quite as much structure as a good French meringue. And, of course, mixing them over the double boiler is always a bit of a faff. But sometimes it's necessary to get the desired result. And I was quite happy with the results I got here! Although I did have to adjust the sugar a fair bit. This seemed to be another case of compounded rounding errors. The measurements for the sugar were given as 1 3/4 c. (14 oz./440g). But 14 oz. is only ~392g. And, unlike flour (which can vary a fair bit based on how you measure it), sugar tends to be a fairly consistent 200g/cup. So, 1 3/4 c. should be a neat 350g, not 440 or 392!


Chocolate Meringues

Slightly adapted from Dessert of the Day by Kim Laidlaw

Ingredients

  • 7 large egg whites
  • 350g sugar
  • 30g natural cocoa powder
  • 125g dark chocolate, chopped

Directions

  1. Preheat oven to 180°C (350°F) and line two baking sheets with parchment paper or silicone baking mats.
  2. Bring a pot of water to a simmer.
  3. Combine the egg whites and sugar in a heat-proof bowl.
  4. Place the bowl over the simmering water and beat vigorously until sugar dissolves completely and mixture becomes opaque.
  5. Remove from heat and beat until stiff peaks form.
  6. Sift in cocoa powder and add dark chocolate. Carefully fold ingredients together until mixed.
  7. Spoon large dollops of meringue onto the prepared baking sheets.
  8. Bake at 180°C (350*deg;F) for 9 minutes.
  9. Rotate and swapt the trays and bake for another 9 minutes.
  10. Transfer to wire racks to cool.

Tuesday, 24 December 2024

Waffles with Cherries in Port Syrup and Whipped Goat Cheese

This is another one of those waffle recipes that I decided to sneak onto the breakfast table even though it's really meant to be more of a dessert. (That said, there are a lot of things that get billed as breakfast foods that really should be considered more of a treat/dessert, so I feel that this is fair.)

As with some of my other recent recipes, I substituted sweetened red wine for the port and slivered almonds for sliced. I also used a mix of white and whole wheat flour for the waffles. I pretty much stuck to the script otherwise though.


Waffles with Cherries in Port Syrup and Whipped Goat Cheese

Slightly adapted from Waffles: Sweet, Savory, Simple by Dawn Yanagihara

Ingredients

  • 1 c. port (or 1 c. red wine + 2 Tbsp. brown sugar)
  • 2 Tbsp. brown sugar
  • 10 black peppercorns
  • 1 strip orange zest
  • 1/4 vanilla bean
  • 250g fresh or frozen cherries, pitted and halved
  • 140g fresh goat cheese (chère)
  • 1/4 c. heavy (35%) cream
  • 1 Tbsp. sugar
  • 4 plain, malted, or Belgian waffles
  • 1/4 c. sliced almonds1, toasted

Directions

  1. Combine the port, sugar, peppercorns, orange zest, and vanilla bean section and bring to a boil over medium-high heat.
  2. Reduce heat to medium and simmer, uncovered, until reduced by ~1/2.
  3. Strain the syrup and pour it over the cherries. Let stand for 1 hour.
  4. Meanwhile, beat the goat cheese with the cream and sugar until smooth and somewhat fluffy.
  5. Make your waffles (or recrisp them in the oven if they were made ahead).
  6. Spoon some cherries and syrup over each waffle and top with a dollop of goat cheese.
  7. Sprinkle with almonds and serve.


1 Slivered will do in a pinch here if you don't have sliced, but I do think that sliced would have been nicer texturally. Back

Monday, 23 December 2024

Swedish Caraway Bread

I'm used to caraway being paired with rye flour in breads. Usually a mix of rye and wheat, but there's still generally at least some rye in the mix. Not this one though! This is an entirely white flour caraway bread. With orange zest. And brown sugar. Definitely a somewhat unusual mix. And it's also tiny. I'm used to using ~450g of flour for a standard 20x10cm (8x4") pan loaf. This recipe only calls for 250g of flour! It makes the ittiest, bittiest loaf. I baked it in an oven-proof bento container! It was adorable. Shortlived, but adorable.


Swedish Caraway Bread

Slightly adapted from Bernard Clayton's New Complete Book of Breads

Ingredients

  • 3/4 c. water
  • 2 Tbsp. brown sugar
  • grated zest of 1 orange
  • 1 Tbsp. unsalted butter
  • 1 tsp. caraway seeds
  • 1 tsp. coarse sea salt
  • 2 1/4 tsp. active dry yeast (or 1 3/4 tsp. instant yeast)
  • 250g hard (strong/high grade/bread) flour, divided

Directions

  1. Combine the water, sugar, orange zest, butter, and caraway seeds and bring to a boil over medium-high heat.
  2. Reduce heat to medium and continue boiling for 3 minutes.
  3. Remove from heat and allow to cool to ~45°C (115°F).
  4. Add salt, yeast, and ~1/2 of the flour to the water mixture and beat for 2-3 minutes.
  5. Cover and set aside to rise at room temperature for ~1 hour.
  6. Mix in ~1/2 of the remaining flour.
  7. Spread the rest of the flour onto the work surface and dump the dough out on top of it. Knead until dough is smooth and supple (8-10 minutes) adding a little more water if necessary.
  8. Round the dough, cover, and rest for 5-10 minutes.
  9. Meanwhile, grease a very small loaf pan (18x8cm/7x3").
  10. Shape the dough into a loaf by your preferred method. (I like to do a letter fold and then roll it up like a jelly roll.)
  11. Place the loaf, seam-side-down, into the prepared pan, cover, and set aside to rise for another hour or so.
  12. Bake at 180°C (350°F) for 30-40 minutes.
  13. Turn out onto wire rack to cool.

Sunday, 22 December 2024

Tiwanese Bakery Sourdough Focaccia

I've been alternating between making Bernard Clayton bread recipes and working my way through the selection of sourdough recipes on the King Arthur Flour website. This unusual focaccia was the next up in my queue. And I am very glad indeed! TF has very normal feelings about this bread. I like it. I like it a lot. But I don't think my enjoyment of it can hold a candle to TF's near unseemly fascination with it. I'm quite tickled that she's enjoying it so much!

I may play around with the proportions somewhat in the future. For this time, I stuck to the recipe and went fairly heavy on the oil. Next time I might try doubling the dough and bumping the corn up a little bit. Just as an experiment. It's really excellent as-is. I just like to tinker!


Tiwanese Bakery Sourdough Focaccia

Slightly adapted from King Arthur Flour

Ingredients

  • 75g ripe (fed) sourdough starter @ 100% hydration
  • 175g water
  • 250g hard (strong/high grade/bread) flour
  • 1 tsp. coarse sea salt
  • 1 tsp. garlic or scallion oil
  • 1 Tbsp. sesame or chili oil
  • 4 links Taiwanese sausage, sliced
  • 2 green onions, sliced
  • 50-60g fresh or frozen corn kernels
  • 1-2 Tbsp. sesame seeds
  • Kewpie mayonnaise

Directions

  1. Make sure your starter is well-fed and active.
  2. Combine the starter and water and mix well.
  3. Add the flour and mix thoroughly.
  4. Cover and let rest for 30-60 minutes.
  5. Add the salt and knead for a few minutes to incorporate it.
  6. Cover and rest for at least an hour.
  7. Do a bowl fold, then spread the garlic/scallion oil over the surface. Cover and allow to rest for 4-8 hours.
  8. Knock the dough back then cover and chill overnight. (If you are in a hurry, you may skip this step, but the flavour will be better with a slow, overnight fermentation.)
  9. Oil a 23x33 (9x13") baking dish with a little of the sesame/chili oil.
  10. Add the dough to the prepared pan and gently stretch it to fill as much of the pan as possible.
  11. Cover and rest at room temperature for 2-3 hours, gently stretching every 30 minutes or so.
  12. Dimple the surface of the dough and drizzle with the remaining oil.
  13. Sprinkle with sliced sausage, green onion, corn, and sesame seeds.
  14. Preheat oven to 230°C (450°F).
  15. Bake focaccia on lower rack for 15-20 minutes.
  16. If surface is not dark enough after 20 minutes, reduce temperature to 200°C (400°F) and bake for an additional 5 minutes.
  17. Turn off oven and let stand in hot oven for 5 minutes.
  18. Remove from oven, drizzle with mayo, cut into squares, and serve.

Saturday, 21 December 2024

Mascarpone-Raspberry Parfaits

I'm used to making parfaits with fresh fruit, yogurt, and granola. You can vary the fruit, add different flavours to the yogurt, try different types of granola or even swap it out for something else entirely (cocoa nibs, wheat germ, graham cracker crumbs, etc.) But those are the general components that I'm familiar with. That's the formula.

This recipe takes a significantly different route.

It still layers fresh fruit with dairy and something crunchy. It just swaps out what you're actually using as your dairy and "cruncy" components.
Instead of yogurt, you beat whipping cream with marsarpone and white chocolate for your dairy component.
For the crunchy... crushed amaretti biscuits.

This all works quite well. The cheese, chocolate, raspberries, and amaretti all make for an excellent (if very rich) final dish. I'm looking forward to having the leftovers after dinner tonight! Yum!


Mascarpone-Raspberry Parfaits

Slightly adapted from Dessert of the Day by Kim Laidlaw

Ingredients

  • 375g mascarpone cheese
  • 1 c. heavy (35%) cream
  • 100g white chocolate
  • 500g raspberries
  • 30-35 amaretti biscuits, coarsely crushed

Directions

  1. Beat the mascarpone with the cream for 10-20 seconds.
  2. Gently melt the chocolate over very low heat.
  3. Drizzle the chocolate into the cheese mixture while beating vigorously. Continue beating for an additional 30-60 seconds.
  4. Spoon a few raspberries into the bottom of each glass. (This made 8 small parfaits of ~200mL each for me.)
  5. Spoon a bit of the cheese mixture on top of the berries.
  6. Sprinkle some cookie crumbs into the cheese.
  7. Repeat layers until glasses are full and all of the ingredients have been used.
  8. Chill until ready to serve.

Friday, 20 December 2024

Curried Split Pea Soup with Kabocha Squash

This is basically a dal. A very Anglo dal, but still mostly a dal: a soup of legumes cooked with aromatics and curry powder with a bit of roasted squash tossed in for good measure. If it were an Indian-style dal, the legumes would be cooked in water rather than broth. And the spices would probably not involve an Anglo-style Madras curry powder. And the peas would probably be cooked in a pressure cooker to get the desired soft texture rather than puréed with a blender. But the overall concept is still there. It's just had a few of the details changed around.


Curried Split Pea Soup with Kabocha Squash

Slightly adapted from Dish of the Day by Kate McMillan

Ingredients

  • 1 small kabocha squash (~500g)
  • 2 Tbsp. olive oil, divided
  • salt and pepper, to taste
  • 1 onion, chopped
  • 2-3 cloves garlic, minced
  • 1/2 Tbsp. Madras curry powder
  • 3/4 c. yellow split peas1 (chana dal)
  • 2 1/2 c. vegetable stock
  • 1/2 c. pumpkin or sunflower seeds, toasted
  • 1/2 c. sour cream (optional)

Directions

  1. Preheat oven to 200°C (400°F) and line a baking sheet with a silicone baking mat.
  2. Cut the squash in half, scoop out the guts, peel the halves, and chop into 2cm cubes.
  3. Toss the squash with 1 Tbsp. of the olive oil and season with salt and pepper.
  4. Roast at 200°C (400°F) until tender (30-40 minutes).
  5. Meanwhile, heat the remaining 1 Tbsp. of oil over medium heat.
  6. Add the onion, season with salt and pepper, and cook until softened (~5 minutes).
  7. Add the garlic and cook for another minute or two.
  8. Add the curry powder and split peas and toast for ~2 minutes.
  9. Add the vegetable stock and bring to a boil.
  10. Cover and reduce heat to medium-low.
  11. Simmer until peas are tender (~35 minutes).
  12. Once peas are tender, partially purée with an immersion blender.
  13. Add roasted squash and cook until heated through (~5 minutes).
  14. Serve topped with toasted seeds and a dollop of sour cream (if using).


1 I think this would also be great with skinned split pigeon peas (toor dal). Although you'd likely need to adjust the cooking time somewhat as I think they generally cook a bit faster than split peas. Back

Thursday, 19 December 2024

Faux Sourdough Naan

I was going to make miche as my next sourdough recipe. But then I saw that this new sourdough naan recipe had been posted. And it looked nice and easy to put together. And I figured that it would complement the dal I had planned for dinner well. So I figured why not?!

I've made sourdough naan before. And it was pretty good. But I'm always game for trying new recipes. And this one was a bit different, since it's meant to use sourdough discard (mostly for a bit of flavour) and then adds a generous quantity of commercial yeast to do the actual leavening. (Hence my categorization of it as a "faux sourdough".)

I liked how this naan came out in the end. Although I did have to adjust the recipe fairly significantly. I don't know if it was written for a much higher hydration starter or if there was just a typo in the quantities or what... (A pox on sourdough recipes that don't specify the hydration of the starter!) But, whatever the underlying issue, the dough was way too dry when made according to the recipe. I ended up working in an extra 120g of starter and still needed to add a few extra teaspoons of water to get it to come together into something workable. And, honestly, I think the overall hydration was still a bit on the low side. Next time I might try working even more water into it. I was just trying not to go too crazy with it this time.


Faux Sourdough Naan

Slightly adapted from King Arthur Flour

Ingredients

  • 420g hard (strong/high grade/bread) flour
  • 120g plain yogurt
  • 240g sourdough discard @ 100% hydration
  • 120-150g water
  • 2 1/4 tsp. instant yeast
  • 1 tsp. coarse sea salt
  • 1/2 tsp. sugar
  • 3 Tbsp. ghee
  • extra ghee, sea salt, and/or spices (optional)

Directions

  1. Combine the flour, yogurt, discard, 120g of the water, yeast, salt, and sugar and mix until the dough comes together.
  2. Turn out and knead for 1-2 minutes.
  3. Work in the ghee 1 Tbsp. at a time.
  4. If the dough seems too stiff, wet your hands and continue kneading. Repeat until enough moisture has been added.
  5. Place in covered bowl to rise for 1-2 hours.
  6. Knock back and divide into 100g portions.
  7. Round each portion, cover, and proof at room temperature for ~30 minutes.
  8. Heat a tawa or cast iron pan over medium heat.
  9. Working with one portion of dough at a time, flatten into a round.
  10. Wet one side thoroughly and place the naan, wet-side-down, onto the tawa. Sprinkle with desired toppings, cover, and cook for 1-2 minutes.
  11. Flip and cook, uncovered, for another 1-2 minutes.
  12. Brush with ghee and wrap in a clean tea towel while the remaining naan are cooked in the same fashion. (Shape each one while the previous one cooks.)
  13. Serve immediately.

Wednesday, 18 December 2024

Spinach, Chicken Sausage, and Barley Soup

This recipe claimed to be for stew, but it's definitely more of a soup. I even cut the broth by 1/3 and it was still more of a soup than a stew. A delicious soup, to be sure, but still a soup.

I ended up using chicken sausage instead of the turkey called for because I found some on sale and used spinach instead of kale (which I doubled, since the 125g called for didn't seem like nearly enough). I also went with a mix of pot barley and pearled wheat because I got wheat instead of barley by accident when I was at the grocery store restocking. Whoops! That said, both grains seemed to work just fine, so I wouldn't hesitate to use either (or both) again in the future.

It was interesting that the recipe called for cooking the barley separately and then adding it to the soup later. I'm used to just adding the uncooked grains to the soup and letting them cook in the broth. I think I'd be tempted to try it that way next time, just to see if doing it that way makes a noticeable difference.


Spinach, Chicken Sausage, and Barley Soup

Slightly adapted from Dish of the Day by Kate McMillan

Ingredients

  • 2 c. water
  • 1 c. pearl barley (and/or pearled wheat)
  • 500g chicken (or turkey) sausage
  • up to 4 c. chicken stock
  • 1 Tbsp. olive oil
  • 1 onion, chopped
  • 4-5 cloves garlic, minced
  • 1 small (~400mL) can diced tomatoes
  • 250g frozen chopped spinach (or kale)
  • salt and pepper, to taste

Directions

  1. Bring water to a boil.
  2. Add the barley and cook until tender1.
  3. Drain the barley and set aside. (I reserved the cooking liquid and used it to poach the sausages rather than pan-frying them.)
  4. Either pan-fry the sausages in a little oil until well-browned on all sides or poach them in some water (or the residual barley cooking liquid until cooked through. Set aside.
  5. Measure out the residual cooking liquid (if you reserved it) and add enough stock to bring the total volume up to 4 c. Set aside.
  6. Heat the oil over medium heat.
  7. Add the onion and garlic and cook until softened (4-5 minutes).
  8. Slice the sausages and return to pot. Cook for another 5 minutes.
  9. Add the tomatoes and chicken stock and bring to a boil.
  10. Reduce heat to medium-low and simmer for 10 minutes.
  11. Add the barley and spinach and cook until heated through (4-5 minutes).
  12. Season to taste with salt and pepper and serve.


1 This took ~25 minutes for my mix of pot barley and pearled wheat. Pearl barley may cook somewhat faster, I'm not sure. Back

Tuesday, 17 December 2024

Honey-Lemon Carrot Salad

This is a nice vegetable side. It's fast, easy, and surprisingly tasty. I quite liked it!


Honey-Lemon Carrot Salad

Slightly adapted from Vegetable of the Day by Kate McMillan

Ingredients

  • 1/2 Tbsp. honey
  • 2 Tbsp. white wine or sherry vinegar
  • 1 Tbsp. lemon juice
  • 1 1/2 Tbsp. olive oil
  • 1/4 tsp. coarse sea salt, ground
  • 500g carrots, grated
  • 1/3 c. sultanas or golden raisins
  • 1/4 c. sliced almonds1
  • 1 Tbps. chopped flat-leaf parsley

Directions

  1. Combine the honey, vinegar, and lemon juice and mix well.
  2. Whisk in the olive oil and salt.
  3. Add the carrots, sultanas, almonds, and parsley and toss to combine.


1 I was all out of sliced almonds, so I used sliced hazelnuts for my salad instead. Back

Monday, 16 December 2024

Mango-Passionfruit Pavlova

This was really, really good! The passionfruit curd was incredibly delicious. And the meringue and fresh fruit complemented it very well. I would 1000% make this again. (Although I'd try to be a bit more careful with the meringue next time. The curd burst through the side of the meringue this time and made a bit of a mess. It was still delicious, just not very aesthetic.)


Mango-Passionfruit Pavlova

Slightly adapted from Dessert of the Day by Kim Laidlaw

Ingredients

Meringue

  • 4 large egg whites
  • 1/2 tsp. malt vinegar
  • 1 c. sugar
  • 1/2 Tbsp. cornstarch (cornflour)

Curd

  • 2 large eggs
  • 4 large egg yolks
  • 3/4 c. sugar
  • 1/2 c. unsalted butter
  • 1/2 c. passionfruit juice1
  • juice of 1 lime

Assembly

  • 1 1/2 c. plain Greek yogurt
  • 2 mangoes, sliced
  • 3 passionfruit

Directions

Meringue

  1. Preheat oven to 165°C (325°F) and line a baking sheet with parchment paper or a silicone baking mat.
  2. Place the egg whites in a clean bowl with the vinegar and whisk until frothy.
  3. Continue whisking on high speed while gradually adding the sugar (~1 Tbsp. at a time).
  4. Beat until stiff peaks form.
  5. Beat in the cornstarch.
  6. Spoon the meringue onto the prepared baking sheet and shape into a large bowl.
  7. Bake at 165°C (325°F) for 3 minutes.
  8. Reduce temperature to 120°C (250°F) and bake for another hour.
  9. Turn off oven and let meringue stand in hot oven for 2-3 hours.

Curd

  1. Combine the eggs, egg yolks, and sugar and mix well.
  2. Combine the butter and passionfruit juice over medium-low heat and cook until the butter is melted.
  3. Gradually stir in the egg mixture, whisking constantly.
  4. Stir in the lime juice.
  5. Cook, stirring frequently, until the mixture thickens enough to coat the back of a spoon (10-20 minutes).
  6. Cover and chill for at least 2 hours.

Assembly

  1. Transfer the merginue to a serving platter.
  2. Pour the curd into the meringue.
  3. Spoon the yogurt on top of the curd.
  4. Arrange the mango slices on top.
  5. Cut the passionfruit in half, scoop out the pulp, and spoon it onto the pavlova.
  6. Serve immediately.


1 I couldn't find any straight-up passionfruit juice. They had passionfruit "drink" (which appeared to be cut with applejuice) and passionfruit-mango juice (which had mango juice and mango pulp added to it along with the passionfruit juice). I decided that since it was going to be topped with mango anyway, the passionfruit-mango blend would be the better match. And I think that was the right choice! It was so, so good. Like I said, would absolutely make this again! Back

Sunday, 15 December 2024

Broccoli with Sesame-Soy Dressing

I really liked this broccoli! It had an excellent deliciousness-to-effort ratio. You just mix up all the dressing ingredients in a bowl, then boil the broccoli for a couple minutes, drain it, toss it with the dressing, sprinkle with some sesame seeds, and you're done!

The broccoli is cooked, but still has a bit of bite to it. The miso and soy sauce give you a bit hit of salt and umami that nicely balances the very slight hint of bitterness from the broccoli. The lemon juice lends a note of sourness without being overwhelming. And the toasted sesame oil and seeds give a mild nuttiness to round things out.

It's honestly great just like that. But if you want to add another layer to the flavours, you can go for something a bit spicy as well. I think Laoganma goes particularly well here. (Then again, I think Laoganma goes well just about everywhere, so maybe take my opinions on this with a grain of salt.)


Broccoli with Sesame-Soy Dressing

Slightly adapted from Vegetable of the Day by Kate McMillan

Ingredients

  • 1 Tbsp. sesame oil
  • 1 Tbsp. light soy sauce
  • 1 tsp. miso paste1
  • 2 tsp. lemon juice
  • 1 tsp. sugar2
  • 500-600g broccoli florets
  • 1 Tbsp. sesame seeds, toasted

Directions

  1. Combine the sesame oil, soy sauce, miso paste, lemon juice, and sugar (if using) and mix well.
  2. Bring a large pot of water to a boil.
  3. Add the broccoli and boil until tender-crisp (2-3 minutes).
  4. Drain broccoli thoroughly and toss it with the dressing.
  5. Sprinkle with sesame seeds and serve.


1 The recipe didn't specify what type of miso to use, so I just used white because that's what I had on hand. Feel free to experiment with different types of miso paste if you have them available though! Back
2 So... I completely forgot to add the sugar to my dressing. That said, I liked it just fine without the sugar. I might try adding it next time just to compare. But, personally, I would consider the sugar optional here. Follow your heart! Back

Saturday, 14 December 2024

Stir-Fried Soba Noodles with Beef and Cabbage

This recipe was good in that we all enjoyed it. It was also clearly insane!

It called for (among other things) 375g of soba noodes, 500g of steak, and an entire napa cabbage and claims to serve four! I didn't even have a whole cabbage left, so I just used the ~2/3 of one that I did have. And even that would barely fit in the wok. And that was before we added the noodles!

We all had fairly large portions last night and the wok was still basically full after dinner. This recipe clearly makes enough to serve a family of 12! So, yeah, I like this recipe, but I think the proportions (and overall yield) are a bit off. I've scaled down the cabbage and noodles here, but left the rest of the ingredients the same. Hopefully this will produce a more reasonable quantity with a better balance between the meat, vegetables, and noodles. I've also reduced the broth called for. Since I found the sauce a bit soupier than I would have liked, even after adding the cornstarch slurry and trying to cook it down.


Stir-Fried Soba Noodles with Beef and Cabbage

Slightly adapted from Dish of the Day by Kate McMillan

Ingredients

  • 500g steak (pref. sirloin)
  • 1/4 c. sesame oil
  • 1/4 c. dark soy sauce
  • 2 Tbsp. ginger paste
  • 200g soba noodles (or whole wheat spaghetti)
  • 1 Tbsp. peanut or corn oil
  • 2-3 cloves garlic, minced
  • 4 green onions, sliced
  • 1/2 head napa cabbage, shredded
  • 1 c. beef broth, divided
  • 1 Tbsp. cornstarch (cornflour)
  • 225g sugar snap peas or snowpeas (mangetout), trimmed and halved diagonally
  • 1/4 c. sesame seeds, toasted
  • Laoganma (老干妈) and/or Sriracha, to serve (optional)

Directions

  1. Thinly slice the beef across the grain and then cut into matchsticks (julienne).
  2. Combine the sesame oil, soy sauce, and ginger paste.
  3. Add the beef and toss to combine. Marinate for 1-3 hours.
  4. Cook the noodles according to package directions. Drain, rinse, and set aside.
  5. Heat the wok over medium-high heat.
  6. Add the oil and swirl to coat.
  7. Add the garlic and green onion and stir-fry for a minute or so.
  8. Add the beef and marinade and stir-fry until cooked (5-8 minutes).
  9. Add the cabbage and 3/4 c. of the broth.
  10. Cover and cook until cabbage wilts (3-4 minutes).
  11. Whisk the cornstarch into the remaining 1/4 c. of broth and pour it over the cabbage.
  12. Add the peas and noodles, toss to combine, and cook until everything is heated through and sauce thickens slightly (2-3 minutes longer).
  13. Sprinkle with sesame seeds.
  14. Serve topped with Laoganma and/or Sriracha (if desired).

Friday, 13 December 2024

Raspberry-Lemon Muffins

I've been dragging my feet on making these muffins. It's not that they don't sound tasty. It's just that, based on the recipe, they a) don't look very filling or nutritionally complete and b) look very rich and sweet. More of a dessert than a breakfast. And I already have ample dessert recipes! But, I was running low on breakfast inspiration this morning and needed something, so I finally decided to give them a try. And they do taste very nice. But, as predicted, are not very substantial.

I do think you could improve the nutrition a bit by swapping out the white flour for whole wheat and replacing some of the butter with applesauce. They still wouldn't be healthy, but they would at least be marginally less unhealthy. I've written the recipe up to reflect those changes. Possibly something to try for next time...


Raspberry-Lemon Muffins

Slightly adapted from The Breakfast Bible by Kate McMillan

Ingredients

  • 250g whole wheat flour
  • 150g brown sugar
  • 1/2 tsp. ground cinnamon
  • 1/8 tsp. coarse sea salt, ground
  • 1/2 tsp. baking powder
  • 1/2 tsp. baking soda
  • 125g fresh or frozen raspberries
  • 1 c. buttermilk
  • 2 large eggs
  • 2 Tbsp. unsalted butter, melted
  • 3 Tbsp. unsweetened applesauce
  • 2 tsp. grated lemon zest
  • 1/2 tsp. vanilla extract
  • 3 Tbsp. turbinado sugar

Directions

  1. Preheat oven to 200°C (400°F) and grease your muffin tin (preferably a 12-well pan with 2" diameter wells).
  2. Combine the flour, sugar, cinnamon, and salt and mix well.
  3. Sift in the baking powder and baking soda and stir to combine.
  4. Carefully mix in the raspberries.
  5. Beat the beggs with the buttermilk and mix in the butter, applesauce, lemon zest, and vanilla.
  6. Pour the wet ingredients into the dry and mix until just combined.
  7. Spoon the batter into the prepared muffin tin.
  8. Sprinkle the top of each muffin with a bit of the turbinado sugar (~1/4 tsp. per muffin for 2" muffins).
  9. Bake at 200°C (400°F) for 20-25 minutes.
  10. Turn out onto a wire rack to cool.


Variants

Blueberry Muffins with Almond Streusel

Ingredients

Muffins

  • 250g whole wheat flour
  • 150g brown sugar
  • 1/8 tsp. coarse sea salt, ground
  • 1/2 tsp. baking powder
  • 1/2 tsp. baking soda
  • 185g fresh or frozen blueberries
  • 1 c. buttermilk
  • 2 large eggs
  • 2 Tbsp. unsalted butter, melted
  • 3 Tbsp. unsweetened applesauce
  • 1/2 tsp. vanilla extract

Almond Streusel

  • 1/4 c. flour
  • 2 Tbsp. sugar
  • 2 Tbsp. unsalted butter, softened
  • 45g sliced almonds

Directions

  1. Preheat the oven (to 200°C) and grease the pan as directed above.
  2. Prepare the batter as directed (with the modified ingredient list provided here).
  3. For the topping: Combine the flour and sugar, then work the butter in with your fingers. Add the almonds and mix them in as well.
  4. Spoon the batter into the prepared muffin tin and sprinkle with the streusel topping.
  5. Bake as directed above.

Thursday, 12 December 2024

Spanish Chicken Stew

I was originally planning on doing a turkey sausage and barley stew for dinner the other night, but then I found a whole chicken on sale. I had intended to cut it up and freeze it for later use. But I kind of ran out of time. And decided that rather than thawing out the sausages, making dinner with them, and then breaking down and freezing the chicken, may be it just made more sense to eat the chicken right away and save the sausages for another time. So, I ended up going with this chicken stew, which not only used up the chicken, but also the bell peppers that we had in the fridge going begging.


Spanish Chicken Stew

Slightly adapted from Dish of the Day by Kate McMillan

Ingredients

  • 1 (1.5-2kg) chicken, cut into 8 pieces
  • 2 tsp. coarse sea salt
  • 1 tsp. black peppercorns, ground
  • 1 Tbsp. butter, olive oil, or schmaltz
  • 2-3 red or yellow bell peppers, finely chopped
  • 1 onion, halved and sliced
  • 2-3 cloves garlic, minced
  • 1 small (~400mL) tin diced tomatoes
  • 2 tsp. smoked paprika
  • 1 tsp. hot paprika
  • ~2 c. cooked chickpeas
  • 3/4 c. pitted green olives1
  • 3/4 c. sliced almonds, toasted and divided

Directions

  1. Season the chicken with the salt and pepper.
  2. Heat the fat over medium-high heat.
  3. Place the chicken pieces, skin-side-down, in the pot and sear until crispy. Flip and sear briefly on the other side. Transfer to a plate.
  4. Pour off all but 1 Tbsp. of fat from the pot.
  5. Return to medium heat and add the onion and bell pepper. Cook until softened.
  6. Add the garlic and cook for another minute or two.
  7. Add the tomato and both kinds of paprika and stir to combine.
  8. Nestle the chicken pieces into the sauce, skin-side-up.
  9. Cover, reduce heat to medium-low, and simmer until chicken is cooked through (30-40 minutes).
  10. Uncover and add chickpeas, olives, and 1/2 c. of the toasted almonds. Simmer for 10 minutes.
  11. Sprinkle with remaining almonds and serve.


1 I didn't have enough green olives on hand for this, so I ended up using a mix of green and kalamata. I do think the green olives went with the dish slightly better, but they were both good. Back

Wednesday, 11 December 2024

Chocolate-Caramel Tart

I made some burnt caramel sauce a while back. It was a bit too burnt, but when mixed with the next, slightly undercooked batch that I made, it was just about right. We'd been gradually using it up as a topping on waffles and desserts, but there was still quite a bit left and I didn't want it to go begging. So, when I ran across this simple tart recipe, it seemed perfect.

The original recipe actually called for making six 3" tartlets. I don't have any small tartlet tins though. But, some quick, back-of-the-envelope calculations told me that one 10" tart would require ~ the same amount of crust as six 3" ones, so I just went with that instead. And that did seem to be about right. I mean, the crust was a bit thicker and tougher than I would have liked, but I'm hoping that swapping out the AP flour for pastry flour and correcting the mistake in the recipe1 will help with that.


Chocolate-Caramel Tart

Slightly adapted from Dish of the Day by Kate McMillan

Ingredients

Pastry

  • 90g unsalted butter
  • 60g icing (confectioners'/powdered) sugar
  • 150g soft (plain/standard/pastry) flour
  • 30g natural cocoa powder
  • 1 large egg
  • 1-2 Tbsp. milk

Caramel

  • 1 c. sugar
  • 3 Tbsp. water
  • 2/3 c. heavy (35%) cream
  • 3 Tbsp. unsalted butter
  • 1/4 tsp. coarse sea salt
  • 1/2 tsp. vanilla extract

Ganache

  • 3/4 c. heavy (35%) cream
  • 185g dark chocolate

Directions

Pastry

  1. Preheat oven to 190°C (375°F).
  2. Sift the icing sugar and cut it into the butter.
  3. Sift the flour and cocoa powder and cut them in as well.
  4. Beat the egg and mix it in with a fork.
  5. If the pastry is still not coming together, add a little milk a tsp. at a time until it does.
  6. Press the dough into the bottom and up the sides of a loose-bottomed 25cm (10") tart tin.
  7. Place the tart tin on a baking sheet, line the pastry shell with baking paper, fill with pie weights, and bake at 190°C (375°F) for 10-15 minutes.
  8. Remove paper and weights and return to oven for 5 minutes.
  9. Set aside to cool.

Caramel

  1. Combine the sugar and water, cover, and bring to a boil over medium-high heat.
  2. Uncover and continue cooking, swirling (but not stirring!) occasionally, until sugar is completely dissolved (~5 minutes).
  3. Contine cooking until caramel is fairly dark (~4 minutes longer).
  4. Remove from heat and carefully stir in cream.
  5. Return to medium-low heat and cook, stirring, until smooth.
  6. Remove from heat and stir in butter.
  7. Once butter is incorporated, stir in the salt and vanilla.
  8. Pour the caramel into the baked tart shell and chill for at least an hour to firm up the caramel a bit.

Ganache

  1. Combine the chocolate and cream and warm over very low heat, stirring occasionally, until chocolate is melted and mixture is smooth. (Althernatively, scald the cream over medium heat and then pour the hot cream over the chocolate and let stand for five minutes. Then stir until mixture is smooth.)
  2. Set aside to cool for a few minutes.
  3. Once ganache and caramel have both firmed up slightly (but ganache is still pourable), pour the ganache into the tart shell.
  4. Chill for at least two hours or until firm.
  5. If desired, sprinkle with a small amount of flaky salt before serving.


1 The original recipe calls for "1 1/4 c. (6 1/2 oz./200g) all-purpose flour". Unfortunately, I just went with the metric measurement without checking their conversions. And their math is way off! 1 1/4 c. of flour weighs ~150g, not 200! So, my pastry was way too dry an dwould not come together at all. So I ened up having to add a bunch of milk to get it to the right consistency. But that really wasn't ideal. And between the extra mixing and the extra volume and having to work it so much to get it to a not completely ridiculous thickness, it was pretty tough by the time I'd finished with it. So, as noted, hopefully by using the corrext amount of a soft flour next time, I'll be able to mostly avoid that particular failure mode. I mean, don't get me wrong, it was still good! I just felt that the pastry was a bit of a letdown and detracted from the delicious filling a bit. Back

Tuesday, 10 December 2024

Baked Zucchini with Red Onion and Mint

This was okay once it finally cooked, but it took forever for the zucchini to cook through. More than twice what the recipe specified! Also, I had one less zucchini than called for an one onion was still nowhere near enough! I've doubled the onion and tripled the vinegar relative the what was called for in the original recipe. I think that makes for much better proportions. And I have no idea what to suggest for the bake time. I'm going to recommend starting out with twice the time called for in the recipe and then going from there.


Baked Zucchini with Red Onion and Mint

Slightly adapted from Vegetable of the Day by Kate McMillan

Ingredients

  • 2 red onions, halved and sliced
  • 2 Tbsp. olive oil
  • 680g zucchini, trimmed and halved lengthwise
  • 1/4 tsp. coarse sea salt
  • 1/8 tsp. black peppercorns, ground
  • 1/4 c. fresh mint, chopped
  • 1 Tbsp. red wine vinegar

Directions

  1. Preheat oven to 200°C (400°F).
  2. Put onion in a 23x33cm (9x13") baking dish and drizzle with the olive oil. Toss to coat and then spread out into an even layer.
  3. Bake at 200°C (400°F) until softened (~10 minutes).
  4. Push the onion to the side and place the zucchini pieces cut-side-down in the baking dish.
  5. Spoon the onion over the zucchini and sprinkle with the salt and pepper.
  6. Bake at 200°C (400°F) for ~20 minutes.
  7. Flip the zucchini over and bake until tender (10-15 minutes).
  8. Transfer zucchini to a serving dish.
  9. Add the mint and vinegar to the onion and toss to combine.
  10. Spoon the onion mixture over the zucchini and serve.

Monday, 9 December 2024

Garlicky Spinach-Parmesan Frittata

This was okay. It definitely delivered on the spinach! Personally, I felt like it could've used a little more Parmesan. And it was way under-done when cooked according to the recipe. I've adjusted both the bake time and temperature below. I've also specified a bit of extra Parmesan sprinkled on top of the frittata just before it goes into the oven to help the cheese come through a little more.


Garlicky Spinach-Parmesan Frittata

Slightly adapted from Vegetable of the Day by Kate McMillan

Ingredients

  • 2 Tbsp. garlic oil, divided
  • 1 onion, halved and sliced
  • 450g frozen chopped spinach
  • 6 large eggs
  • 1-2 Tbsp. milk (optional)
  • 4-5 cloves garlic, minced
  • ~1/2 c. grated Parmesan, divided
  • 1/2 tsp. coarse sea salt, ground
  • 1/4 tsp. black peppercorns, ground
  • 1/8 tsp. hot paprika

Directions

  1. Preheat oven to 190°C (375°F).
  2. Heat 1 Tbsp. of the oil over medium heat.
  3. Add the onion and cook until softened (~5 minutes).
  4. Add the spinach, cover, and cook until wilted.
  5. Cook, uncovered, for another minute or two to help cook off some of the moisture.
  6. If it is still wet, drain it. Set aside.
  7. Beat the eggs with a splash of milk (if desired).
  8. Mix in the garlic, 1/4 c. of Parmesan, salt, pepper, and paprika.
  9. Add the spinach to the egg mixture and stir to combine.
  10. Return the pan to medium heat and add the remaining 1 Tbsp. of oil.
  11. Pour in the egg mixture and cook for 2-3 minutes.
  12. Sprinkle with remaining 1/4 c. of Parmesan and transfer to oven and bake for ~12 minutes.
  13. Set broiler to "high" and broil until top is set and lightly browned (2-3 minutes).
  14. Turn out onto plate, cut into wedges, and serve.

Sunday, 8 December 2024

Walnut Wheat Bread

A 100% whole wheat bread filled with walnuts and enriched with milk and honey. What's not to love?

I also decided to add a bit of sourdough discard to mine. Mostly to use it up. It's completely optional. Although you may find you need slightly less flour if omitting the starter since it increases the hydration by a small amount.

And I will admit that I got a bit impatient while kneading this bread and didn't get as much gluten development as I probalby should have. So the loaves tore themselves apart during proofing rather than puffing up into nice, smooth-topped loaves like I had hoped. They were still tasty! Just not as pretty or high-rising as I would have liked.


Walnut Wheat Bread

Slightly adapted from Bernard Clayton's New Complete Book of Breads

Ingredients

  • ~800g hard (strong/high grade/bread) whole wheat flour, divided1
  • 3 1/4 tsp. instant yeast
  • 2 tsp. coarse sea salt
  • 1/2 c. skim milk powder
  • 2 1/4 c. hot water (~50°C)
  • 1/4 c. honey
  • ~125g sourdough discard (optional)
  • 2 Tbsp. unsalted butter
  • 1 c. walnuts, chopped

Directions

  1. Combine ~400g of the flour with the yeast, salt, and milk powder and mix well.
  2. Add the water, honey, and sourdough discard (if using) and beat vigorously by hand or with a flat beater on a stand mixer for 2-3 minutes.
  3. Add ~100g of the remaining flour and mix very well.
  4. Add the butter and continue working in the remaining flour ~30g at a time until a soft, sticky dough forms.
  5. Cover the dough and allow it to rest for 5-10 minutes.
  6. Replace the flat beater with a dough hook or turn the dough out onto a well-floured surface and work in as much of the remaining flour as needed to form a supple, workable dough.
  7. Knead for at least half an hour by hand or 8-10 minutes by hook.
  8. Round the dough and place it in a covered bowl to rise at room temperature. First rise should take ~1 hour (give or take, depending on the temperature of your room.)
  9. Once the dough is fully risen, knock it back and turn it out onto a lightly floured surface.
  10. Press it flat and add the walnuts to the middle.
  11. Fold the edges over so that the walnuts are enclosed in the centre.
  12. Knead for a few minutes until the walnuts are fully incorporated and distributed throughout.
  13. Divide the dough into two equal portions, round each one, cover, and rest for ~10 minutes.
  14. Meanwhile, grease two 22x11cm (8.5x4.5") loaf pans.
  15. Working with one portion at a time, press the dough flat, letter fold, roll up like a jelly roll, and place, seam-side-down into one of the prepared loaf pans. Repeat with remaining dough.
  16. Cover and proof at room temperature. (This rise should take ~45 minutes, give or take.)
  17. Preheat oven to 190°C (375°F).
  18. Uncover loaves and bake at 190°C (375°F) until done (30-40 minutes).
  19. Turn out onto a wire rack to cool.


1 Clayton has you mix half of the flour with the wet ingredients first to make a batter. Beat that to get a bit of gluten development. And then gradually add in the rest of the flour. I did that this time and that's how I've written up the instructions here. But I would be tempted to try it with the Laurel's Kitchen method of combining all of the dry ingredients first, making a well in the centre, pour in the wet ingredients, and then gradually incorporating the wet into the dry, working from the centre outward. That seems to work very well for most of their breads and it would be interesting to see if it made any difference with this one. Both approaches should have a similar effect. But... I'd still be curious to compare and contrast. Back

Saturday, 7 December 2024

Broccoli Stir-Fry with Dark Soy Sauce

This was very quick and easy to make and quite tasty! Especially for the small amount of effort it required. That said, there was definitely way too much sauce for the amount of broccoli. And it also didn't thicken up noticeably at all. So, I've halved all of the liquids in the sauce, but left the cornstarch unchanged. Hopefully that will produce better results next time.


Broccoli Stir-Fry with Dark Soy Sauce

Slightly adapted from Vegetable of the Day by Kate McMillan

Ingredients

  • 1/3 c. raw cashews
  • 1/4 c. chicken or vegetable stock
  • 1 Tbsp. oyster sauce
  • 1 Tbsp. dark soy sauce
  • 1 Tbsp. mirin
  • 1 tsp. cornstarch
  • 1-2 Tbsp. corn or peanut oil
  • ~500g broccoli florets
  • 2 cloves garlic, minced

Directions

  1. Preheat oven to 190°C (375°F) and toast the cashews until browned (5-6 minutes).
  2. Combine the stock, oyster sauce, soy sauce, mirin, and cornstarch and mix well. Set aside.
  3. Heat a wok over medium-high heat.
  4. Drizzle in the oil and swirl to coat.
  5. Add the broccoli and stir-fry until bright green (2-3 minutes).
  6. Add the garlic and stir-fry for another minute or so.
  7. Pour in the sauce and stir-fry until broccoli is tender (3-5 minutes).
  8. Serve with rice and protein of your choice.


Variants

Vegetarian Version1

Ingredients

  • 1/3 c. raw cashews
  • 1/4 c. vegetable stock
  • 1 Tbsp. vegetarian oyster sauce
  • 1 Tbsp. dark soy sauce
  • 1 Tbsp. mirin
  • 1 tsp. cornstarch
  • 1-2 Tbsp. corn or peanut oil
  • ~500g broccoli florets
  • 2 cloves garlic, minced


1 This version is probably also vegan, but you'll need to check your ingredients to be sure. Most soy sauces and vegetarian oyster sauces are vegan, but some are not. Traditional mirin is generally vegan, but some modern variants may contain honey. Back

Friday, 6 December 2024

Rice Vermicelli with Chicken and Shrimp

I have some serious questions about this recipe. On the one hand, it was both easy and tasty, so it had that going for it. On the other hand, the proportions seemed way off. As written, it called for 250g of chicken, 125g of shrimp, and 375g of noodles. I had a 450g package of chicken, 340g of shrimp, and 400g of noodles. So, initially I was thinking that I'd just use half each of the chicken and shrimp and all of the noodles and that would be only slightly off from the recommended amounts. But, after seeing just how many noodles that was, TF and I decided that using all of the proteins would be more appropriate.

Honestly, I still found it pretty noodle heavy. I think it probably could've also used doubled veggies. But it at least had a reasonable amount of protein this way.

I think next time I'd just halve the noodles and sauce and call it a day. That seems easier than doubling everything else. And it means it would actually produce a reasonable amount. (Rather than enough noodles to feed a freaking army!) Oh well... at least now I know.


Rice Vermicelli with Chicken and Shrimp

Slightly adapted from Dish of the Day by Kate McMillan

Ingredients

  • 250g skinless boneless chicken breasts and/or thighs
  • 6 Tbsp. chicken stock
  • 1 1/2 Tbsp. fish sauce
  • 1 Tbsp. dark soy sauce
  • 1/2 Tbsp. light soy sauce
  • 1/2 tsp. sugar
  • 200g rice vermicelli
  • 2 Tbsp. corn or peanut oil, divided
  • 125g shrimp, peeled and deveined
  • 1 Tbsp. ginger paste
  • 2-3 cloves garlic, minced
  • 1 onion, halved and sliced
  • 1 large (or 2 small) carrots, grated
  • 2-3 c. shredded napa cabbage
  • 2-3 green onions, sliced
  • Sriracha, to serve (optional)

Directions

  1. Poach the chicken in a bit of water or stock. Once cooked through, drain and shred. Set aside.
  2. Combine the stick, fish sauce, dark and light soy, and sugar and mix well. Set aside.
  3. Place the noodles in a heatproof bowl. Pour over enough boiling water to cover the noodles. Soak for 2 minutes. Then drain, rinse, and set aside.
  4. Heat a wok over medium-high heat.
  5. Drizzle in 1 Tbsp. of the oil and swirl to coat.
  6. Add the shrimp and stir-fry for a minute or two until cooked through.
  7. Remove shrimp from wok with slotted spoon and set aside.
  8. Return wok to medium-high heat and add the ginger, garlic, onion, and carrot. Stir-fry until vegetables soften (2-4 minutes).
  9. Add vegetables to bowl with shrimp and set aside.
  10. Return wok to medium-high heat.
  11. Drizzle in the remaining 1 Tbsp. of oil and swirl to coat.
  12. Add the noodles and stir-fry for a minute or so.
  13. Add the cabbage and chicken and stir-fry until combined and heated through.
  14. Add the shrimp and veggies and toss to combine.
  15. Pour in the sauce and stir-fry until sauce is absorbed (2-4 minutes).
  16. Sprinkle with green onions.
  17. Serve and top with Sriracha (if desired).

Thursday, 5 December 2024

S'mores Waffles

I've been hesitating on making the rest of the waffles in the waffle book because they're all meant to be dessert waffles rather than breakfast options. And I have so many other desserts to make. And most of them call for ingredients that I don't typically have on hand anyway. So, I've been making other desserts instead and the waffle recipes have just been sitting there. Staring at me.

But we needed something for breakfast this morning. And we had all the bits for these s'mores-inspired waffles. They're pretty sweet and rich. But, honestly, they're no worse than most of the things in the "pastries" section of the Breakfast Bible. So, I figured I'd just roll with it and give 'em a try!

They were pretty good. Although, even with a reduced quantity of chocolate (~75% of what the recipe called for), we all still found them very rich and excessively chocolate-y. I think next time I'd probably go with half chocolate. I also had a bit of trouble getting the somewhat unusual, watered down Swiss meringue to whip up nicely. It still worked. And the finished texture was actually quite nice. It just wouldn't hold a peak. Maybe that was just down to my impatience with the double boiler though. I may not have let it cook enough before transferring it to the stand mixer. Either way, it was still pretty good. Just a bit tricky to work with.

The recipe suggested making these with either malted or peanut butter waffles. I decided that peanut butter waffles (with some of the AP flour swapped out for whole wheat) sounded like a nice combo, so I went with those. That said, I do think that the malt waffles would have also been very nice. As would whole wheat. I might actually try 100% whole wheat peanut butter (or malted) waffles next time. I think the whole grain would be a nice way to evoke a bit more of the graham cracker character that I normally associate with s'mores.


S'mores Waffles

Slightly adapted from Waffles: Sweet, Savory, Simple by Dawn Yanagihara

Ingredients

  • 1 batch (6-7) peanut butter or malted waffles (preferably made with whole wheat flour)
  • ~180g dark chocolate, chopped
  • 3 large egg whites
  • 1/8 tsp. cream of tartar
  • 6 Tbsp. warm water
  • 1 1/2 c. sugar
  • 1 Tbsp. vanilla extract1

Directions

  1. Make waffles as directed and preheat oven to 220°C (425°F).
  2. Place the waffles on baking sheets and top each one with ~30g of the chocolate.
  3. Bake at 220°C (425°F) for ~2 minutes to melt the chocolate and crisp the waffles.
  4. Meanwhile, bring a small pot of water to a simmer and place a heatproof bowl over it.
  5. Add the egg whites, cream of tartar, and water to the bowl.
  6. Gradually add the sugar while whisking vigorously.
  7. Keep whisking until the sugar is completely dissolved and the mergine is opaque and warm to the touch.
  8. Transfer to a stand mixer and beat on high speed until soft peaks form (3-5 minutes).
  9. Beat in vanilla.
  10. Spoon the meringe into the waffles and return to oven until meringue is lightly browned on top and cooked through (4-6 minutes).
  11. Serve with a glass of milk on the side.
1 Oh no! I just realized that I completely forgot to add the vanilla to my meringue! That would have made it so much nicer! Whoops. Oh well... not much I can do about it now. :( Back

Wednesday, 4 December 2024

Miso Soup with Shrimp

This was supposed to be miso soup with shrimp and pea sprouts, but I didn't have any pea sprouts and I didn't feel like trying to go out and get some when TF and I were already hungry. I just wanted something quick and easy that I could throw together for lunch. So, I just did the miso soup without the pea sprouts. (I had intended to get some sprouts from Noki Farms to add to the leftovers when I was downtown later in the day, but then ended up meeting up with TM instead and didn't make it to the mall to get my sprouts in the end.)


Miso Soup with Shrimp (and Pea Sprouts)

Slightly adapted from Dish of the Day by Kate McMillan

Ingredients

  • 1 (~15cm) piece of konbu
  • 3 c. cold water
  • 15g bonito flakes
  • 2 Tbsp. white miso paste
  • 125g shrimp, peeled and deveined
  • 10g pea shoots (optional)

Directions

  1. Bring the konbu and water to a boil over medium-high heat.
  2. Remove from heat and remove and discard the konbu (or reserve for making second dashi).
  3. Add the bonito flakes, stir once, and let stand for 5 minutes.
  4. Strain the broth and discard the bonito flakes (or reserve for making second dashi1).
  5. Combine 1/4 c. of the hot broth with the miso paste and stir until smooth.
  6. Pour the miso mixture into the rest of the broth and warm over medium heat until almost (but not quite) boiling. Do not let the broth boil!
  7. Add the shrimp and cook until shrimp are pink and cooked through (3-4 minutes).
  8. Stir in the pea shoots and serve.


1 To make second dashi: Take the konbu and bonito used to make the first dashi (which is what you've just made for this miso soup) and add it to another 3 c. of water. Bring nearly (but not quite) to a boil and gently simmer for 15 minutes. Strain and reserve the broth. Discard the solids. Second dashi is good in dishes with other strong flavours where the dashi stock is not front-and-centre. Back