Sunday, 30 June 2024

Glazed Carrots with Coriander

This was a very simple and tasty recipe that I suspect would come together very quickly under normal circumstances. Unfortunately I was not, and also instead of 1kg of large carrots we had 1kg of many extremely small carrots, which made cutting them take a while. Still, everyone liked it and it's a good way to use up a lot of carrots without needing many other ingredients.

Glazed Carrots with Coriander

Vegetable of the Day by Kate McMillan (p. 266)

Ingredients

  • 1 kg carrots, peeled and bias-cut into 5mm slices
  • 1 tsp whole coriander
  • 4 tbsp butter
  • juice of ½ lemon
  • 3 tbsp honey
  • ⅔ C water
  • ⅛ tsp peppercorns, ground
  • ¼ tsp salt
  • 2 tbsp coarsely chopped fresh cilantro

Directions

  1. Lightly toast the coriander seeds in a small pan.
  2. Let cool, then grind.
  3. In a large pan, melt the butter over medium heat.
  4. Add the ground toasted coriander and cook until fragrant, ~1 minute.
  5. Stir in the water, lemon juice, and honey and cook for another minute.
  6. Add the carrots, salt, and pepper. Stir to coat and raise the heat to medium-high.
  7. Cook until the carrots are tender and the sauce has reduced to a thick glaze, ~15 minutes. If the carrots are not at the desired tenderness by the time the sauce has reduced, add a bit more water and continue.
  8. Remove from heat, stir in the cilantro, and serve.

Saturday, 29 June 2024

Braised Pork Chops with Cherries and Leeks

I don't tend to eat pork very often, but they had packs of boneless pork chops on sale the other day, so I grabbed one on spec. I knew I still had lots of pork recipes waiting to be tried, so it would definitely get used eventually. Then I forgot to cancel or tweak last week's produce basket and we ended up with a surprise leek. And that fit into this braised pork chop recipe very nicely!

The recipe as written calls for port, but I didn't want to go out and get a whole bottle just for the 1/4 c. that I needed for the sauce. So I just added a bit of brown sugar to some red wine and called it a day. (I probably should have gotten the port, since I have other recipes that call for it and I'm sure it would've gotten used up eventually, but I was running short on time and just went with the substitute this time around.)


Braised Pork Chops with Cherries and Leeks

Slightly adapted from Dish of the Day by Kate McMillan

Ingredients

  • 1kg pork chops (pref. bone-in)
  • 1 tsp. coarse sea salt
  • 1/2 tsp. black peppercorns, ground
  • 1 Tbsp. fresh rosemary, chopped (or 1/2 Tbsp. dried rosemary, ground)
  • 2 Tbsp. unsalted butter, divided
  • 2 leeks, white parts only, halved and sliced
  • 1 c. chicken stock
  • 1/4 c. port
  • 2 Tbsp. balsamic vinegar
  • 1 c. fresh pitted cherries, halved (or 1/2 c. dried cherries)
  • 1-2 tsp. cornstarch (optional)

Directions

  1. Season the pork chops with salt, pepper, and rosemary.
  2. Melt 1 Tbsp. of the butter over medium heat.
  3. Add the pork chops and sear on both sides.
  4. Remove from pan and set aside.
  5. Melt the remaining 1 Tbsp. of butter over medium heat.
  6. Add the leeks and cook, stirring occasionally, until softened.
  7. Add the chicken stock and deglaze the pan.
  8. Add the port, vinegar, and cherries.
  9. Return the pork to the pan. Nestle it into the sauce and spoon the leeks and cherries over.
  10. Bring to a boil, cover, and reduce heat to medium-low.
  11. Simmer until pork is cooked through (15-20 minutes).
  12. If you would like a thicker sauce: remove the pork from the pan and sift some cornstarch into the sauce. Bring to a boil and cook until thickened.
  13. Serve the pork chops topped with the sauce. Goes well with mashed root vegetables.

Lamb Tagine with Olives and Preserved Lemon

This was a big hit with TF. The Kidlet and I also liked it, but TF was especially enamored of it. Even though I wasn't able to get the proper boneless lamb shoulder and ended up using some discount loin chops instead. I think the only change I'd make in the future would be to double the olives (and maybe add a bit more preserved lemon).


Lamb Tagine with Olives and Preserved Lemon

Slightly adapted from Dish of the Day by Kate McMillan

Ingredients

  • 1 1/2 c. chicken stock
  • 1/2 tsp. saffron threads
  • 2 Tbsp. olive oil, divided
  • 1kg boneless lamb shoulder, cubed
  • 1 tsp. coarse sea salt
  • 1/2 tsp. black peppercorns, ground
  • 1 onion, halved and sliced
  • 1 tsp. ground ginger
  • 1/2 tsp. sweet paprika
  • 1/2 tsp. cumin seeds, ground
  • 2-3 cloves garlic, minced
  • 1 bay leaf
  • 12-24 pitted green olives
  • 1 preserved lemon, flesh discarded and peel minced
  • 1-2 Tbsp. chickpea flour (optional)
  • 2 Tbsp. minced flat-leaf parsley

Directions

  1. Heat the chicken stock until steaming.
  2. Stir in the saffron and set aside to steep.
  3. Heat 1 Tbsp. of the oil over medium heat (preferably in a tagine).
  4. Season the lamb with the salt and pepper.
  5. Add the lamb to the tagine and sear on all sides.
  6. Transfer the lamb to a plate and set aside.
  7. Add the remaining 1 Tbsp. of oil to the tagine.
  8. Add the onion and cook until softened (5-10 minutes).
  9. Add the ginger, paprika, cumin, and garlic and cook for 2 minutes.
  10. Return the lamb to the tagine.
  11. Add the bay leaf and the stock and bring to a boil.
  12. Reduce heat to low, cover, and simmer for 90 minutes.
  13. Transfer lamb to a serving platter.
  14. Increase heat to medium and stir in olives, preserved lemon, and chickpea flour (if using).
  15. Cook until sauce thickens slightly.
  16. Pour sauce over lamb, sprinkle with parsley, and serve.

Friday, 28 June 2024

Banana Bread (Breakfast Bible Version)

I already have quite a few banana bread recipes. That said, just because I have a bunch of good ones already, doesn't mean I'm not interested in trying even more!

Today was my first day in New Zealand. (I mean, not actually today-today. Not June 28th when this recipe is posted, but December 30th when I'm actually writing from.) I arrived in Hamilton yesterday and today was my first full day here. I woke up good and early due to the time change and decided that it would be nice to make use of the time and make something tasty for breakfast for everyone else to wake up to. That said, being my first day here, I hadn't had a chance to do a grocery shop yet or get a good handle on what was in the kitchen. But I knew that there were a bunch of bananas, eggs, sugar, and flour, so I figured that was a pretty good start.

I did end up making a few tweaks to the recipe. All-purpose flour isn't really a thing here, so I used a mix of "high grade" (hard) and "standard" (soft) flour. There wasn't any plain yogurt, just manuka honey yogurt, so I rolled with that but then halved the sugar. The bananas and eggs were both on the small side, so I threw an extra of each in. And since unsalted butter doesn't really seem to be a thing here, so I just used the salted and then omitted the salt from the recipe. I also ended up swapping out the walnuts for a mix of chocolate chips and sunflower seeds, since there didn't appear to be any walnuts in the pantry. And, as it turns out, that worked out quite well since Reiver doesn't really care for walnuts in his banana bread1 and ended up quite liking the sunflower seeds.


Banana Bread

Adapted from The Breakfast Bible by Kate McMillan

Ingredients

  • 2 1/4 c. all-purpose flour2
  • 1/2 c. sugar
  • 1 tsp. baking soda
  • 4 very ripe bananas, mashed
  • 2 large (or 3 medium) eggs
  • 1/3 c. manuka honey Greek yogurt3
  • 1/2 c. salted butter4, melted
  • 1 tsp. vanilla extract
  • 1/2 c. chocolate chips and/or chopped walnuts
  • 2-3 Tbsp. sunflower seeds (or more walnuts)

Directions

  1. Preheat oven to 180°C (350°F) and grease and flour a 23x13cm (9x5") loaf pan.
  2. Combine the flour and sugar, sift in the baking soda, and mix well.
  3. Mash the bananas.
  4. Beat the eggs into the bananas and stir in the yogurt, butter, and vanilla.
  5. Stir in the chocolate chips and/or walnuts.
  6. Pour the batter into the prepared tin and sprinkle with the sunflower seeds.
  7. Bake at 180°C (350°F) for ~1 hour.
  8. Transfer to wire rack to cool for 10 minutes.
  9. Turn out of tin and allow to finish cooling on the cooling rack.


1 Although I did later find out that apparently part of the reason he preferred the sunflower seeds was that they are smaller than walnuts. Which initially confused me since I usually chop my walnuts to about the same size as sunflower seeds or chocolate chips. But apparently that's not the norm here and people typically just toss whole walnut halves into their baked goods! (New Zealand is a strange place.) Back
2 I used 2 c. of hard flour and 1/4 c. of soft flour for mine. Back
3 I also think that plain yogurt, either Greek or not, would probably work fine here. Your bread will be a little less sweet if you're using plain yogurt, but I still think that it would be sweet enough. And, if you find it's not, you can always add a bit more sugar. Back
4 Or unsalted butter + 1/2 tsp. coarse sea salt. Back

Wednesday, 26 June 2024

Pan-Seared Broccoli

The searing on this recipe didn't quite work as I had hoped. The broccoli was a bit too wet to sear properly. But it was good otherwise. And I appreciate the simplicity: just broccoli, salt, pepper, lemon juice, and a bit of olive oil.


Pan-Seared Broccoli

Slightly adapted from Vegetable of the Day by Kate McMillan

Ingredients

  • 680g broccoli, cut into florets
  • 1 Tbsp. olive oil
  • 1 tsp. coarse sea salt, ground
  • 1/2 tsp. black peppercorns, ground
  • juice of 1 lemon

Directions

  1. Get a bowl of ice water ready.
  2. Bring a pot of water to a boil.
  3. Add the broccoli and blanch for 30 seconds.
  4. Drain and trasfer to the ice bath.
  5. Heat the oil over medium-high heat.
  6. Add the broccoli and cook for a minute or so until it gets a bit of colour on it.
  7. Flip/stir and cook for another minute or so.
  8. Transfer to a bowl, sprinkle with salt and pepper, drizzle with lemon juice, and serve.

Tuesday, 25 June 2024

Soufflé Omelette (Breakfast Bible Version)

I've made soufflé omelettes before. This one takes a slightly simpler approach than the previous one that I tried. For this one, you simply separate your eggs, add a little salt and pepper to the yolks, beat the whites, and then fold them into the yolks. The omelette is topped with soft goat cheese and fresh chives and baked. It doesn't get folded or filled with anything more than that.

It was nice. I appreciate the ease of preparation. And the flavour was fine. Personally, I think it could've done with a bit more cheese. And I do think some mushrooms or other toppings would have been nice. It doesn't need them, but I do think they would have added to the experience. Still, this is nice if you just want a quick and simple fluffy omelette.


Soufflé Omelette

Slightly adapted from The Breakfast Bible by Kate McMillan

Ingredients

  • 6 large eggs, separated
  • 1/4 tsp. coarse sea salt, ground
  • 1/8 tsp. black peppercorns, ground
  • 60-70g fresh goat cheese (chère), crumbled
  • 2 Tbsp. chopped fresh chives

Directions

  1. Preheat oven to 180°C (350°F) and grease an oven-proof frying pan.
  2. Combine the egg yolks, salt, and pepper and mix well.
  3. In a separate bowl, beat the egg whites until soft peaks form.
  4. Mix ~1/4 of the egg whites into the yolks to loosen them.
  5. Add the remaining egg whites and fold in until just combined.
  6. Pour the eggs into the prepared pan.
  7. Sprinkle with goat cheese and chives and bake until just set (10-15 minutes).

Tuesday, 18 June 2024

Dal Dhoklis

We ate all the kachoris that I made to go with the salad last night, but we still had lots of salad left, so I wanted to make a simple curry to go with it. One that wouldn't require a trip to the grocery store.

I'd always sort of glossed over this recipe because the idea of making the dhoklis (basically a spicy, wheat-based Indian gnocchi) sounded too labour-intensive to me. But the curry looked very simple otherwise, and it didn't look that difficult to make the little dumplings, so I decided to give it a go.

TF and I both really liked this. The Kidlet wasn't a fan of the dhoklis, but seemed to like the dal part of the curry well enough. That said, I do think I would make some changes next time.

The recipe as written only called for 1/2 c. of pigeon peas for 4 c. of water. This makes a very thin, soupy dal. Which is fine, but I think I would've preferred a thicker, more substantial base. So I think I'd try doubling the pigeon peas next time.

I also had some trouble with the dhokli dough. It called for 1/2 c. of roti flour, 2 Tbsp. oil, and "enough hot water to form a dough", which Iyer said should take ~1/4 c. However, 2 Tbsp. of oil was enough to completely soak and saturate the dough and then I could barely get more than 1 Tbsp. of water in before the dough started getting way too wet. It felt very greasy and was difficult to shape. To the point where I suspect there may be a typo in the recipe. Maybe it was supposed to be 2 tsp. of oil? Or 1 c. of flour, rather than 1/2 c.? I think I might try doubling the dhokli recipe next time, but halving the oil. Hopefully that would make the dumplings a bit less greasy. And it would give even more dhoklis in the finished dish which, I have to say, I wouldn't mind.

Again, not that it was bad like this. I just think it could've been even better!


Dal Dhoklis

Slightly adapted from 660 Curries by Raghavan Iyer

Ingredients

Dhoklis

  • 1 c. roti (atta) flour
  • 1 tsp. coarse sea salt
  • 2 tsp. granulated sugar
  • 1 tsp. ground Kashmiri chilies
  • 1/2 tsp. ground turmeric
  • 1 tsp. bishop's weed (ajwain)
  • 1/4 c. chopped fresh cilantro
  • 1 Tbsp. canola (or other neutral) oil
  • ~1/4 c. hot water

Dal

  • 1 c. split skinned pigeon peas
  • 4 c. water
  • 1 tsp. dhania-jeera masala
  • 1/2 Tbsp. coarse sea salt
  • 1/2 tsp. ground turmeric
  • 2 fresh green Thai chilies, minced
  • 1 Tbsp. ghee
  • 1 tsp. mustard seeds
  • 1 tsp. cumin seeds
  • 1/2 tsp. fenugreek seeds
  • 1/4 tsp. ground asafetida
  • 8 fresh or frozen curry leaves
  • 1 large tomato, chopped
  • 2 tsp. chopped fresh cilantro

Directions

  1. Rinse the pigeon peas for the dal very well.
  2. Add the peas and the water to a pressure cooker/InstantPot and pressure cook on high for 15 minutes, followed by a 15-minute natural release.
  3. Meanwhile, combine the flour, sea salt, sugar, chilies, turmeric, and bishop's weed and mix well.
  4. Add the cilantro and oil and mix very well.
  5. Drizzle in the hot water until a stiff dough forms.
  6. Divide the dough into two equal portions.
  7. Roll each portion into a 30cm (12") long rope/log.
  8. Cut each rope into 48 equal pieces (96 pieces total).
  9. Roll each piece of dough into a ball, then press it with your thumb to make a depression in the centre. Set aside.
  10. Once the pigeon peas are cooked, give them a stir. If they are not breaking down on their own, use a blender (immersion blenders work well for this) to purée until smooth.
  11. Stir in the dhania-jeera masala, salt, turmeric, and chilies.
  12. Add the dhoklis and stir to prevent them from sticking to each other.
  13. Bring to a boil and cook for 15-20 minutes.
  14. Meanwhile, melt the ghee over medium-high heat.
  15. Add the mustard seeds to the ghee, cover, and cook until they stop popping (30-60 seconds).
  16. Remove from heat; add the cumin seeds, fenugreek seeds, asafetida, and curry leaves; and mix well.
  17. Add the ghee mixture to the dal.
  18. Stir in the tomato and cilantro and serve.

Monday, 17 June 2024

Bund Gobhi Kakadi nu Salade (Cabbage-Cucumber Salad)

I had initially been intending to do some baked cod for dinner last night, but, when dinner time rolled around... I just wasn't feeling it. So I flipped through the curry cookbook instead. I started at the back and worked my way forward until I got to this interesting salad recipe.

It's hot here right now, so the idea of a nice, cool salad for dinner was quite appealing. And it meant that I could finally use up the cabbage and cucumber out of the fridge! Granted it was napa cabbage rather than the green cabbage the recipe called for, but I had a hunch that I could get away with making that swap in this instance.

I made the recipe to spec initially and it was good. That said, I felt like it could stand to be a little punchier, so I added a couple tsp. of Maharashtrian garam masala. I think that helped, but I might be inclined to add a minced green chile next time as well. Still... it was a tasty refreshing salad for a hot day.


Bund Gobhi Kakadi nu Salade

Slightly adapted from 660 Curries by Raghavan Iyer

Ingredients

  • 1 small head cabbage, shredded
  • 1 English cucumber, halved lengthwise and thinly sliced crosswise
  • 1/2 c. shredded fresh coconut1
  • 1/4 c. chopped fresh cilantro
  • 1 fresh green Thai, finger, or serrano chile, minced (optional)
  • 1 Tbsp. sugar
  • 1 tsp. coarse sea salt
  • 1/2 c. raw peanuts (without skins)
  • 1-2 Tbsp. mustard oil
  • 1 tsp. mustard seeds
  • 1/4 tsp. ground asafetida
  • juice of 1 lime
  • 1-2 tsp. Maharashtrian garam masala (optional)

Directions

  1. Combine the cabbage, cucumber, coconut, cilantro, chile (if using), sugar, and sea salt and mix well.
  2. Toast the peanuts over medium-high heat until brown and spotty.
  3. Transfer to a molcajete or large mortar and pestle and coarsely grind (to the texture of coarse breadcrumbs). If using a food processor, blender, or spice grinder wait until the peanuts have cooled completely before grinding or else they will become cakey.
  4. Add the peanuts to the salad.
  5. Heat the oil over medium-high heat.
  6. Add the mustard seeds, cover, and cook until they've stopped popping (30-60 seconds).
  7. Remove from heat and stir in the asafetida.
  8. Allow to cook in the residual heat for 5-10 seconds, then pour the oil mixture over the salad and stir to combine.
  9. Add the lime juice and garam masala (if using) and mix well.
  10. Serve cold or room temperature.


1 Alternatively, use 1/4 c. of dried, unsweetened shredded coconut. Pour over 1/4 c. of boiling water, let stand for 10-15 minutes, then drain and use as directed. Back

Sunday, 16 June 2024

Mutter Kachoris (Fried Flatbreads Stuffed with Green Peas)

Iyer notes that these flatbreads are a popular breakfast food in northern India and often served alongside potato curries. I opted to serve them as a salad accompaniment to round out our light dinner last night.

Being deep fried -- and full of butter to boot! -- these are definitely not health food. But they are delicious! We all ended up having seconds last night.


Mutter Kachoris

Slightly adapted from 660 Curries by Raghavan Iyer

Ingredients

Dough

  • 1 1/4 c. all-purpose flour
  • 1/2 tsp. coarse sea salt
  • 1 tsp. nigella seeds
  • 1/4 c. unsalted butter
  • 4-5 Tbsp. cold water

Filling

  • 4-6 fresh green Thai, finger, or serrano chilies
  • 3 slices fresh ginger (~6cm x 2cm x 3mm)
  • 1 c. frozen green peas, thawed
  • 1 Tbsp. mustard oil
  • 1/2 tsp. dhania-jeera masala
  • 1/2 tsp. coarse sea salt

Directions

  1. Combine the flour, salt, and nigella and mix well.
  2. Cut in the butter.
  3. Drizzle in the water while mixing with a fork. Use just enough water to get the dough to come together in a cohesive mass.
  4. Divide into six equal portions, cover, and chill until ready to use.
  5. Meanwhile, combine the chilies and ginger in a food processor (or blender) and mince.
  6. Add the peas and pulse until finely minced.
  7. Heat the oil over medium heat.
  8. Add the pea mixture and cook, stirring frequently, until mixture is dry to the touch (~5 minutes).
  9. Remove from heat and stir in the dhania-jeera masala and salt.
  10. Working with one portion of dough at a time, roll into a circle on a floured surface. I found that I preferred rolling the edges slightly thinner and leaving the centre thicker.
  11. Spoon ~2 Tbsp. of filling into the centre of the dough and fold up the edges to completely encase the filling and form a packet.
  12. Press to flatten slightly, flip seam-side-down, and roll out to form a circle 10-12cm (4-5") across. Repeat with remaining portions of dough and filling.
  13. Pour at least 2-3cm of oil into a wok (or use a deep fryer).
  14. Heat oil to 190-200°C (375-400°F).
  15. Cook the kachoris one or two at a time (depending on the size of your deep fryer). Slide them into the hot oil and press them down as the rise to the surface and puff up so that the cook evenly on both sides. Flip them over if necessary to achieve even browning.
  16. Transfer to a rack or paper towels to drain.
  17. Serve plain or with a curry of your choice.

Saturday, 15 June 2024

Arbi Curry (Taro Curry)

I ended up making this curry with ube (ratalu) rather than taro root, but it still seemed to work well. It tasted nice and was still starchy enough to thicken up the sauce. And I appreciated that making it with frozen, cubed ube meant that I didn't have to deal with peeling fresh taro myself.


Arbi Curry

Slightly adapted from 660 Curries by Raghavan Iyer

Ingredients

  • 450g taro root
  • 1-2 Tbsp. canola (or other neutral) oil
  • 1 tsp. mustard seeds
  • 1 Tbsp. skinned split black lentils (urad dal/mapte beans)
  • 1/4 tsp. ground turmeric
  • 1/4 c. chopped fresh cilantro
  • 1 tsp. coarse sea salt
  • 12 curry fresh or frozen curry leaves
  • 2-4 fresh green Thai, finger, or serrano chilies, chopped

Directions

  1. Peel the taro and cut into 2cm cubes.
  2. Place in a pot and add enough water to cover.
  3. Bring to a boil then reduce heat to medium-low and cook, covered, until tender (~8 minutes).
  4. Reserve 1 c. of cooking water and drain the taro.
  5. Heat the oil over medium-high heat.
  6. Add the mustard seeds, cover, and cook until they've stopped popping (30-60 seconds).
  7. Add the lentils and cook, stirring constantly, until golden-brown (20-30 seconds).
  8. Add the turmeric and cook for ~5 seconds.
  9. Add the oil mixture to the cooked taro along with the reserved cooking water, cilantro, salt, curry leaves, and chilies.
  10. Bring to a boil, then reduce heat to medium and cook, uncovered, stirring occasionally, until thickened (~5 minutes).

Friday, 14 June 2024

Sugar and Spice Butter

The Breakfast Bible has a sort of mix-and-match approach to pancakes. It provides three basic pancake recipes -- buttermilk, whole wheat, and gluten free -- and then gives a selection of suggested combinations of mix-ins and a separate section with suggested combinations of toppings. This compound butter was suggested along with apples and maple syrup.

Sugar and Spice Butter

From The Breakfast Bible by Kate McMillan

Ingredients

  • 1/4 c. unsalted butter, softened
  • 2 Tbsp. icing (powdered/confectioners') sugar
  • 3/4 tsp. ground cinnamon
  • 1/4 tsp. ground ginger
  • 1/8 tsp. coarse sea salt, ground

Directions

  1. Sift the icing sugar into the butter.
  2. Add the cinnamon, ginger, and salt and mix well.

Thursday, 13 June 2024

Roasted Beets with Arugula and Feta

As written this wants ricotta salata, but as usual we didn't have that and we did have feta, so feta it is.

Roasted Beets with Arugula and Feta

Dish of the Day by Kate McMillan (p. 19)

Ingredients

  • large beets totaling about 500g
  • 3 tbsp olive oil
  • 2 tbsp fresh orange juice
  • 1 tbsp fresh lemon juice
  • ¼ tsp mustard
  • ½ tsp salt
  • ¼ tsp pepper
  • 2 C (~60g) baby arugula
  • 130-150g feta, crumbled

Directions

  1. Trim roots and stems from beets.
  2. Arrange beets on a baking tray and brush with 1½ tbsp oil.
  3. Bake at 350° until fork-tender, turning every half hour, about 60-90 minutes depending on beet size.
  4. Remove and let cool.
  5. Meanwhile, whisk together remaining oil, juices, mustard, salt, and pepper in a large bowl.
  6. Peel beets and cut into thin wedges.
  7. Add beets to dressing and turn gently until coated.
  8. Add arugula and feta and toss to combine. Serve.

Wednesday, 12 June 2024

Waffles with Sausage Gravy

With this, I am finally done with all of this savoury recipes in the waffle cookbook1! (Although, now that I think about it, I don't think I ever got around to doing the fried chicken and waffles write-up. I should probably get on that!)

This recipe is a take on souther biscuits and gravy. Rather than a more traditional brown gravy, it uses "country gravy", which is a milk-based sauce. It's basically a b&eactue;chamel sauce with sausage in it.

The recipe recommends one of several different types of waffle as a stand-in for the biscuits: classic waffles, buttermilk waffles, or cornmeal waffles. I had intended to make cornmeal waffles to go with the fried chicken and buttermilk waffles for this one. But I didn't have enough cornmeal left, so I ended up flipping them around and making the buttermilk waffles to go with the chicken and made cornmeal waffles for this one.


Waffles with Sausage Gravy

Slightly adapted from Waffles: Sweet, Savory, Simple by Dawn Yanagihara

Ingredients

Directions

  1. Cook the sausage over medium heat, breaking it up as it cooks.
  2. Once fully cooked, remove the sausage from the pan with a slotted spoon.
  3. If the pan contains less than 2 Tbsp. of fat, add a little butter, lard, or bacon grease to the pan to bring the total amount of fat up to ~2 Tbsp.
  4. Add the flour and cook, stirring, until flour is cooked (~2 minutes).
  5. Pour in milk, whisking until smooth.
  6. Add bay leaf, nutmeg, salt, and pepper and cook, stirring frequently, until thickened (~5 minutes).
  7. Return the sausage to the pan and cook until heated through (2-3 minutes).
  8. Cover and keep warm until ready to use.
  9. Make or reheat the waffles.
  10. Pour ~1/4 of the gravy over each waffle, top with green onions, and serve.


1 Except for the one seafood recipe. Back

Tuesday, 11 June 2024

Khoya (Milk Solids)

Khoya isn't particularly difficult to make. It's just time-consuming. It requires boiling down milk until most of the liquid is gone and you're left with a doughy mass of milk solids. And you have to keep stirring it lest it stick or scortch. This means that, on the rare occasions that I use khoya in my cooking, I normally buy ready-made bricks of it from the Indian grocery rather than making my own. This week, however, I wanted to throw together a last-minute curry and decided that the long cooking was preferrable to having to run out to the store. (It also meant that I could easily make it lactose-free for TF.)

Khoya

From 660 Curries by Raghavan Iyer

Ingredients

  • 2 c. whole (3.25%) milk

Directions

  1. Bring the milk to a boil and cook, uncovered, stirring frequently, until very thick (~30 minutes). Lumps may form, but if you stir well, they should soften and mix back in to form a smooth mass.
  2. Once the mixture is molasses-thick, reduce heat very slightly and continue cooking and stirring for another 5 minutes or so, then remove from heat and allow to cool.
  3. 2 c. of milk should produce ~1/4 c. of khoya. It can be stored in the fridge for up to a week before use.

Monday, 10 June 2024

Toovar Mandvishing nu Dal (Pigeon Pea and Peanut Dal)

I have not been very good about keeping on top of the meal planning and groceries lately. I had been trucking along with the "<x> of the Day" cookbooks pretty well so far. But... I kind of lost my momentum and I've been having trouble getting back in the groove again. So, when dinner time rolled around and I still hadn't gotten together any of the supplies I needed for the other recipes I'd been looking at, I turned to my trusty copy of 660 Curries and paged through the legume section until I found something suitable.

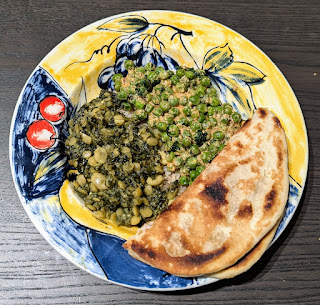
Although this dal couldn't hold a candle to the green pea curry I ended up making to go with it, it was still very nice. The legumes made it filling enough to serve as a main course and the fenugreek added enough greens that it felt like we were getting our veggies as well.

Photo goes here.

Toovar Mandvishing nu Dal

Slightly adapted from 660 Curries by Raghavan Iyer

Ingredients

  • 1 c. skinned, split pigeon peas
  • 1/2 c. raw peanuts, skinned
  • 4 c. water
  • 2 c. chopped fresh or frozen fenugreek leaves
  • 1/4 c. shredded, unsweetened dried coconut (or 1/2 c. fresh)
  • 1 Tbsp. crumbled jaggery
  • 1 tsp. coarse sea salt
  • 1 tsp. tamarind concentrate
  • 1/4 tsp. ground turmeric
  • 4-6 fresh green Thai, finger, or serrano chilies, halved lengthwise
  • 2 Tbsp. ghee
  • 1 tsp. mustard seeds
  • 1/4 tsp. ground asafetida

Directions

  1. Combine the pigeon peas and peanuts and rinse well and drain.
  2. Add the water and bring to a boil over medium-high heat.
  3. Skim off and foam and add the fenugreek.
  4. Reduce heat to medium-low, cover, and cook, stirring occasionally, until the peas are tender (20-25 minutes).
  5. Add the coconut, jaggery, salt, tamarind, turmeric, and chilies and continue to simmer, uncovered, stirring occasionally, for 5 minutes.
  6. Melt the ghee over medium-high heat.
  7. Add the mustard seeds, cover, and cook until they've stopped popping (30-60 seconds).
  8. Stir in the asafetida and immediately remove from heat.
  9. Pour the ghee mixture over the dal and serve.


Variants

Vegan Version

Ingredients

  • 1 c. skinned, split pigeon peas
  • 1/2 c. raw peanuts, skinned
  • 4 c. water
  • 2 c. chopped fresh or frozen fenugreek leaves
  • 1/4 c. shredded, unsweetened dried coconut (or 1/2 c. fresh)
  • 1 Tbsp. crumbled jaggery
  • 1 tsp. coarse sea salt
  • 1 tsp. tamarind concentrate
  • 1/4 tsp. ground turmeric
  • 4-6 fresh green Thai, finger, or serrano chilies, halved lengthwise
  • 2 Tbsp. coconut oil or vegetable ghee
  • 1 tsp. mustard seeds
  • 1/4 tsp. ground asafetida

Saturday, 8 June 2024

Khoya Elaichi Mutter (Green Peas with Khoya-Cardamom Sauce)

I almost didn't make this curry. It was late. I'd already made a dal and TF had cooked some rice. And it was even a somewhat vegetably dal with lots of fenugreek leaves in it. So, in theory, I didn't actually need another curry. But I wanted one. And I've been eyeing this one for ages.

Unfortunately, it calls for khoya (milk solids). I've never made my own khoya. It involves a very long process of boiling milk down until it ceasing being milk and forms a solid, dough-like mass. It's simple, but time-consuming. So, on the rare occasions that I do cook with khoya, I usually buy it in ready-made bricks from the Indian grocery.

This is fine when I've planned ahead. But on days like today when I'm just trying to throw something together last-minute, I really don't want to have to deal with either option. Making the khoya or buying it are both too much hassle for me for a quick meal or side dish.

Hence, almost not making this curry. In the end though, I decided that I was alright with the prospect of a very late dinner and measured out some milk and started cooking it down.

It did, indeed, take quite a while, but the results were delicious! TF is completely in love with this sauce. She just wants to eat it on everything! And I have to admit, I am also a big fan. It's so good it kind of outshone the dal that was meant to be the main dish! I would definitely make this one again. That delicious creamy-spicy sauce is worth the effort!


Khoya Elaichi Mutter

Slightly adapted from 660 Curries by Raghavan Iyer

Ingredients

  • 1/2 c. plain yogurt
  • 1/4 c. khoya
  • 1/2 tsp. green cardamom seeds
  • 1-2 Tbsp. ghee
  • 1 tsp. cumin seeds
  • 2 tsp. ground Deggi chilies1
  • 1 tsp. coarse sea salt
  • 1/2 c. water
  • 450g frozen green peas
  • 1/2 tsp. Punjabi garam masala
  • 2 Tbsp. chopped fresh cilantro

Directions

  1. Combine the yogurt, khoya, and cardamom in a blender and purée until smooth.
  2. Heat the ghee over medium-high heat.
  3. Add the cumin seeds and sizzle for 15-30 seconds.
  4. Pour in the yogurt sauce and add the ground chilies and sea salt.
  5. Reduce heat to medium and simmer, uncovered, stirring occasionally, until some of the ghee starts to separate (~5 minutes).
  6. Add the water and the pease and bring to a boil.
  7. Cook, uncovered, boiling vigorously (increase heat if necessary), and stirring occasionally, until sauce thickens (~15 minutes).
  8. Stir in the garam masala.
  9. Sprinkle with cilantro and serve.


1 Iyer suggests that if you can't find Deggi chilies, then 1 tsp. of ground cayenne + 1 tsp. of sweet paprika will make a reasonable substitute. I opted to use 1 tsp. of ground Kashmiri chilies + 1 tsp. of sweet paprika for mine. This produces a slightly milder result than using cayenne, but I really enjoy the flavour of the Kashmiri chilies. Back

Monday, 3 June 2024

Brown Rice, Asparagus, and Egg Salad

Lunch time rolled around today and TF and I were both feeling ravenous. Unfortunately, we didn't really have any leftovers in the fridge. And no bread or other quick and easy lunch options. We were considering having some sort of ramen. But I decided to take a quick look through the egg book before resorting to instant noodles. Luckily I ran across this recipe and remembered that we still had some asparagus in the fridge that needed to be used up.

The original recipe called for basmati rice, but we swapped it out for long-grain brown rice. It takes a little longer to cook, but it's a bit healthier and more filling than white rice. We also swapped out the fresh ginger for ginger paste1 and halved the oil called for. This worked quite well and made a tasty and relatively easy lunch option!


Brown Rice, Asparagus, and Egg Salad

Slightly adapted from The Good Egg by Marie Simmons

Ingredients

Salad

  • 1 c. long-grain brown rice
  • 1 c. water2
  • peanut (or other neutral) oil
  • 4 large eggs
  • 1/2 tsp. ginger paste
  • 1 clove garlic, minced
  • 1/4 tsp. coarse sea slat, ground
  • 340g asparagus, trimmed
  • 1-2 tsp. sesame oil
  • 1/2 c. sliced green onions
  • 1 Tbsp. sesame seeds, toasted

Dressing

  • 1/2 c. rice vinegar
  • 1 tsp. sugar
  • 1 tsp. ginger paste
  • 1 clove garlic, minced
  • 1/2 tsp. coarse sea salt
  • 3 Tbsp. neutral oil
  • 1 Tbsp. sesame oil

Directions

  1. Cook the rice by your preferred method.
  2. Meanwhile, heat a few mm of oil in a 6" frying pan over medium-high heat.
  3. Beat the eggs with the ginger, garlic and salt.
  4. Once the oil is hot, pour in the egg mixture and cook, without stirring, for 2 minutes.
  5. Lift the edges of the egg and let the uncooked mixture flow underneath. Cook for 1 more minute.
  6. Flip and cook for 1 minute longer.
  7. Transfer to a strainer or paper towel to drain.
  8. Cut or tear the omelette into bite-sized pieces. Set aside.
  9. Place a steamer basket over a few cm of boiling water and steam the asparagus for 3-4 minutes.
  10. Rinse the asparagus under cold water, transfer to serving bowl, toss with sesame oil, and set aside.
  11. Combine the vinegar, sugar, ginger, garlic, and sea salt for the dressing and mix well.
  12. Whisking constantly, add the oil in a thin, steady stream.
  13. Continue whisking and drizzle in the sesame oil. Set aside.
  14. Once the rice is done, add it to the bowl with the asparagus along with the green onions and toss to combine.
  15. Pour over the dressing, add the omelette pieces, and stir to mix.
  16. Sprinkle with toasted sesame seeds and serve.


1 I doubled the quantity of ginger paste since I find it doesn't tend to have quite as much presence as fresh ginger. If you are using grated fresh ginger, then halve the quantities called for here. Back
2 The amount of water needed to cook the rice will vary depending on the method used to cook it. The proportions shown here are appropriate for pressure cooking in an InstantPot. Back

Sunday, 2 June 2024

Malted Waffles

I have been mostly going through the waffle cookbook in order so far. (And I'm now more than half-way through the book!) I did, however, have to skip over a couple recipes. One got left out because it calls for shellfish and we're still waiting to see if it's safe for the Kidlet to have shellfish. And the other was this malted waffle recipe. I ended up skipping it because I just couldn't find non-diastatic malt powder anywhere. Malted milk? Sure! Malt syrup? Already have some! And I'm pretty sure I could make myself some diastatic malt powder/flour if I cared to. But plain old (non-diastatic) malt powder? That's trickier.

I had already checked the local grocery stores and the health food store. No dice. I figured, if anywhere in town was going to have it, it'd be the Flour Barrel. Unfortunately, things have been so busy that I haven't had a chance to actually go to the Flour Barrel recently!

But I was downtown for a haircut last week and actually both had time and remembered to go have a look before heading home. Sure enough, they had a whole shelf of the stuff! So now I've finally been able to go back and fill in that little gap in my waffle coverage.

I served these with raspberries and chocolate sauce, but I think they'd also be good with maple syrup. Or even ham, eggs, and other savoury toppings.

I don't think these beat out a classic buttermilk waffle for me. But I'm still glad I tried them. It's nice to have a little variety from time-to-time.


Malted Waffles

Slightly adapted from Waffles: Sweet, Savory, Simple by Dawn Yanagihara

Ingredients

  • 280g all-purpose flour
  • 90g non-diastatic malt powder
  • 2 Tbsp. sugar
  • 1/2 tsp. coarse sea salt, ground
  • 2 1/4 tsp. baking powder
  • 2 large eggs
  • 2 c. milk
  • 1/2 tsp. vanilla extract
  • 6 Tbsp. unsalted butter, melted

Directions

  1. Preheat your waffle iron.
  2. Combine the flour, malt powder, sugar, and salt.
  3. Sift in the baking powder and stir to combine.
  4. Beat the eggs and vanilla into the milk.
  5. Stir the melted butter into the milk mixture.
  6. Pour the wet ingredients into the dry ingredients and mix until just combined.
  7. Once the waffle iron is preaheated, pour in 1 portion of batter and cook according to manufacturer directions. Repeat until all batter has been used.
  8. Serve with fresh fruit, chocolate sauce, whipped cream, and/or maple syrup. Or make them savoury and serve with ham, eggs, bacon, chicken and/or Hollandaise sauce.