Tuesday, 7 February 2023

Fry Bread Tacos

I've made fry bread before, but I'd never tried using it for tacos. Cook's Country had a recipe for fry bread tacos though, so I figured I'd give it a try. Their fry bread is a bit different than the type I've made before but, as I noted in that write-up, there's a lot of variability in fry bread recipes. The folks at Cook's Country opted for a yeasted dough. This does mean it takes a little longer than the chemically leavened fry breads, but I just made the dough first and then worked on the taco filling and side dish while I was waiting for the breads to be ready to cook. It actually worked out quite well.

The dough seemed really sticky when I was first mixing it. Even after kneading for a while (which I did in the bowl), it still seemed pretty wet. But it tamed down a bit after its first rise and I actually found it surprisingly easy to work with when rolling out my rounds. I figured it'd stick and tear all over the place, but I just slapped it down on the bench and went at it with the rolling pin and it behaved quite well! (My bench top is bamboo and my rolling pin is marble. I have a maple rolling pin as well, but I figured the marble one might stick less.)

I found the taco filling a little underwhelming, but that could be due to the fact that I ran out of chili powder and had to make some substitutions. And it could also be due to the fact that, since I didn't want to have to use one-and-a-half packages of ground beef, I used tofu as a stand-in for the last 225g of beef. Don't get me wrong, it was still tasty, just not as punchy as I'd hoped. I'd be inclined to toss in some chipotles in adobo or pickled jalapeños next time.


Fry Bread Tacos

Slightly adapted from Cook's Country August/September 2018

Ingredients

Fry Bread

  • 280g all-purpose flour
  • 20g skim milk powder
  • 1 tsp. coarse sea salt
  • 2 1/4 tsp. instant yeast
  • 3/4 c. warm water
  • 3 Tbsp. unsalted butter

Filling

  • 1 Tbsp. oil or bacon grease
  • 1 onoin, chopped
  • 2 Tbsp. chili powder
  • 3 cloves garlic, minced
  • 2 tsp. cumin seeds, ground
  • 1 tsp. dried oregano
  • 680g ground beef
  • 1/2 tsp. coarse sea salt
  • 1/4 tsp. black peppercorns, ground
  • 1 c. salsa
  • sour cream, to serve
  • grated cheese, to serve
  • shredded lettuce, to serve
  • extra salsa, to serve

Directions

Fry Bread

  1. Combine flour, milk powder, salt, and yeast and mix well.
  2. Drizzle in water and butter while mixing until dough forms.
  3. Knead in bowl for 5-10 minutes.
  4. Cover and let rise for 30-60 minutes. (You can use this time to do a little mise en place for the filling ingredients.)
  5. Knock the dough back and knead it a few strokes, then divide into eight equal portions.
  6. Round each one and cover. Let rest for a couple minutes.
  7. Grease two baking sheets.
  8. Working with one ball at a time, roll it out into a thin round 2-3mm thick. Do not use any flour when shaping or rolling out the fry breads.
  9. Place the round on one of the greased baking sheets, cover, and repeat with remaining dough balls.
  10. Let rest, covered, for 20 minutes.
  11. Meanwhile, pour ~3cm of oil into a wok or Dutch oven and heat it to ~190°C (375°F).
  12. Once the fry breads are puffy, cut a small slit in the centre of each one.
  13. Working with one fry bread at a time (or maybe two if you're frying in a large Dutch oven), carefully add the dough round to the oil and fry for 1-2 minutes per side.
  14. Remove from oil and set on wire rack to drain.
  15. Do not stack fry breads as you finish cooking them, keep them in a single layer.

Filling

  1. Heat fat over medium heat.
  2. Add onion and cook for 4-5 minutes.
  3. Add chili powder, garlic, cumin, and oregano and cook for ~1 minute.
  4. Add beef and cook until no longer pink.
  5. Add salsa, salt, and pepper, and cook for 2-3 minutes longer.

Assembly

  1. Top each fry bread with some filling, cheese, sour cream, extra salsa, and shredded lettuce.

Monday, 6 February 2023

Rosemary-Cream Cheese Sourdough

I don't usually make white bread, but this recipe looked too good to pass up. And I am pretty pleased with how it came out. Judging by TF's response to it, she is very pleased with how it came out. I'll definitely have to make more rosemary bread in the future!

When it comes to breads, I find that I'm generally able to get very good results from 100% whole wheat doughs that use commercial yeast, but I still sometimes struggle to get a really nice internal structure with the 100% whole wheat sourdoughs. Although, after this experience, I've realized that that may be, in part, down to my shaping technique rather than anything to do with the dough itself. More experimentation required...


Rosemary-Cream Cheese Sourdough

Slightly adapted from The Fresh Loaf

Ingredients

  • 470g hard (strong/high grade/bread) white flour
  • 80g hard (strong/high grade/bread) whole wheat flour
  • 410mL water
  • 100g ripe/fed sourdough starter (100% hydration)
  • 40g pâte fermentée
  • 40g cream cheese, softened
  • 12g coarse sea salt
  • 6g honey
  • 2 Tbsp. minced fresh rosemary
  • 1/4 tsp. black peppercorns, ground

Directions

  1. Feed your starter so that it's nice and active by the time you're ready to mix your dough.
  2. Combine the flours and pour in the water. Mix well, cover, and let rest at room temperature for anywhere from 1-12 hours.1
  3. Mix all the remaining ingredients into the dough. I like to do them one at a time, but mix them however you'd prefer.
  4. Cover and let rest at room temperature for ~2 hours, stretching and folding every 30 minutes.
  5. Cover and ferment in fridge for up to 24 hours.
  6. Divide the dough into two equal portions and round each one. Cover and let rest at room temperature for 10-20 minutes.
  7. Shape your loaves2 and place in covered bannetons to rise.
  8. Proof at room temperature for 1-2 hours.
  9. Preheat oven to 250°C (475°F) and dust a baking sheet with cornmeal. (I like to use a little butter on the baking sheet to help the cornmeal "stick".)
  10. Turn the loaves out onto the prepared baking sheet and slash as desired.
  11. Pour some boiling water into a pan and place it on the bottom rack of the oven.
  12. Bake the loaves on the middle rack over the pan of boiling water for 15 minutes.
  13. After 15 minutes, remove the water pan and reduce oven temperature to 200°C (400°F) and bake for another 15-20 minutes.
  14. Turn off oven and let loaves rest in warm oven for 10 minutes.
  15. Remove from oven and transfer to wire rack to cool.


1 I like to feed my starter and mix the flour and water the night before. That way the flour can be autolysing while the starter is building toward its peak. Back
2 I normally shape my sourdough loaves the same way I'd shape a pan loaf: letter fold, then roll up jelly roll style. I did that for one of these loaves. But for the other one, I tried a book fold. It was that second one that produced the better shape and gave me a nicer oven spring. So... maybe try book folds for sourdoughs going into bannetons to proof and save the jelly-roll-ing for pan loaves? Back

Sunday, 5 February 2023

Easy Pound Cake

I've been craving cake for the last few days. Unfortunately (or possibly fortunately, depending on how you look at it), we don't have any cake and I haven't had the time or the energy to change that fact. What we have had though are little containers of surplus lemon juice and lemon zest sitting in the fridge, waiting for a use. I was worried that if I didn't use them soon, they'd end up going bad, so I decided that (and my unrelenting cake craving) were enough reason for me to prioritize making myself a lemon pound cake.

Normally I put the version of the recipe that I actually made at the top as the main focus of the write-up and add any alternate versions below. But, since the lemon version is just the vanilla version + some lemon juice and lemon zest, I figured I might as well do that as the focal point and put the lemon variant below.


Pound Cake

Slightly adapted from Cook's Country December/January 2017

Ingredients

  • 250g sugar
  • 4 large eggs
  • 1/2 Tbsp. vanilla extract
  • 1 c. unsalted butter, melted and hot
  • 170g soft (plain/standard/cake) flour
  • 1/4 tsp. coarse sea salt, ground
  • 1 tsp. baking powder

Directions

  1. Preheat oven to 180°C (350°F) and grease and flour a 21.5x11.5cm (8.5x4.5") loaf pan.
  2. Beat sugar with eggs and vanilla.1
  3. Slowly drizzle in the hot butter while continuing to beat the egg mixture.
  4. Sift in ~1/3 of the flour, sprinkle the salt on top, then this into the batter.
  5. Sift in 1/2 the remaining flour and mix it in.
  6. Sift in the last portion of flour along with the baking powder and mix it in.
  7. Beat until there are no more lumps.
  8. Pour the batter into the perpared tin.
  9. Bake at 180°C (350°F) for 50-60 minutes.
  10. Remove from oven and let cool in tin set on wire rack for 10 minutes.
  11. Turn cake out of tin and set on wire rack to finish cooling.
  12. If desired, drizzle with citrus glaze. (See below)

Citrus Glaze

Ingredients

  • 1/2 c. icing (powdered/confectioners') sugar, sifted
  • 3-4 tsp. lemon, lime, or orange juice
  • 1 tsp. lemon, lime, or orange zest (optional)

Directions

  1. Wisk juice into sugar 1 tsp. at a time until desired consistency is achieved.
  2. Mix in zest (if using).
  3. Drizzle over cake.


Variantions

Lemon Pound Cake

Ingredients

  • 250g sugar
  • 4 large eggs
  • 1/2 Tbsp. vanilla extract2
  • 2 Tbsp. lemon zest
  • 2 tsp. lemon juice
  • 1 c. unsalted butter, melted and hot
  • 170g soft (plain/standard/cake) flour
  • 1/4 tsp. coarse sea salt, ground
  • 1 tsp. baking powder

Orange Pound Cake

The recipe for orange pound cake isn't actually included in the magazine. It simply says that for the orange, almond, and ginger variants you should go to the Cook's Country website. Unfortunately, they only offer free access to those recipes for three or four months after the magazine comes out. And this one is now six years old. My guess is that the orange version was just the lemon version, but with orange zest and juice in place of the lemon. I'm not sure what the others would have been though.

  • 250g sugar
  • 4 large eggs
  • 1/2 Tbsp. vanilla extract
  • 2 Tbsp. orange zest
  • 2 tsp. orange juice
  • 1 c. unsalted butter, melted and hot
  • 170g soft (plain/standard/cake) flour
  • 1/4 tsp. coarse sea salt, ground
  • 1 tsp. baking powder


1 Cook's Country actually recommends doing this step in a food processor, but I don't have one of those, so I just used my hand mixer on one of the higher settings. The next step is also meant to be done in the food processor. This (along with the temperature of the hot butter) apparently helps to emulsify the mixture. Once the butter is mixed in, you're meant to transfer it to a bowl and mix in the dry ingredients with a whisk. I just did the whole thing in a large mixing bowl with a hand mixer. Do whatever works for you. Back
2 The recipe doesn't call for reducing the vanilla at all when making the lemon version but a) vanilla is expensive, b) I was running a little low, and c) I didn't want to dirty another measuring spoon, so I just reduced the vanilla to 1 tsp., rather than 1 1/2. I figured it'd be fine to go a little light on the vanilla since we would be getting the lemon flavour in there as well. Back

Saturday, 4 February 2023

Cream Cheese Spread

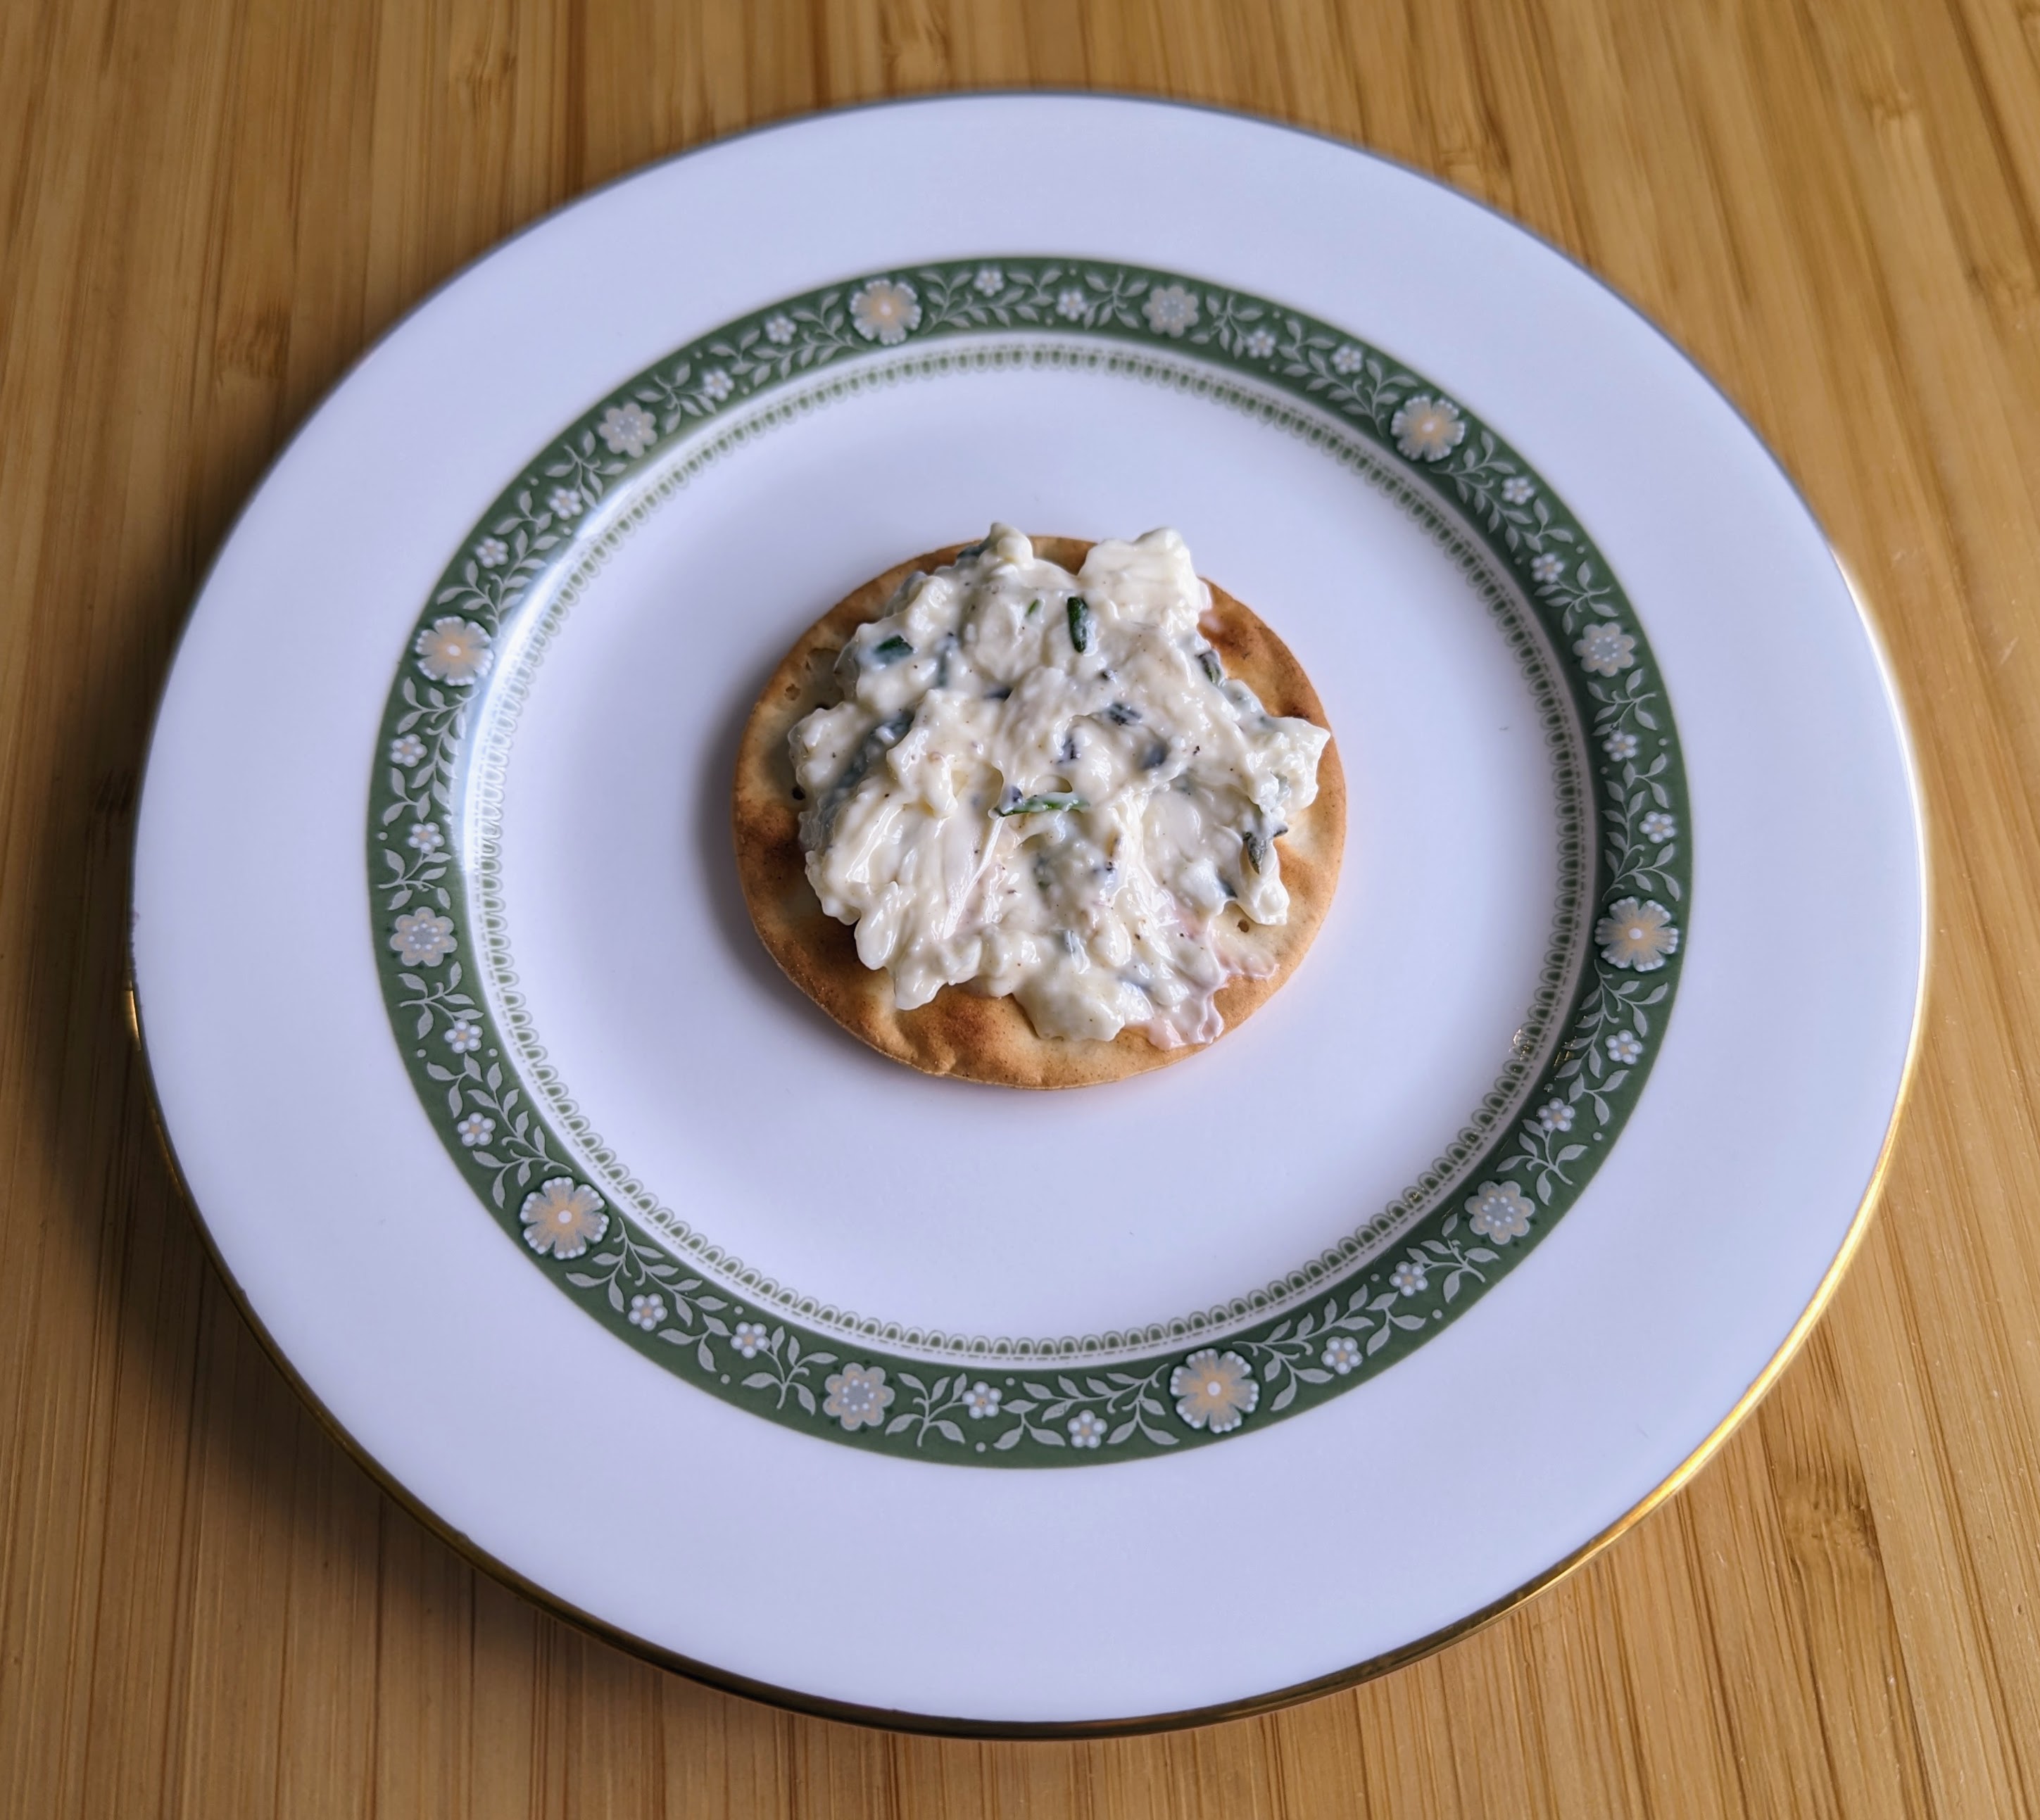
I grabbed some rosemary in the last produce basket we got. I keep running into recipes that call for fresh rosemary and I either have to substitute dried or punt on them because they really seem to hinge on the fresh rosemary. This wasn't one of the recipes I'd had in mind when I got the rosemary, but it looked tasty and I had a lot of cream cheese to use up, so I figured I'd give it a go.

I'm really pleased with the result. And TF and the Kidlet both seem to like it as well. I'd love to try to other flavours sometime as well. The olive and scallion really sings to me and I think the Kidlet would be very enthusiastic about the cinnamon and brown sugar version. And, of course, I think everyone would like the smoked salmon and chive one!


Honey and Rosemary Cream Cheese Spread

Slightly adapted from Cook's Country April/May 2019

Ingredients

  • 250g cream cheese, softened
  • 1/8 tsp. coarse sea salt, ground
  • 1/4 tsp. black peppercorns, ground
  • 2 Tbsp. honey
  • 1 Tbsp. minced fresh rosemary

Directions

  1. Combine everything and mix well.1
  2. Store in an airtight container in the fridge until ready to use.


Variations

Herb and Garlic Cream Cheese Spread

Ingredients

  • 250g cream cheese, softened
  • 1/8 tsp. coarse sea salt, ground
  • 1/4 tsp. black peppercorns, ground
  • 1/2 c. fresh flat-leaf parsley2
  • 1/4 c. fresh basil
  • 1 tsp. lemon juice
  • 1 clove garlic

Cinnamon and Brown Sugar Cream Cheese Spread

Ingredients

  • 250g cream cheese, softened
  • 2 Tbsp. brown sugar
  • 1 tsp. ground cinnamon

Smoked Salmon and Chive Cream Cheese Spread

Ingredients

  • 250g cream cheese, softened
  • 1/4 tsp. black peppercorns, ground
  • 60g sliced cold-smoked salmon3
  • 1/4 c. chopped fresh chives
  • 1 tsp. lemon juice

Olive and Scallion Cream Cheese Spread

Ingredients

  • 180g cream cheese, softened
  • 1 tsp. black peppercorns, ground
  • 1/2 c. pitted kalamata olives, patted dry
  • 2 tsp. olive brine
  • 4 scallions, minced


1 Cook's Country says to use a food processor, but I managed just fine with a spoon. Just make sure your cream cheese is good and soft so you can mix it easily. Back
2 If you're using a food processor, you can just put the leaves into it whole. If you're mixing by hand, you'll need to mince them very fine first. Back
3 For use in a food processor, just tear it into chunks (4-5cm is fine). If mixing by hand, mince as finely as possible before adding it to the cream cheese. Back

Friday, 3 February 2023

Bucatini with Eggplant and Tomatoes

I've put this recipe on my short list many times over the last few years. It always sounds promising, but somehow I never quite seem to get around to making it. Not this time! I finally made it. And it was great!

I ended up using tinned tomatoes instead of fresh because I had some open in the fridge that needed to be used up. And I couldn't get any fresh basil, so I had to roll with dried. Not my preference, but whatcha gonna do?

I think the only possible change I'd make is to double the sauce quantity. I mean, it was fine the way it was. I think it was an appropriate amount of sauce for one pound of pasta. But the sauce was tasty and I wouldn't've been opposed to having even more of it. Plus, it'd give you more veggies per portion. So that seems like a win.


Bucatini with Eggplant and Tomatoes

Slightly adapted from Cook's Country October/November 2018

Ingredients

  • 500g eggplant, peeled and cut into 1cm pieces
  • 1 tsp. coarse sea salt
  • 1 tsp. sugar
  • 450g bucatini
  • 3 Tbsp. olive oil
  • 1/2 tsp. black peppercorns, ground
  • 3 cloves garlic, minced
  • 1/4 tsp. red pepper flakes
  • 1 1/2 c. diced tomatoes
  • 2 Tbsp. chopped fresh basil (or 1 Tbsp. dried)
  • Pecorino Romano or Parmesan cheese, to serve

Directions

  1. Toss eggplant with sugar and salt, cover, and microwave for ~6 minutes.
  2. Line a plate with paper towels, transfer eggplant to prepared plate, and set aside to drain.
  3. Bring a pot of water to a boil1, add the pasta, and cook until al dente.
  4. Reserve 1/2 c. of the pasta cooking water, then drain the noodles and set aside.
  5. Heat the olive oil over medium heat in the now-empty pot.
  6. Add the eggplant and pepper and cook for ~4 minutes.
  7. Add garlic and pepper flakes and cook for 1 more minute.
  8. Add tomatoes and reserved cooking water and cook for 2-3 minutes longer.
  9. Remove from heat and add pasta. Toss to combine.
  10. Sprinkle with basil and serve topped with cheese.


Variations

Double Sauce Variation

Ingredients

  • 1kg eggplant, peeled and cut into 1cm pieces
  • 2 tsp. coarse sea salt
  • 3 tsp. sugar
  • 450g bucatini
  • 4 Tbsp. olive oil
  • 1 tsp. black peppercorns, ground
  • 6 cloves garlic, minced
  • 1/4 tsp. red pepper flakes
  • 3 c. diced tomatoes
  • 4 Tbsp. chopped fresh basil (or 2 Tbsp. dried)
  • Pecorino Romano or Parmesan cheese, to serve
Eggplant will likely need more time in the microwave to soften and cook.

Vegan Version

The recipe is already vegan as is. Just make sure you're using vegan sugar and don't top it with cheese at the end. Or, alternatively, top it with nutritional yeast or a plant-based cheese of your choice.


1 Cook's Country recommends 4 quarts (~4L) of water with 1 Tbsp. of salt. I always found I that liked my noodles just fine -- usually even better, actually -- without the salt, so I never used to salt the water. Lately I have been finding that I do appreciate a little salt, but I still don't add anywhere near as much as they call for. For 3-4L of water and 450g of pasta, I've found that 1 tsp. of salt is about right for me. Back

Thursday, 2 February 2023

Pùte Fermentée

It turns out that when I first started making sourdough bread, I wasn't actually doing it with sourdough starter, I was doing it with pâte fermentée. It's a similar concept, just slightly different composition.

When I first started making sourdough, it was out of necessity. I'd already been making my own bread for close to two years when the pandemic hit. Then COVID-19 happened and we were all in lockdown and -- once they'd finished buying up all the toilet paper -- suddenly everyone decided that they were gonna start making bread. The yeast was all gone. The flour was all gone. Even the odd-ball, specialty flours were sold out. Baking soda? Nope. Baking powder? Nada. Any sort of ground grain and anything that you could conceivably use to leaven it had been bought up. Even -- much to my annoyance -- the big, industrial half-kilo bricks of instant yeast.

Now, I didn't care about the flour being all gone. I had a 10-kg bag of wheat berries and a grain mill at home. I could quite happily grind my own flour. But I needed something to make it rise!

In the end, I decided to use my last teaspoon of commercial yeast to make some bagels. And then, when making them, I held back one bagel's worth of dough and stashed it in a jar in the fridge.

A day or two later, I added that little dough lump to some fresh dough to make some pan loaves... and held back a fist-sized piece of dough and kept it in the fridge.

I kept doing that for a while. Eventually, I started going longer than a couple of days between batches of bread. And I started offering my pet dough lump feedings of flour and water in between to keep it going.

Somewhere along the line I started reading up on sourdough and learing about starters and how to maintain and bake with them. And slowly my pet dough lump transitioned into something more like a traditional, wet (100% hydration) sourdough starter.

I'd never actually heard the term "pâte fermentée" until a couple days ago. But, looking at it, it was traditionally pretty much exactly what I started with: a lump of dough held back from the previous day's bread and used to help condition and leaven the fresh dough. It's generally stiffer (lower hydration) than sourdough starter and, unlike starter, contains salt.

Sometime I should try to read up more on all the different bread leaveners: starter, mother dough, pâte fermentée, poolish, biga, sponge, rewena bug... Not sure what others there are. For all I know, some of those could even be different names for the same thing! But it would be interesting to learn about all of them and compare notes. For now though, here's what I've got for pâte fermentée...

Pâte Fermentée

Slightly adapted from King Arthur Baking

Ingredients

  • 210g hard (strong/high grade/bread) white flour
  • ~1/16 tsp. instant yeast
  • 1/2 tsp. coarse sea salt
  • 140g water

Directions

  1. Combine all ingredients and mix well.
  2. Cover and allow to ferment at room temperature for 8-14 hours.
  3. If not using right away, cover and store in the fridge until ready to use (up to 4 days).

Wednesday, 1 February 2023

French Onion Hamburger Steaks with Potatoes and Gravy

Hamburger steaks! They aren't a prestige food, but they are cheap, easy to make, and delicious. A lot of the time I'd rather have a good hamburger steak than a steak steak.

The recipe as written calls for 1.5lbs of hamburger meat. Since we have frozen 1lb bags, I used two bags and scaled some of the other ingredients up slightly.


French Onion Hamburger Steaks with Potatoes and Gravy

From Cook's Country August/September 2018 (recipe card)

Ingredients

  • 675g (1½ lbs) potatoes, halved lengthwise
  • 1 tbsp butter, melted, + 3 tbsp butter, solid
  • ½ tsp salt
  • ½ tsp pepper, freshly ground
  • 900g lean ground beef
  • 160mL (⅔ C) panko
  • 1 packet onion soup mix
  • 225g cremini mushrooms, thinly sliced
  • 1 tbsp flour
  • 240mL beef, chicken, or vegetable broth
  • 2 tbsp chives, minced

Directions

  1. Toss potatoes with melted butter, salt, and pepper.
  2. Arrange cut face down on a baking sheet and bake at 450°F until tender and browned, ~30 minutes.
  3. Combine beef, panko, and soup mix a large bowl. Form into six wide, flat patties.
  4. Melt ½ tbsp butter in a large skillet over medium-high heat.
  5. Cook three of the patties until well browned and cooked through (160°F). Remove and buffer.
  6. Melt another ½ tbsp of butter and repeat with the other three patties.
  7. Add mushrooms and cook until they release their liquid and begin to brown, 5-7 minutes.
  8. Stir in flour and cook for 1 minute.
  9. Stir in broth, bring to a boil, and cook until thickened, 2-4 minutes.
  10. Remove from heat and stir in remaining butter. Pour over beef and sprinkle with chives.