Showing posts with label gws. Show all posts

Saturday, 13 July 2019

Dan Dan Mien

TF and I used to make this quite often when we were students. It's cheap, it's easy, and it's quick. It's also pretty void of nutritional value if you just have the noodles and sauce without added veggies or protein... but that's pretty par for the course for student fare.

Since I no longer really enjoy just eating big bowls of starch, I braised a little bok choy with some garlic and ginger to go with my noodles. If I'd had the energy, I would've also added some baked tofu for protein. It's still not a great meal nutrituion-wise, but it's okay as a quick fix once in a while. Especially if you can use something like whole wheat spaghetti or soba for the noodles. (Not necessarily the traditional choices, but tasty and a little more nourishing than plain noodles).

Dan Dan Mien

Slightly adapted from Goons with Spoons

Ingredients

  • noodles
  • sesame oil
  • 3 parts dark soy sauce
  • 3 parts light soy sauce
  • 3 parts black vinegar
  • 2 parts Laoganma (spicy chili crisp)1
  • 3 parts natural peanut butter (or toasted sesame paste if you have it)
  • 1 part brown sugar
  • bok choy and/or other veggies (optional)
  • meat and/or tofu (optional)
  • green onions/scallions (optional)

Directions

  1. Cook and drain noodles.
  2. Toss with a little sesame oil to prevent sticking.
  3. Combine soy sauces, vinegar, Laoganma, peanut butter (or sesame paste), and brown sugar. Mix well.
  4. Portion noodles, add any veggies or protein as desired, spoon sauce over.
  5. Garnish with chopped scallions (if using).


1 Original recipe calls for 3 parts chili oil and 1 part Sichuan peppercorn. I opted to use Laoganma (or, rather, a Laoganma knock-off) instead. Back

Monday, 12 January 2015

Kare-Kare (Peanut Butter Stew)

Visiting my parents over the holidays means that I was able to get some more oxtail. Last time I made some sumptuous oxtail soup, but I wanted to try something different this time, so I turned to the Goons with Spoons wiki and decided that kare-kare sounded like an excellent choice.


Kare-Kare
1/4 c. oil (or bacon grease)
1 oxtail (~1 1/2 lbs.)
1 lb. stewing beef
salt and pepper
1 Tbsp. annatto seeds
4-6 cloves garlic, minced
2 small yellow onions, sliced
generous 1/4 c. short-grain white rice (or sticky rice), toasted and ground
scant 1 c. crunchy peanut butter (preferably a "natural" peanut butter)

2 Tbsp. fish sauce
2 Chinese eggplants, peeled and cubed
1/4 c. garlic oil
1 bundle yard-long beans, trimmed and cut into 2cm lengths
4 heads Shanghai bok choy, cut into bit-sized pieces
lime (optional)
shrimp paste (optional)

1. Season the meat with salt and pepper and brown in batches in the oil.
2. Remove the meat from the pot, reduce heat to medium-low, and add the annatto seeds. Simmer in the hot oil until it turns a deep, rich reddish-orange. Remove and discard the seeds, retaining the coloured oil.
3. Turn the heat back up to medium and add the garlic. Cook until the garlic is browned, but not burnt. Immediately add the onion.
4. Once the onion has softened, return the meat to the pot and add 5 c. water.
5. Combine the toasted rice flour with 1 c. water to make a slurry and stir that into the pot as well.
6. Stir in the peanut butter and the fish sauce.
7. Reduce heat to low and simmer for at least three hours. (Mine simmered for a little over four hours.)
8. Remove the oxtail and discard the bones. Return the meat to the pot.
9. Fry the eggplant in the garlic oil until it begins to brown and add to the pot.
10. If there's any oil left in the wok after frying the eggplant, the beans can be given a quick fry. If not, they're perfectly fine to go in raw.
11. Add the bok choy to the pot. Stir to combine and cook over medium heat until the bok choy has just wilted.
12. Serve over rice with lime and shrimp paste.


We had lemons on hand, so I actually squeezed a bit of lemon juice into my stew. However, I think lime would be even better. If you want to do it properly, you should actually mix equal parts lime (or calamansi) juice and shrimp paste and take a little bit on the tip of your spoon with each bite of stew. I wasn't feeling the shrimp paste when we made this, so I just used a bit of lime juice, but I might try some with the leftovers tonight.

I deviated from the Goons with Spoons recipe in a few places, but I'm still pleased with the results. I didn't have enough oxtail on hand to do an all tail version, so I threw in a package of stew meat to make up the difference. It came out meltingly tender and wonderful!

The original also doesn't call for frying the eggplant, but I sometimes have texture issues with eggplant and find that frying goes a long way to alleviating this, so I figured it was worth adding a step. If you're a great lover of eggplant and aren't worried about textural weirdness then, by all means, skip the frying and let it do all its cooking in the stew!

Saturday, 10 January 2015

Cherry-Asparagus Panini

Yet another find from Spache's fabulous blog! I made a few modifications based on my own preferences and what I had on hand, but it's still her recipe at the core. It's somewhat involved for a sandwich, but very tasty if you're willing to put the effort in.

Balsamic Cherry-Asparagus Panini
1 c. pitted sweet cherries, chopped
3 Tbsp. pomegranate balsamic vinegar
zest of 1 large lemon
6 asparagus spears, shaved (with vegetable peeler)
2 Tbsp. fresh mint, chopped
2 Tbsp. fresh basil, chopped
2 Tbsp. almond oil
2 long multigrain buns (or 1 baguette, cut in half)
Brie
fresh mozzarella
salt and pepper
~1 Tbsp. melted butter

1. Combine cherries, vinegar, and lemon zest. Add salt and pepper to taste.
2. Toss asparagus, mint, and basil with almond oil. Add salt and pepper to taste.
3. Cover the bottom half of each bun with pieces of Brie. (Make sure to leave the rind on for maximum delicious!)
4. Cover the top half of each bun with thick slices of mozzarella.
5. Slather the mozzarella with the cherry mixture and top the Brie with the herbed and oiled shaved asparagus.
6. Now, very carefully, combine the sandwich halves.
7. Brush the outside of the buns with the melted butter and grill/press until the inside gets deliciously melt-y and the outside gets deliciously toast-y. (If you have an electric panini press, use that, set to 350F. If you're doing this stovetop, I recommend cooking on medium-low.)

So much tasty!

Thursday, 8 January 2015

Dothraki Blood Pie


I'm a big fan of black pudding. And white pudding. And pretty much anything you'd find in a full Irish breakfast. But especially black pudding. I'm also generally a fan of pistachios, leeks, and chèvre. So, when I saw a Game of Thrones-inspired pie that involved all of these things, I was intrigued.

Dothraki Blood Pie
Adapted from C&C Cakery
1/2 c. pistachios, ground
3/4 c. whole wheat flour
1/2 c. chickpea flour
1/2 tsp. salt
1/2 c. cold butter, cut into cubes
1 egg
1/4 c. cold water
2 leeks, sliced
4 cloves garlic, minced
1/4 tsp. dried thyme
1/4 tsp. dried rosemary
1/4 tsp. black pepper
2 large eggs
2/3 c. heavy cream
140g chèvre
225g black pudding, chopped

1. Combine pistachios, whole wheat flour, chickpea four, and 1/4 tsp. salt. Cut in cold butter until mixture has a uniform, crumbly texture.
2. Stir in egg. Add cold water 1 Tbsp. at a time until dough comes together into a ball. Cover with plastic wrap and chill for at least 30 minutes.
3. Meanwhile, sauté the leeks and garlic in the remaining 2 Tbsp. of butter. Add thyme, rosemary, and pepper.
4. Once the dough has chilled, unwrap and roll out to ~1/4" thickness and line a pie plate (or in my case a square cake pan) with it. Prick the bottom with a fork and bake at 350F for 15 minutes.
5. Once the crust is baked, beat eggs until light and fluffy, then gradually add the cream.
6. Add the remaining 1/4 tsp. salt to the egg mixture and crumble in the chèvre.
7. Place the sautéed leeks in the bottom of the pie crust and top with chopped black pudding. Pour egg mixture over this and then bake at 350F for 30 minutes.


TF really liked this pie (and so did the froglet)! He generally finds black pudding too heavy and intense to eat much of it in a sitting, so he found the blood pie to be a great way to enjoy it. For my part, it was okay... but I felt like it could've used some work.

I was initially intrigued by the unique crust recipe. However, I found the dough to be fairly difficult to handle and I didn't think it actually complemented the filling that well. I actually think that a traditional pie crust, puff pastry, or a whole wheat crust (without the chickpea flour pistachios) would've worked better here.

I also wasn't a huge fan of the layering effect with the leeks and black pudding staying quite separate. If I made this again, I'd actually combine the leeks and pudding (and maybe try mixing in the cheese once the mixture had cooled as well).

I had an extra leek and it was starting to look a little sad, so I decided to throw it in. I liked the extra leek and still felt that there was enough pudding and cheese to go with it; the egg was a little lacking though. I think I'd like to try adding an extra egg next time. I know the egg isn't really meant to be centre stage here, it's just there to hold everything else together and give it some cohesion, but I still think I would've liked a bit more of it.

It's certainly an interesting recipe, and I'm glad that I tried it. That said, I wasn't overly impressed with it. I'll definitely try to tweak it if I make it again. However, unless TF specifically requests it, I doubt I'll be revisiting this one.

Wednesday, 31 December 2014

Bacon Cupcakes

What can I say? I had to try these. How could I not? It's bacon... in a cupcake!

Maple-Bacon Cupcakes
From C&C Cakery (slightly modified)
8 slices of bacon (maple bacon if possible)
1/4 c. butter, softened
1 Tbsp. bacon fat, solidified
5 Tbsp. brown sugar
1/4 c. high-quality maple syrup
1 large egg
1 1/4 c. all-purpose flour
1 3/4 tsp. baking powder
1 tsp. baking soda
1/2 tsp. salt
1/2 c. milk

Maple-Bacon Frosting
1/4 c. butter, softened
1/4 c. bacon fat, solidified
1/4 c. maple syrup
2 c. icing sugar, sifted
turbinado sugar (optional)
coarse sea salt (optional)

1. Cook bacon until very crisp, reserving drippings. Crumble six of the slices and reserve the other two for garnishing the finished cupcakes.
2. Beat the butter with the bacon fat until combined then add the sugar and cream together until light and fluffy.
3. Blend in the maple syrup and the egg.
4. Combine the dry ingredients and add to the wet mix a little at a time, alternating with the milk and ending with a dry addition.
5. Stir in the crumbled bacon.
6. Spoon into cupcake liners and bake at 350F for 18-20 minutes. (C&C says this should make a dozen cupcakes, but I must've made mine slightly larger than she made hers because I only got nine.)
7. Combine butter, bacon fat, and maple syrup and beat until well-blended.
8. Gradually sift in icing sugar and beat until frosting is smooth and delicious.
9. Once cupcakes are cool, decorate with frosting. Sprinkle on a little turbinado sugar and/or sea salt as desired. (My bacon was pretty salty, so I didn't feel the need to add any extra salt.) Top each cupcake with ~1/6 of a slice of bacon. Enjoy your bacon-y dessert!

The maple flavour in these cupcakes is pretty subtle. It's definitely detectable, but bacon is definitely the dominant flavour here. And it works! That said, I think it would be nice with a stronger maple presence as well. I might try using a slightly darker syrup next time and/or replacing 1 Tbsp. of the brown sugar with a Tbsp. of maple syrup to try to pump up the maple-y goodness.

Another interesting option might be to try injecting the cupcakes with a little bit of maple syrup. It would help keep them delicious and moist for longer and definitely increase the maple quotient. I'd just have to make sure not to overdo it and end up with a sickly sweet, sticky mess rather than a delicious confection. Maybe the answer is to leave out a Tbsp. or two of sugar from the batter and then inject each cupcake with 1-2mL of syrup once they come out of the oven... Hmmm... I think this requires additional testing. For science!

Monday, 29 December 2014

Chinese Sausage and Lotus Root Stir-Fry


This will probably be my last stir-fry for a while as I received a tagine for Christmas and am extremely excited to try it out. Tagine would've been on the menu for tonight had I not already purchased the lotus roots and mushrooms for this stir-fry last week. Seeing as they needed to be cooked anyway, I figured I stick with my original plan and pull out the wok again before moving on to the wonderful world of tagines.

This particular stir-fry is based on some advice given in the Goons with Spoons Chinese food thread, but includes some of my own improvisations as well. There was a question of what to do with Chinese sausages and someone mentioned that they were excellent stir-fried with black fungus and lotus root with a mix of hoisin sauce and oyster sauce and a bit of black vinegar (and maybe some tofu). This gave me a pretty good starting point and I just went from there with it.

Sausage and Lotus Root Stir-Fry
400g firm tofu, cubed
227g cremini mushrooms, sliced
1 onion, sliced
1-2 Tbsp. black bean lao gan ma
1-2 Tbsp. garlic paste
*1 Tbsp. ginger paste or minced ginger
*3 small carrots, peeled and sliced
1-2 small lotus roots, cubed
a handful of dried black fungus, rehydrated
1 pkg. Chinese sausage, sliced
1/4 c. hoisin sauce
1/4 c. oyster sauce
1/4 c. black vinegar
*1-2 tsp. sugar
*1 Tbsp. light soy sauce
*4 green onions, chopped
chili crisp lao gan ma, to taste

I know I should type out all the instructions properly, but I'm feeling tired and low-effort tonight, so I'm just going to do a high-level overview:
  • fry the tofu, reserve
  • fry the cremini mushrooms, reserve
  • fry the onion, add the aromatics
  • add carrots, then lotus root, then sausage
  • add black fungus, cremini, and tofu
  • add sauce, thicken with cornstarch slurry as necessary
  • add green onions
  • serve over rice with more lao gan ma as desired
The ingredients with asterisks didn't actually make it into this edition of the stir-fry. Next time I think I'd replace one of the two small lotus root segments with some carrots and add a bit of sugar and soy sauce to the sauce mix since I felt it needed a little something. I was unsure about whether or not to put ginger in, but after tasting it, I think the ginger would've gone nicely. I'll toss a little bit in the next time I'm making this. Other than that, I think it came out pretty well and I'm happy with the results.

Cinnamon-Hazelnut Brownies

I'm not really much of a brownie person. I mean, don't get me wrong, I'll eat brownies and I actually like most brownies, they're just not my favourite. I generally prefer things like cookies or cake or chocolate or ice cream. (Now, brownies + ice cream? That's a whole different animal! You kind of end up with a "more than the sum of its parts" situation there. Fabulous!) But yeah, brownies are not generally my first choice when it comes to baked goods. TF, however, loves them! He also loves hazelnuts. And Nutella. So, when I found a brownie recipe that called for all of these things, I had to try it.


I was tempted to leave out the cinnamon called for in these and just really focus on the hazelnuts, but I figured I'd stick to the recipe as written the first time around.

Cinnamon-Hazelnut Brownies
from Spache the Spatula
1 c. all-purpose flour
3 Tbsp. Dutched cocoa
1/2 tsp. baking powder
1/2 tsp. salt
1 1/4 tsp. cinnamon
1/2 c. butter
4 oz. (114g) + 1/4 c. semi-sweet chocolate chips (sorry for mixing weight, mass, and volume here)
1 c. granulated sugar
1/3 c. chocolate-hazelnut spread (eg. EuroCreme or Nutella)
2 large eggs
1 tsp. vanilla extract
1/3 c. hazelnuts, crushed

1. Combine the dry ingredients (flour, cocoa, baking powder, salt, and cinnamon).
2. Melt the butter over medium heat, then remove from heat and add the 4 oz. of chocolate chips, stirring to melt them as well.
3. Pour the chocolate mixture into a large bowl with the sugar and beat for a couple minutes. (Spache's recipe specifies using a paddle attachment on a stand mixer, but since I have neither, I just used a regular hand mixer. It seemed to work fine.)
4. Mix in the chocolate spread, eggs, and vanilla.
5. Gradually stir in the dry ingredients until just blended.
6. Spread batter into a well-greased 8x8 square pan. (I skipped the parchment paper when preparing the pan. Feel free to use it if you're worried about sticking though.)
7. Combine the crushed hazelnuts (I just mashed mine up with a mortar and pestle) with the remaining semi-sweet chocolate chips and use this mixture to top the brownie batter in the pan.
8. Bake at 375F for 30 minutes. (TF thinks they probably could've stood another few minutes in the oven, but says they're delicious as is and the edges are perfect. He is in agreement with Spache that it's better to slightly undercook rich, fudgey brownies like these than to end up overcooking them.)
9. Once brownies have completely cooled, cut and enjoy!


Update: I tried a little corner of one of these brownies and, while I'm still not a brownie person, I can say that I am so glad that I didn't leave out the cinnamon! It's so nice with the richness of the chocolate and the hazelnuts! I thought that it might detract and distract from the wonderful nuttiness of these brownies, but it's just the opposite. It really does enhance the flavour. Yum!

Friday, 19 December 2014

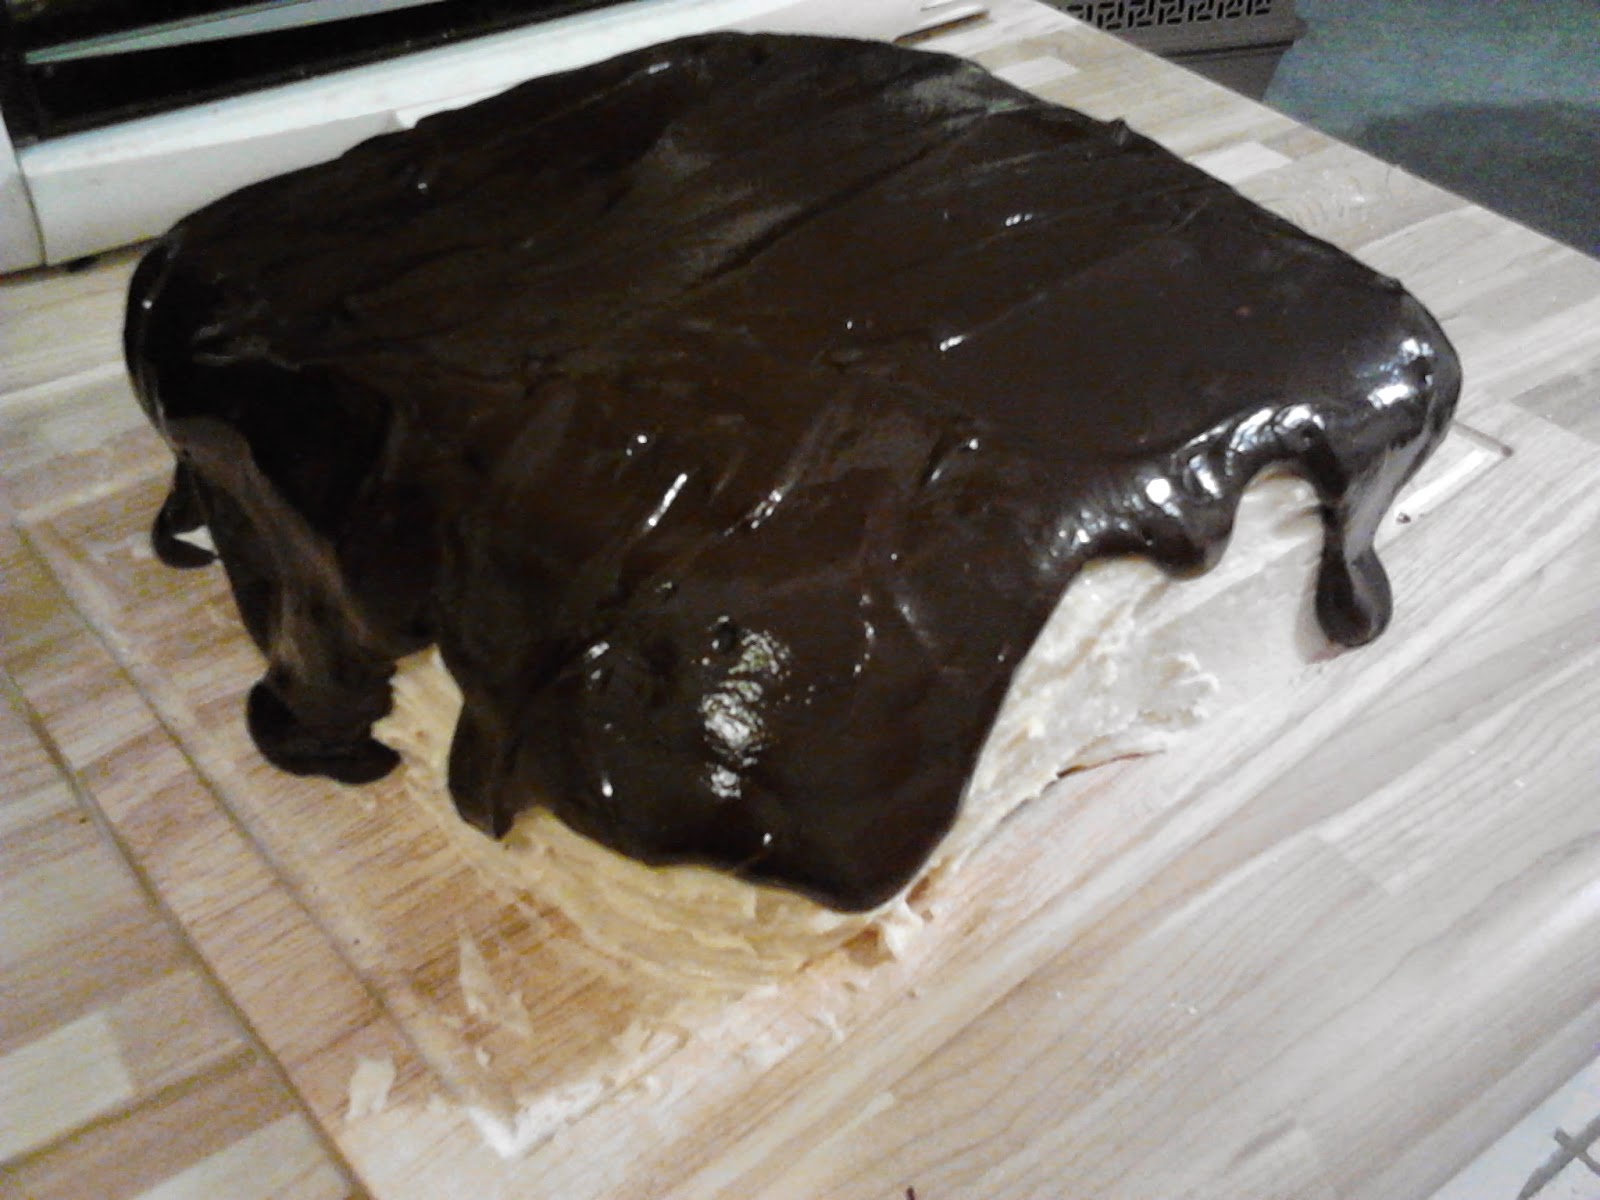
Sour Cream Chocolate Cake with Peanut Butter Frosting and Chocolate Ganache

I got into the Goons with Spoons CAKE thread a few years back and tried out a couple of the recipes shared. I haven't been doing any cake baking lately, but I did rediscover one of the recipes I'd made before. It was delicious! Seriously. It was probably the best cake I have ever made. Ever.

The recipe was posted on Smitten Kitchen and can still be found there, but I just wanted to copy it out here so that I have it on hand for future reference.

Sour Cream Chocolate Cake
2 c. (250g) all-purpose flour
2 1/2 c. (500g) sugar
3/4 c. (~65g) Dutched cocoa powder
2 tsp. baking soda
1 tsp. salt
1 c. canola oil
1 c. sour cream
1 1/2 c. water
2 Tbsp. white vinegar
1 tsp. vanilla extract
2 large eggs

1. Sift together the flour, sugar, cocoa, baking soda, and salt.
2. Add the oil and sour cream and whisk to blend.
3. Gradually beat in the water.
4. Blend in the vinegar and the vanilla.
5. Whisk in the eggs and beat until well blended.
6. (The recipe states to split among three 8" round cake pans, but I'm pretty sure I did this as a single 9" square layer.) Divide the batter among greased cake pans. The bottoms and sides of the pans should be greased for this.
7. Bake at 350F for 30-35 minutes or until tester comes out almost clean.
8. Cool in pans for 20 minutes before inverting on a wire rack and lifting off the pan. (Smitten Kitchen blogger notes that the cakes are much easier to work with if you stick them in the freezer for a bit before trying to do anything with them. I don't think I did this, but she said it makes them a lot easier to handle.)
9. Frost the cake with the peanut butter frosting. (Doing a crumb coat and then chilling the cake before adding the rest of the frosting should result in a neater looking finished product. Chilling again before applying the ganache will probably improve results as well.)
10. Pour the ganache over the top of the cake and use a spatula to spread it all over the top just to the edges. Allow the ganache to drop down the sides of the cake.
11. Chill until the ganache is well-set.

Peanut Butter Frosting
10 oz. cream cheese, at room temperature
1 stick (1/2 c.) unsalted butter, at room temperature
5 c. (600g) icing sugar, sifted
2/3 c. (170g) smooth peanut butter

1. Beat the cream cheese and butter until light and fluffy.
2. Gradually add the icing sugar, scraping down the bowl as you go. Continue to beat again until light and fluffy (3-4 minutes).
3. Add the peanut butter and mix thoroughly.

Chocolate-Peanut Butter Ganache
8 oz. semi-sweet chocolate, coarsely chopped
3 Tbsp. (50g) smooth peanut butter
2 Tbsp. (40g) light corn syrup
1/2 c. half-and-half

1. Combine chocolate, peanut butter, and corn syrup in a double boiler. Cook, whisking as the chocolate melts.
2. Once the chocolate is melted and the mixture is smooth, remove from head and whisk in the half-and-half. Beat until smooth. Use while still warm.

It's been two or three years since I made this, so I can't offer any detailed notes on exactly what I did or how it came out. I remember it being really, really good though. TF still fondly remembers it as well. He's got some photos kicking around somewhere. I'll see if I can find them and put them up when I get a chance.

Update: Found those photos!


Thursday, 18 December 2014

Fried Nian Gao


This one was a bit of a learning experience. The instructions (found in the Wok This Way thread on Something Awful) were a little vague and I made a few mistakes due to inexperience as well. Now that I've seen how nian gao behave when cooked, I think I could do a much better job next time.

Fried Nian Gao
1 pkg. frozen nian gao
6 Tbsp. peanut oil
1 onion, thinly sliced
2 Tbsp. garlic paste
1 Tbsp. ginger paste
*2 Tbsp. Sichuan bean paste
dash of white pepper
2 tsp. ground cumin
500g-700g thinly sliced lamb
227g sliced cremini mushrooms
3-4 cloves garlic, minced
6-12 whole dried chiles
*1 c. stock (vegetable, chicken, beef, pork)
8-12 napa cabbage leaves, shredded
3 carrots, cut into thin coins
4 green onions, chopped
1 Tbsp. shaoxing wine
2 Tbsp. black vinegar
2 Tbsp. light soy sauce
1 Tbsp. sugar
Laoganma (optional)

1. Place the nian gao in water for a couple of hours to thaw.
2. Do all the chopping and slicing and mincing and mix the sauce (wine, vinegar, soy sauce, and sugar).
3. Heat up the wok and add 2 Tbsp. of oil. Add the onion and stir-fry for a minute. Add the pastes, cumin, and pepper and stir-fry for another minute. Add the lamb and stir-fry for a few more minutes until it's just cooked.
4. Remove the lamb from the wok and add more oil if necessary. Add the mushrooms and stir-fry for a couple of minutes until desired doneness.
5. Remove the mushrooms from the wok and add a couple more Tbsp. of oil. Add the minced garlic and chiles and fry until aromatic but not burnt.
6. Add the (drained) nian gao and keep them moving! After 30 seconds or so add ~1/4 c. of stock and keep stirring. Cook until nian gao are softened and some begin to brown slightly around the edges adding more stock as needed during cooking.
7. Add the vegetables to the wok and stir-fry until cabbage is wilted.
8. Return the mushrooms and meat to the wok and stir to combine.
9. Stir in the sauce.
10. Serve garnished with Laoganma if desired.

The ingredients marked with asterisks are ones that I didn't include this time around but would like to try out next time. I just used water for cooking the nian gao this time and they came out tasty, but I think they would've been even better cooked in some nice vegetable stock!

I only put six chiles in this time around because, once again, I was trying to make sure it was mild enough for the froglet. It came out pretty mild though and I think I'd use at least 12 chiles next time and still consider it baby-appropriate. (The froglet is a trooper and seems to be good with moderately spicy dishes so far.) Along similar lines, I'd like to experiment with adding a bit of Sichuan bean paste or Laoganma when cooking the meat. Maybe a bit of soy sauce too. I felt it could've used a bit more spice and a bit more salt.

I put 8 napa cabbage leaves into the wok this time and it was good, but I think 10 or 12 would've been better. The cabbage really cooks down and it kind of ended up getting lost amongst the other ingredients. I had the opposite problem with the lamb. It came in a 700g package, so I just tossed all of it in. I really think that was too much though. I think more cabbage and less meat would make for better proportions the next time I'm making this.

Even with my minor mistakes (like not letting the nian gao cook for long enough before adding the veg and adding too much water) this was still pretty good. I think it has the potential to go from good to excellent if done right though. Maybe I'll give it a try again sometime soon and see if I can nudge it up to the next level of delicious.

Sunday, 14 December 2014

Salt-Fried Potatoes

Stir-frying potatoes is hard mode!


Once again, I forgot to as TF to take a picture before he dished his dinner up.

I thought if I just kept them moving it'd be okay. I thought that being prepared to constantly stir and flip would be enough. I was wrong!

Those potatoes welded themselves to the bottom of that wok! Eventually I gave up and started adding water to try to deglaze it a little. Of course, this means that my potatoes ended up more boiled than fried by the end. But honestly, by that point, I just wanted to get them cooked and it didn't much matter how!

I also added the meat and veg to the wok too soon. I should've tested the potatoes for doneness, but my arm was already pretty tired from stirring them so much and they were sliced so thin... I figured they must be done by now! This means that by the time the veg was done, the potatoes were still a bit underdone. I turned the heat back on and cooked it up a bit more, but then all my stirring (and the addition of more water) caused my lovely thin potato slices to start breaking down. So the final product looks a lot messier than I'd hoped.

I think, for me at least, the answer may be to briefly deep fry the potatoes before adding them to the wok. I am just not good enough to stir-fry a potato. If your wok-fu is greater than mine, by all means, give this a try without the deep fry cheat!

Salt-Fried Potatoes
~700g very thinly sliced meat (I used lamb)
2 tsp. coarse sea salt
generous 2 tsp. cumin seeds, ground
dash white pepper
generous 2 Tbsp. Laoganma
2 Tbsp. dark soy sauce
4 cloves garlic, minced
2 Tbsp. minced ginger
4 potatoes, thinly sliced
4 green onions
2 bell peppers, any colour(s)
200g cremini mushrooms, sliced (optional)

1. Slice the meat as thin as possible. (Par-freezing helps here.)
2. Lightly boil the meat. (No more than a minute or so.) Drain; season with 1/4 tsp. salt, pepper, cumin, and anything else you'd like; and set aside.
3. Do all your other chopping, slicing, and mincing and make sure everything's ready to go.
4. Heat up the wok and add a bit of oil. Toss in the meat and stir-fry until it starts to brown.
5. Remove the meat from the wok and give the wok a rinse. Add the soy sauce and half the Laoganma to the meat and set aside.
5 1/2. Optionally, heat the wok back up, add a bit more oil, and stir-fry your mushrooms. Remove from wok and set aside.
6. If you're hardcore, this is the part where the potatoes get stir-fried. Heat up the wok and add a generous quantity of oil. Add the garlic and ginger followed by the potatoes and keep 'em moving!
If your wok-fu is weak like mine, cheat and deep fry your potatoes a little bit before adding them to the wok with the garlic and ginger. You're not looking for potato chip crisp here, but we do want them a bit browned with maybe a hint of crispiness on the outside.
7. Once you've achieved nice golden brown potatoes, add the rest of the Laoganma and the salt. Stir to distrubute.
8. Add the meat (and mushrooms) and stir to combine.
9. Add the green onions and bell peppers. Stir-fry until bell peppers achieve desired done-ness.
10. Serve with additional Laoganma if desired.

Thursday, 11 December 2014

Spicy Chicken Stir-Fry


Yet another great recipe courtesy of Goons with Spoons! I made a few changes for my version (not all of them intentional). I'll share my take here. Or rather... what I would've done if I'd not been so discombobulated when preparing dinner tonight.

Spicy Chicken Stir-Fry
100g slivered almonds
500g skinless, boneless chicken thighs
1 lotus root
3 small heads Shanghai bok choy
4 green onions
1 tsp. Sichuan peppercorns
3 fresh red Thai chiles
3 dried red chiles (de arbol)
4 cloves garlic
2 Tbsp. ginger paste
1 generous Tbsp. Laoganma
1 Tbsp. sugar
1 Tbsp. shaoxing wine
2 Tbsp. light soy sauce
2 Tbsp. black vinegar
1/4 c. pork stock
cornstarch slurry (1 Tbsp. cold water + 1 tsp. cornstarch)

1. Chop the chicken into small cubes and toss in whatever marinade you prefer. (I used a couple splashes of shaoxing wine combined with some light soy and a bit of sesame oil and white pepper.)
2. Chop the lotus root and set aside. Chop the bok choy and green onions and set aside. Mince the garlic and chiles and combine with the Laoganma, Sichuan peppercorns, and ginger paste and set aside. Combine the sugar, shaoxing wine, soy sauce, black vinegar, and pork stock and set aside. Mix the cornstarch slurry and set aside.
3. Lightly fry/toast the nuts in a little oil.
4. Heat wok over high and add a bit of oil. Add the chicken and stir-fry until it releases some liquid and most of the liquid has cooked off. Set the chicken aside and give the wok a rinse.
5. Heat the wok back up and add a touch more oil. Toss in the aromatics (Laoganma, chiles, garlic, Sichuan peppercorns, and ginger). Stir around for a few seconds (15-30), then add the lotus root.
6. Stir fry the lotus root for a minute or so, then add the bok choy and green onion. (Add a bit of water if the wok is too dry.)
7. Once the bok choy has wilted, return the chicken and nuts to the wok and give it a stir. Stir in the sauce followed by the cornstarch slurry and allow it to thicken the sauce a bit.
7. Serve over rice (with more Laoganma if desired).

I was planning on toasting ~100g of slivered almonds and using them in place of the peanuts, but I plum forgot! I missed adding the Sichuan peppercorns as well, sadly. And I was running a bit short of green onions, so I only had three, rather than the four I would've preferred. Still came out quite tasty though! And I found it to be a nice level of heat as well.

If I were to do this again, I think I'd consider adding a few more vegetables. Another small head of bok choy certainly wouldn't go amiss and I think a red bell pepper might be a nice addition as well. The lotus root gives a nice, slightly crisp texture and I think the nuts would've been excellent in it as well if I'd remembered to add them!

Also, a note on Laoganma: I normally consider "spicy chili crisp" to be the default type if the recipe doesn't specify. However, the Asian supermarket I normally go to doesn't seem to stock that variety anymore, so I decided to try one of the other products in the line. The black bean type that I have now seems to be working out pretty well so far. The texture is markedly different than the usual "crisp", but it does have a pretty similar flavour and heat level, so I consider it a reasonable substitute. Feel free to experiment with other varieties of Laoganma as you see fit! I'm told they're all delicious!

My brain's kind of fried tonight, so I won't say much more about this one. Very tasty! I definitely want to try making this on again sometime!

Monday, 8 December 2014

Pancit Bihon

I know I've been posting a lot of Goons with Spoons recipes lately, but that's because there's an awful lot of delicious in that forum/wiki. This recipe is courtesy of the "Pilipino Pood" thread and can also be found on the GwS wiki.

I've been in a noodle-y sort of mood lately, so something using rice vermicelli was quite appealing. And, it even calls for carrots, which is great, because I have a bunch in the fridge that need to be used up!

The recipe as written has you making chicken stock from scratch. However, I had a bunch of delicious, wonderful pork stock left over from my adventures with sisig. So, I opted to use that as my liquid and go from there.

Pancit Bihon
4 chicken thighs
salt and pepper
oil
4 c. pork stock
~1/2 tsp. celery seed
3 cloves garlic, minced
1 onion, chopped
3 small carrots, peeled and julienned
1 pkg. Chinese sausage, sliced into coins
3 heads Shanghai bok choy, shredded
2 Tbsp. dark soy sauce
1 Tbsp. fish sauce
1 (225g) pkg. rice vermicelli
3 green onions, chopped
1 lime, cut into wedges

1. Apply salt and pepper to the chicken thighs. Heat up a pot or wok with a bit of oil and sear the chicken. (I used skinless, boneless thighs because I already had some pork stock on hand. Skin-on, bone-in will be better if you're starting with water instead of stock.)
2. Add the stock (or water) to the pot/wok, bring to a boil, then reduce heat and simmer until chicken is done.
3. Empty the pot/wok, reserving both chicken and stock. Shred the chicken.
4. Brown the garlic, adding a little oil to the pot/wok as necessary.
5. Add the onion and sauté until tender and starting to brown.
6. Add the sausage and carrot and cook until carrot reaches desired done-ness.
7. Add the bok choy and cook for a minute or two until it wilts.
8. Remove everything from the pot/wok and set aside.
9. Return the stock to the pot/wok, add the soy sauce and fish sauce, and bring to a boil. Add the noodles.
10. Make sure noodles are submerged in stock, then dump all the reserved items (shredded chicken, garlic, onion, sausage, carrot, and bok choy) in on top of them.
11. Once the noodles are soft enough to stir without breaking, stir everything together. Continue to cook until all the stock is absorbed.


12. Serve garnished with green onions and squeeze a little lime juice on top (or calamansi if you can find it). Yum!


This recipe is pretty flexible. You can include fish or seafood if that's your thing. (The original suggests half a pound of shrimp.) You can make it with pork instead of chicken if you want. You can use pre-made stock or make it from scratch. Change up the veg. Whatever you want!

The original recipe suggested using one small head of napa cabbage, but I didn't want to go out and buy more cabbage when I had a bunch of bok choy on hand, so I used that instead. Likewise, I didn't want to get a whole celery just to use the one rib called for in this dish, so I just added a few celery seeds to my stock and called it a day!

If you're starting with water and making your stock from scratch, you'll probably want to include a few more seasonings while boiling the chicken. (And also use skin-on, bone-in chicken.) I'd recommend adding a bay leaf or two and a few black peppercorns as well as a touch of extra salt for a start. Feel free to add in whatever else sounds tasty from there! Garlic, onion, parsley, cilantro? My stock just had salt, pepper, bay leaves, citrus (probably mandarin orange) juice, and pork (neck bones, ears, and belly) for its initial cooking and then the added chicken and celery seed today and it seemed to come out plenty tasty! I do think a bit of garlic (or even just garlic powder) in the stock would've been a nice touch though.

I really like how this turned out with the dark soy in the stock and the lime juice drizzled over it to serve. The hit of sourness from the lime is a really quite nice. I would be curious to try a variation that skips the lime and just adds a double quantity of toyomansi to the stock though. I would also love to try it with actual calamansi but, so far, I have been unable to find it here, so toyomansi is the closest I can get for now!

I love how flexible, delicious, and satisfying this dish is! It requires a fair amount of chopping but, other than that, is actually pretty easy. Now that I think about it, it occurs to me that most of the prep work could be eliminated if you're willing to use pre-made stock or broth and toss in a bag of coleslaw mix in place of the shredded cabbage/bok choy and carrot. Then all you need to do is mince the garlic and chop the onion and scallions (and sausage if you're using it). And, if you're not making the stock from scratch, you're free to throw in leftover chicken (or whatever other meat) instead of cooking it from raw. This could reasonably be made into a tasty, low-effort, weekday dinner!

Sunday, 7 December 2014

Kung Pao Tofu

If you've ever been to a Chinese restaurant in North America, you're probably familiar with Kung Pao Chicken. It's a Chinese take-out staple. It turns out that it's actually pretty easy to make at home. Added bonus: this lets you adjust salt, sugar, and spice levels to your taste.

The recipe poster actually ended up making their kung pao "chicken" with tofu since they were cooking for a vegetarian, and that actually sounded quite appealing to me, so I figured I'd give it a try.

Kung Pao Tofu
100g peanuts
400g extra firm tofu, cubed
1 large or 2 small carrots, peeled and chopped
3 green onions, chopped
3 cloves garlic, minced
1-2 Tbsp. ginger, minced
1 tsp. Sichuan peppercorns/prickly ash
2-3 dried chiles, broken up
1 stalk 莴笋 (asparagus lettuce/celtuce) or substitute vegetable of choice
1 Tbsp. Shaoxing wine
2 Tbsp. light soy sauce
2 Tbsp. black vinegar
1 Tbsp. sugar
1 Tbsp. sesame oil
cornstarch slurry (1 Tbsp. cold water + 2 tsp. cornstarch)

1. Make sure that everything that needs chopping or mincing is chopped and minced appropriately.
2. Mix the wine, soy sauce, vinegar, sugar, and sesame oil in a bowl and set aside.
3. Mix the cornstarch slurry and set aside.
4. Add a small amount of oil to the wok and gently fry/toast the peanuts over low heat. (My peanuts were sort of old and had developed a bitter aftertaste, so I ended up using slivered almonds instead.)
5. Remove nuts from wok and set aside. Increase to high heat. Let wok heat up for about 30 seconds, then add more oil (~3 Tbsp.). Add the tofu cubes and fry to golden-brown.
6. Remove tofu from wok. Wash wok if necessary before returning to medium heat. Add more oil if necessary. Add carrots, green onion, garlic, ginger, and Sichuan peppercorns. Cook until carrots reach desired done-ness.
Important note: If wok becomes very dry, add ~1/4 c. water and continue cooking. Repeat as necessary.
7. Add chiles and cook for another minute or so.
8. Raise heat to high and add asparagus lettuce (or other vegetable). Cook until wilted, adding water as necessary. (I used a large head of Shanghai bok choy here because that's what I had on hand. It worked quite nicely.)
9. Add nuts and tofu. Stir to mix.
10. Pour sauce into wok and give it a stir. Add cornstarch slurry and continue to cook and stir until sauce thickens.
11. Serve alone or over rice or noodles. Enjoy!


I made a few changes from the original recipe.

My peanuts weren't tasting so fresh anymore, so I substituted some slivered almonds. I know it's a different flavour, but it was still quite tasty and had a nice, slightly crunchy texture.

I didn't have any asparagus lettuce on hand (I'm not sure if I can even get it here, honestly), but I did have a bunch of Shanghai bok choy, so I chopped up a large-ish head and tossed that in instead.

I also doubled the quantity of sauce called for since I was planning on serving it over noodles and wanted something extra saucy for that.

The original recipe also didn't list specific quantities for the Sichuan peppercorns or chiles and suggested adding salt and/or MSG to taste. I found the soy sauce added enough salt for my taste, so I didn't include any extra. I went with two chiles for this rendition because I wanted to make sure it was mild enough for the froglet to eat. They were hardly perceptible in the finished dish, and I think I'd use at least four in future attempts (and a lot more if I'm not planning on sharing with the little one). I think 1 tsp. is about right for the Sichuan peppercorns, but mine don't seem to be very potent, so it's hard to tell.

As mentioned above, I served my kung pao tofu over some noodles. They weren't anything particularly special, but I'll run over what I did quickly for any who might be interested (or for my own future reference).

Fried Brown Rice Vermicelli
200g brown rice vermicelli
2 Tbsp. oil
1 green onion, chopped
dash of garlic powder
dash of ground white pepper
splash of light soy sauce

1. Cook noodles however you prefer. I like to put them in a bowl and pour boiling water over them, let them sit for a minute or two, then drain.
2. Heat oil in a pan and add noodles. (It may help to oil the noodles first and then add little to no oil to the pan for frying.)
3. Add the green onion, garlic powder, and white pepper and stir fry until noodles begin to brown and crisp and green onion is cooked.
4. Add a splash or two of soy sauce and stir to coat. Serve topped with stir-fry of choice.


Saturday, 6 December 2014

Pork Sisig

I tried new thing today. I found a recipe for sisig on the Goons with Spoons wiki. It immediately captured my attention and I was determined to try it.

The page gives instructions for making "sissy's sisig" with pork loin, but I wanted to, at least for the first time around, make at least somewhat "authentic" sisig. If I wanted to be really authentic about it, I'd need a whole pig's head and a giant pot in which to braise it. I decided that semi-authentic was good enough for me and settled for getting some pig's ears, neck bones, and belly to make it with.

I followed the Goons with Spoons recipe pretty closely, but I'll write out my full procedure below since the recipe page was a little vague on some of the steps.

Pork Sisig
1 lb. pig ears
1 1/2 lb. pork belly
2 1/2 lb. pork neck bones
5 bay leaves
2 tsp. peppercorns
1 tsp. coarse sea salt
4 c. water
2 c. citrus juice (I'm not sure what type I had... some variety of mandarin maybe?)

1/2 c. Mama Sita's Toyo & Kalamansi
3 Tbsp. cane vinegar
sprinkle of black pepper
3 small cloves garlic, minced
1 scant Tbsp. ginger paste
2 Tbsp. peanut oil
1 onion, chopped
3 red Thai chiles, chopped
2 eggs

1. Dump all the pig bits into a big pot. Toss in the bay leaves, peppercorns, and salt. Add the water and the citrus juice.
2. Bring to a boil, then reduce to a simmer and cook, covered, until tender. (I think I cooked mine for about an hour and a half.)
3. Drain the meat (reserving the broth for another use if desired).
4. Once meat is cool enough to handle, remove any bones and chop into very small pieces.


5. Measure out one pound of chopped pork and place it in a bowl. (Freeze the rest of the meat for future sisig.) Add the toyomansi (or a mix of soy and calamansi or lime juice), vinegar, pepper, garlic, and ginger and stir to coat the meat well. Allow to stand for at least 15 minutes.
6. Heat a pan (preferably cast iron) over high heat. Add the peanut oil and coat the bottom of the pan with it.
7. Remove the meat from the bowl with a slotted spoon and add it to the hot pan.
8. Once the meat is seared and has developed some tasty brown bits, add the onion and the chiles to the pan, stir them in, and continue to cook.
9. Add left over marinade to the pan as needed to keep it from getting dry.
10. Once the onion is cooked, crack the eggs into the pan on top of the meat. If you have a cast iron pan, serve at once! Stir in the egg, allowing the residual heat of the meat and pan to cook it.


If you don't have a cast iron pan, you may want to stir in the egg while still on the stove and cook it a little before serving.


This came out amazingly well. So well, in fact, that TF has declared it his new favourite pork dish! That's right, given the choice between a plate of bacon and a plate of sisig... he'd take the sisig! I'm pretty pleased that he liked it so much.

I also thought it was delicious. The flavour was excellent. The cartilage from the ears was still quite noticeable though. The texture of the cartilage wasn't necessarily bad, but I do think I would've preferred it without that aspect.

I almost passed on the neck bones for this. They weren't specifically mentioned in any of the recipes I looked at. However, they did fit the <$2/lb. criteria mentioned on the Goons with Spoons wiki (at $0.99/lb.) and I figured neck bones would be reasonable in a dish meant to be made from a pig's head. I'm so glad I didn't pass them up! The meat came out incredibly tender and luscious, almost like a pork-y version of oxtail. Next time I might consider making this with neck meat alone! It was more tender and less fatty than the belly and more meaty and less cartilaginous than the ears.

TF is in favour of trying a sisig variant using a 1:1:1 ratio of neck, belly, and liver at some point. I'm down with that, but I'd also like to try a neck only version sometime. I just can't get over how lovely that neck meat was when I was picking the bones! If you've never had pork neck before, you should definitely consider giving it a try!

Tuesday, 2 December 2014

Fish-Fragrant Eggplant & Ninja Ramen

My former landlady used to make this delicious eggplant dish. I'm not generally a fan of eggplant, but this stuff was delicious. It was full of garlic and oil and I did ask her how to make it, but her description was somewhat vague. When I came across a recipe for "fish-fragrant eggplant" in a Chinese cooking thread online, I flagged it as a likely candidate. It's not quite the same, but it is nearly as delicious as my landlady's mystery garlic eggplant.


I'm honestly not sure why it's called "fish-fragrant" as it contains neither fish nor even fish sauce, but it certainly is a tasty way to prepare eggplant!

Fish-Fragrant Eggplant
5 Chinese eggplants
1 c. peanut oil
1 1/2 Tbsp. Sichuan chile-bean paste
1 Tbsp. minced ginger
2 Tbsp. minced garlic
1/2 c. chicken stock
1 1/2 tsp. sugar
1/2 tsp. light soy sauce
1 1/2 tsp. corn starch mixed with 1 Tbsp. cold water
1 1/2 tsp. Chinese black vinegar
4 green onions, chopped
1 tsp. sesame oil

1. Peel the eggplants and chop into chunks (I went for ~1" chunks). Mince garlic and ginger and chop the green onion. Ready the stock and all the various sauces, vinegar, corn starch slurry, etc.
2. Heat up the wok. Add the peanut oil and fry the eggplant in small batches. Remove eggplant to paper towel to drain.
3. If more than 2 Tbsp. of oil is left in the wok after frying the eggplant, pour out the excess oil.
4. Reheat the oil, if necessary, and ad the chile-bean paste and stir-fry for 30-60 seconds.
5. Add garlic and ginger and fry for another 30-60 seconds.
6. Add chicken stock, sugar, and soy sauce and stir to combine.
7. Add fried eggplant and allow to simmer in sauce for several minutes.
8. Stir in corn starch slurry and cook until sauce thickens.
9. Add black vinegar and green onion. Cook, stirring, until onion is no longer raw.
10. Adjust seasoning to taste. Add more salt or sugar as desired and drizzle with sesame oil to serve.

I found this very tasty as it was. That said, I don't think I could resist trying out a few tweaks the next time I make it. (And there will definitely be a next time!) I think I'd try increasing the chile-bean paste to 2 Tbsp. next time. And I'd like to try adding 1 tsp. of dark soy sauce as well.

TF actually ended up taking over the cooking for the "ninja ramen". It is yet another recipe off of the Goons with Spoons wiki. And one that I've been meaning to try for quite a while at that.

Since the "recipe" doesn't list any quantities or proportions, it took a little trial-and-error to get the flavour right. We also had to make a substitution since I'd forgotten that we were all out of sambal oelek. Here's what we ended up using for our ninja ramen.

Ninja Ramen
2 pkg. ramen
3 Tbsp. sesame oil
1 Tbsp. Sichuan chile-bean paste
2 cloves garlic
12 white button mushrooms, sliced
2 Tbsp. light soy sauce
3 Tbsp. hoisin sauce
5 green onions, chopped

Verdict: Nice flavour, but not enough of a step up from my favourite instant ramen preparations to warrant the extra effort, I think.

Sunday, 30 November 2014

Csirkepaprikás Tarhonya (Chicken Paprikash with Tarhonya)

So I tried making chicken paprikash for the first time today:

It was delicious!

Who'd've thought that a pot of paprika and sour cream smothered chicken could taste so wonderful! I'm used to all the really delicious stuff containing lots of different spices and seasonings; this recipe didn't even call for garlic! And yet, it is still so very good.

I will admit that, before tasting another Hungarian dish that used paprika as one of the main ingredients, I really only thought of that lovely red powder as a garnish. Paprika is the stuff you sprinkle over deviled eggs or potato salad, right? It looks pretty but doesn't have much flavour of it's own. Unless maybe you get smoked or hot paprika, then you have some noticeable flavour and aroma, but still... I didn't really consider it a key component, just a mild, supplementary seasoning.

Once I'd tasted a few paprika-heavy dishes, I started to reconsider, but I'd still never really done anything myself that focused mainly on paprika. TF said he liked the idea of trying out a chicken paprikash recipe this weekend though, so I figured we'd give it a whirl.

This recipe is dangerous! It's delicious, fattening, and easy. Sauté some onions, toss in a bunch of paprika -- high quality paprika is crucial here! -- add your chicken and water. Cook, thicken up the sauce with some roux and sour cream while you bone the chicken. Toss the meat back in the pot and voilà! Really, dangerously easy.

The page I got the recipe from also had instructions for cooking tarhonya, which I'd never hear of before, but sounded pretty tasty. I decided to give that a try as well since paprikash really needs a substrate and tarhonya sounded both more delicious and more interesting than just boiling up some plain egg noodles. (Not that I have anything against egg noodles, they're wonderful, but it's always fun to try something different.)

I was expecting to find a package of pasta that was actually labeled "tarhonya" when I went to my local eastern European grocery store. If they had anything with that name, I certainly couldn't find it though. They did have a pasta section filled with neat little parcels of adorably tiny egg noodles. I found some that looked roughly the shape and size of the ones pictured on the recipe page in the hopes that they'd do the trick.

Unfortunately, I didn't think to take a picture of them before cooking, but here's what they looked like after:

They cooked up quite nicely and made for a perfect substrate for the saucy csirkepaprikás. The little, slightly irregular nuggets of pasta cooked up into savoury round beads of deliciousness, roughly the shape and size of Isreli couscous, but much firmer. They have a really nice mouthfeel and a bite somewhere between al dente pasta and brown rice. I thought they worked really well with the chicken and they'll definitely be my go-to side/substrate for it in the future!


The same brand of pasta was available in a bunch of different shapes. As I said, I got the one that seemed closest to what I'd seen in the online photos, but I think it'd be interesting to use the same method with some of the other shapes and see how they come out.

I also braised a little cabbage to go with this. Just so that I could at least pretend it was something like a balanced meal. The cabbage wasn't bad, but it certainly wasn't anything to write home about either. Especially not after the sheer wonderfulness that was the rest of the meal. I just wanted to have a vegetable to go along with the rich, creamy sauce and buttery tarhonya.

This made for a wonderfully satisfying and tasty dinner and we had (and still have) plenty of tarhonya to go around, but I think I'd make a double batch of the paprikash next time. We did end up with leftovers, but not as many as I would've liked for such a delicious dish. Then again, there were three of us eating, and we sent some of the leftovers home with A, so we probably actually had ~8 servings of that succulent, saucy chicken all told. It just disappeared really fast!